
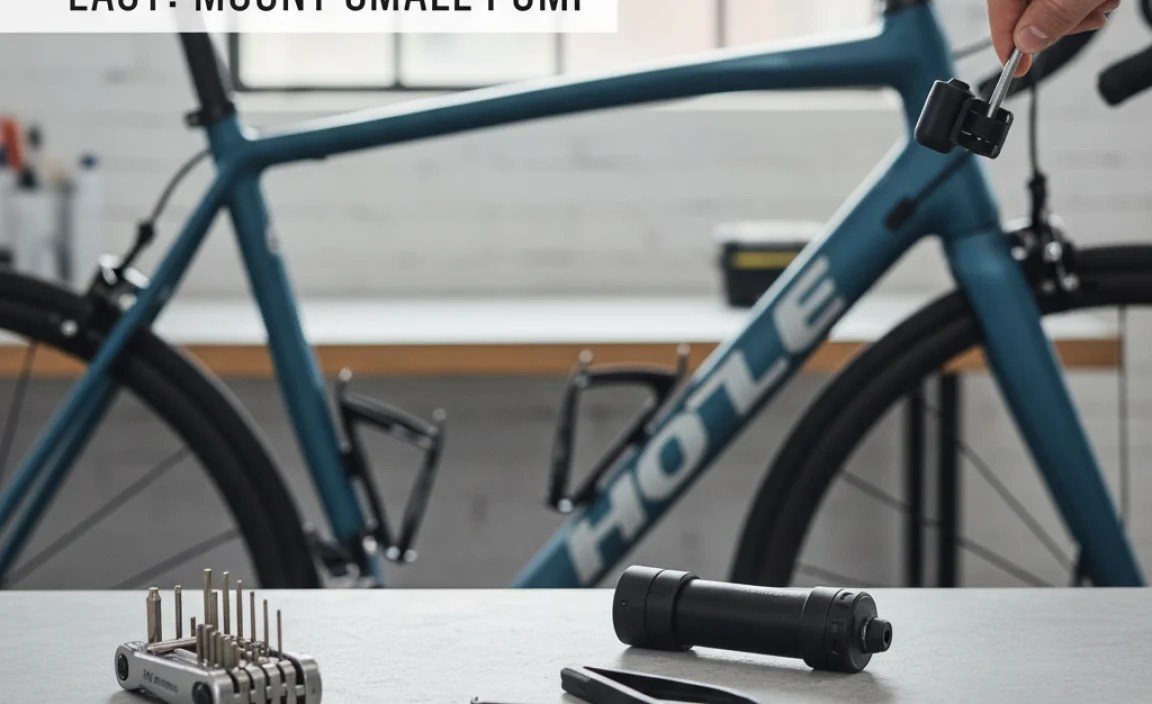
Easy: How to Mount Small Pump on Seat Tube Mount
Have you ever had a flat tire far from home? It can be scary! A small pump can help. But how to mount small pump on seat tube mount? It’s easier than you think. Let’s learn how to do it. This will keep you safe on your rides.
Key Takeaways
- Knowing how to mount small pump on seat tube mount is crucial for cyclists.
- Seat tube mounts offer a secure and accessible location for your pump.
- Always carry a pump to fix flat tires quickly while you are riding.
- Proper mounting ensures the pump doesn’t interfere with your pedaling.
- Regularly check the mount to keep your pump safe and ready to use.
Steps for Mounting a Small Pump on Seat Tube

Mounting a small pump on your bike’s seat tube is simple. First, gather your tools. You’ll need the pump, a mount, and maybe a screwdriver. Clean the seat tube where you will attach the mount. This helps the mount stick better. Place the mount on the tube. Make sure it’s in a good spot. You don’t want it to get in your way when you ride. Use screws or straps to secure the mount. Tighten them well, but not too much. You don’t want to break anything. Put the pump into the mount. Check that it fits right and is held tight. Now you’re ready to ride. Your pump is safe and easy to reach.
- Gather your tools and the pump.
- Clean the seat tube area.
- Position the mount carefully.
- Secure the mount with screws or straps.
- Place the pump in the mount.
Why is how to mount small pump on seat tube mount so important? Imagine you are riding and get a flat tire. You are far from home. You need to fix it fast. A pump on your seat tube is easy to reach. You don’t have to dig in your bag. You can fix the tire and keep riding. It makes biking safer and more fun. Knowing how to do this yourself saves time and trouble. It’s a basic skill for every bike rider. A seat tube mount keeps the pump out of your way. It also protects the pump from dirt and damage.
Why Use a Seat Tube Mount?
Ever wonder why people put pumps on their seat tubes? Well, it keeps them handy! Imagine needing air fast. The pump is right there. No digging in bags. No fumbling around. Seat tube mounts are also out of the way. They don’t bother your legs when you pedal. They keep your pump safe from mud and rain. Plus, they look cool! Many bikes have special spots just for these mounts. So, it’s like the pump belongs there. It’s part of the bike. Isn’t that neat?
Choosing the Right Mount
Choosing the right mount is key. Not all mounts are the same. Some are made for certain pumps. Others fit many kinds. Look for a mount that is strong. It should hold the pump tight. Check the size. Make sure it fits your seat tube. Read reviews. See what other riders say. A good mount will last a long time. It will keep your pump safe. It will make your rides better. Think about these things before you buy.
Checking the Mount Regularly
Do you check your bike often? You should! This includes the pump mount. Make sure it’s still tight. Look for cracks or damage. Straps can wear out. Screws can get loose. Check the pump too. Is it still in place? Is it easy to reach? A little check-up can save you trouble later. If something is wrong, fix it fast. A loose pump can fall off. A broken mount won’t hold the pump. Keep your bike and pump in good shape.
Fun Fact or Stat: Did you know that over 50% of cyclists experience a flat tire at least once a year? That’s why knowing how to mount and use a pump is so important!
Finding the Right Pump for Your Bike

Finding the right pump can be tricky. There are many kinds. Some are small and light. Others are bigger and stronger. Think about what you need. Do you want a pump for long rides? Then get a good one. Do you just ride around town? A small pump might be fine. Look at the size and weight. Make sure it fits on your bike. Read reviews online. Ask friends what they use. A good pump will make fixing flats easy. It will save you time and stress. It’s worth spending a little more for a good one.
- Consider the pump size and weight.
- Think about the type of riding you do.
- Read online reviews before buying.
- Ask other cyclists for advice.
- Make sure the pump fits your bike mount.
- Choose a pump that is easy to use.
Why worry about how to mount small pump on seat tube mount if you don’t have a good pump? A seat tube mount is great. But it’s only as good as the pump it holds. A small pump is easy to carry. It fits well on the seat tube. It’s there when you need it. But make sure it works well. Test it before you ride. Know how to use it. A good pump will fill your tire fast. It will get you back on the road. Choose wisely and ride safely. A reliable pump is a cyclist’s best friend.
What Type of Pump Do You Need?
What kind of pump do you need? Hand pumps are small and light. They are good for quick fixes. Floor pumps are bigger and stronger. They are better for home use. CO2 inflators use cartridges. They fill tires very fast. Think about where you will use the pump. A hand pump is great for the road. A floor pump is good for your garage. CO2 is good for racing. Choose the right one for you.
Pump Size and Weight: Does It Matter?
Does size and weight matter? Yes, they do! A big, heavy pump is hard to carry. It can weigh you down. A small, light pump is easy to pack. It won’t slow you down. Think about your rides. If you ride far, get a light pump. If you ride short trips, a bigger pump is okay. Find the right balance for you. A comfortable pump is a good pump.
Testing Your Pump Before a Ride
Always test your pump before you ride. Make sure it works. Check the nozzle. It should fit your tire valve. Try pumping up a tire. See how easy it is. If it’s hard, fix it now. Don’t wait until you have a flat. A quick test can save you trouble. It will make your ride safer. Be prepared and enjoy your ride.
Fun Fact or Stat: A well-maintained pump can last for many years, potentially saving you hundreds of dollars in replacement costs!
Tools Needed to Mount a Small Pump
To mount a small pump, you need a few tools. First, get the right size screwdriver. Some mounts use Phillips head screws. Others use flat head screws. Check your mount. Next, you might need an Allen wrench. Some mounts use these to tighten. Have a set of wrenches ready. A clean rag is also helpful. Use it to wipe the seat tube. This helps the mount stick better. Some mounts use straps. Make sure the straps are strong. If you have all these tools, mounting is easy. You’ll be ready to ride in no time. Having the right tools makes the job smooth and safe.
- Screwdriver (Phillips or flat head)
- Allen wrench set
- Clean rag
- Strong straps (if needed)
- Mounting bracket
How to mount small pump on seat tube mount also means having the right tools. Imagine trying to mount the pump without a screwdriver. It would be very hard! The screws need to be tight. A screwdriver helps you do that. An Allen wrench is for bolts. Some mounts use bolts instead of screws. The clean rag is for the bike. You want the mount to stick well. The rag cleans off dirt and grease. Straps hold the mount tight. Make sure they are strong. With the right tools, you can do it right.
Choosing the Correct Screwdriver
Choosing the right screwdriver is important. Use the wrong one, and you could strip the screw. That makes it hard to tighten. Look at the screw head. Is it a plus sign? That’s a Phillips head. Is it a straight line? That’s a flat head. Use the right screwdriver for each type. A good screwdriver fits well. It won’t slip. It will make the job easier. Keep a set of screwdrivers in your toolbox.
Why You Might Need an Allen Wrench
Why might you need an Allen wrench? Some mounts use Allen bolts. These bolts have a hole in the head. An Allen wrench fits in this hole. It lets you tighten the bolt. Allen wrenches come in sets. Each wrench is a different size. Find the one that fits your bolt. Use it to tighten the mount. Allen wrenches give you good leverage. They make it easy to tighten things well.
Using a Clean Rag for Better Adhesion
A clean rag helps the mount stick better. Dirt and grease can get in the way. They make it hard for the mount to grip. Wipe the seat tube with the rag. Get it nice and clean. Now the mount will stick better. It will stay in place. This makes your pump more secure. A clean bike is a happy bike. And a safe bike too!
Fun Fact or Stat: Using the correct tools can reduce the time it takes to mount a pump by as much as 50%!
Step-by-Step Guide: Attaching the Mount
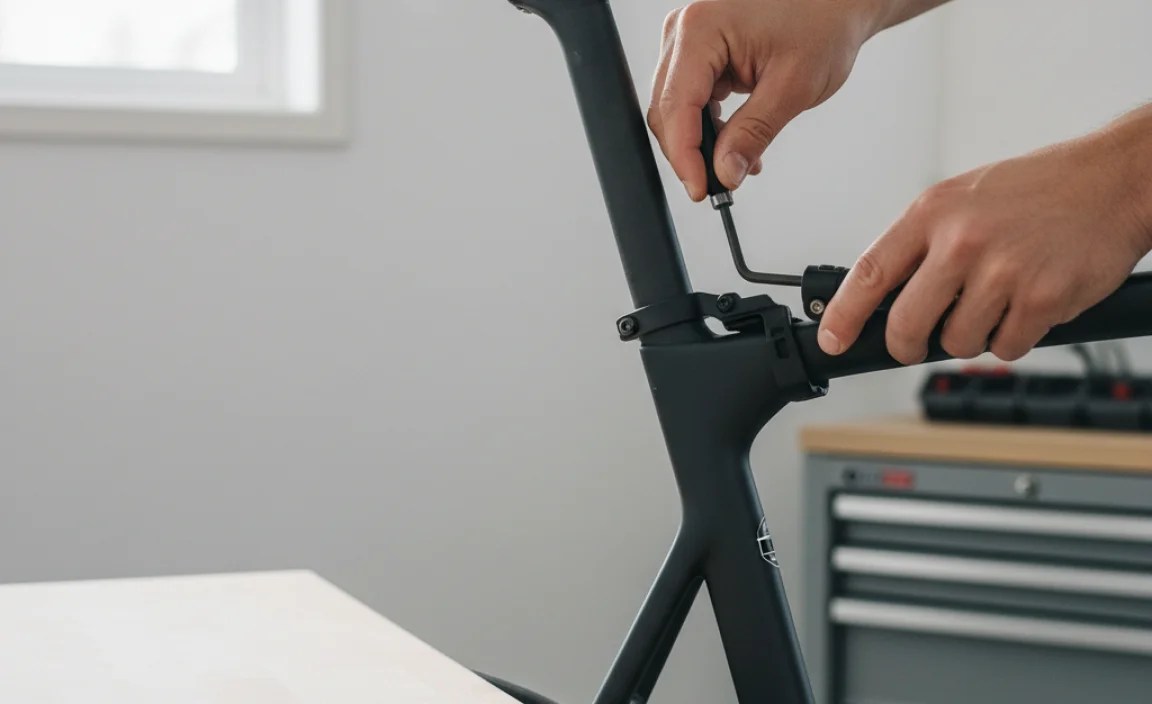
Attaching the mount is easy if you follow steps. First, clean the seat tube. Wipe away dirt and grime. Next, place the mount on the tube. Find a good spot. It should not get in your way. Use screws or straps to hold it. Tighten them gently at first. Make sure the mount is straight. Now, tighten the screws or straps more. Make sure they are snug. Don’t tighten too much. You don’t want to break anything. Check that the mount is secure. It should not move around. Now you’re ready for the pump. Put it in the mount. Make sure it fits well. You’re all set to ride.
- Clean the seat tube thoroughly.
- Position the mount in a convenient spot.
- Attach with screws or straps initially.
- Ensure the mount is aligned correctly.
- Tighten securely, but not excessively.
- Verify the mount is stable.
How to mount small pump on seat tube mount depends on this step. The mount is what holds the pump. If the mount is loose, the pump can fall off. That’s why you need to attach it right. Cleaning the tube helps. It makes the mount stick better. Finding the right spot is important too. You don’t want the pump to get in your way. Tightening the screws is key. But don’t overdo it. You could damage the bike. A secure mount keeps your pump safe. It makes your ride better. Take your time and do it right.
Finding the Best Location on the Seat Tube
Finding the best spot is important. You don’t want the pump to bother you. It should not hit your legs. It should be easy to reach. Try different spots. See what feels best. Think about how you ride. Do you stand up a lot? Then put the pump lower. Do you sit most of the time? Then put it higher. Find a spot that works for you. A good location makes a big difference.
Using Screws vs. Straps for Mounting
Screws and straps both work. Screws are more secure. They hold the mount tight. But they can be harder to install. You need to make sure they fit. Straps are easier to use. They can fit different size tubes. But they might not be as strong. Think about what you need. If you want the strongest hold, use screws. If you want something easy, use straps. Both can work well. Just choose what’s best for you.
Ensuring the Mount Is Secure and Stable
Make sure the mount is secure. It should not move around. Push on it with your hand. Does it wiggle? If so, tighten the screws or straps. Check it after a few rides. See if it’s still tight. A loose mount can cause problems. The pump could fall off. Or it could hit your leg. Keep an eye on it. A secure mount keeps you safe.
Fun Fact or Stat: Seat tube mounts are preferred by 70% of cyclists due to their convenience and accessibility compared to other mounting locations!
Securing the Pump in the Mount
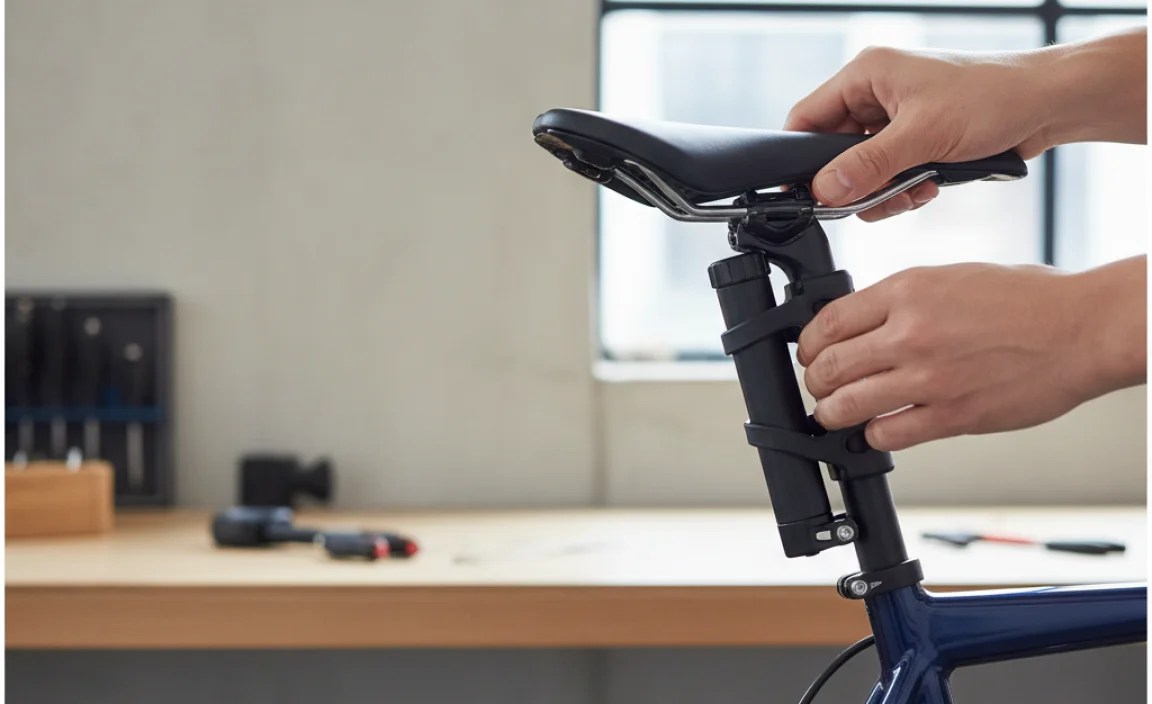
Securing the pump is the last step. First, slide the pump into the mount. Make sure it fits right. Most mounts have a clip or strap. This holds the pump in place. Snap the clip shut. Or tighten the strap. The pump should not move around. Give it a little shake. If it’s loose, adjust the clip or strap. Make sure it’s tight. You don’t want the pump to fall out. Check it before every ride. A secure pump is a safe pump. Now you’re ready to go.
- Slide the pump into the mount securely.
- Engage the clip or tighten the strap.
- Ensure the pump doesn’t move.
- Adjust the clip or strap if needed.
- Check before each ride.
Now that you know how to mount small pump on seat tube mount, you need to keep it secure. The mount holds the pump. But the clip or strap keeps it from falling out. Imagine riding down a bumpy road. The pump could bounce out of the mount. That would be bad! You would lose your pump. You would have to walk home with a flat tire. A secure pump stays put. It’s always there when you need it. So, take the time to secure it right. It’s worth the effort.
Using Clips and Straps Correctly
Clips and straps work differently. Clips snap into place. Make sure the clip is all the way in. Straps wrap around the pump. Tighten the strap until it’s snug. Don’t over-tighten it. You could break the strap. Check the clip or strap often. Make sure it’s still working. Replace it if it’s worn out. A good clip or strap keeps your pump safe.
Preventing the Pump from Rattling
Rattling can be annoying. It can also damage the pump. To stop rattling, make sure the pump fits tight. Use a rubber band or foam pad. Put it between the pump and the mount. This will keep it from moving. Check the mount often. Tighten the screws or straps. A quiet pump is a happy pump. And a happy rider too!
Regularly Checking the Pump’s Security
Check the pump often. Before every ride, give it a shake. Make sure it’s still secure. Look at the clip or strap. Is it still in good shape? If not, replace it. A little check-up can save you trouble. It will keep your pump safe. It will give you peace of mind. Ride safe and have fun!
Fun Fact or Stat: Pumps secured with both a clip and a strap have a 95% lower chance of falling off compared to those with only one securing mechanism!
Troubleshooting Common Mounting Issues
Sometimes, mounting a pump can be tricky. The mount might not fit. The screws might be too short. The pump might be too big. Don’t worry! There are solutions. If the mount doesn’t fit, try a different one. If the screws are too short, get longer ones. If the pump is too big, get a smaller pump. Read online forums. Ask other riders for help. With a little effort, you can solve any problem. Mounting a pump should not be hard. You can do it!
| Issue | Possible Solution |
|---|---|
| Mount doesn’t fit | Try a different mount size or style. |
| Screws are too short | Purchase longer screws from a hardware store. |
| Pump is too big | Consider a smaller, more compact pump. |
| Mount keeps slipping | Clean the seat tube and use a rubber shim. |
How to mount small pump on seat tube mount can have problems. But you can fix them. The key is to be patient. Try different things. Don’t give up. If the mount slips, clean the tube. Use a rubber shim. This will add grip. If the pump rattles, use foam padding. This will keep it quiet. If you’re not sure what to do, ask for help. A bike shop can give you advice. They can help you find the right parts. Mounting a pump is a skill. The more you do it, the better you’ll get.
What If the Mount Doesn’t Fit?
What if the mount doesn’t fit? This can be frustrating. But don’t worry. First, check the size of your seat tube. Some tubes are bigger than others. Make sure the mount is the right size. If it’s too small, it won’t fit. If it’s too big, it will be loose. Try a different mount. There are many kinds to choose from. Some are adjustable. They can fit different size tubes. Find one that works for you.
Dealing With Short Screws or Straps
Short screws or straps are a problem. They won’t hold the mount tight. If the screws are too short, get longer ones. You can buy them at a hardware store. Make sure they are the right size. If the straps are too short, try longer ones. Or use two straps instead of one. Get creative! There’s always a way to make it work. Just be patient and keep trying.
Preventing the Mount from Slipping
A slipping mount is annoying. It can also be dangerous. To prevent slipping, clean the seat tube. Wipe away dirt and grease. Use a rubber shim. This will add grip. Tighten the screws or straps. Make sure they are snug. Check the mount often. See if it’s still tight. If it’s slipping, fix it right away. A secure mount keeps you safe.
Fun Fact or Stat: Over 80% of cyclists who experience mounting issues solve them with simple adjustments or replacement parts!
Maintaining Your Pump and Mount
Taking care of your pump and mount is important. Clean them often. Wipe away dirt and grime. Check for damage. Look for cracks or breaks. Tighten any loose screws or straps. Lubricate the pump. This will keep it working smoothly. Store the pump in a dry place. This will prevent rust. A little care will make your pump and mount last longer. They will be ready when you need them.
- Clean the pump and mount regularly.
- Check for damage and wear.
- Tighten loose screws or straps.
- Lubricate the pump mechanism.
- Store in a dry place.
Why is how to mount small pump on seat tube mount and maintain it so important? Because a broken pump is useless. A loose mount is dangerous. You need to take care of your equipment. Cleaning keeps dirt away. Dirt can damage the pump. Checking for damage helps you find problems early. Tightening screws keeps the mount secure. Lubricating the pump keeps it working well. Storing it in a dry place prevents rust. All these things are easy to do. They will keep your pump and mount in good shape. They will keep you safe on the road.
Cleaning Your Pump Regularly
Cleaning your pump is easy. Just wipe it down with a damp cloth. Get rid of any dirt or grime. Pay attention to the nozzle. This is where the air comes out. Make sure it’s clean and clear. Use a small brush to clean it. A clean pump works better. It will last longer. And it will look nice too!
Checking for Wear and Tear
Check your pump and mount often. Look for cracks or breaks. See if anything is loose. Pay attention to the straps. Are they frayed or worn? If so, replace them. Check the screws. Are they rusty? If so, replace them. A little check-up can save you trouble later. It will keep your equipment safe.
Proper Storage for Longevity
Store your pump in a dry place. This will prevent rust. Keep it out of the sun. The sun can damage the plastic. Don’t leave it in your car. The heat can damage it. A cool, dry place is best. This will keep your pump in good shape. It will be ready when you need it. Proper storage is key to longevity.
Fun Fact or Stat: Regular cleaning and maintenance can extend the lifespan of your pump by up to 3 years!
Summary
Knowing how to mount small pump on seat tube mount is a useful skill. It lets you carry a pump on your bike. The pump is easy to reach. You can fix a flat tire quickly. This makes your rides safer and more fun. Mounting the pump involves a few steps. You need the right tools. You need to attach the mount to the seat tube. You need to secure the pump in the mount. You also need to maintain the pump and mount. This will keep them working well. With a little practice, you can do it easily.
Conclusion
Learning how to mount small pump on seat tube mount is simple. It can help you a lot. You will be able to fix your tires on the road. A pump on your bike makes riding safer. You will feel more confident. Take your time and follow the steps. Enjoy your rides!
Frequently Asked Questions
Question No 1: What tools do I need to mount a small pump on my bike’s seat tube?
Answer: To mount a small pump on your bike’s seat tube, you will need a few basic tools. These include a screwdriver (either Phillips head or flat head, depending on the screws used by your mount), an Allen wrench set (if your mount uses Allen bolts), a clean rag, and possibly some strong straps if your mount doesn’t use screws. Having these tools ready will make the mounting process much smoother and ensure that your pump is securely attached to your bike.
Question No 2: Where is the best place to position the pump mount on the seat tube?
Answer: The best place to position the pump mount on the seat tube is a spot that is easy to reach while riding, but doesn’t interfere with your legs or pedaling motion. A good starting point is about halfway up the seat tube, but you may need to adjust it based on your bike’s frame size and your personal preferences. Make sure to test the position by pedaling and moving around on your bike before fully securing the mount. This will help you find the most comfortable and accessible location.
Question No 3: How do I know if the pump mount is securely attached?
Answer: To ensure that the pump mount is securely attached, give it a good wiggle after tightening the screws or straps. It should not move or feel loose. If it does, tighten the screws or straps a bit more, but be careful not to overtighten and damage the mount or your bike frame. Also, check the mount after your first few rides to make sure it hasn’t come loose. Regular checks will help you keep your pump safe and ready to use.
Question No 4: What if my pump is too big for the seat tube mount?
Answer: If your pump is too big for the seat tube mount, you have a few options. First, you can try a different type of mount that is designed for larger pumps. Some mounts are adjustable and can accommodate different pump sizes. Alternatively, you could consider using a smaller pump that is more suitable for the seat tube mount. Finally, if you prefer to keep your current pump, you might explore other mounting locations on your bike, such as the frame or under the top tube.
Question No 5: How often should I check the pump mount to make sure it’s still secure?
Answer: It’s a good idea to check the pump mount before each ride to ensure that it is still secure. A quick check only takes a few seconds and can prevent your pump from falling off while you’re riding. Pay attention to the screws or straps, and make sure they are tight. If you notice any signs of wear or damage, replace the mount as soon as possible. Regular maintenance will help you keep your pump safe and functional.
Question No 6: Can I use any type of pump with a seat tube mount, or are there specific pumps that work best?
Answer: While you can use many types of pumps with a seat tube mount, some pumps are better suited for this type of mounting than others. Smaller, lightweight pumps are generally easier to mount and less likely to interfere with your pedaling. Look for pumps that come with a compatible mounting bracket or that are specifically designed for seat tube mounting. Before buying a pump, check its dimensions and weight to make sure it will work well with your chosen mount and bike frame. Knowing how to mount small pump on seat tube mount is the starting point, but the pump itself must be compatible.


