
Maintenance Checklist for Bike Pump Chucks: Easy Fix!
Quick Summary: Keep your bike tires properly inflated by regularly maintaining your pump chuck! Inspect it for wear, clean it to remove dirt, lubricate moving parts, and replace worn-out O-rings or the entire chuck when needed. Regular maintenance ensures accurate pressure readings and prevents air leaks, keeping you rolling smoothly!
Is your bike pump suddenly losing pressure or struggling to connect to your valve? A sticky or leaky pump chuck can be a real headache, turning a quick tire top-off into a frustrating struggle. Don’t let a neglected pump chuck ruin your ride! Fortunately, keeping your pump chuck in top shape is easier than you think.
This guide will walk you through a simple maintenance checklist to keep your bike pump chuck working like new. We’ll cover everything from basic cleaning to O-ring replacement, so you can confidently maintain your pump and keep your tires properly inflated. Let’s get started!
Understanding Bike Pump Chucks

Before diving into maintenance, let’s briefly understand what a bike pump chuck is and why it’s so important.
What is a Bike Pump Chuck?
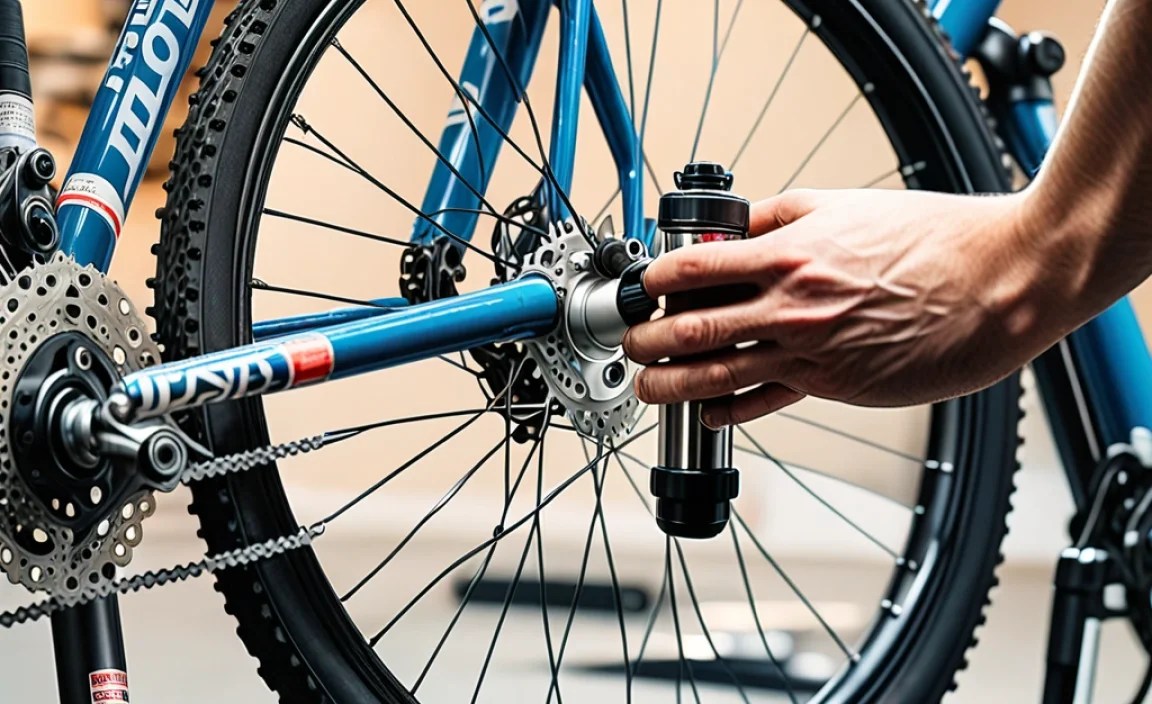
The chuck is the part of your bike pump that connects to the tire’s valve (either Presta or Schrader). It’s a small but critical component responsible for creating an airtight seal, allowing air to flow into the tire without leakage. A well-functioning chuck is essential for accurate inflation and efficient pumping.
Why Regular Maintenance Matters
Over time, dirt, grime, and wear can compromise the chuck’s performance. Here’s why regular maintenance is crucial:
- Prevents Leaks: A clean, properly sealed chuck prevents air from escaping during inflation.
- Ensures Accurate Pressure: A faulty chuck can lead to inaccurate pressure readings, resulting in over- or under-inflated tires.
- Extends Pump Life: Regular maintenance reduces strain on the pump, extending its lifespan.
- Saves Time and Effort: A well-maintained chuck makes inflating tires quicker and easier.
Maintenance Checklist for Bike Pump Chucks

Follow this step-by-step checklist to keep your bike pump chuck in optimal condition.
1. Gather Your Tools and Supplies
Before you begin, gather the necessary tools and supplies:
- Clean rags or paper towels
- Small brush (like an old toothbrush)
- Mild degreaser or soap and water
- Silicone-based lubricant or grease (safe for rubber O-rings)
- Small flathead screwdriver or pick (for removing O-rings)
- Replacement O-rings (matching the size of your chuck’s O-rings)
- Work gloves (optional, to keep your hands clean)
2. Inspect the Chuck for Wear and Damage
Carefully examine the chuck for any signs of wear, damage, or contamination:
- Cracks or Breaks: Check for any visible cracks or breaks in the chuck body or lever.
- Deformed or Worn O-rings: Inspect the O-rings for flat spots, cracks, or swelling.
- Dirt and Debris: Look for dirt, grime, or sealant buildup inside and outside the chuck.
- Corrosion: Check for any signs of rust or corrosion, especially on metal parts.
If you notice any significant damage, such as cracks or breaks, it’s best to replace the entire chuck.
3. Clean the Chuck Thoroughly
Cleaning is essential for removing dirt and grime that can interfere with the chuck’s sealing ability.
- Disassemble the Chuck (if possible): Some chucks can be partially disassembled to allow for better cleaning. Refer to your pump’s manual or the chuck manufacturer’s instructions.
- Clean with Degreaser: Use a small brush and a mild degreaser or soap and water to scrub away dirt and grime from all parts of the chuck.
- Rinse Thoroughly: Rinse the chuck with clean water to remove any soap residue.
- Dry Completely: Allow the chuck to air dry completely before reassembling or lubricating it. You can use compressed air to speed up the drying process.
4. Lubricate Moving Parts
Proper lubrication ensures smooth operation and prevents premature wear.
- Apply Lubricant: Apply a small amount of silicone-based lubricant or grease to the moving parts of the chuck, such as the lever pivot points and the area where the chuck connects to the valve.
- Work the Lubricant In: Operate the chuck lever several times to distribute the lubricant evenly.
- Wipe Away Excess: Wipe away any excess lubricant to prevent it from attracting dirt.
Important: Avoid using petroleum-based lubricants, as they can damage rubber O-rings.
5. Replace Worn O-Rings
Worn or damaged O-rings are a common cause of air leaks. Replacing them is a simple and effective way to restore the chuck’s sealing ability.
- Remove Old O-Rings: Use a small flathead screwdriver or pick to carefully remove the old O-rings from their grooves. Be careful not to scratch or damage the surrounding surfaces.
- Install New O-Rings: Lubricate the new O-rings with silicone grease and carefully install them into the grooves. Make sure they are properly seated and not twisted.
- Test the Seal: After replacing the O-rings, test the chuck by connecting it to a tire valve and inflating the tire. Check for any air leaks around the chuck.
It’s a good idea to have a selection of O-rings on hand, as different chucks may use different sizes. A set like this one from Amazon is a good start: O-Ring Assortment Kit.
6. Check and Tighten Connections
Ensure that the chuck is securely connected to the pump hose.
- Inspect Connections: Check the connection between the chuck and the pump hose for any looseness or damage.
- Tighten Connections: If necessary, tighten the connections using appropriate wrenches or tools. Be careful not to overtighten, as this could damage the threads.
7. Test the Chuck’s Performance
After performing maintenance, it’s essential to test the chuck to ensure it’s working correctly.
- Connect to Valve: Connect the chuck to a tire valve (either Presta or Schrader, depending on your chuck type).
- Inflate Tire: Inflate the tire to the desired pressure.
- Check for Leaks: Listen for any hissing sounds or feel for air leaks around the chuck. If you detect any leaks, double-check the O-rings and connections.
- Verify Pressure: Use a separate pressure gauge to verify that the pump’s gauge is accurate.
Troubleshooting Common Issues
Even with regular maintenance, you may encounter some common issues with your bike pump chuck. Here’s how to troubleshoot them:
Air Leaks Around the Chuck
Possible Causes:
- Worn or damaged O-rings
- Loose connections
- Dirt or debris in the chuck
Solutions:
- Replace the O-rings.
- Tighten the connections.
- Clean the chuck thoroughly.
Chuck Won’t Connect to Valve
Possible Causes:
- Deformed or damaged chuck head
- Valve stem issues
- Incorrect chuck type for the valve
Solutions:
- Replace the chuck head.
- Check the valve stem for damage or blockage.
- Ensure you’re using the correct chuck type for the valve (Presta or Schrader).
Difficulty Inflating Tire
Possible Causes:
- Clogged chuck
- Damaged pump piston or seals
- Leaky hose
Solutions:
- Clean the chuck thoroughly.
- Inspect and repair or replace the pump piston and seals.
- Check the hose for leaks and replace if necessary.
Choosing the Right Bike Pump Chuck

Selecting the right bike pump chuck can significantly impact your inflation experience. Here’s what to consider when choosing a chuck:
Presta vs. Schrader
The first consideration is the type of valve your bike uses. Presta valves are common on road bikes and high-performance bikes, while Schrader valves are typically found on mountain bikes, hybrid bikes, and some older road bikes. Some chucks are designed to work with both Presta and Schrader valves, while others are specific to one type.
Chuck Material
Chucks are typically made of plastic, metal, or a combination of both. Metal chucks are generally more durable and offer a more secure connection, while plastic chucks are lighter and less expensive. Choose a material that suits your needs and budget.
Chuck Head Design
Different chuck head designs offer varying levels of ease of use and performance. Some chucks have a simple push-on design, while others have a lever or locking mechanism to ensure a secure connection. Consider your personal preferences and the type of riding you do when choosing a chuck head design.
Dual Head vs. Single Head
Dual-head chucks have separate openings for Presta and Schrader valves, while single-head chucks can accommodate both valve types with a reversible or adjustable design. Dual-head chucks are often more convenient, as you don’t have to switch or adjust anything when switching between valve types.
Top Bike Pump Chuck Recommendations
Here are some top-rated bike pump chucks available on the market:
| Chuck | Type | Features | Approximate Price |
|---|---|---|---|
| Lezyne Dual Valve Head | Dual Head | Aluminum construction, Presta and Schrader compatibility | $25 – $35 |
| Silca HIRO Chuck | Thread-on | High-end, durable, precise | $100 – $120 |
| Topeak SmartHead DX3 | Single Head | Automatically adjusts to Presta and Schrader valves | $20 – $30 |
| Park Tool PCL-1 | Dual Head | Durable composite construction, comfortable grip | $15 – $25 |
Note: Prices may vary depending on the retailer and availability.
Extending the Life of Your Bike Pump

Maintaining your bike pump chuck is just one aspect of keeping your entire pump in good working order. Here are some additional tips for extending the life of your bike pump:
- Store Your Pump Properly: Store your pump in a clean, dry place to protect it from dirt, moisture, and extreme temperatures.
- Clean the Pump Regularly: Wipe down the pump body and hose with a damp cloth to remove dirt and grime.
- Lubricate the Piston: Periodically lubricate the pump piston with silicone grease to ensure smooth operation.
- Replace Worn Parts: Replace any worn or damaged parts, such as the hose, O-rings, or pump head, as soon as you notice them.
- Follow Manufacturer’s Instructions: Refer to your pump’s manual for specific maintenance recommendations and guidelines.
FAQ: Bike Pump Chuck Maintenance
Here are some frequently asked questions about bike pump chuck maintenance:
Q: How often should I maintain my bike pump chuck?
A: You should inspect and clean your bike pump chuck every few months, or more frequently if you use your pump regularly or ride in dirty conditions. Replace O-rings as needed, typically once a year.
Q: What type of lubricant should I use on my bike pump chuck?
A: Use a silicone-based lubricant or grease that is safe for rubber O-rings. Avoid petroleum-based lubricants, as they can damage the O-rings.
Q: Can I use a multi-purpose lubricant on my bike pump chuck?
A: It’s best to use a lubricant specifically designed for rubber O-rings and seals. Multi-purpose lubricants may contain additives that can damage the rubber.
Q: How do I know what size O-rings to use for my bike pump chuck?
A: The best way to determine the correct O-ring size is to measure the old O-rings with a caliper or refer to your pump’s manual. You can also purchase an O-ring assortment kit that includes a variety of sizes.
Q: What should I do if my bike pump chuck is still leaking after replacing the O-rings?
A: Double-check that the O-rings are properly seated and not twisted. Also, inspect the chuck body for any cracks or damage. If the chuck is damaged, it may need to be replaced.
Q: Can I use a bike pump chuck on different types of valves?
A: Some bike pump chucks are designed to work with both Presta and Schrader valves, while others are specific to one type. Make sure you’re using the correct chuck type for the valve you’re trying to inflate.
Q: When should I replace my bike pump chuck?
A: Replace your bike pump chuck if it’s cracked, broken, or severely worn, or if it continues to leak air despite regular maintenance and O-ring replacement.
Conclusion
Maintaining your bike pump chuck is a simple yet essential task that can significantly improve your cycling experience. By following this maintenance checklist, you can keep your chuck working smoothly, prevent air leaks, and ensure accurate tire pressure. Regular maintenance not only extends the life of your pump but also saves you time and frustration on the road or trail. So, grab your tools, give your pump chuck some love, and enjoy the ride!


