
How to Stop Air Leaks in Bike Pump Chucks – Easy!
Quick Summary: Is your bike pump chuck leaking air? Don’t worry! You can usually fix it. First, tighten the chuck head. Then, check for worn-out rubber seals or O-rings and replace them. Make sure the chuck is fully engaging the valve. Clean any dirt or debris from the chuck and valve. These simple steps will often solve the problem and get you back on the road quickly!
It’s super frustrating when you’re trying to pump up your bike tire, but air keeps hissing out from around the pump chuck. You pump harder, but the tire stays soft, and that annoying leak persists. This happens to all of us eventually! The good news is that most bike pump chuck leaks are easy to fix at home with just a few simple steps. You don’t need to be a bike mechanic to get your pump working like new again.
This guide will walk you through troubleshooting and fixing those pesky air leaks. We’ll cover everything from tightening loose parts to replacing worn-out seals. You’ll learn how to identify the cause of the leak and get your tires properly inflated in no time. Let’s get started!
Understanding Bike Pump Chucks and Air Leaks

Before we dive into fixing the leaks, let’s quickly cover the basics of bike pump chucks and why they leak in the first place.
What is a Bike Pump Chuck?
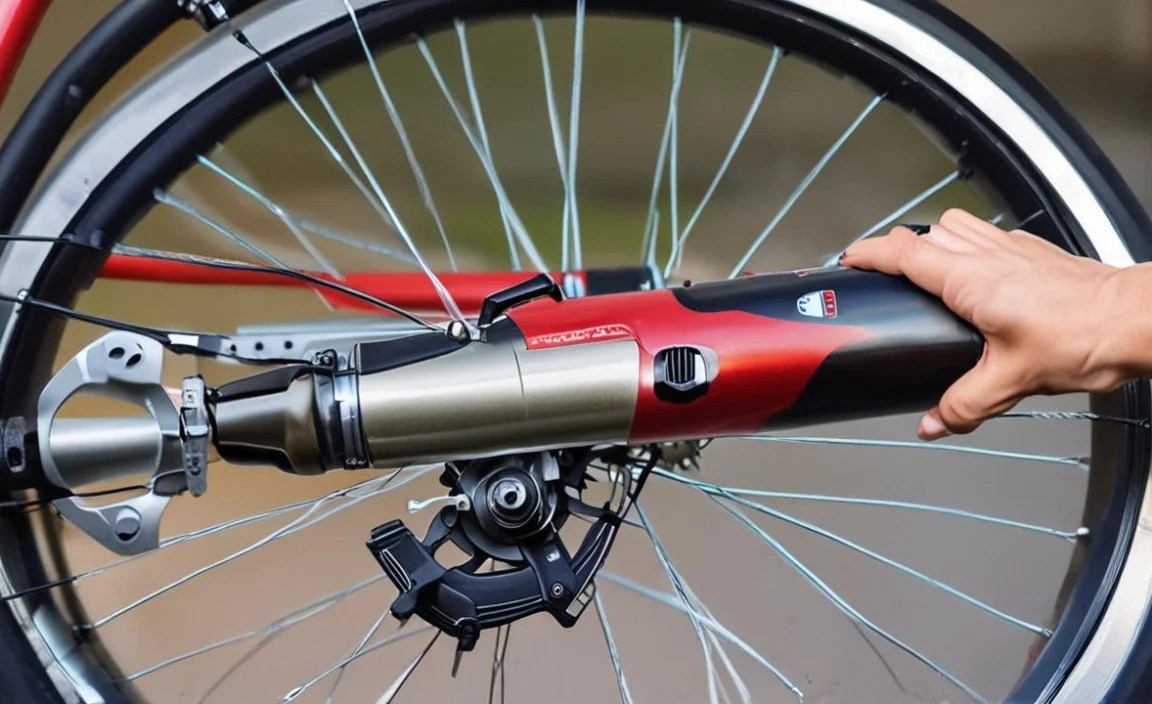
The chuck is the part of your bike pump that connects to the tire’s valve (either Presta or Schrader). It’s designed to create an airtight seal so that air can be efficiently pumped into the tire. There are two main types:
- Thread-on chucks: These screw onto the valve.
- Lever-lock chucks: These press onto the valve and use a lever to create a tight seal.
Why Do Chucks Leak?
Air leaks in pump chucks are common, and they often stem from a few key issues:
- Worn or Damaged Seals: The rubber O-rings or seals inside the chuck can dry out, crack, or wear down over time, leading to leaks.
- Loose Connections: The chuck head might become loose from the hose, or internal components can wiggle free.
- Dirt and Debris: Grit, grime, or old sealant can get lodged between the chuck and the valve, preventing a tight seal.
- Valve Issues: Sometimes, the problem isn’t the chuck but the tire valve itself.
Tools and Materials You’ll Need

Before you start troubleshooting, gather these essential tools and materials:
- Bike Pump Repair Kit: Many pump manufacturers sell kits with replacement O-rings and seals.
- Adjustable Wrench or Pliers: For tightening loose connections.
- Small Screwdrivers: Both flathead and Phillips head might be needed to open the chuck.
- Clean Rags: For wiping away dirt and grime.
- Silicone Grease or Lubricant: To help seals seat properly and prevent drying.
- Valve Core Tool (optional): To tighten or replace the valve core on Schrader valves.
Step-by-Step Guide to Stop Air Leaks

Follow these steps to diagnose and fix air leaks in your bike pump chuck.
Step 1: Inspect the Chuck
Carefully examine the chuck for any obvious signs of damage or wear.
- Check for Cracks: Look for cracks in the plastic or metal body of the chuck.
- Inspect the Rubber Seals: Examine the O-rings or rubber seals for dryness, cracks, or deformation.
- Look for Debris: Check for dirt, grit, or sealant buildup around the chuck opening.
Step 2: Tighten Loose Connections
Loose connections are a common cause of air leaks. Use an adjustable wrench or pliers to gently tighten any loose parts.
- Tighten the Chuck Head: Make sure the chuck head is securely attached to the hose.
- Check Internal Connections: If possible, open the chuck (usually by unscrewing it) and check for loose internal components.
Step 3: Clean the Chuck and Valve
Dirt and debris can prevent the chuck from creating a tight seal. Clean both the chuck and the tire valve thoroughly.
- Clean the Chuck: Use a clean rag to wipe away any dirt or grime from the chuck opening. You can also use a small brush or cotton swab to clean hard-to-reach areas.
- Clean the Valve: Use a clean rag to wipe the tire valve. For Presta valves, gently open and close the valve a few times to dislodge any debris.
Step 4: Replace Worn or Damaged Seals
If the rubber seals are cracked, dry, or deformed, they need to be replaced. This is where a bike pump repair kit comes in handy.
- Disassemble the Chuck: Carefully disassemble the chuck to access the O-rings or seals. Take note of the order in which the parts are assembled.
- Remove the Old Seals: Use a small screwdriver or pick to remove the old seals. Be careful not to scratch or damage the surrounding parts.
- Install New Seals: Lubricate the new seals with silicone grease or lubricant and install them in the correct position.
- Reassemble the Chuck: Reassemble the chuck in the correct order, making sure all parts are securely in place.
Step 5: Check Valve Core (Schrader Valves)
If you’re using a Schrader valve, the valve core might be loose or damaged. Use a valve core tool to tighten or replace it.
- Tighten the Valve Core: Insert the valve core tool into the valve and gently tighten the core.
- Replace the Valve Core: If tightening doesn’t solve the problem, remove the old valve core and replace it with a new one.
Step 6: Test the Chuck
After making any repairs, test the chuck to see if the leak is gone.
- Connect the Chuck to the Valve: Attach the chuck to the tire valve as you normally would.
- Pump Up the Tire: Pump up the tire and listen for any air leaks.
- Check for Leaks: If you still hear a leak, re-examine the chuck and valve to identify the source of the leak. You may need to repeat the previous steps or try a different solution.
Troubleshooting Specific Chuck Types
The steps above apply to most bike pump chucks, but here are some tips for specific types:
Lever-Lock Chucks
- Check Lever Tension: Make sure the lever is fully engaged and provides enough tension to create a tight seal. Some lever-lock chucks have an adjustment screw to increase or decrease the lever tension.
- Inspect the Rubber Gasket: The rubber gasket that seals against the valve can wear out over time. Replace it if it’s damaged or worn.
Thread-On Chucks
- Check the Threads: Make sure the threads on the chuck and the valve are clean and undamaged. Damaged threads can prevent a tight seal.
- Use Teflon Tape: If you’re still experiencing leaks, try wrapping the threads with Teflon tape to create a better seal.
Preventing Future Air Leaks

Here are some tips to help prevent air leaks in your bike pump chuck:
- Regularly Clean the Chuck and Valve: Keep the chuck and valve clean to prevent dirt and debris from building up.
- Store Your Pump Properly: Store your pump in a clean, dry place to prevent the seals from drying out.
- Lubricate the Seals: Periodically lubricate the seals with silicone grease or lubricant to keep them supple and prevent them from cracking.
- Replace Worn Seals Promptly: Don’t wait until the seals are completely worn out before replacing them. Replace them as soon as you notice any signs of wear or damage.
Table: Common Air Leak Problems and Solutions
| Problem | Possible Solution |
|---|---|
| Air leaking around the chuck head | Tighten the chuck head with an adjustable wrench. |
| Air leaking from the chuck while pumping | Clean the chuck and valve. Replace worn O-rings or seals. |
| Chuck won’t stay on the valve | Adjust lever tension (lever-lock chucks). Check for damaged threads (thread-on chucks). |
| Air leaking from the valve itself | Tighten or replace the valve core (Schrader valves). Check for damage to the valve stem (Presta valves). |
| New pump leaking | Check for proper assembly. Ensure correct chuck head for the valve type. |
Table: Types of Bike Valves and Chuck Compatibility
| Valve Type | Description | Chuck Compatibility | Notes |
|---|---|---|---|
| Presta | Narrower, with a valve core that needs to be opened before inflation. | Requires Presta-specific chuck or adapter. | Common on road bikes and high-performance bikes. |
| Schrader | Wider, similar to car tire valves. | Compatible with Schrader-specific chucks. | Common on mountain bikes, hybrid bikes, and some older road bikes. |
| Dunlop (Wood) | Older style, less common now. | Requires Dunlop-specific chuck or adapter. | Often found on older European bikes. |
When to Consider Replacing the Entire Pump
While most air leaks can be fixed, there are times when it’s more practical to replace the entire pump. Consider replacing your pump if:
- The pump is old and heavily used: Over time, the internal components of the pump can wear out, making it difficult to maintain a good seal.
- The pump is severely damaged: If the pump body is cracked or broken, it may not be repairable.
- Replacement parts are unavailable or too expensive: Sometimes, the cost of replacement parts can exceed the cost of a new pump.
If you decide to replace your pump, consider investing in a high-quality pump from a reputable brand like Park Tool or Topeak. A good pump will last for many years and provide reliable performance.
FAQ: Troubleshooting Bike Pump Chucks
Why is my bike pump leaking at the valve?
A leak at the valve usually means the chuck isn’t sealed correctly. Try repositioning the chuck or tightening the lever if it has one. Make sure the valve itself is clean and in good condition. Also, ensure your chuck is compatible with your valve type (Presta or Schrader).
How do I know if my bike pump chuck is worn out?
Look for cracks or tears in the rubber parts of the chuck. If it’s difficult to get a good seal, or if air constantly leaks even when you’re holding it firmly, it’s likely worn out. A worn chuck will often feel loose or wobbly.
Can I use a car tire inflator on my bike?
Yes, if your bike has Schrader valves (like car tires). However, car inflators often deliver too much air too quickly, so be careful not to overinflate. For Presta valves, you’ll need an adapter.
What’s the difference between Presta and Schrader valves?
Presta valves are narrow with a small locking nut at the tip, mostly used on road bikes. Schrader valves are wider and more robust, like those on car tires, and are common on mountain and hybrid bikes.
How often should I replace my bike pump chuck?
It depends on how often you use it. If you pump tires daily, check the chuck every few months. For occasional use, check it yearly. Replace it as soon as you notice any leaks or damage.
Why does my pump work on some tires but not others?
This is usually a valve compatibility issue. Some pumps have dual heads for both Presta and Schrader valves. Make sure you’re using the correct side of the chuck. If it still doesn’t work, the valve on the tire might be damaged.
Is it better to get a floor pump or a hand pump?
Floor pumps are best for home use because they’re more efficient and easier to use for reaching higher pressures. Hand pumps are portable for on-the-go inflation during rides, but require more effort.
Conclusion
Fixing air leaks in your bike pump chuck might seem daunting at first, but as you’ve seen, it’s usually a straightforward process. By following these steps, you can save money and keep your tires properly inflated for a smooth and enjoyable ride. Remember to regularly inspect and maintain your pump to prevent future problems. With a little care, your bike pump will be a reliable companion for years to come. Now get out there and enjoy the ride, knowing you’re prepared for anything!


