
Pump Gauge Clip Mount: The Easiest Install!
Quick Summary: A pump gauge clip mount secures your bike pump’s gauge, preventing damage and making inflation easier. This guide covers choosing the right mount, installing it correctly, and maintaining it for long-term use, ensuring accurate pressure readings and protecting your investment.
Ever struggled with a bike pump gauge flopping around while trying to inflate your tires? It’s a common frustration for cyclists. A loose gauge can be hard to read and even get damaged. Luckily, a pump gauge clip mount offers a simple solution. It keeps your gauge securely in place, so you can focus on getting the right tire pressure. This guide will walk you through everything you need to know to choose, install, and maintain a pump gauge clip mount. Let’s get started and make your pumping experience smoother!
Understanding Pump Gauge Clip Mounts

A pump gauge clip mount is a small but crucial accessory for any serious cyclist. It’s designed to hold your bike pump’s pressure gauge securely. This prevents the gauge from dangling, getting damaged, or being difficult to read while you’re inflating your tires. Think of it as a holster for your gauge, keeping it safe and accessible.
Why Use a Pump Gauge Clip Mount?
Here’s why investing in a pump gauge clip mount is a smart move:
- Protection: It shields your gauge from impacts and scratches, extending its lifespan.
- Accuracy: A secure gauge is easier to read, ensuring accurate tire pressure.
- Convenience: It keeps the gauge within easy reach, simplifying the inflation process.
- Organization: It helps keep your pump and accessories tidy and organized.
Types of Pump Gauge Clip Mounts
Pump gauge clip mounts come in various designs, each with its own advantages. Here are some common types:
- Frame-mounted clips: These attach directly to your bike frame, providing a dedicated spot for your pump.
- Pump-integrated clips: Some pumps come with built-in clips for the gauge.
- Universal clips: These can be attached to various parts of the pump or frame using straps or adhesive.
Choosing the right type depends on your pump and bike frame design. Consider ease of installation and accessibility when making your decision.
Choosing the Right Pump Gauge Clip Mount

Selecting the appropriate pump gauge clip mount involves considering several factors. This ensures it fits your pump and meets your specific needs.
Compatibility
The most important factor is compatibility. Make sure the clip mount is designed to fit your specific pump gauge. Check the diameter and shape of your gauge and compare it to the clip mount’s specifications. Some mounts are adjustable, offering a more universal fit.
Material
The material of the clip mount affects its durability and longevity. Common materials include:
- Plastic: Lightweight and affordable but may be less durable.
- Metal: More durable and resistant to wear and tear.
- Composite: A blend of materials offering a balance of strength and weight.
Consider the conditions you’ll be using the pump in. If you frequently ride in wet or harsh environments, a metal or composite mount is a better choice.
Mounting Style
The mounting style determines how the clip mount attaches to your pump or bike frame. Common options include:
- Bolts: Secure and stable, requiring pre-existing mounting points.
- Straps: Versatile and easy to install, suitable for various frame shapes.
- Adhesive: Simple and non-permanent, but may not be as secure.
Choose a mounting style that suits your bike frame and pump design. Bolts offer the most secure attachment, while straps provide greater flexibility.
Durability and Weather Resistance
A good pump gauge clip mount should be able to withstand the elements. Look for models made from weather-resistant materials that won’t corrode or degrade over time. This is especially important if you frequently ride in wet or humid conditions.
Consider these points when comparing different pump gauge clip mounts:
| Feature | Plastic | Metal | Composite |
|---|---|---|---|
| Durability | Moderate | High | High |
| Weight | Light | Moderate | Light to Moderate |
| Weather Resistance | Moderate | High (if treated) | High |
| Cost | Low | Moderate | Moderate to High |
Tools and Materials Needed for Installation
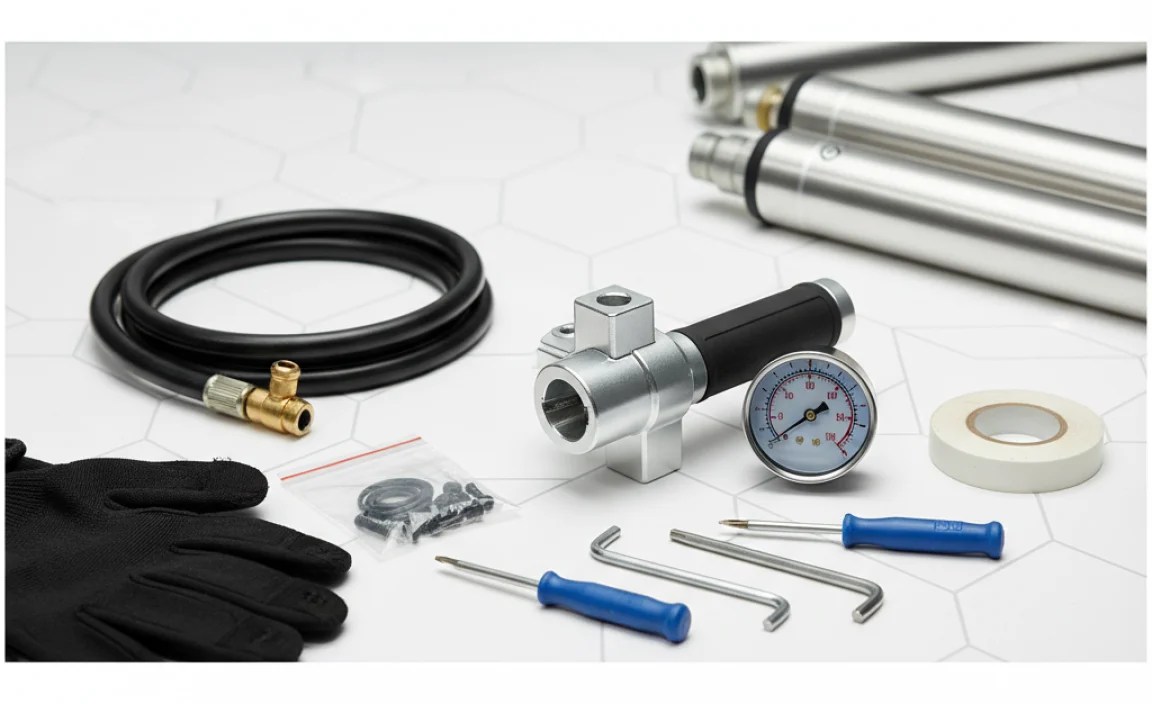
Before you start installing your pump gauge clip mount, gather the necessary tools and materials. Having everything on hand will make the process smoother and more efficient.
- Pump Gauge Clip Mount: The clip mount itself, chosen based on your pump and bike.
- Screwdriver or Allen Wrench: Depending on the type of bolts used.
- Mounting Hardware: Bolts, screws, or straps included with the clip mount.
- Clean Cloth: For cleaning the mounting surface.
- Isopropyl Alcohol: For degreasing the mounting surface (if using adhesive).
- Measuring Tape: To ensure proper placement.
- Pencil or Marker: For marking drill points (if needed).
- Drill (Optional): If you need to create new mounting holes.
Make sure you have the correct size screwdriver or Allen wrench for the bolts included with the clip mount. Using the wrong size can damage the bolts or the clip mount.
Step-by-Step Installation Guide
Installing a pump gauge clip mount is a straightforward process. Follow these steps for a secure and reliable installation:
Step 1: Prepare the Mounting Surface
Clean the area where you’ll be attaching the clip mount. Remove any dirt, grease, or debris. Use a clean cloth and, if necessary, isopropyl alcohol to degrease the surface. This ensures a strong and lasting bond, especially if you’re using an adhesive mount.
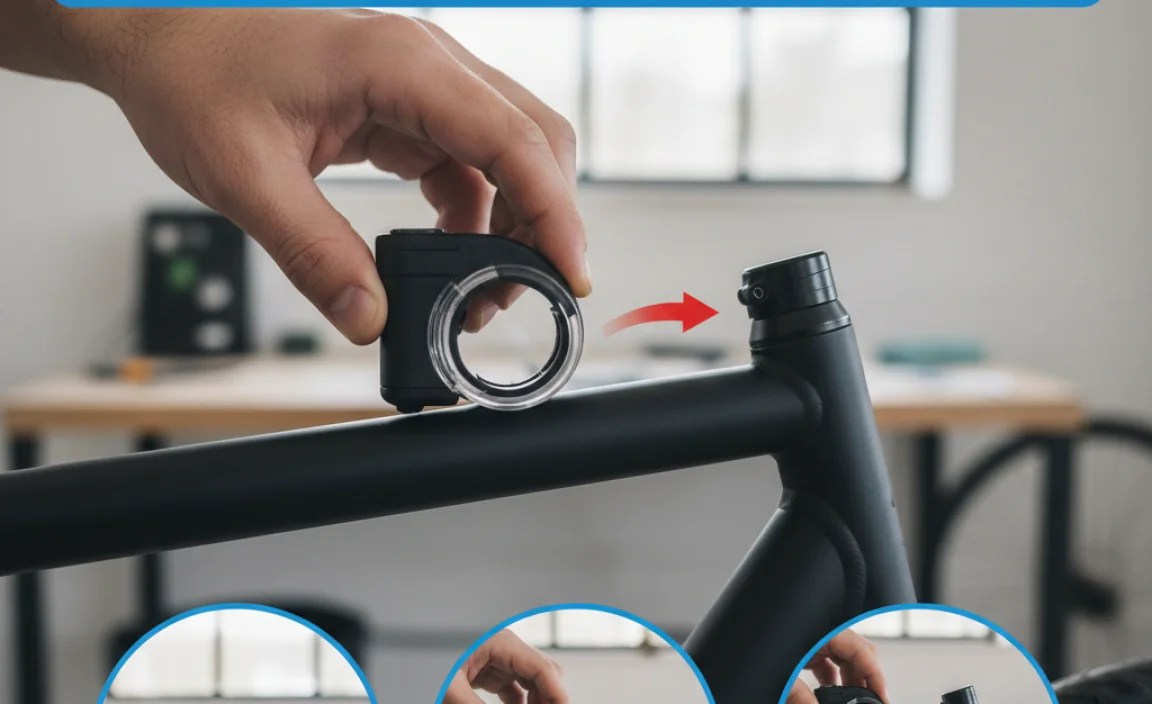
Step 2: Position the Clip Mount
Decide where you want to place the clip mount. Consider accessibility and visibility. Make sure the gauge will be easy to read while you’re inflating your tires. Use measuring tape to ensure the clip mount is aligned correctly. Mark the drill points with a pencil or marker if necessary.
Step 3: Attach the Clip Mount
Depending on the mounting style, follow these instructions:
- Bolts: Align the clip mount with the mounting holes. Insert the bolts and tighten them with a screwdriver or Allen wrench. Be careful not to overtighten, which can damage the clip mount or the frame.
- Straps: Wrap the straps around the frame or pump. Thread them through the clip mount and tighten them securely. Make sure the clip mount is stable and doesn’t move around.
- Adhesive: Remove the backing from the adhesive strip. Press the clip mount firmly onto the prepared surface. Hold it in place for a few seconds to allow the adhesive to bond.
Step 4: Test the Installation
Once the clip mount is attached, test its stability. Gently tug on it to make sure it’s securely in place. Insert the pump gauge into the clip mount and check that it fits properly. Make sure the gauge is easy to read and doesn’t interfere with the pump’s operation.
Tips for a Secure and Long-Lasting Installation

To ensure your pump gauge clip mount stays securely in place, follow these tips:
- Use Threadlocker: For bolted connections, apply a small amount of threadlocker to the bolts. This will prevent them from loosening over time due to vibrations.
- Check Regularly: Periodically check the clip mount for any signs of wear or damage. Tighten any loose bolts or straps.
- Protect from the Elements: If you frequently ride in harsh conditions, consider applying a protective coating to the clip mount. This will help prevent corrosion and extend its lifespan.
- Avoid Overloading: Don’t try to force a gauge that’s too large into the clip mount. This can damage the clip mount or the gauge.
Maintaining Your Pump Gauge Clip Mount
Regular maintenance will keep your pump gauge clip mount in good condition and ensure it functions properly. Here are some maintenance tips:
- Clean Regularly: Wipe down the clip mount with a damp cloth to remove dirt and grime. Avoid using harsh chemicals or abrasive cleaners, which can damage the finish.
- Inspect for Damage: Check the clip mount for any cracks, breaks, or signs of wear. Replace it if necessary.
- Lubricate Moving Parts: If your clip mount has any moving parts, such as hinges or swivels, lubricate them with a light oil or grease. This will keep them moving smoothly and prevent corrosion.
- Store Properly: When not in use, store your pump and clip mount in a dry, protected location. This will help prevent damage and extend its lifespan.
Troubleshooting Common Issues
Even with careful installation and maintenance, you may encounter some common issues with your pump gauge clip mount. Here are some troubleshooting tips:
| Issue | Possible Cause | Solution |
|---|---|---|
| Clip mount is loose | Loose bolts or straps | Tighten the bolts or straps |
| Gauge doesn’t fit | Incorrect clip mount size | Replace with a clip mount that fits the gauge |
| Clip mount is broken | Wear and tear or impact damage | Replace the clip mount |
| Adhesive fails | Dirty mounting surface or weak adhesive | Clean the surface and use a stronger adhesive |
Pump and Gauge Recommendations
If you’re in the market for a new pump or gauge, here are some recommendations based on different needs and budgets:
Floor Pumps
- Budget-Friendly: Lezyne Classic Floor Drive – Reliable and accurate, a great value for the price.
- Mid-Range: Topeak JoeBlow Sport III – Durable and easy to use, with a large, easy-to-read gauge.
- High-End: Silca Pista – A classic pump known for its exceptional quality and durability. Silca’s website offers more information.
Hand Pumps
- Budget-Friendly: Pro Bike Tool Mini Bike Pump – Compact and lightweight, perfect for on-the-go inflation.
- Mid-Range: Lezyne Road Drive – High-volume hand pump with a flexible hose for easy inflation.
- High-End: Silca Impero – Beautifully crafted and highly efficient, a premium option for serious cyclists.
Digital Gauges
- Budget-Friendly: Accu-Gage Digital Tire Gauge – Accurate and easy to use, with a large digital display.
- Mid-Range: Topeak SmartGauge D2 – Versatile gauge that works with Presta and Schrader valves.
- High-End: Quarq TyreWiz – Provides real-time tire pressure data via Bluetooth.
FAQ About Pump Gauge Clip Mounts
Here are some frequently asked questions about pump gauge clip mounts:
- Q: What is the purpose of a pump gauge clip mount?
- A: A pump gauge clip mount secures the gauge of your bike pump, preventing damage and making it easier to read while inflating tires.
- Q: Are pump gauge clip mounts universal?
- A: Some are universal, but it’s best to check compatibility with your specific pump and gauge. Adjustable mounts offer a more versatile fit.
- Q: How do I install a pump gauge clip mount?
- A: Clean the mounting surface, position the clip mount, and attach it using bolts, straps, or adhesive, depending on the model.
- Q: What materials are pump gauge clip mounts made of?
- A: Common materials include plastic, metal, and composite, each offering different levels of durability and weather resistance.
- Q: How do I maintain a pump gauge clip mount?
- A: Clean it regularly, inspect for damage, lubricate moving parts, and store it properly when not in use.
- Q: Can I use any adhesive to attach a clip mount?
- A: It’s best to use the adhesive provided with the clip mount or a strong, weather-resistant adhesive specifically designed for plastics or metals.
- Q: Where can I buy a pump gauge clip mount?
- A: You can find them at most bike shops, online retailers like Amazon, or directly from pump manufacturers’ websites. Check REI’s website for options.
Conclusion
A pump gauge clip mount is a small investment that can make a big difference in your cycling experience. By keeping your pump gauge secure and protected, it ensures accurate tire pressure readings and extends the lifespan of your equipment. With the information and tips provided in this guide, you can confidently choose, install, and maintain a pump gauge clip mount. Now you can focus on enjoying your rides with properly inflated tires. Happy cycling!


