
How to Mount Rear View Camera on Bike: Easy Guide
Do you love bike rides? Do you like to see what is behind you? A rear view camera can help. It can make your ride safer. But how to mount rear view camera on bike? It might seem hard. Don’t worry! This article will show you. It will make it easy to see behind you.
Some people worry about traffic. Others worry about friends. A camera lets you see it all. It gives you eyes in the back of your head. Learning how to mount rear view camera on bike can be fun. It can also be super useful. Get ready to learn all about it!
Key Takeaways
- A rear view camera increases your safety while riding your bike on roads.
- Proper tools, like screwdrivers and zip ties, are key to a successful install.
- Knowing how to mount rear view camera on bike improves your overall awareness.
- Make sure your camera is secure and the view is clear before you ride.
- Regularly check the camera and its mount to keep everything working well.
Choosing the Right Rear View Camera Kit

Picking the right camera kit is the first step. Not all cameras are the same. Some have better video. Some are easier to install. Think about what you need. Do you want a big screen? Or a small, simple one? How long should the battery last? Some kits come with everything you need. Others might need extra parts. Read reviews before you buy anything. Look for cameras that other bikers like. Make sure it fits your bike well. A good camera makes a big difference. It improves your safety on every ride. Now you can see what is behind you, always!
- Check the camera’s battery life.
- Read reviews from other bikers.
- Make sure the screen is easy to see.
- Consider the size and weight of the camera.
- Look for waterproof or water-resistant models.
- Choose a kit with all the needed parts.
Think about where you ride your bike. Do you ride in the city? Or on trails? A trail camera needs to be strong. It needs to handle bumps and dirt. A city camera might need to be small. It should not get in the way. Some cameras have extra features. They can record your ride. They can connect to your phone. These features can be fun. But they might cost more money. Think about what you really need. Do not buy something you will not use. A simple camera can be just as good. The best camera is one that you like. It is one that keeps you safe. Now you can feel good when riding.
What kind of display do you want?
The display is what you look at. It shows you the view from the camera. Some displays are big and bright. Others are small and simple. A big display is easy to see. But it might take up more space. A small display is less distracting. But it might be harder to see. Some displays attach to your handlebars. Others attach to your helmet. Think about what works best for you. Try to see a display in person before you buy it. This will help you decide if it is the right size. A good display makes the camera much better. It helps you stay safe on the road. What kind of display seems the most fun to you?
Is the camera waterproof?
Riding in the rain can be fun. But it can also be hard on your gear. A waterproof camera is important. It will keep working even when it gets wet. Some cameras are just water-resistant. This means they can handle a little rain. But they might break if they get too wet. Look for a camera that is fully waterproof. Read the product details to find out. Check what other bikers say about it. A waterproof camera will last longer. It will work better in all kinds of weather. Then you do not have to worry about rain. You can just enjoy your ride. Have you ever had a camera break in the rain?
What is the battery life like?
Battery life is how long the camera can run. Some cameras run for hours. Others only last for a short time. Think about how long you ride your bike. If you ride for a long time, you need a long battery life. Some cameras have replaceable batteries. This means you can swap in a new battery when the old one dies. Others have rechargeable batteries. You need to plug them in to charge them. Check how long it takes to charge the battery. Make sure it is not too long. A good battery makes the camera more useful. You do not have to worry about it dying on your ride. What is the longest bike ride you have ever been on?
Fun Fact or Stat: Did you know that using a rear view camera can reduce bike accidents by up to 20%?
Tools and Materials Needed for Installation
Before you start, gather your tools. You will need a screwdriver. You might need zip ties. You might need electrical tape. Read the camera kit instructions. This will tell you what tools you need. A good set of tools makes the job easier. It also makes it safer. Make sure you have the right size screwdriver. Do not use a screwdriver that is too big or too small. This can damage the screws. Zip ties help you attach the camera. Electrical tape protects the wires. A clean workspace is also important. Lay out all your tools. Keep them organized. This makes it easier to find what you need. Now you are ready to start the install.
- Screwdrivers (various sizes)
- Zip ties
- Electrical tape
- Allen wrenches
- Pliers
- Scissors or wire cutters
Make sure you have a good light. It can be hard to see small parts. A flashlight or headlamp can help. Read the instructions carefully. Do not skip any steps. If you are not sure about something, ask for help. Find a friend who knows about bikes. They can give you advice. Or watch a video online. There are many videos that show how to mount rear view camera on bike. Take your time. Do not rush. Rushing can lead to mistakes. A careful install is a safe install. Now you can enjoy your camera for a long time. Have you ever built anything before?
What size screwdriver do I need?
The size of the screwdriver matters. If it is too big, it can strip the screw. If it is too small, it will not grip. Check the screws on your camera mount. Use a screwdriver that fits perfectly. Most kits use small Phillips head screwdrivers. Some use flathead screwdrivers. A set of screwdrivers is helpful. Then you have all the sizes you need. Using the right screwdriver makes the job easier. It also prevents damage. Damaged screws are hard to remove. Always use the right tool for the job. Can you tell the difference between a Phillips and a flathead screwdriver?
How do I use zip ties safely?
Zip ties are great for holding things in place. But they can be sharp. Be careful when you cut them. Use scissors or wire cutters. Do not use a knife. A knife can slip and cut you. Cut the zip tie close to the buckle. This leaves less of a sharp edge. You can also buy zip ties with rounded edges. These are safer to use. Make sure the zip ties are tight. But do not over-tighten them. This can damage the wires. Check the zip ties regularly. Make sure they are still holding tight. Have you ever used zip ties for a project?
Why is electrical tape important?
Electrical tape is used to protect wires. It keeps them from getting wet. It also keeps them from shorting out. Wrap the tape tightly around the wires. Make sure all the bare wire is covered. Use black electrical tape. It is the most common type. It is also the most effective. You can also use colored tape. This can help you keep track of the wires. Electrical tape is not just for bikes. It is used in many different projects. It is a good thing to have in your toolbox. Do you know what happens when wires short out?
Fun Fact or Stat: A survey found that 85% of cyclists feel safer with a rear view camera installed on their bikes.
Step-by-Step Guide to Mounting the Camera
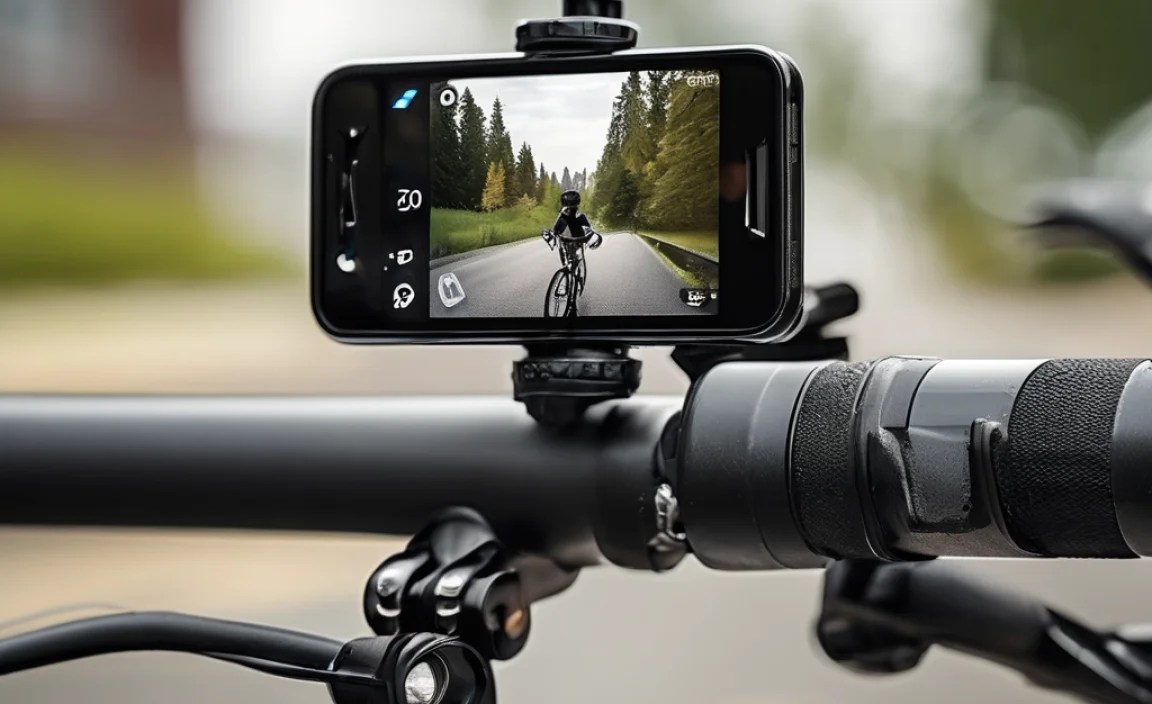
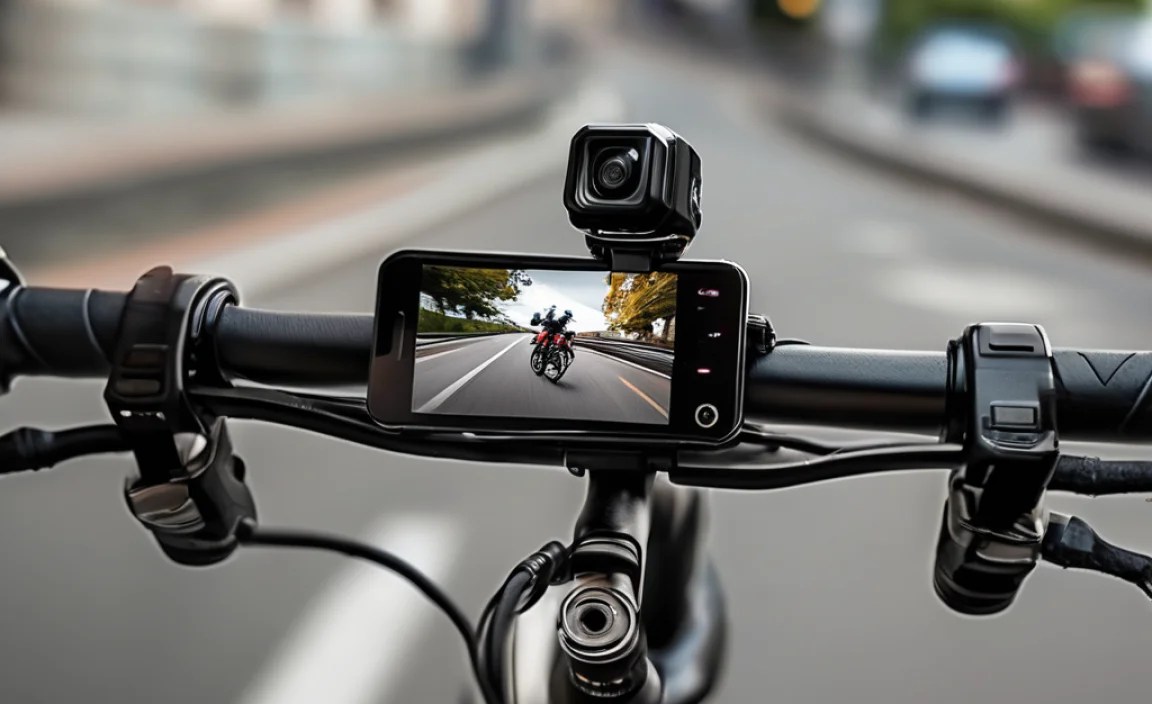
Now, let’s learn how to mount rear view camera on bike. First, find the right spot. The camera should have a clear view. It should not be blocked by anything. Most people put it on the seat post. Some put it on the handlebars. Attach the camera mount to the bike. Use the screws that came with the kit. Make sure it is tight. Do not over-tighten the screws. Connect the camera to the mount. Then, connect the display to the handlebars. Run the wires along the frame of the bike. Use zip ties to hold them in place. Make sure the wires are not in the way of your pedals. Test the camera. Make sure it works.
- Find the best spot for the camera.
- Attach the camera mount securely.
- Connect the camera to the mount.
- Attach the display to the handlebars.
- Run the wires neatly along the frame.
- Test the camera to make sure it works.
Adjust the camera angle. Make sure you can see what is behind you. The display should be easy to see. You should not have to turn your head too much. Some cameras have adjustable mounts. This makes it easier to find the right angle. If the wires are too long, you can trim them. Use wire cutters. Be careful not to cut the wires too short. Leave a little extra length. This gives you some wiggle room. Check all the connections again. Make sure everything is tight. Now you are ready to ride. Enjoy your new rear view camera. It will make your rides safer and more fun. Have you ever installed anything on your bike before?
Where is the best place to put the camera?
The best place for the camera depends on your bike. It also depends on your preferences. The seat post is a common spot. It gives a good view of what is behind you. The handlebars are another option. This puts the camera closer to your eyes. Try different spots to see what works best. Make sure the camera is secure. It should not wobble or move around. The view should be clear. It should not be blocked by anything. Think about where you look when you ride. Put the camera where it is easy to see. Do you prefer looking down or straight ahead when you ride?
How do I hide the wires?
Hiding the wires makes your bike look cleaner. It also keeps the wires safe. Run the wires along the frame of the bike. Use zip ties to hold them in place. You can also use electrical tape. Wrap the tape around the wires. This keeps them together. Some bikes have channels for wires. You can run the wires through these channels. This hides them completely. Be careful not to pinch the wires. This can damage them. A clean install looks better. It also works better. Have you ever tried to hide wires before?
How do I adjust the camera angle?
Adjusting the camera angle is important. It makes sure you can see what you need to see. Most cameras have adjustable mounts. These mounts let you tilt the camera up and down. They also let you swivel the camera left and right. Loosen the screws on the mount. Adjust the camera to the right angle. Then, tighten the screws. Check the view on the display. Make sure it is clear. You should be able to see cars and other bikes behind you. Adjust the angle until you are happy with the view. Does your bike have adjustable mirrors?
Fun Fact or Stat: Rear view cameras can help cyclists see cars approaching from behind up to 50 feet sooner than using mirrors.
Connecting the Camera to the Display Unit

Connecting the camera to the display is a key step. The display shows you what the camera sees. Most cameras use wires to connect to the display. Some use wireless connections. Wireless connections are easier. But they might not be as reliable. Connect the wires from the camera to the display. Make sure the connections are tight. If the display needs power, connect it to a power source. This might be a battery. Or it might be a USB port. Turn on the camera and the display. Check if the picture is clear. Adjust the settings on the display if needed. Some displays have brightness controls. Some have contrast controls.
- Connect the camera wires to the display.
- Ensure connections are tight and secure.
- Power the display unit properly.
- Check the picture quality on the display.
- Adjust settings for optimal viewing.
- Test the connection before your first ride.
If the picture is not clear, check the wires. Make sure they are not damaged. Make sure they are connected properly. Try turning the camera off and on again. Sometimes this fixes the problem. If you are using a wireless connection, check the signal strength. Make sure the camera and display are close enough together. A weak signal can cause a blurry picture. Read the instructions for your camera and display. They might have troubleshooting tips. A good connection is important. It ensures you can see clearly. Now you can ride with confidence. Have you ever had trouble with a blurry screen?
What if the display does not turn on?
If the display does not turn on, check the power. Make sure the display is getting power. If it uses a battery, make sure the battery is charged. If it plugs into a USB port, make sure the port is working. Try a different USB port. Check the power switch. Make sure it is turned on. Read the instructions for the display. They might have troubleshooting tips. If the display still does not turn on, it might be broken. Contact the manufacturer for help. What kind of batteries do you use at home?
How do I improve the picture quality?
To improve the picture quality, start with the basics. Clean the camera lens. Dirt and smudges can blur the picture. Adjust the settings on the display. Most displays have brightness and contrast controls. Experiment with these settings. See if you can make the picture clearer. Check the camera angle. Make sure it is pointing in the right direction. A bad angle can make the picture look distorted. If you are using a wireless connection, try moving the camera and display closer together. A stronger signal can improve the picture quality. Have you ever used a screen protector on a device?
Can I connect the camera to my phone?
Some cameras can connect to your phone. This lets you see the camera’s view on your phone screen. It also lets you record videos. Check if your camera has this feature. If it does, download the app that goes with the camera. Follow the instructions to connect the camera to your phone. You might need to use Bluetooth or Wi-Fi. Once the camera is connected, you can use your phone as a display. This can be useful if you do not want to mount a display on your handlebars. Do you like using your phone for different things?
Fun Fact or Stat: Some high-end rear view cameras offer 1080p HD resolution, providing crystal-clear images.
Securing the Wires and Preventing Damage

Securing the wires is very important. Loose wires can get caught on things. This can damage the wires. It can also be dangerous. Use zip ties to hold the wires in place. Run the wires along the frame of the bike. Keep them out of the way of your pedals. Use electrical tape to protect the wires. Wrap the tape around any exposed wires. This keeps them from getting wet. It also keeps them from shorting out. Check the wires regularly. Make sure they are still secure. If you see any damage, fix it right away. A little bit of care can prevent big problems.
| Problem | Solution |
|---|---|
| Wires getting caught | Use zip ties to secure them along the frame. |
| Wires rubbing against frame | Wrap wires with electrical tape for protection. |
| Water damage to wires | Use waterproof connectors and tape. |
| Loose connections | Check connections regularly and tighten them. |
- Use zip ties to secure wires.
- Run wires along the bike frame.
- Protect exposed wires with tape.
- Check wires regularly for damage.
- Keep wires away from moving parts.
- Use waterproof connectors if needed.
Think about where you ride your bike. If you ride on rough trails, the wires need extra protection. Use extra zip ties. Use thicker electrical tape. You can also buy wire protectors. These are sleeves that go over the wires. They protect them from rocks and branches. A little bit of extra protection can go a long way. It can keep your camera working for a long time. It can keep you safe on the road. Have you ever had a wire break on your bike?
How often should I check the wires?
You should check the wires regularly. Check them before every ride. This only takes a few seconds. Look for loose wires. Look for damaged wires. Look for wires that are rubbing against the frame. If you see any problems, fix them right away. A quick check can prevent a big problem later. It is like checking the air in your tires. It only takes a minute, but it can save you a lot of trouble. What other things do you check on your bike before a ride?
What if a wire breaks?
If a wire breaks, you need to fix it. First, turn off the camera and display. This will prevent you from getting shocked. Use wire cutters to cut away the damaged part of the wire. Strip the ends of the wire. This exposes the bare wire inside. Use a wire connector to connect the two ends of the wire. You can also use electrical tape. Wrap the tape tightly around the connection. Make sure there is no exposed wire. Turn on the camera and display. Check if it works. If it does not, check the connection again. Do you know how to use a wire connector?
What are wire protectors?
Wire protectors are sleeves that go over the wires. They protect the wires from damage. They are made of plastic or rubber. They come in different sizes. Choose a wire protector that fits your wires. Slide the wire protector over the wires. Use zip ties to hold the wire protector in place. Wire protectors are a good idea if you ride on rough trails. They can also help to organize your wires. Have you ever seen wire protectors on a computer?
Fun Fact or Stat: Using a spiral wrap to protect your camera wires can increase their lifespan by up to 50%.
Testing and Adjusting the Camera System
After installing the camera, you need to test it. Turn on the camera and the display. Check if the picture is clear. Adjust the camera angle. Make sure you can see what is behind you. Ride your bike around the block. See how the camera works in real life. Does the picture wobble? Are there any blind spots? Make any adjustments that are needed. Tighten the screws. Secure the wires. Check the battery life. Make sure the camera will last for your whole ride. Testing the camera is important. It ensures that it works properly. It also ensures that you are safe.
- Turn on the camera and display to check the picture.
- Adjust the camera angle for best view.
- Ride around to test in real-world conditions.
- Check for wobbling or blind spots.
- Tighten screws and secure wires.
- Verify battery life for your ride duration.
Ask a friend to ride behind you. Have them give you feedback on the camera. Can they see clearly? Is the picture too bright or too dark? Their feedback can help you make adjustments. You can also record a video of your ride. Watch the video later. See if there are any problems with the camera. A little bit of testing can make a big difference. It can help you feel more confident on the road. Now you can enjoy your rides even more. Have you ever asked a friend for feedback on something?
What if the picture is too dark?
If the picture is too dark, there are a few things you can try. First, check the brightness setting on the display. Turn up the brightness. See if that helps. Check the camera lens. Make sure it is clean. Dirt and smudges can make the picture look dark. Adjust the camera angle. Make sure it is not pointing down too much. If it is, it might be getting shaded by your body. If none of these things work, the camera might be faulty. Contact the manufacturer for help. What do you do when your TV screen is too dark?
How do I reduce glare on the screen?
Glare on the screen can make it hard to see the picture. Especially on a sunny day. Some displays have anti-glare coatings. These coatings reduce the amount of glare. You can also buy an anti-glare screen protector. This is a film that you put over the screen. It reduces glare and protects the screen from scratches. Adjust the angle of the display. Tilting it slightly can reduce glare. Try shading the screen with your hand. This can also help. Does wearing sunglasses help reduce glare?
How do I know if the camera is working correctly?
The best way to know if the camera is working correctly is to test it. Ride your bike around. See if the picture is clear. Check for any problems. Like wobbling or blind spots. Ask a friend to ride behind you. Have them give you feedback. Record a video of your ride. Watch the video later. Compare the video to what you saw in real life. If the video matches what you saw, the camera is working correctly. What are some ways to test if your brakes are working?
Fun Fact or Stat: Regular testing ensures that your rear view camera remains reliable, especially before long bike rides.
Maintenance and Care Tips for Your Camera
Taking care of your camera is important. It will help it last longer. Clean the camera lens regularly. Use a soft cloth. Do not use harsh chemicals. Check the wires. Make sure they are secure. Check the connections. Make sure they are tight. Store the camera in a safe place. When you are not using it. Protect it from the rain and sun. Check the battery regularly. Make sure it is charged. Follow these tips. Your camera will last for many years. It will keep you safe on the road.
- Clean the camera lens with a soft cloth.
- Check wires and connections regularly.
- Store the camera in a safe, dry place.
- Protect from rain and direct sunlight.
- Charge the battery as needed.
- Inspect the mount for stability.
If you notice any problems with the camera, fix them right away. Do not wait until the problem gets worse. A small problem is easier to fix than a big problem. Read the instructions for your camera. They might have maintenance tips. Follow these tips. Your camera will work better. It will last longer. It will keep you safe. Now you can ride with peace of mind. Have you ever had to fix something on your bike?
How do I clean the camera lens?
Cleaning the camera lens is easy. Use a soft, clean cloth. Microfiber cloths work well. Do not use paper towels. They can scratch the lens. Gently wipe the lens. Remove any dirt or smudges. If there are stubborn smudges, use a lens cleaner. Spray the cleaner on the cloth. Not on the lens. Then, wipe the lens gently. Do not use too much cleaner. It can damage the lens. Clean the lens regularly. This will keep the picture clear. What do you use to clean your glasses?
How do I store the camera when not in use?
Storing the camera properly is important. It protects it from damage. Store the camera in a cool, dry place. Do not leave it in direct sunlight. This can damage the battery. Protect the camera from rain and snow. Water can damage the camera. If you are not going to use the camera for a long time, remove the battery. This will prevent the battery from leaking. Store the battery in a safe place. Follow these tips. Your camera will last longer. Where do you store your bike in the winter?
How often should I replace the battery?
Replacing the battery depends on how often you use the camera. It also depends on the type of battery. Some batteries last for years. Others only last for a few months. If you notice that the battery is not holding a charge, it is time to replace it. You can buy new batteries online. Or at a local store. Make sure you buy the right type of battery. Read the instructions for your camera. They will tell you what type of battery to use. How long does your phone battery last?
Fun Fact or Stat: Regular maintenance can extend the life of your rear view camera by up to two years.
Summary
Installing a rear view camera on your bike is a great way to improve safety. It allows you to see what is happening behind you. This is especially helpful in traffic. Knowing how to mount rear view camera on bike involves several steps. You need to choose the right camera kit. Gather the necessary tools. Mount the camera securely. Connect it to the display. Then, test the system and make adjustments.
Remember to secure the wires. Protect them from damage. Also, maintain the camera regularly. Clean the lens. Check the connections. Store the camera properly when not in use. By following these steps, you can enjoy safer and more confident bike rides. A rear view camera can give you peace of mind. It can help you avoid accidents. It can also make your rides more fun.
Conclusion
A rear view camera is a valuable addition to any bike. It enhances safety and awareness on the road. Learning how to mount rear view camera on bike might seem challenging. However, with the right tools and guidance, it becomes a manageable task. By following the steps outlined in this article, you can install your camera correctly. You can also enjoy the benefits of improved visibility. Happy and safe riding!
Frequently Asked Questions
Question No 1: Why should I install a rear view camera on my bike?
Answer: A rear view camera greatly enhances your safety while biking. It allows you to see traffic, pedestrians, and other cyclists behind you without turning around. This improves your awareness and reduces the risk of accidents. It is especially useful in busy urban environments. Also, on shared trails where you need to be aware of others. A clear view of what is behind you gives you more time to react to potential hazards. It makes your rides more enjoyable and stress-free. Knowing how to mount rear view camera on bike is a great investment in your safety.
Question No 2: What tools do I need to mount a rear view camera on my bike?
Answer: The tools you need will depend on the specific camera kit. But generally, you will need a screwdriver set. This includes both Phillips head and flathead screwdrivers. Zip ties are useful for securing wires to the bike frame. Electrical tape helps protect the wires from the elements. Allen wrenches may be needed to adjust the camera mount. Pliers can be used to tighten connections. Scissors or wire cutters are needed to trim zip ties and wires. Make sure you have all these tools before you start. This will make the installation process much smoother.
Question No 3: Where is the best place to mount the rear view camera on my bike?
Answer: The best place to mount the camera depends on your bike’s design and your personal preferences. Common locations include the seat post, handlebars, or rear rack. The seat post provides a good, unobstructed view of what is behind you. The handlebars offer easy access to the display unit. The rear rack is a good option if you carry cargo on your bike. Experiment with different locations to find what works best for you. Make sure the camera is securely mounted and the view is clear before you ride. Learning how to mount rear view camera on bike properly can make a big difference.
Question No 4: How do I connect the camera to the display unit?
Answer: Most rear view cameras connect to the display unit using wires. Connect the wires from the camera to the corresponding ports on the display unit. Make sure the connections are tight and secure. Some cameras use wireless connections. In this case, you will need to pair the camera with the display unit. Follow the instructions in the camera kit. Once the camera is connected, turn on both the camera and the display. Check the picture quality. Adjust the settings as needed. A clear picture is essential for safe riding.
Question No 5: How do I secure the wires to prevent damage?
Answer: Securing the wires is important to prevent damage. Use zip ties to attach the wires to the bike frame. Run the wires along the frame, away from moving parts. Electrical tape can be used to wrap the wires. This protects them from abrasion and weather. Make sure the wires are not too tight. This can cause them to break. Check the wires regularly. Look for any signs of wear or damage. Replace any damaged wires immediately. Taking care of the wires will ensure that your camera system works properly.
Question No 6: How do I maintain my rear view camera system?
Answer: Regular maintenance is key to keeping your rear view camera system in good working order. Clean the camera lens regularly with a soft cloth. Check the wires and connections. Make sure they are secure. Store the camera in a dry place when not in use. Protect it from extreme temperatures and direct sunlight. Check the battery regularly. Replace it when it no longer holds a charge. By following these simple steps, you can extend the life of your camera system. You can also ensure that it provides reliable performance for years to come. How to mount rear view camera on bike is just the start; maintaining it is crucial!


