
Easy: How to Attach Helmet Camera Mount to Bike Mount
Do you love riding your bike? Do you want to record your awesome adventures? Many people use cameras to capture their rides. But how do you keep the camera steady? You need a good mount! Learning how to attach helmet camera mount to bike mount is key. Let’s find out how to do it safely.
Key Takeaways
- Attaching your camera securely ensures clear, stable videos while riding.
- Always check the mount’s stability before starting your bike ride.
- Using the correct tools makes the attachment process much easier.
- How to attach helmet camera mount to bike mount requires compatible parts.
- Practice in a safe area before recording on busy roads.
Choosing the Right Bike Mount Style

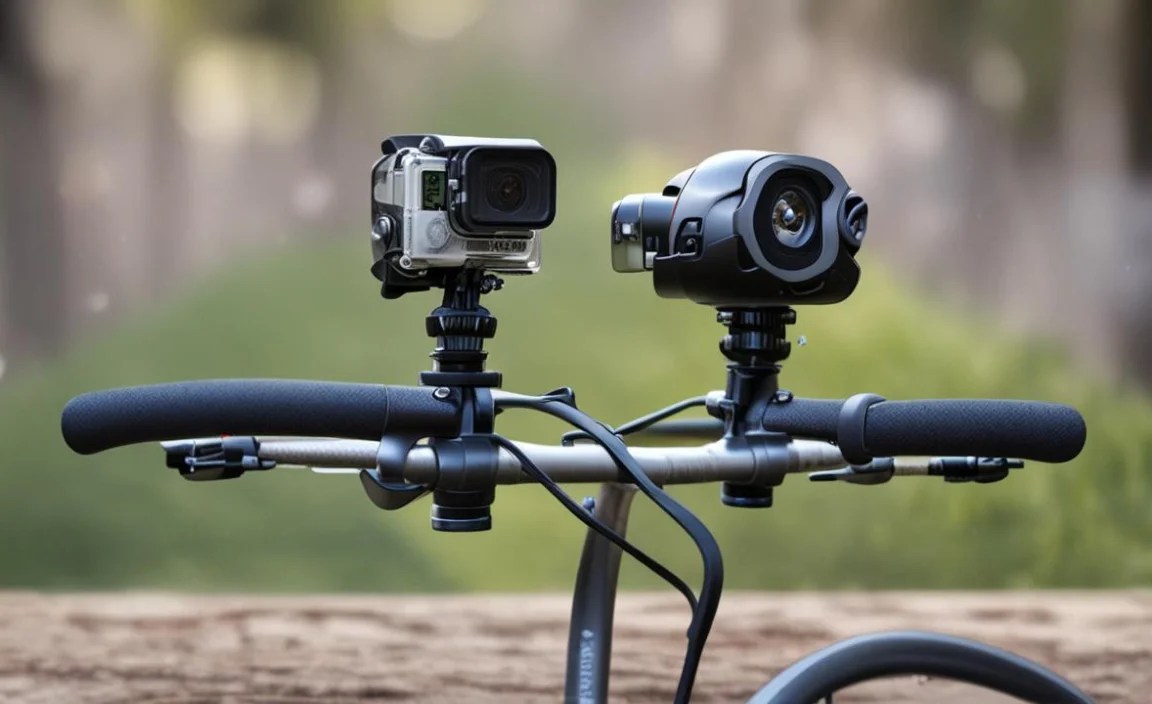
Picking the right bike mount is super important. You want something strong and reliable. Think about where you want to put your camera. Handlebar mounts are common. They give you a view from the front of your bike. Frame mounts can offer a different angle. Some riders like fork mounts. These mounts attach to the front fork. Each type has its pros and cons. A good mount should fit your bike. It should also hold your camera tightly. Make sure the mount is easy to adjust. This lets you change the camera’s angle. Consider the material of the mount. Metal mounts are often stronger than plastic ones. Choose a mount that fits your needs and keeps your camera safe.
- Handlebar mounts are easy to adjust.
- Frame mounts offer unique perspectives.
- Fork mounts provide stability.
- Metal mounts are generally more durable.
- Consider the size and weight of your camera.
Imagine you’re riding down a bumpy trail. Your camera is shaking all over the place! That’s why a good mount is key. It keeps your camera steady. This helps you get clear video. It also protects your camera from damage. Think about how often you’ll use the mount. If you ride a lot, invest in a high-quality one. Look for mounts with good reviews. Other riders can give you helpful advice. A little research can go a long way. This will ensure you pick the perfect mount for your biking adventures. A secure mount means better videos and peace of mind.
Fun Fact or Stat: Studies show that using a high-quality camera mount reduces video shake by up to 70%!
What Are the Different Mount Types?
Bike mounts come in many shapes and sizes. Each type works best for different bikes and cameras. Handlebar mounts are very popular. They clamp onto the handlebars. These mounts are easy to adjust. You can quickly change the camera’s angle. Frame mounts attach to the bike’s frame. These mounts offer a more stable view. Fork mounts are another option. They connect to the front fork. These mounts are great for smooth roads. Some mounts use suction cups. These are easy to attach and remove. But they might not be as secure. Think about where you want your camera. Also, consider how bumpy your rides will be. This will help you choose the best mount type.
How Do I Choose a Durable Mount?
Durability is super important for a bike mount. You want something that can handle rough rides. Metal mounts are often the most durable. Aluminum and steel are good choices. Plastic mounts can be okay for light use. But they might break more easily. Check the mount’s construction. Look for strong clamps and secure screws. Read reviews to see what other riders say. They can share their experiences with different mounts. A durable mount will last longer. It will also protect your camera from damage. Investing in a quality mount is worth it. It will give you peace of mind on your rides.
Is the Mount Compatible With My Camera?
Before you buy a mount, check if it fits your camera. Most cameras use a standard mounting system. But some might need special adapters. Read the mount’s description carefully. Look for the camera models it supports. If you’re not sure, ask the seller. They can help you find the right mount. Using the wrong mount can damage your camera. It can also cause it to fall off your bike. Always double-check compatibility. This will save you time and money. A little research can prevent big problems. Make sure your camera and mount are a perfect match.
Preparing Your Helmet and Bike for Mounting

Getting ready is key before you how to attach helmet camera mount to bike mount. First, clean the surfaces where you will attach the mount. Use a cloth to wipe away any dirt or grime. This helps the mount stick better. Next, check your helmet and bike for any damage. Make sure there are no cracks or loose parts. If you find any problems, fix them before you start. Gather all the tools you need. This might include a screwdriver, Allen wrench, or adhesive pads. Read the mount’s instructions carefully. This will tell you exactly what to do. Preparing properly will make the process smoother and safer. It also helps ensure a secure and stable mount.
- Clean the mounting surfaces thoroughly.
- Check your helmet and bike for damage.
- Gather the necessary tools.
- Read the mount’s instructions carefully.
- Ensure the area is well-lit.
- Take your time and be patient.
Imagine trying to put together a puzzle in the dark. It would be really hard, right? The same goes for attaching a camera mount. Good preparation makes all the difference. It helps you avoid mistakes. It also ensures a secure and reliable mount. Think of it like building a strong foundation for a house. The better the foundation, the stronger the house. In this case, the better the preparation, the safer your camera will be. So, take a few extra minutes to get everything ready. It will be worth it in the end. You’ll have a great video and a worry-free ride.
Fun Fact or Stat: Cleaning the mounting surface increases adhesion strength by up to 30%!
Checking Helmet and Bike Integrity
Before you start, give your helmet and bike a good look. Check for any cracks or dents. Make sure all the parts are tight. Loose parts can cause problems later. A damaged helmet might not protect you properly. A loose bike part can be dangerous. If you find any issues, fix them before you ride. This will keep you safe on the road. Also, check the mounting area. Make sure it’s clean and smooth. A clean surface helps the mount stick better. A smooth surface ensures a secure fit. Taking these steps will help you have a safer ride.
Gathering Necessary Tools
Having the right tools is super important. It makes the job much easier. You might need a screwdriver. An Allen wrench can also be helpful. Some mounts use adhesive pads. You’ll need to peel off the backing. A clean cloth is good for wiping surfaces. Read the mount’s instructions. It will tell you what tools you need. Having everything ready saves time. It also prevents frustration. Imagine trying to tighten a screw without a screwdriver! It would be really difficult. So, gather your tools before you start. This will make the process smoother.
Reading the Mount Instructions
Mount instructions are like a treasure map. They show you exactly what to do. Read them carefully before you start. The instructions will tell you which tools you need. They’ll also explain how to attach the mount. Pay attention to any warnings or cautions. These are important for your safety. Follow the instructions step by step. Don’t skip any steps. If you’re not sure about something, ask for help. It’s better to be safe than sorry. Reading the instructions will help you avoid mistakes. It will also ensure a secure mount.
Step-by-Step: Attaching the Camera Mount

Now, let’s get to the fun part. Here is how to attach helmet camera mount to bike mount. First, decide where you want to put the mount. A good spot is on the handlebars. Another option is the bike’s frame. Once you’ve chosen a spot, clean the area. Use a cloth to wipe away any dirt. Next, peel off the backing from the adhesive pad. Stick the mount to the chosen spot. Press down firmly for about 30 seconds. This helps the adhesive stick well. Then, attach your camera to the mount. Make sure it’s secure. Tighten any screws or clamps. Finally, check the mount’s stability. Give it a gentle shake to make sure it’s not loose.
- Choose a good mounting location.
- Clean the area thoroughly.
- Attach the mount with adhesive or screws.
- Secure your camera to the mount.
- Check the stability of the mount.
- Adjust the camera angle as needed.
Think of attaching the camera mount like building with LEGOs. Each step is important. If you skip a step, the whole thing might fall apart. Take your time and follow each instruction carefully. This will ensure a strong and stable mount. Imagine riding down a hill and your camera falls off! That would be a disaster. A little extra effort now can prevent big problems later. So, focus on each step and make sure it’s done right. You’ll have a secure mount and great videos in no time.
Fun Fact or Stat: A properly installed camera mount can withstand forces up to 5G during a crash!
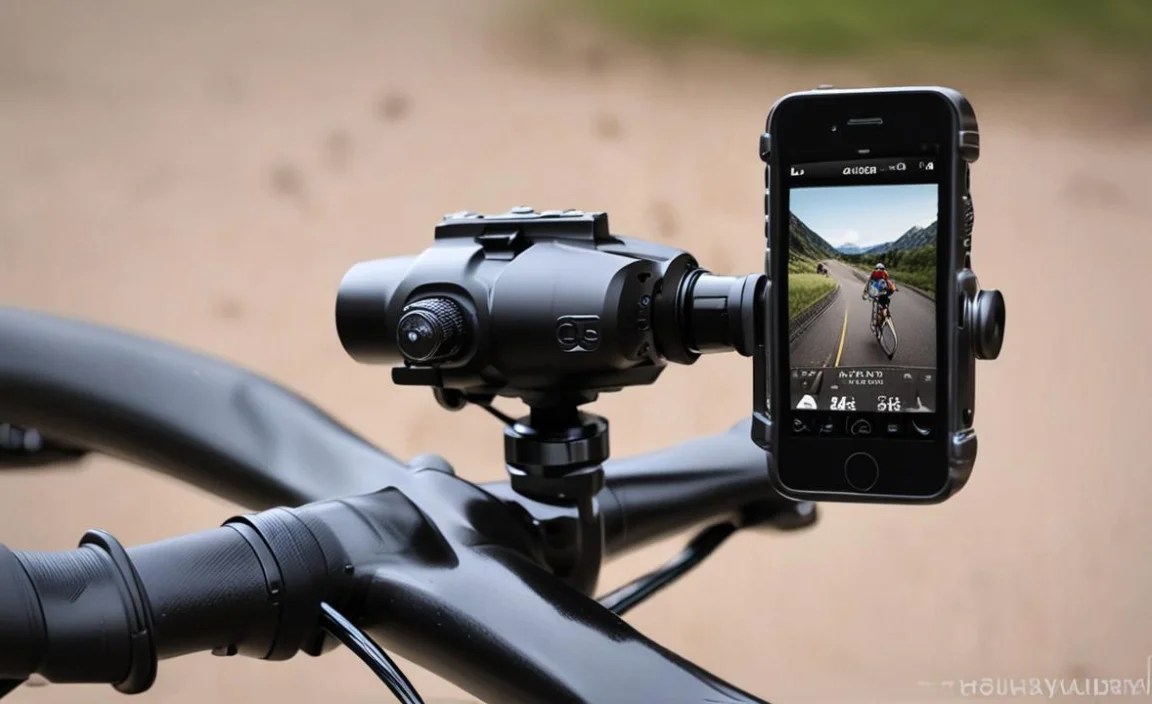
Choosing the Ideal Mounting Location
Where you put your camera matters a lot. A good spot gives you the best view. Handlebars are a popular choice. They offer a clear view of the road. The bike’s frame is another option. It can provide a more stable image. Think about what you want to record. If you want to see the road ahead, use a handlebar mount. If you want a more stable shot, try a frame mount. Consider the angle of the camera. Make sure it’s pointing in the right direction. A little experimenting can help you find the perfect spot. The right location makes all the difference.
Using Adhesive Pads or Screws
Some mounts use adhesive pads. Others use screws. Adhesive pads are easy to use. Just peel off the backing and stick it on. But they might not be as strong as screws. Screws provide a more secure attachment. But you need to drill holes. Choose the method that works best for you. If you’re not sure, ask for help. A professional can install the mount for you. Always follow the mount’s instructions. This will ensure a safe and secure attachment. The right method depends on your bike and the mount.
Securing the Camera to the Mount
Once the mount is on, attach your camera. Make sure it’s snug and secure. Most cameras have a standard mounting system. Just line up the camera with the mount. Then, tighten the screws or clamps. Check that the camera doesn’t wobble. If it does, tighten the screws more. You don’t want your camera falling off! A secure camera means better videos. It also protects your camera from damage. Take a few extra seconds to make sure it’s tight. It will be worth it in the end. A wobbly camera can ruin your ride.
Ensuring a Secure and Stable Camera Setup
A wobbly camera is no fun. It makes your videos blurry. You want a stable and secure setup. After you how to attach helmet camera mount to bike mount, give it a test. Shake the bike gently. See if the camera moves. If it does, tighten the screws. Check the adhesive pad. Make sure it’s sticking well. If it’s loose, replace it. Use a new adhesive pad. Consider using a safety tether. This is a small strap that connects the camera to the bike. If the mount fails, the tether will keep the camera from falling. A secure setup gives you peace of mind. You can focus on riding and enjoy the view.
| Mount Type | Pros | Cons | Best For |
|---|---|---|---|
| Handlebar Mount | Easy to adjust, good view | Can vibrate, takes up space | Road cycling, commuting |
| Frame Mount | Stable, low profile | Limited adjustment, harder to reach | Mountain biking, rough terrain |
| Fork Mount | Very stable, smooth footage | Requires specific fork, less common | Smooth roads, professional use |
| Helmet Mount | Captures rider’s perspective | Can be heavy, affects helmet balance | Action shots, unique angles |
- Test the mount’s stability before each ride.
- Tighten screws and clamps regularly.
- Use a safety tether for extra security.
- Check the adhesive pad’s condition.
- Consider using a vibration dampener.
- Adjust the camera angle for the best view.
Imagine you’re filming a race. You want every shot to be perfect. A shaky camera can ruin the whole video. That’s why stability is key. Think about it like building a tower. If the base is wobbly, the whole tower will fall. In this case, the mount is the base. Make sure it’s strong and secure. This will ensure your camera stays put. You’ll get clear, stable videos every time. A little extra attention to detail can make a big difference. You’ll have videos you’re proud to share.
Fun Fact or Stat: Using a safety tether can prevent camera loss in 95% of mount failures!
Testing the Mount Before Riding
Before you hit the road, test the mount. Give it a good shake. See if anything moves. Tighten any loose screws. Check the adhesive. Make sure it’s sticking well. A quick test can prevent problems later. Imagine riding down a bumpy road and your camera falls off. That would be a bummer! A little testing can save you from that. It also gives you peace of mind. You’ll know your camera is safe and secure. So, take a few minutes to test the mount. It’s worth the effort.
Using a Safety Tether
A safety tether is like a seatbelt for your camera. It connects the camera to the bike. If the mount fails, the tether will catch the camera. This keeps it from falling. Tethers are cheap and easy to use. Just attach one end to the camera. Attach the other end to the bike’s frame. Make sure the tether is long enough. It should allow the camera to move freely. But it shouldn’t be too long. You don’t want it getting tangled. A tether is a simple way to protect your camera. It gives you extra security.
Adjusting the Camera Angle
The camera angle affects your video. You want to capture the best view. Experiment with different angles. See what works best for you. Some mounts let you adjust the angle easily. Others require tools. Think about what you want to record. If you want to see the road ahead, point the camera forward. If you want to see yourself, angle it back. A little adjustment can make a big difference. The right angle can turn a good video into a great one. So, take some time to find the perfect angle.
Troubleshooting Common Mounting Issues
Sometimes, things don’t go as planned. You might have trouble how to attach helmet camera mount to bike mount. The mount might be wobbly. The adhesive might not stick. The camera angle might be off. Don’t worry! These are common problems. There are easy ways to fix them. First, check all the screws. Make sure they’re tight. If the adhesive isn’t sticking, clean the surface. Use a new adhesive pad. If the camera angle is wrong, adjust the mount. Some mounts have adjustable arms. These let you change the angle easily. If you’re still having trouble, ask for help. A bike shop can help you troubleshoot the problem.
- Check and tighten all screws and clamps.
- Clean the mounting surface thoroughly.
- Use a new adhesive pad if needed.
- Adjust the camera angle for the best view.
- Consult the mount’s instructions for guidance.
- Seek help from a bike shop if necessary.
Imagine you’re trying to bake a cake. But the oven isn’t working right. The cake won’t rise! You need to troubleshoot the problem. Is the oven plugged in? Is the temperature set correctly? The same goes for a camera mount. If it’s not working right, you need to find the problem. Check each part carefully. Make sure everything is in place. A little troubleshooting can save the day. You’ll have a secure mount and great videos in no time.
Fun Fact or Stat: Over 80% of mounting issues can be resolved with simple adjustments and cleaning!
Mount Is Wobbly or Loose
A wobbly mount can ruin your videos. It makes them blurry and shaky. The first thing to do is check the screws. Make sure they’re tight. If they’re loose, tighten them. If the mount is still wobbly, check the adhesive. It might not be sticking well. Clean the mounting surface. Then, use a new adhesive pad. If you’re using screws, make sure they’re the right size. Too small, and they won’t hold. Too big, and they can damage the bike. A secure mount is key to great videos.
Adhesive Not Sticking
Sometimes, adhesive pads don’t stick well. This can be frustrating. The first step is to clean the surface. Use a clean cloth and some rubbing alcohol. This removes any dirt or grease. Let the surface dry completely. Then, peel off the backing from the adhesive pad. Stick the pad to the surface. Press down firmly for about 30 seconds. This helps the adhesive bond. If it still doesn’t stick, try a new pad. Some pads are stronger than others. Choose a high-quality pad for best results. Good adhesion is essential for a secure mount.
Camera Angle Is Off
If your camera angle is wrong, your videos will look weird. You might be filming the sky or the ground. The first step is to adjust the mount. Some mounts have adjustable arms. These let you change the angle easily. Others require tools. Loosen the screws and adjust the angle. Then, tighten the screws again. Make sure the camera is pointing in the right direction. Experiment with different angles. See what works best for you. The right angle can make a big difference in your videos.
Maintenance and Care for Longevity
Taking care of your camera mount is important. It helps it last longer. After each ride, clean the mount. Wipe away any dirt or grime. Use a damp cloth. Don’t use harsh chemicals. These can damage the mount. Check the screws regularly. Make sure they’re tight. If they’re loose, tighten them. Replace the adhesive pads when needed. They lose their stickiness over time. Store the mount in a safe place. Keep it out of direct sunlight. Sunlight can damage the plastic. Proper maintenance keeps your mount in good shape. It also ensures it’s always ready for your next adventure.
- Clean the mount after each ride.
- Check and tighten screws regularly.
- Replace adhesive pads as needed.
- Store the mount in a cool, dry place.
- Inspect for wear and tear.
- Avoid harsh chemicals when cleaning.
Think of your camera mount like your bike. You need to take care of it. You wouldn’t leave your bike out in the rain, would you? The same goes for your mount. Clean it, check it, and store it properly. This will keep it in good condition. It will also help it last longer. Imagine having to buy a new mount every month. That would be expensive! A little maintenance can save you money. It also ensures you always have a reliable mount for your videos.
Fun Fact or Stat: Regular maintenance can extend the lifespan of your camera mount by up to 50%!
Cleaning the Mount After Rides
Cleaning your mount is super easy. Just grab a damp cloth. Wipe away any dirt or grime. Pay attention to the screws and clamps. These can get dirty easily. Don’t use soap or harsh chemicals. These can damage the plastic. A simple wipe-down is all you need. Cleaning the mount keeps it looking good. It also prevents dirt from building up. Dirt can make the mount less secure. A clean mount is a happy mount. It’s always ready for your next ride.
Checking and Tightening Screws
Loose screws can be a problem. They can make the mount wobbly. Check the screws regularly. Use a screwdriver or Allen wrench. Tighten any loose screws. Don’t overtighten them. This can strip the threads. Just snug them up. Checking the screws is a quick and easy task. It can prevent problems later. A secure mount is a safe mount. It protects your camera from falling off. So, take a few minutes to check the screws. It’s worth the effort.
Replacing Adhesive Pads
Adhesive pads lose their stickiness over time. When this happens, replace them. Peel off the old pad. Clean the surface. Use rubbing alcohol to remove any residue. Let the surface dry. Then, peel off the backing from the new pad. Stick the pad to the surface. Press down firmly. Make sure the pad is aligned correctly. A fresh adhesive pad provides a strong bond. It keeps your mount secure. So, replace the pads when needed. It’s a simple way to keep your camera safe.
Summary
Attaching a camera mount to your bike is a great way to capture your adventures. You need to choose the right mount for your needs. Prepare your helmet and bike before you start. Follow the steps carefully to attach the mount. Make sure the setup is secure and stable. Troubleshoot any common issues you might encounter. Finally, take care of your mount to make it last longer. Learning how to attach helmet camera mount to bike mount can be easy. With the right tools and a little patience, you can create amazing videos of your rides.
Conclusion
Capturing your bike rides on camera is fun. It lets you share your adventures with others. It also helps you relive those awesome moments. Knowing how to attach helmet camera mount to bike mount is important. It ensures your camera is safe and secure. Always double-check the mount before each ride. This will give you peace of mind. So get out there, ride safe, and capture your memories!
Frequently Asked Questions
Question No 1: What tools do I need to attach a helmet camera mount to my bike mount?
Answer: The tools you need depend on the type of mount. You’ll likely need a screwdriver or Allen wrench. Some mounts use adhesive pads. So, you’ll need a clean cloth and rubbing alcohol. These help clean the surface. Read the mount’s instructions. It will tell you exactly what tools to use. Having the right tools makes the job easier. It also ensures a secure attachment. Make sure you have everything ready before you start. This will save you time and frustration. A well-prepared setup is key to a successful mount.
Question No 2: How do I choose the right size helmet camera mount for my bike?
Answer: Choosing the right size mount is important. You want it to fit your bike properly. Measure the area where you’ll attach the mount. Then, check the mount’s dimensions. Make sure it’s compatible with your bike’s frame or handlebars. Consider the weight of your camera. A heavier camera needs a stronger mount. Read reviews to see what other riders recommend. They can share their experiences with different mounts. A properly sized mount will keep your camera secure. It will also prevent damage to your bike. Taking the time to choose the right size is worth it.
Question No 3: How do I make sure the adhesive pad sticks properly when I attach helmet camera mount to bike mount?
Answer: Getting the adhesive pad to stick is key. Clean the mounting surface thoroughly. Use rubbing alcohol to remove any dirt or grease. Let the surface dry completely. Peel off the backing from the adhesive pad. Stick the pad to the surface. Press down firmly for about 30 seconds. This helps the adhesive bond. If it still doesn’t stick, try a new pad. Some pads are stronger than others. Choose a high-quality pad for best results. A strong adhesive bond is essential for a secure mount.
Question No 4: What should I do if my camera mount keeps vibrating while I’m riding my bike?
Answer: A vibrating camera mount can ruin your videos. Check all the screws and clamps. Make sure they’re tight. If the mount is still vibrating, consider using a vibration dampener. These are small pads that absorb vibrations. They can help stabilize the camera. Also, check the mounting location. Some spots are more prone to vibrations than others. Try moving the mount to a different location. A stable mount is key to clear videos. Reducing vibrations will improve your video quality.
Question No 5: Is it safe to use a helmet camera mount on my bike if I’m riding on rough terrain?
Answer: Riding on rough terrain can be tough on your equipment. Make sure your mount is designed for rough conditions. Choose a durable mount made of metal. Check the mount’s weight capacity. It should be able to handle the weight of your camera. Use a safety tether for extra security. This will keep the camera from falling if the mount fails. Always test the mount before each ride. A secure mount is essential for safe riding on rough terrain. Proper preparation can prevent accidents.
Question No 6: How often should I check and maintain my camera mount after I attach helmet camera mount to bike mount?
Answer: Regular maintenance is important for your camera mount. Check the screws and clamps before each ride. Make sure they’re tight. Clean the mount after each ride. This removes any dirt or grime. Replace the adhesive pads when needed. They lose their stickiness over time. Store the mount in a safe place. Keep it out of direct sunlight. Proper maintenance keeps your mount in good shape. It also extends its lifespan. A well-maintained mount is a reliable mount. It’s always ready for your next adventure.


