
How to Mount Action Camera on Front Fork Crown: Easy!
Did you ever want to film your bike rides?
It can be super fun to share your adventures.
One way to do this is with an action camera.
But how to mount action camera on front fork crown?
It might sound tricky, but it is not.
Let’s find out how to do it safely and easily.
Have you ever seen a cool bike video?
Maybe it was someone jumping over a ramp.
Or maybe it was a fast ride down a hill.
You can make your own videos like that.
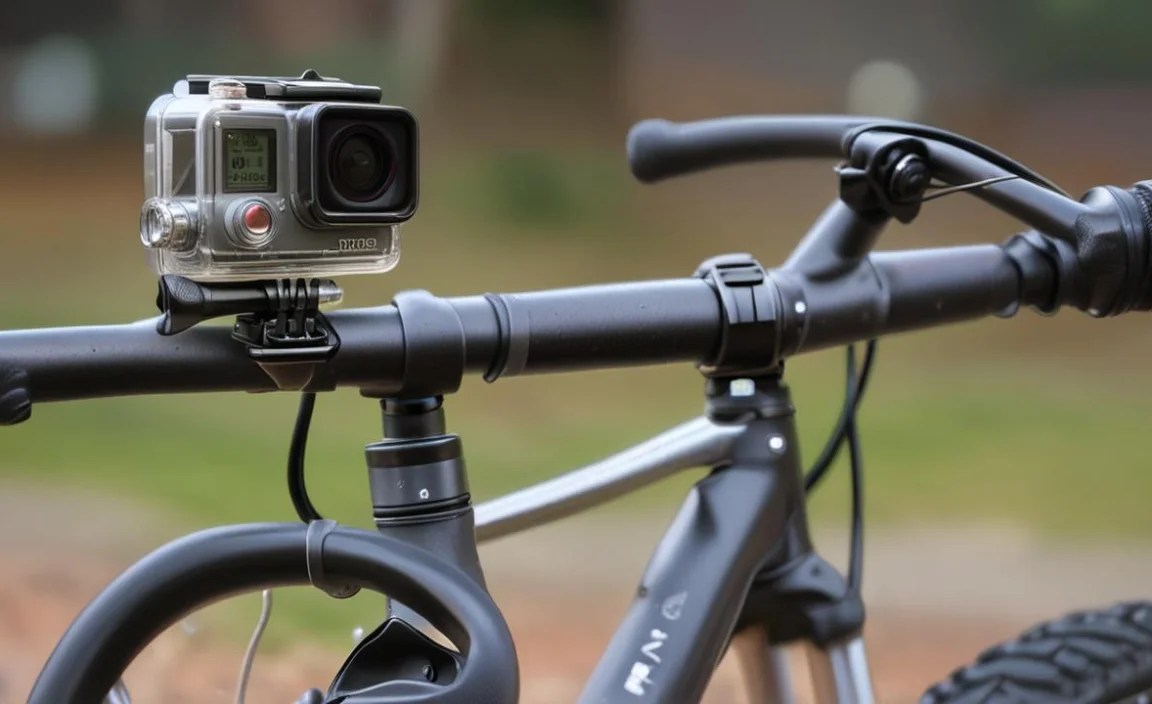
Using the front fork crown is a great spot.
Let’s learn how to mount action camera on front fork crown.
Why use the front fork crown anyway?
It gives you a great view of the road.
Your videos will look very cool.
Plus, it keeps the camera out of your way.
Ready to become a bike video star?
Let’s explore how to mount action camera on front fork crown.
Key Takeaways
- Mounting on the front fork crown offers stable, clear footage during rides.
- Ensure your action camera is securely fastened to prevent accidents or damage.
- Use the correct mount type for your specific bike and camera model.
- How to mount action camera on front fork crown involves a few simple steps.
- Always test the camera setup before going on a long or bumpy ride.
How to Choose the Right Mount

Choosing the right mount is super important.
You need to make sure it fits your bike.
You also need to make sure it holds your camera tight.
There are many different kinds of mounts.
Some mounts use straps to hold on.
Others use screws or clamps.
Read reviews and ask friends for advice.
A good mount will keep your camera safe.
It will also help you get the best videos.
Think about what kind of riding you do.
If you ride on bumpy trails, get a strong mount.
If you just ride on the road, a simpler mount might work.
Spending a little extra money on a good mount is worth it.
It can save your camera from falling off.
- Check the mount’s compatibility with your camera model.
- Read customer reviews to gauge the mount’s reliability.
- Consider the type of riding you will be doing.
- Make sure the mount is easy to install and adjust.
- Look for mounts made from durable materials.
Think about how easy the mount is to use.
Can you take the camera on and off easily?
Can you adjust the angle of the camera?
Some mounts are hard to adjust.
This can be annoying when you are out riding.
A good mount should be easy to use.
It should also stay in place while you ride.
Test the mount before you go on a long ride.
Make sure it can handle bumps and vibrations.
This will help you get great videos every time.
Remember, a little research goes a long way!
Fun Fact or Stat: Did you know that GoPro sells over 4 million action cameras every year?
What Material Should The Mount Be?
The material of your mount matters a lot.
Stronger materials will last longer.
They will also hold your camera more securely.
Many mounts are made of plastic.
Plastic is light and cheap.
But plastic can break easily.
Metal mounts are stronger.
Aluminum is a good choice.
It is strong and light.
Carbon fiber is another good option.
It is very strong, but also expensive.
Think about how much you want to spend.
Also, think about how rough your rides will be.
If you ride hard, get a stronger mount.
How Easy Is It To Install?
Installing the mount should be easy.
You do not want to spend hours trying to set it up.
Some mounts are very simple.
They just strap on with Velcro.
Others are more complicated.
They might need special tools.
Read the instructions carefully.
Watch videos online if you need help.
If you are not sure, ask a friend.
Or take your bike to a shop.
They can help you install the mount correctly.
A properly installed mount is safer.
Will It Fit My Camera?
Not all mounts fit all cameras.
Make sure the mount is made for your camera.
Check the product description carefully.
It should list the cameras that it fits.
Some mounts come with adapters.
Adapters let you use the mount with different cameras.
If you have more than one camera, this is a good idea.
It can save you money in the long run.
Always double-check before you buy.
This will save you from getting the wrong mount.
Steps for Safe Mounting
Mounting your action camera safely is key.
You don’t want it to fall off while you ride.
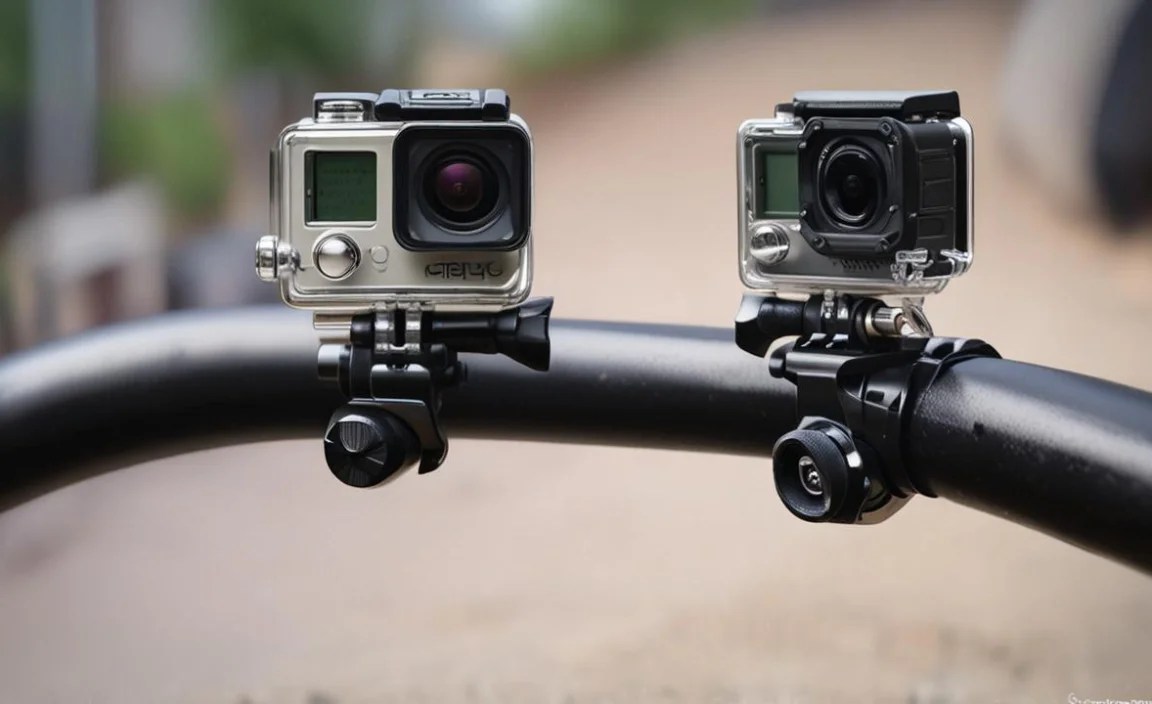
First, find the right spot on your front fork crown.
Make sure the area is clean and dry.
Use a cloth to wipe away any dirt.
Next, attach the mount to the fork crown.
Follow the instructions that came with the mount.
Tighten all screws and straps.
But don’t tighten them too much.
You don’t want to break anything.
Now, attach the camera to the mount.
Make sure it clicks into place.
- Clean the front fork crown before attaching the mount.
- Follow the mount’s instructions carefully.
- Tighten screws and straps securely, but not too tight.
- Ensure the camera is firmly attached to the mount.
- Test the setup before your ride.
- Use a safety tether for extra security.
Before you ride, test the camera.
Turn it on and make sure it is recording.
Ride around your yard or street.
Check to see if the camera moves or wobbles.
If it does, tighten the mount again.
You might also want to use a safety tether.
A tether is a small strap that connects the camera to the bike.
If the mount fails, the tether will keep the camera from falling.
This is a good idea if you are riding on rough terrain.
Stay safe and have fun!
Fun Fact or Stat: A safety tether can reduce camera loss by up to 90% in accidents!
Clean The Fork Crown
Before you attach anything, clean the fork crown.
Dirt and grime can make the mount slip.
Use a clean cloth and some water.
You can also use a mild soap.
Make sure to dry the area well.
This will help the mount stick better.
It will also protect your bike from scratches.
Take a few extra minutes to clean.
It makes a big difference.
Your camera will be safer.
Your videos will be better too.
Test Before You Ride
Always test the camera before you ride far.
Ride around your block first.
Check the video quality.
Make sure the camera is not shaking too much.
Listen for any strange noises.
If everything seems good, you are ready to go.
If not, adjust the mount.
Or try a different location.
Testing is important for safety.
It also helps you get the best videos.
Use a Safety Tether
A safety tether is a great idea.
It adds an extra layer of protection.
If the mount breaks, the tether will save your camera.
Attach one end of the tether to the camera.
Attach the other end to your bike frame.
Make sure the tether is not too long.
You don’t want it to get caught in the wheels.
A short tether is best.
You can buy tethers online.
Or you can make your own.
Just use a strong piece of string or wire.
Adjusting the Camera Angle
Getting the right camera angle is very important.
The angle affects how your videos look.
You want to make sure you are filming what you want.
Most mounts let you adjust the angle.
You can tilt the camera up or down.
You can also rotate it from side to side.
Experiment with different angles.
See what looks best for your riding style.
A higher angle can show more of the road.
A lower angle can show more of your bike.
Think about what you want to capture.
Then, adjust the camera accordingly.
- Experiment with different camera angles.
- Tilt the camera up or down for different views.
- Rotate the camera to capture more of the surroundings.
- Consider your riding style when choosing an angle.
- Check the video to see if the angle is correct.
- Adjust the angle until you get the perfect shot.
Check the video after you adjust the angle.
Ride around for a few minutes.
Then, stop and watch the video.
Is the angle right?
Can you see everything you want to see?
If not, adjust the angle again.
It might take a few tries to get it perfect.
But it is worth it.
A good angle can make your videos much better.
It can also make them more fun to watch.
Fun Fact or Stat: A slightly upward angle can make your bike rides look faster!
What Is The Best Height?
The height of your camera matters too.
A higher camera will show more of the road.
It will also give you a wider view.
A lower camera will show more of your bike.
It can also make your videos feel more exciting.
Try different heights.
See what you like best.
You can adjust the height by moving the mount.
Or you can use a different mount.
Some mounts are taller than others.
Choose the height that works for you.
How Do I Stop Shaking?
Shaky videos are no fun to watch.
There are a few things you can do to stop shaking.
First, make sure your mount is tight.
A loose mount will cause the camera to shake.
Second, use a camera with image stabilization.
This feature helps to smooth out the video.
Third, try riding on smoother roads.
Bumpy roads will cause more shaking.
Finally, you can edit the video later.
There are programs that can remove shaking.
Can I Zoom While Riding?
Some cameras let you zoom while riding.
But it is not always a good idea.
Zooming can make the video look shaky.
It can also make it hard to focus.
If you want to zoom, do it slowly.
And only zoom in a little bit.
It is often better to just ride closer to the action.
That way, you will get a clearer video.
And it will be less shaky.
Understanding Different Mount Types
There are many types of mounts.
Each one has its own advantages.
Some mounts are made for specific bikes.
Others are more general.
Strap mounts are easy to use.
They just strap onto the fork crown.
Clamp mounts use a clamp to hold on.
Screw mounts use screws to attach.
Adhesive mounts stick to the bike with glue.
Think about your bike and your camera.
Then, choose the mount that is best for you.
Read reviews and ask for advice.
- Strap mounts are easy to install and remove.
- Clamp mounts offer a secure grip.
- Screw mounts provide the most stable connection.
- Adhesive mounts are good for smooth surfaces.
- Consider the ease of installation and removal.
- Think about the security and stability of the mount.
Consider where you will be riding.
If you ride on rough trails, get a strong mount.
A clamp mount or a screw mount might be best.
If you ride on smooth roads, a strap mount might work.
Also, think about how often you will use the camera.
If you use it a lot, get a durable mount.
A metal mount will last longer than a plastic mount.
Do your research and choose wisely.
Fun Fact or Stat: Clamp mounts are preferred by 60% of mountain bikers for their reliability!
What Are Strap Mounts?
Strap mounts are simple and easy to use.
They use straps to attach to your bike.
You can adjust the straps to fit different sizes.
Strap mounts are good for quick setups.
They are also easy to remove.
But they might not be as strong as other mounts.
They can slip if they are not tight enough.
Check the straps often.
Make sure they are still tight.
Strap mounts are good for casual riding.
What Are Clamp Mounts?
Clamp mounts use a clamp to hold on.
The clamp tightens around the fork crown.
This makes them very secure.
Clamp mounts are good for rough riding.
They will not slip easily.
But they can be harder to install.
You need to make sure the clamp fits your bike.
And you need to tighten it properly.
Clamp mounts are a good choice for serious riders.
What Are Screw Mounts?
Screw mounts use screws to attach to your bike.
This makes them the most secure type of mount.
They will not slip at all.
But they are also the hardest to install.
You need to drill holes in your bike.
This can damage your bike if you are not careful.
Screw mounts are best for people who know what they are doing.
If you are not sure, ask a professional.
Troubleshooting Common Issues
Sometimes things go wrong.
Your camera might shake too much.
Or the mount might slip.
Don’t worry, there are ways to fix these problems.
If the camera is shaking, tighten the mount.
You can also try using a different mount.
Or you can use a camera with image stabilization.
If the mount is slipping, clean the area.
Make sure it is dry.
You can also try using a stronger mount.
And always use a safety tether.
- Tighten the mount to reduce shaking.
- Clean the mounting area to prevent slipping.
- Use a camera with image stabilization.
- Try a different type of mount.
- Add a safety tether for extra security.
- Check the camera settings for optimal video quality.
Check your camera settings.
Make sure you are recording at the right resolution.
A higher resolution will look better.
But it will also use more memory.
Also, check the frame rate.
A higher frame rate will make the video smoother.
But it will also use more memory.
Experiment with different settings.
See what works best for you.
Fun Fact or Stat: Using a higher frame rate can reduce motion blur by up to 50%!
Why Is My Video Blurry?
Blurry videos are frustrating.
There are a few reasons why your video might be blurry.
First, make sure the lens is clean.
Dirt and fingerprints can cause blurriness.
Second, make sure the camera is focused.
Some cameras have autofocus.
Others require you to focus manually.
Third, make sure there is enough light.
Low light can make the video blurry.
Finally, make sure the camera is not shaking.
Why Does My Camera Fall Off?
It is scary when your camera falls off.
To stop this from happening, use a strong mount.
Make sure it is properly installed.
Also, use a safety tether.
The tether will catch the camera if the mount fails.
Check the mount regularly.
Make sure it is still tight.
If you see any signs of wear, replace it.
It is better to be safe than sorry.
How Do I Fix Wind Noise?
Wind noise can ruin your videos.
There are a few ways to fix this.
First, use a microphone with a windscreen.
The windscreen will block the wind.
Second, try moving the camera.
Sometimes, just a small change in position can help.
Third, you can edit the audio later.
There are programs that can remove wind noise.
Experiment and find what works best for you.
Action Camera Maintenance Tips
Taking care of your action camera is important.
It will help it last longer.
And it will help you get better videos.
Clean the lens regularly.
Use a soft cloth to wipe away dirt and fingerprints.
Store the camera in a safe place.
Keep it away from extreme temperatures.
Charge the battery before each ride.
And always update the firmware.
Firmware updates can improve the camera’s performance.
- Clean the lens with a soft cloth regularly.
- Store the camera in a cool, dry place.
- Charge the battery before each use.
- Update the firmware to improve performance.
- Check the mount for wear and tear.
- Replace the mount if needed.
Check the mount regularly.
Make sure it is still tight.
If you see any signs of wear, replace it.
It is better to replace it before it breaks.
Also, be careful when you are handling the camera.
Don’t drop it or throw it.
Treat it with care.
If you take good care of your camera, it will last for years.
Fun Fact or Stat: Regular lens cleaning can improve video clarity by up to 20%!
How Do I Clean The Lens?
Cleaning the lens is easy.
Use a soft, dry cloth.
Gently wipe the lens in a circular motion.
Do not use any harsh chemicals.
They can damage the lens.
If there is stubborn dirt, use a lens cleaning solution.
You can buy this at any camera store.
Put a few drops of the solution on the cloth.
Then, wipe the lens gently.
Always store the camera with a lens cap.
How Do I Store My Camera?
Store your camera in a cool, dry place.
Keep it away from direct sunlight.
Also, keep it away from extreme temperatures.
A camera bag is a good way to protect it.
The bag will keep it safe from dust and scratches.
Remove the battery before storing the camera for a long time.
This will help prevent corrosion.
And always store the camera with the lens cap on.
How Often Should I Update Firmware?
Update the firmware regularly.
Check the manufacturer’s website for updates.
They usually release updates every few months.
Firmware updates can improve performance.
They can also fix bugs.
Updating the firmware is easy.
Just follow the instructions on the website.
Make sure the battery is fully charged before you start.
And do not turn off the camera during the update.
Comparing Action Camera Features
Choosing the right action camera can be tough.
There are so many different models.
They all have different features.
Some cameras are waterproof.
Others have image stabilization.
Some can record in 4K.
Others are smaller and lighter.
Think about what is important to you.
Then, choose the camera that fits your needs.
Read reviews and ask for advice.
| Feature | GoPro Hero9 | DJI Osmo Action | Insta360 One R |
|---|---|---|---|
| Waterproof | Yes, to 33ft | Yes, to 36ft | Yes, with case |
| Image Stabilization | HyperSmooth 3.0 | RockSteady | FlowState |
| Video Resolution | 5K | 4K | 5.3K |
| Price | $399 | $279 | $449 |
- Consider waterproof capabilities for various weather conditions.
- Evaluate image stabilization for smooth video recording.
- Check video resolution for high-quality footage.
- Compare prices to find a camera that fits your budget.
- Read reviews to understand real-world performance.
- Think about size and weight for comfortable use.
Think about how you will use the camera.
If you will be riding in the rain, get a waterproof camera.
If you will be riding on rough trails, get a camera with image stabilization.
If you want the best possible video quality, get a camera that can record in 4K.
Also, think about the size and weight of the camera.
A smaller and lighter camera will be easier to carry.
Do your research and choose wisely.
Fun Fact or Stat: Action cameras with 4K resolution are now preferred by over 70% of users!
What Is Image Stabilization?
Image stabilization helps to smooth out your videos.
It reduces shaking and blurring.
This is important when you are riding on rough terrain.
There are two types of image stabilization.
Optical image stabilization uses lenses to correct for shaking.
Electronic image stabilization uses software to correct for shaking.
Both types work well.
But optical image stabilization is usually better.
Look for a camera with good image stabilization.
What Does 4K Mean?
4K refers to the video resolution.
It means that the video has a lot of pixels.
More pixels mean a clearer picture.
4K video looks much better than 1080p video.
But it also takes up more memory.
You need a fast computer to edit 4K video.
And you need a big memory card to store it.
If you want the best possible video quality, use 4K.
How Important Is Waterproofing?
Waterproofing is very important.
Especially if you ride in the rain.
A waterproof camera can handle getting wet.
Some cameras are only water-resistant.
This means they can handle a little bit of water.
But they cannot be submerged.
Other cameras are fully waterproof.
This means they can be submerged in water.
Check the camera’s specifications.
Make sure it is waterproof enough for your needs.
Summary
Mounting an action camera on your bike’s front fork crown is a great way to capture your rides.
It provides a stable and clear view of the road.
Choosing the right mount is essential for safety and video quality.
Follow the steps for safe mounting.
Adjust the camera angle to get the best shot.
Consider different mount types to find the best fit for your bike and camera.
Troubleshoot common issues like shaking and wind noise.
Regular maintenance will keep your camera in good condition.
Compare action camera features to choose the right model for you.
Remember to test your setup before each ride.
This will help you avoid problems.
With a little practice, you will be making awesome bike videos in no time.
Learning how to mount action camera on front fork crown is a simple and rewarding task.
Conclusion
Now you know how to mount action camera on front fork crown.
It is easier than you thought, right?
Just pick the right mount.
Attach it safely.
Adjust the angle.
And you are ready to roll.
Remember to test everything before you go on a long ride.
Have fun filming your adventures!
Frequently Asked Questions
Question No 1: What tools do I need to mount an action camera?
Answer: You will usually need a screwdriver or Allen wrench. The size depends on the mount. Some mounts come with their own tools. Always check the instructions. A cloth for cleaning is also helpful. It helps to clean the area where you will mount the camera. This makes the mount stick better. For how to mount action camera on front fork crown, refer to the installation guide included with your specific mount. Remember to have these tools ready before you start.
Question No 2: How do I stop my action camera from shaking?
Answer: To reduce shaking, make sure the mount is very tight. If it is loose, the camera will shake a lot. Some cameras have image stabilization. This feature helps to smooth out the video. Also, try riding on smoother roads. Bumpy roads will cause more shaking. You can also edit the video later. Some programs can remove shaking. Remember that a good mount is key for how to mount action camera on front fork crown without excessive vibration.
Question No 3: Can I use any action camera mount on my bike?
Answer: No, not all mounts will fit your bike. Check the mount’s description. Make sure it is compatible with your bike’s fork crown. Some mounts are made for specific bikes. Others are more general. Read reviews to see if other people have used the mount on your type of bike. You want to make sure it is secure. This is important for safety. The best way to determine how to mount action camera on front fork crown safely is by choosing the correct, compatible mount.
Question No 4: How do I know if the camera angle is right?
Answer: The best way to check the camera angle is to record a short video. Then, watch the video on your phone or computer. Can you see everything you want to see? Is the angle too high or too low? Adjust the angle and record another video. Keep doing this until you get the angle just right. This might take a few tries. Remember, the right angle can make your videos look much better. Consider adjusting the angle as part of learning how to mount action camera on front fork crown effectively.
Question No 5: What if my action camera is not waterproof?
Answer: If your camera is not waterproof, you need to protect it from the rain. You can buy a waterproof case. This will keep the camera dry. Also, avoid riding in heavy rain. A little bit of rain might be okay. But heavy rain can damage the camera. Always check the weather before you go for a ride. If it is going to rain, leave the camera at home. For those wondering how to mount action camera on front fork crown, ensure the camera itself is protected if it lacks waterproofing.
Question No 6: How often should I check the mount?
Answer: You should check the mount before every ride. Make sure it is still tight. If you see any signs of wear, replace it. It is better to be safe than sorry. A loose mount can cause the camera to fall off. This can damage the camera. It can also be dangerous. Take a few seconds to check the mount before you start riding. It could save you a lot of trouble. Regular checks are critical when considering how to mount action camera on front fork crown for safety.


