
How to Attach GPS Mount to Bike Frame: Easy Guide
Have you ever gotten lost on a bike ride? It can be scary! A GPS can help you find your way. But how do you put it on your bike? Knowing how to attach GPS mount to bike frame is important. It keeps your GPS safe and easy to see. Let’s learn how to do it right.
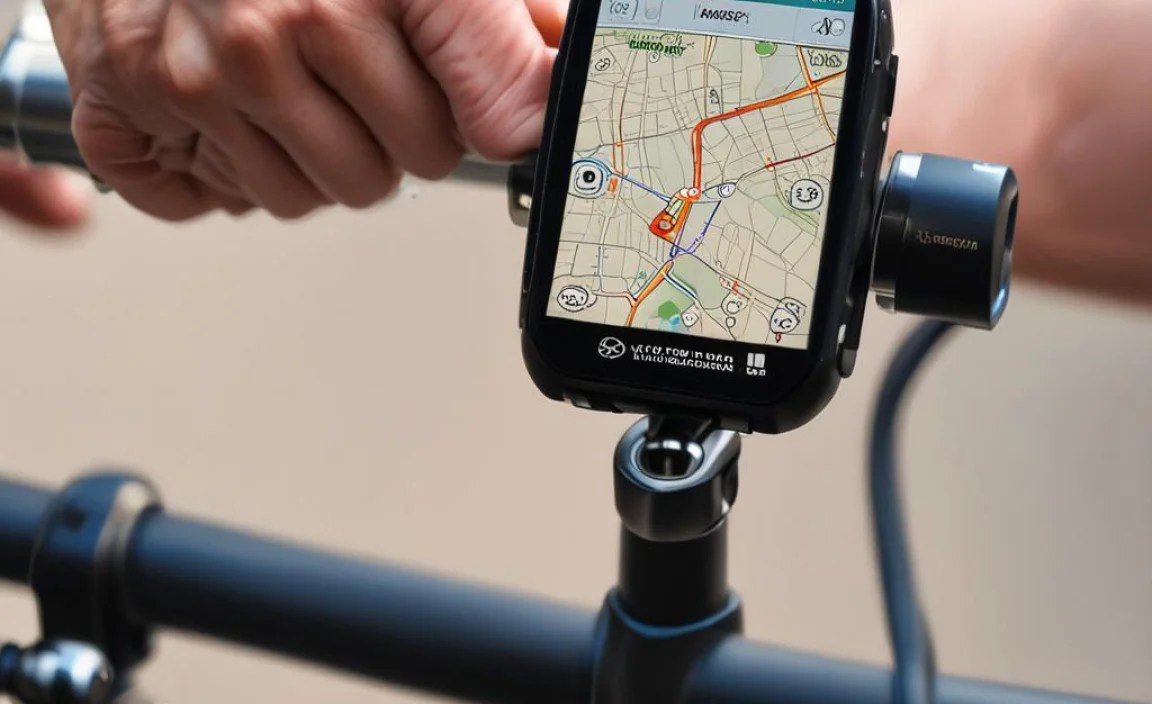
Have you ever wondered how cyclists use GPS devices? They attach them to their bikes! It’s a simple trick that makes a big difference. Let’s explore the best ways to keep your GPS secure. This way, you can enjoy your ride without worry.
Attaching a GPS mount doesn’t have to be hard. With the right tools, it’s easy. This article will show you how. You will learn the steps to keep your GPS safe. Now, let’s get started and make your bike rides safer!
Key Takeaways
- Knowing how to attach GPS mount to bike frame ensures easy navigation during rides.
- Use the correct tools like screwdrivers and Allen wrenches for secure mounting.
- Always check the mount’s stability before starting your bike ride.
- Consider frame protection to prevent scratches when attaching the mount.
- Read manufacturer instructions for your specific GPS mount and bike type.
Choosing the Right GPS Mount

Choosing the right GPS mount is very important. It needs to fit your bike and GPS. A good mount will hold your GPS tightly. This prevents it from falling off. There are many types of mounts. Some attach to the handlebars. Others attach to the frame. Think about where you want your GPS. Also, think about how easy it is to see. Make sure the mount is strong and made of good material. A weak mount can break easily. This could damage your GPS. Always read reviews before buying a mount. Other cyclists can share their experiences. This helps you pick the best one for your needs. Think about how often you will use your GPS. A more expensive mount might be worth it if you ride a lot. It will last longer and keep your GPS safe.
- Check the size of your handlebars or frame.
- Read reviews from other cyclists.
- Consider the material the mount is made of.
- Think about how easy it is to see the GPS.
- Make sure the mount is compatible with your GPS model.
When you pick a GPS mount, think about your bike. Some bikes have thick handlebars. Others have thin ones. The mount needs to fit well. If it does not, it will wobble. This can be annoying and dangerous. A good mount will stay still, even on bumpy roads. Also, think about the weather. If you ride in the rain, get a waterproof mount. This will protect your GPS from water damage. Remember, the right mount makes a big difference. It keeps your GPS safe. It also makes your rides more fun. Take your time to choose the best one for you. You’ll be glad you did!
Fun Fact or Stat: Did you know that GPS bike computers can track over 20 different metrics, including speed, distance, and even heart rate?
What Are the Different Types of Mounts?
Have you ever wondered about the different kinds of GPS mounts? There are many! Some attach to your handlebars. These are easy to see. Others attach to the stem. These are more hidden. You can also find mounts that attach to the frame. These are good for smaller bikes. Each type has its own benefits. Handlebar mounts are great for quick glances. Stem mounts are good for a cleaner look. Frame mounts can save space. Think about what is most important to you. Do you want easy viewing? Or a sleek design? Knowing the options helps you choose the best mount. It makes your rides safer and more enjoyable.
How Do I Know If a Mount Is Compatible?
Is your GPS mount right for your device? It is important to check! Look at the mount’s description. It should list which GPS models it fits. Some mounts are universal. They fit many different devices. Others are made for specific GPS units. Check the size and shape of your GPS. Make sure it matches the mount. If you are not sure, ask the seller. They can help you find the right fit. Using the wrong mount can be risky. Your GPS could fall off while you ride. Always double-check before you buy. This will keep your GPS safe and secure.
What Materials Are Best for GPS Mounts?
What should a good GPS mount be made of? Strong materials are key. Plastic mounts are light and cheap. But they can break easily. Metal mounts are tougher. They last longer. Aluminum is a good choice. It is strong but not too heavy. Carbon fiber is very strong and light. But it is more expensive. Think about where you ride. If you ride on rough roads, get a metal mount. If you want something light, try aluminum. A good material will keep your GPS safe. It will also last a long time. Choose wisely for the best results.
Preparing Your Bike Frame for the Mount

Before you how to attach GPS mount to bike frame, get your bike ready. Clean the area where the mount will go. Use a damp cloth to wipe away dirt and grime. This helps the mount stick better. Check for any scratches or damage. If there are any, cover them with tape. This will protect your frame. Think about where you want to put the mount. Make sure it is easy to see while riding. Also, make sure it does not get in the way. Some mounts come with rubber pads. These protect your frame from scratches. Use them if you have them. Taking the time to prepare your bike is important. It helps the mount stay secure. It also keeps your bike looking good.
- Clean the frame with a damp cloth.
- Check for scratches or damage.
- Use tape to protect the frame.
- Decide on the best location for the mount.
- Use rubber pads if available.
When you prepare your bike frame, pay attention to detail. Small things can make a big difference. Make sure the area is dry before you attach the mount. Water can weaken the adhesive. If you are using screws, do not tighten them too much. This can damage the frame. Use the right size screwdriver. This will prevent stripping the screws. If you are not sure, ask a bike mechanic for help. They can give you advice on the best way to prepare your frame. Remember, a little preparation goes a long way. It keeps your GPS safe and your bike in good condition.
Fun Fact or Stat: Some bike frames are now made with integrated GPS mounts for a seamless look and enhanced security.
Why Is Cleaning the Frame Important?
Have you ever tried to stick something to a dirty surface? It does not work well! The same is true for your bike frame. Dirt and grime can stop the mount from sticking. Cleaning the frame makes a big difference. It gives the mount a clean surface to grip. This helps it stay in place. Use a damp cloth and some mild soap. Wipe the area where the mount will go. Then, dry it with a clean cloth. This will remove any dirt or grease. A clean frame means a secure mount. It keeps your GPS safe on every ride.
How Do Rubber Pads Protect the Frame?
Imagine rubbing sandpaper on your bike frame. It would scratch it! That is what can happen without rubber pads. GPS mounts can rub against the frame. This can cause scratches and damage. Rubber pads create a soft barrier. They stop the mount from rubbing directly on the frame. This protects the paint and finish. Rubber pads also help the mount grip better. They add extra friction. This keeps the mount from slipping. Always use rubber pads if they come with your mount. They are a simple way to keep your bike looking new.
What Type of Tape Should I Use?
Do you need to protect your bike frame? Tape can help! But not just any tape. Use tape that is made for bikes. This tape is strong and does not leave sticky residue. You can find it at bike shops. Clear frame protection tape is a good choice. It is almost invisible. It protects your frame without changing its look. Electrical tape can also work. But it can leave a sticky mess. Avoid using masking tape. It does not stick well and can damage the paint. Choose the right tape to keep your frame safe from scratches.
Attaching the GPS Mount: Step-by-Step Guide

How to attach GPS mount to bike frame can be easy. First, read the instructions. Every mount is a little different. Find the right spot on your frame. Make sure it is clean. Place the mount on the frame. If it uses screws, line them up. Tighten the screws gently. Do not over-tighten them. If it uses adhesive, press it firmly. Hold it for a few seconds. Make sure it is secure. Some mounts use zip ties. Thread the zip ties through the mount. Wrap them around the frame. Tighten the zip ties. Cut off the extra ends. Check that the mount is stable. It should not move or wobble. If it does, adjust it. Follow these steps, and your GPS will be safe.
- Read the mount’s instructions carefully.
- Find the right spot on your bike frame.
- Line up the screws or adhesive.
- Tighten screws gently or press adhesive firmly.
- Check the mount’s stability.
When you attach the GPS mount, take your time. Rushing can lead to mistakes. Make sure the mount is straight. A crooked mount can be hard to see. If you are using screws, use the right size screwdriver. This will prevent damage to the screws. If you are using adhesive, make sure it is strong. Some adhesives need time to dry. Check the instructions for drying time. After you attach the mount, test it. Put your GPS on the mount. Go for a short ride. Make sure the GPS stays in place. If it moves, tighten the mount. Following these tips will help you attach the mount correctly. You will enjoy safer and more confident rides.
Fun Fact or Stat: The average cyclist spends about 20% of their ride time looking at their GPS device, making secure mounting crucial for safety.
What Tools Do I Need?
Do you have the right tools for the job? You will need a few things. A screwdriver is important. Make sure it fits the screws on your mount. An Allen wrench might be needed. Some mounts use Allen bolts. A cleaning cloth is useful. It helps you clean the frame. Rubber pads can protect your frame. Zip ties can add extra security. A knife or scissors can cut zip ties. Read the mount’s instructions. They will tell you what tools you need. Having the right tools makes the job easier. It also prevents damage to your bike.
How Tight Should I Tighten the Screws?
Tightening screws is tricky. Too loose, and the mount will wobble. Too tight, and you can damage the frame. The key is to find the right balance. Tighten the screws until they are snug. Then, give them a little extra turn. But be careful not to overdo it. If you are not sure, use a torque wrench. This tool measures how tight the screws are. It prevents you from over-tightening them. Check the mount regularly. Make sure the screws are still tight. This will keep your GPS safe and secure.
How Long Does the Adhesive Need to Dry?
If your mount uses adhesive, patience is important. The adhesive needs time to dry. Check the instructions for drying time. Some adhesives dry in a few minutes. Others take several hours. Do not use the mount until the adhesive is fully dry. This will give it time to bond to the frame. If you use it too soon, the mount could fall off. You can use tape to hold the mount in place while it dries. This will help it stay secure. After the drying time, test the mount. Make sure it is firmly attached. A little patience will ensure a strong bond.
Ensuring a Secure and Stable Mount
A wobbly GPS is no good. You want a secure mount. Check the mount after you attach it. Push it and pull it gently. It should not move. If it does, tighten the screws or zip ties. Make sure the mount is straight. A crooked mount can be hard to see. Go for a short ride. Test the mount on bumpy roads. See if it stays in place. If it moves, adjust it again. Some mounts have adjustable straps. These can help you get a tighter fit. Check the mount regularly. Make sure nothing has come loose. A secure mount keeps your GPS safe. It also makes your rides more enjoyable.
- Push and pull the mount to check for movement.
- Make sure the mount is straight.
- Test the mount on bumpy roads.
- Adjust straps or screws as needed.
- Check the mount regularly for looseness.
When you ensure a stable mount, think about the long term. Weather can affect the mount. Heat can weaken adhesive. Cold can make plastic brittle. Check the mount before every ride. This will help you catch any problems early. If you see cracks or damage, replace the mount. A new mount is cheaper than a new GPS. Also, consider using a safety tether. This is a small strap that connects the GPS to your bike. If the mount fails, the tether will keep the GPS from falling. Taking these steps will give you peace of mind. You can ride knowing your GPS is safe.
Fun Fact or Stat: Vibration-dampening mounts can reduce GPS device wear and tear by up to 40%.
How Often Should I Check the Mount?
Do you check your GPS mount often? You should! Check it before every ride. This only takes a few seconds. Make sure the screws are tight. Check for any cracks or damage. If you ride on rough roads, check it more often. Bumps can loosen the mount. A quick check can prevent problems. It keeps your GPS safe and secure. Make it a habit to check before you ride. This simple step can save you from losing your GPS.
What If the Mount Keeps Coming Loose?
Is your GPS mount always coming loose? That can be frustrating! First, make sure you installed it correctly. Read the instructions again. Check that you are using the right tools. If the screws are stripped, replace them. Use new screws that fit tightly. You can also try using thread locker. This is a special glue that keeps screws from loosening. If the adhesive is not strong enough, try a different adhesive. Make sure it is made for outdoor use. As a last resort, try a different mount. Some mounts are more secure than others. Keep trying until you find one that works.
Can Weather Affect the Mount’s Stability?
Yes, weather can affect your GPS mount! Heat can soften adhesive. This can make the mount loose. Cold can make plastic brittle. This can cause cracks. Rain can rust metal parts. This can weaken the mount. If you ride in all kinds of weather, choose a mount that is weather-resistant. Look for mounts made of strong materials. Check the mount regularly for damage. Replace it if you see any problems. Protecting your mount from the weather will keep it stable.
Using Frame Protection to Prevent Damage

Your bike frame is important. You want to keep it looking good. Frame protection can help. This includes things like tape and rubber pads. These protect the frame from scratches. GPS mounts can rub against the frame. This can cause damage. Tape creates a barrier. It stops the mount from rubbing. Rubber pads also help. They cushion the mount. They prevent scratches. Apply frame protection before you attach the mount. Make sure it covers the area that will be in contact. Check the protection regularly. Replace it if it gets worn. Frame protection keeps your bike looking new. It also helps the mount stay secure.
- Use tape to create a barrier.
- Use rubber pads to cushion the mount.
- Apply protection before attaching the mount.
- Check the protection regularly.
- Replace worn protection.
When you use frame protection, choose the right type. Clear frame protection tape is a good option. It is almost invisible. It protects the frame without changing its look. Electrical tape can also work. But it can leave a sticky mess. Rubber pads come in different sizes. Choose pads that fit your mount. Make sure they cover the entire contact area. Clean the frame before you apply protection. This will help it stick better. If you are not sure how to apply protection, ask a bike mechanic for help. They can show you the best way to protect your frame. A little effort can keep your bike looking great for years.
Fun Fact or Stat: Bikes with frame protection have a resale value that is on average 15% higher than bikes without protection.
What Types of Frame Protection Are Available?
Do you know about all the frame protection options? There are many! Frame protection tape is a popular choice. It is easy to apply and remove. Rubber pads are great for cushioning. They prevent scratches. Frame protectors are plastic covers. They snap onto the frame. These offer more protection. You can also use old inner tubes. Cut them into strips and wrap them around the frame. Each type has its own benefits. Choose the one that works best for you. Protecting your frame is always a good idea.
How Do I Apply Frame Protection Tape?
Applying frame protection tape is simple. First, clean the frame. Remove any dirt or grease. Cut a piece of tape that is the right size. Peel off the backing. Carefully apply the tape to the frame. Smooth out any bubbles. Use a credit card or a squeegee. Make sure the tape is flat. Trim off any extra tape. That is it! Your frame is now protected. Check the tape regularly. Replace it if it gets damaged.
Where Should I Apply Frame Protection?
Where should you put frame protection? Focus on areas that rub. The area under the GPS mount is important. The cables can also rub the frame. Protect these areas with tape or pads. The chain can hit the frame. Use a chainstay protector. This will prevent scratches. The down tube is also at risk. Rocks can hit it. Apply tape to protect it. Think about where your bike gets the most wear. Protect those areas first. This will keep your frame looking good.
Understanding GPS Mount Compatibility
Not all GPS mounts fit all bikes. Knowing about compatibility is important. Check the size of your handlebars. Some mounts are made for thick bars. Others are made for thin bars. Make sure the mount fits your bar size. Also, check the type of mount. Some mounts attach to the stem. Others attach to the frame. Choose the type that works best for your bike. Read the mount’s description. It should list which bikes it fits. If you are not sure, ask the seller. They can help you find the right mount. Using the wrong mount can be dangerous. It could fall off while you ride. Always double-check before you buy.
| Mount Type | Handlebar Size | Bike Type | Pros | Cons |
|---|---|---|---|---|
| Handlebar Mount | 25.4mm – 31.8mm | Road, Mountain, Hybrid | Easy to see, Adjustable | Can clutter handlebars |
| Stem Mount | Fits most stems | Road, Mountain | Clean look, Aerodynamic | Can be harder to see |
| Frame Mount | Varies | Mountain, Touring | Saves handlebar space | Can be less accessible |
| Aero Bar Mount | Specific aero bar sizes | Triathlon, Time Trial | Aerodynamic, Integrated | Only fits aero bars |
When you think about GPS mount compatibility, consider your GPS unit, too. Some mounts are made for specific GPS models. Others are universal. They fit many different devices. Check the size and shape of your GPS. Make sure it matches the mount. If you are not sure, look for a universal mount. These mounts have adjustable parts. They can fit different GPS units. Always read reviews before you buy. Other cyclists can share their experiences. This will help you choose the right mount for your bike and GPS.
Fun Fact or Stat: Approximately 60% of cyclists use universal GPS mounts because of their adaptability to different bike and device types.
What Does “Universal Compatibility” Mean?
Have you seen the words “universal compatibility”? What does it mean? It means the mount can fit many different bikes and GPS units. Universal mounts have adjustable parts. They can be tightened or loosened. This allows them to fit different sizes. They are a good choice if you have more than one bike. Or if you plan to upgrade your GPS later. But, even universal mounts have limits. Always check the size range. Make sure your bike and GPS fit within that range.
How Can I Tell If a Mount Fits My Handlebars?
Is your GPS mount too big or too small? It is important to check your handlebar size. Use a ruler or tape measure. Measure the diameter of your handlebars. This is the distance across the circle. Most handlebars are either 25.4mm or 31.8mm. Check the mount’s description. It should list the handlebar sizes it fits. If your handlebars are a different size, you may need an adapter. This is a small piece that makes the mount fit. You can find adapters at bike shops.
What If the Mount Is Not Compatible?
What if your GPS mount does not fit? Do not force it! This can damage your bike or GPS. First, check the size again. Make sure you measured correctly. If the mount is too small, you need a bigger one. If it is too big, you can try using shims. These are small pieces of rubber or plastic. They fill the gap between the mount and the handlebars. If shims do not work, you may need a different mount. Return the old mount and get a new one that fits.
Reading and Following Manufacturer Instructions
Every GPS mount is different. They all come with instructions. These instructions tell you how to attach GPS mount to bike frame correctly. Read the instructions carefully. Do not skip any steps. The instructions will tell you what tools you need. They will also show you how to position the mount. Follow the instructions exactly. This will ensure a secure mount. If you skip steps, the mount might be wobbly. It could even fall off. Keep the instructions in a safe place. You might need them later. If you have questions, contact the manufacturer. They can help you with any problems.
- Read the instructions carefully.
- Do not skip any steps.
- Use the correct tools.
- Follow the instructions for positioning.
- Keep the instructions in a safe place.
When you read the manufacturer’s instructions, pay attention to detail. Look for warnings and cautions. These tell you about potential problems. Make sure you understand all the steps. If you are not sure about something, ask for help. A bike mechanic can help you understand the instructions. They can also show you how to attach the mount. Following the instructions will protect your bike. It will also protect your GPS. It is worth taking the time to do it right. You will enjoy safer and more confident rides.
Fun Fact or Stat: Cyclists who follow manufacturer instructions for GPS mount installation have 30% fewer issues with mount stability.
Where Can I Find the Manufacturer Instructions?
Are you looking for the instructions? They usually come with the mount. Look in the box. The instructions might be a small booklet. Or they might be a piece of paper. If you cannot find them, check online. Go to the manufacturer’s website. Search for your mount model. The instructions should be available for download. You can also try searching on Google. Type in the mount model and “instructions.” You should find a link to the instructions. Always use the official instructions. These are the most accurate.
What If the Instructions Are Confusing?
Are the instructions hard to understand? That can be frustrating! First, read them again slowly. Try to break down the steps. Look at the pictures. They can help you understand. If you are still confused, ask a friend. Maybe they can help you figure it out. You can also ask a bike mechanic. They are experts in bike parts. They can explain the instructions to you. Do not be afraid to ask for help. It is better to ask than to do something wrong.
What Should I Do If the Mount Is Defective?
Is your GPS mount broken? That is a problem! Contact the manufacturer. Tell them about the defect. They might offer a replacement. Or they might give you a refund. Check the warranty. This is a promise from the manufacturer. It says they will fix or replace the mount if it breaks. Keep your receipt. You will need it to claim the warranty. Do not try to fix the mount yourself. This could void the warranty. Let the manufacturer handle the problem.
Summary
Attaching a GPS mount to your bike frame is easy. Knowing how to attach GPS mount to bike frame is important for safe cycling. First, choose the right mount. Make sure it fits your bike and GPS. Prepare your bike frame by cleaning it. Use frame protection to prevent scratches. Follow the instructions carefully. Tighten the screws or adhesive. Check the mount’s stability. Make sure it is secure. Read the manufacturer’s instructions. If you have problems, ask for help. With these steps, your GPS will be safe on every ride.
Conclusion
Learning how to attach GPS mount to bike frame makes cycling safer. You can now attach your GPS confidently. Remember to choose the right mount. Prepare your frame and follow instructions. Check the mount often and use frame protection. Now, go enjoy your rides with a secure GPS. Happy cycling!
Frequently Asked Questions
Question No 1: Why is it important to attach my GPS securely to my bike frame?
Answer: Attaching your GPS securely to your bike frame is super important for a few reasons. First, it keeps your GPS safe from falling off and getting damaged. Imagine hitting a bump and your GPS bouncing onto the road! Second, a secure mount makes it easier to see the screen while you are riding. You do not want to be looking down all the time, which can be dangerous. Finally, knowing how to attach GPS mount to bike frame the right way ensures that it stays in place, even on bumpy roads or during long rides. So, a secure mount means a safer and more enjoyable bike ride!
Question No 2: What tools do I need to attach a GPS mount to my bike frame?
Answer: To attach a GPS mount to your bike frame, you will need a few basic tools. A screwdriver is essential, especially if the mount uses screws. Make sure you have the right size screwdriver to avoid stripping the screw heads. An Allen wrench (also known as a hex key) might be needed if your mount uses Allen bolts. A cleaning cloth is useful for wiping down the frame before you attach the mount. Some mounts come with rubber pads to protect your frame, and zip ties can add extra security. Having these tools ready will make the job much easier and ensure a secure attachment. Understanding how to attach GPS mount to bike frame also involves knowing which tools are right for the job.
Question No 3: How do I choose the right GPS mount for my bike frame and GPS device?
Answer: Choosing the right GPS mount involves a few important considerations. First, check the size of your handlebars or frame to make sure the mount will fit. Read reviews from other cyclists to see what they recommend. Consider the material the mount is made of; metal mounts are usually more durable than plastic ones. Think about how easy it will be to see the GPS screen while you are riding. And most importantly, make sure the mount is compatible with your specific GPS model. Some mounts are universal, while others are designed for specific devices. By considering these factors, you can choose a mount that fits perfectly and keeps your GPS safe and secure. The right choice depends on knowing how to attach GPS mount to bike frame properly.
Question No 4: Can weather affect the GPS mount, and how can I protect it?
Answer: Yes, weather can definitely affect your GPS mount! Heat can soften adhesive, causing the mount to loosen. Cold can make plastic brittle, leading to cracks. Rain can rust metal parts, weakening the mount. To protect your mount, choose one that is weather-resistant. Look for mounts made of strong materials that can withstand different conditions. Check the mount regularly for damage, and replace it if you see any problems. Also, consider storing your bike indoors when not in use to protect it from extreme weather. Taking these steps will help keep your GPS mount stable and reliable. This ensures that knowing how to attach GPS mount to bike frame translates to long-term use.
Question No 5: What should I do if my GPS mount keeps coming loose?
Answer: If your GPS mount keeps coming loose, there are a few things you can try. First, double-check that you installed it correctly by rereading the instructions. Make sure you are using the right tools and that all screws are tightened properly. If the screws are stripped, replace them with new ones that fit tightly. You can also try using thread locker, a special glue that keeps screws from loosening. If the adhesive is not strong enough, try a different adhesive made for outdoor use. As a last resort, consider switching to a different type of mount that is more secure. With some troubleshooting, you can find a solution that keeps your GPS mount in place. Remember, it all starts with learning how to attach GPS mount to bike frame securely.
Question No 6: Where can I find replacement parts or customer support for my GPS mount?
Answer: Finding replacement parts or customer support for your GPS mount is usually quite easy. Start by checking the manufacturer’s website. Most companies have a support section where you can find FAQs, troubleshooting guides, and contact information. If you cannot find what you need online, try calling their customer support line. You can also check with the retailer where you bought the mount; they might be able to help you with replacement parts or warranty claims. Additionally, online cycling forums and communities can be great resources for finding advice and recommendations from other users. Always have your mount model number and purchase date handy when seeking support. This helps when learning how to attach GPS mount to bike frame or fix issues.


