
How to Check Hose Connection on Shock Gauge? Easy Fix
Quick Summary: To check the hose connection on your shock gauge, start by visually inspecting the hose and fittings for any cracks or damage. Tighten any loose connections by hand. Next, attach the gauge to your shock and pump a few strokes. Watch for leaks around the hose and fittings. If you see or hear air escaping, try tightening the connection again or replace the hose if needed. Regular checks ensure accurate pressure readings and prevent damage to your suspension.
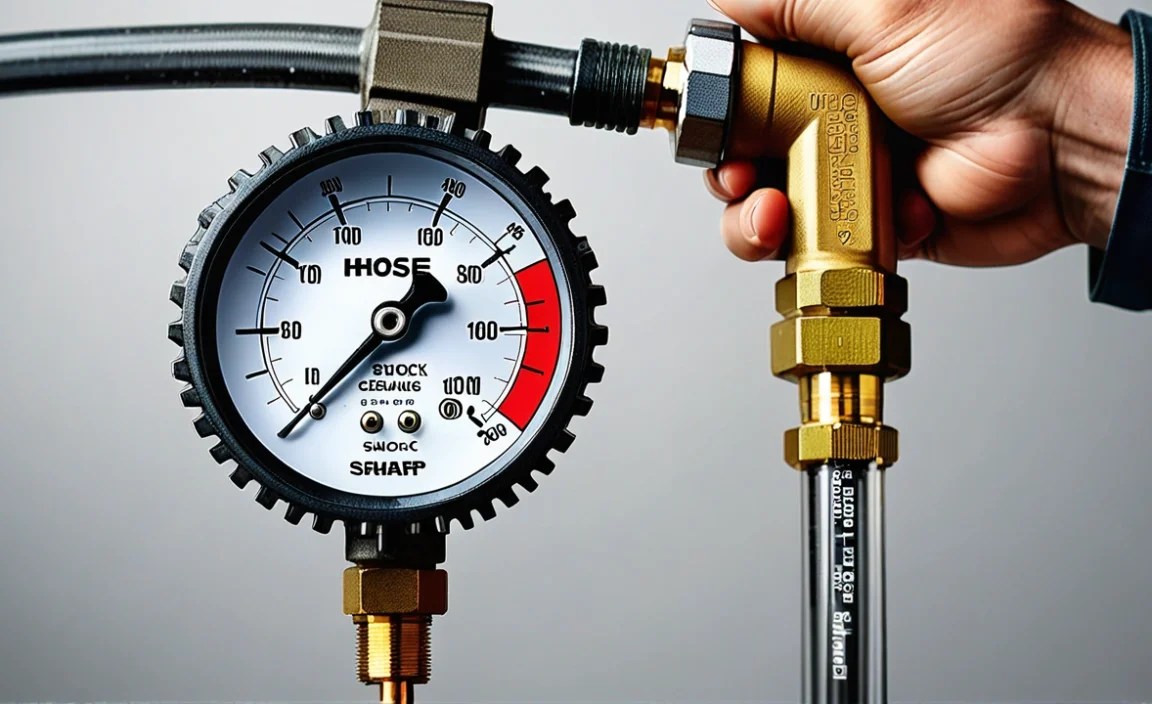
Ever get that sinking feeling when your shock gauge gives you a reading that just doesn’t seem right? You pump and pump, but something feels off. Chances are, the problem might not be your shock itself, but rather the hose connection on your shock gauge. A leaky or poorly connected hose can lead to inaccurate pressure readings, wasted effort, and even damage to your suspension components. Don’t worry, this is a common issue and an easy fix. This guide will walk you through a simple, step-by-step process to check and troubleshoot your shock gauge hose connection so you can get back to riding with confidence.
Why Checking Your Shock Gauge Hose Matters

Your shock gauge is a crucial tool for maintaining your bike’s suspension. It allows you to accurately measure and adjust the air pressure in your shocks, ensuring optimal performance and ride quality. But what happens when the gauge itself isn’t working correctly? A faulty hose connection can lead to a cascade of problems:
- Inaccurate Pressure Readings: The most obvious issue. A leak in the hose connection means the gauge isn’t measuring the true pressure in your shock.
- Wasted Effort: You might be pumping air into your shock that’s immediately escaping, leading to unnecessary effort and frustration.
- Suspension Damage: Incorrect pressure settings can negatively affect your suspension. Riding with too little pressure can cause bottoming out and damage, while too much pressure can lead to a harsh ride and potential component failure.
- Safety Concerns: Improperly maintained suspension can compromise your bike’s handling and stability, potentially leading to accidents.
Regularly checking your shock gauge hose connection is a simple preventative measure that can save you time, money, and potential headaches down the road.
Tools You’ll Need
Fortunately, checking your shock gauge hose connection doesn’t require a lot of fancy tools. Here’s what you’ll need:
- Your Shock Gauge: Obviously!
- A Clean Rag: For wiping away any dirt or debris.
- Soapy Water (Optional): For detecting leaks. Mix a small amount of dish soap with water in a spray bottle.
- Appropriate Wrenches (Optional): Only if you need to tighten fittings, and only use the correct size to avoid damage.
- Replacement Hose (If Needed): Have a spare hose on hand if you suspect yours is damaged.
Step-by-Step Guide: Checking Your Shock Gauge Hose Connection

Follow these steps to thoroughly inspect your shock gauge hose connection:
Step 1: Visual Inspection
Start with a close visual inspection of the entire hose and all connection points.
- Check the Hose: Look for any cracks, kinks, or signs of wear and tear along the length of the hose. Pay close attention to areas where the hose bends or flexes.
- Inspect the Fittings: Examine the points where the hose connects to the gauge and the shock adapter. Look for any signs of damage, such as cracks, rust, or stripped threads.
- Look for Debris: Make sure there’s no dirt, mud, or other debris clogging the connections. Clean with a rag if needed.
Step 2: Tighten Connections (Hand Tight)
Gently tighten all the hose connections by hand. Be careful not to overtighten, as this can damage the fittings.
- Gauge Connection: Tighten the fitting where the hose connects to the gauge body.
- Shock Adapter Connection: Tighten the fitting where the hose connects to the shock adapter.
Step 3: Leak Test with Shock
Now, attach the gauge to your shock and perform a leak test.
- Attach the Gauge: Connect the shock adapter to your bike’s shock valve.
- Pump a Few Strokes: Use the gauge’s pump to add a small amount of air pressure to the shock (around 50-100 PSI is sufficient).
- Listen for Leaks: Carefully listen for any hissing sounds coming from the hose or connections.
- Visual Inspection: Look for any signs of air escaping around the connections.
- Soapy Water Test (Optional): If you suspect a leak but can’t pinpoint it, lightly spray the connections with soapy water. If there’s a leak, you’ll see bubbles forming.
Step 4: Address Any Leaks
If you detect a leak, take the following steps:
- Tighten Further (With Wrench – Carefully): If the connection was slightly loose, use an appropriately sized wrench to gently tighten it a bit more. Be extremely careful not to overtighten and strip the threads.
- Check the O-Rings: Many shock gauge connections use small O-rings to create a seal. Inspect these O-rings for damage or wear. If necessary, replace them with new ones.
- Replace the Hose: If the hose itself is cracked or damaged, it’s best to replace it entirely. You can usually find replacement hoses at your local bike shop or online.
Step 5: Re-Test
After addressing any leaks, repeat the leak test (Step 3) to ensure the problem is resolved. If you’re still experiencing leaks, double-check all connections and consider replacing the hose or fittings.
Understanding Different Types of Hose Connections
Shock gauges use various types of hose connections, each with its own characteristics. Understanding these differences can help you troubleshoot issues more effectively.
Threaded Connections
Threaded connections are the most common type. They involve screwing the hose fitting onto a corresponding threaded port on the gauge or shock adapter.
- Pros: Secure, reliable connection when properly tightened.
- Cons: Can be prone to leaks if overtightened or if the threads are damaged. Requires the correct size wrench for tightening.
Quick-Release Connections
Quick-release connections allow you to quickly attach and detach the hose from the shock valve without losing pressure.
- Pros: Convenient, fast connection. Minimizes air loss during attachment and detachment.
- Cons: Can be more complex and potentially more prone to leaks if the mechanism is not properly maintained.
O-Ring Seals
Many hose connections use O-rings to create a tight seal. These small rubber rings sit between the fitting and the port, preventing air from escaping.
- Pros: Effective sealing, relatively inexpensive to replace.
- Cons: Can dry out, crack, or become damaged over time, leading to leaks.
Troubleshooting Common Hose Connection Problems
Here are some common problems you might encounter with your shock gauge hose connection and how to fix them:
| Problem | Possible Cause | Solution |
|---|---|---|
| Leak at the gauge connection | Loose fitting, damaged O-ring, stripped threads | Tighten the fitting (carefully!), replace the O-ring, replace the gauge (if threads are stripped) |
| Leak at the shock adapter connection | Loose fitting, damaged O-ring, worn-out adapter | Tighten the fitting (carefully!), replace the O-ring, replace the adapter |
| Leak in the middle of the hose | Cracked or damaged hose | Replace the hose |
| Gauge reading fluctuates erratically | Loose connection, damaged hose, faulty gauge | Check and tighten all connections, inspect the hose for damage, consider replacing the gauge |
| Difficulty attaching the adapter to the shock valve | Dirty or damaged valve, incorrect adapter size | Clean the valve with a soft brush, ensure you’re using the correct adapter, consider replacing the valve |
Preventative Maintenance Tips
Here are some tips to keep your shock gauge hose connection in good working order:
- Regular Inspection: Make it a habit to visually inspect your hose and connections before each ride or at least once a month.
- Proper Storage: Store your shock gauge in a clean, dry place away from direct sunlight and extreme temperatures.
- Gentle Handling: Avoid bending or kinking the hose excessively.
- O-Ring Lubrication: Periodically lubricate the O-rings with a small amount of silicone grease to keep them supple and prevent drying out.
- Use the Right Tools: Always use the correct size wrench when tightening fittings to avoid damaging them.
- Replace Worn Parts: Don’t wait until a part fails completely. Replace hoses, O-rings, and adapters as soon as you notice signs of wear or damage.
When to Replace Your Shock Gauge Hose
Even with proper maintenance, your shock gauge hose will eventually need to be replaced. Here are some signs that it’s time for a new hose:
- Visible Cracks or Damage: Any cracks, cuts, or abrasions on the hose are a clear indication that it needs to be replaced.
- Persistent Leaks: If you’ve tried tightening the connections and replacing the O-rings but are still experiencing leaks, the hose itself may be the problem.
- Stiff or Brittle Hose: Over time, the hose can become stiff and brittle, making it more prone to cracking.
- Age: Even if the hose looks okay, it’s a good idea to replace it every few years as a preventative measure.
Choosing a Replacement Hose
When choosing a replacement hose, consider the following factors:
- Compatibility: Make sure the hose is compatible with your shock gauge and shock adapter. Check the thread size and type.
- Quality: Choose a hose made from high-quality materials that are resistant to cracking and abrasion.
- Length: Select a hose that’s the appropriate length for your needs. Too short, and it will be difficult to use. Too long, and it can get in the way.
- Features: Some replacement hoses come with additional features, such as swivel fittings or integrated pressure relief valves.
FAQ: Checking Hose Connections on Shock Gauges
Why is my shock gauge showing different readings every time I pump?
Inconsistent readings often point to a leak in the hose connection or a faulty gauge. Check the hose and fittings for tightness and damage first. If the problem persists, the gauge itself might be malfunctioning.
How often should I check my shock gauge hose connection?
Ideally, check it before each ride or at least once a month. Regular checks catch small issues before they become major headaches.
Can I use any type of hose as a replacement for my shock gauge hose?
No. You need a hose specifically designed for high-pressure applications. Using the wrong type of hose can be dangerous and lead to inaccurate readings or even failure.
What does it mean if I see bubbles when I spray soapy water on the hose connection?
Bubbles indicate an air leak. The soapy water magnifies the escaping air, making it easier to pinpoint the source of the leak.
Is it okay to use Teflon tape on the hose connections?
While some people use Teflon tape, it’s generally not recommended for shock gauge hose connections. O-rings are designed to create a seal, and Teflon tape can interfere with their effectiveness. If you’re still having leaks after replacing the O-ring, consult a bike mechanic.
How do I know if I’m overtightening the hose connections?
Overtightening can damage the threads on the fittings. Tighten the connections until they’re snug, but not excessively tight. If you feel resistance, stop tightening. Use the correct size wrench to avoid applying too much force.
Can a damaged hose connection affect my bike’s suspension performance?
Yes. A leak in the hose connection leads to inaccurate pressure readings, which can negatively affect your suspension’s performance. Riding with incorrect pressure can compromise handling, comfort, and even damage the suspension components.
Conclusion
Checking the hose connection on your shock gauge is a simple yet vital part of bike maintenance. By following these steps, you can ensure accurate pressure readings, prevent suspension damage, and enjoy a smoother, safer ride. Remember to regularly inspect your hose and connections, address any leaks promptly, and replace worn parts as needed. With a little bit of care and attention, your shock gauge will continue to provide reliable service for years to come, helping you dial in your suspension and get the most out of every ride. So, grab your tools, give your shock gauge a once-over, and get ready to hit the trails with confidence!


