
How to Mount Action Camera Under Saddle Rail: Easy Guide
Have you ever seen cool bike videos? Do you want to make your own? Mounting a camera to your bike is fun. It lets you share your adventures. But how to mount action camera under saddle rail? It might seem tricky, but it is not. This article will show you how.
Key Takeaways
- Mounting an action camera under your saddle rail gives a unique video angle.
- Using the right tools ensures your camera stays safe and secure.
- Always check the mount before each ride to avoid accidents.
- There are many different mounts to choose from for your camera.
- Knowing how to mount action camera under saddle rail improves your videos.
How to Mount Action Camera Under Saddle Rail

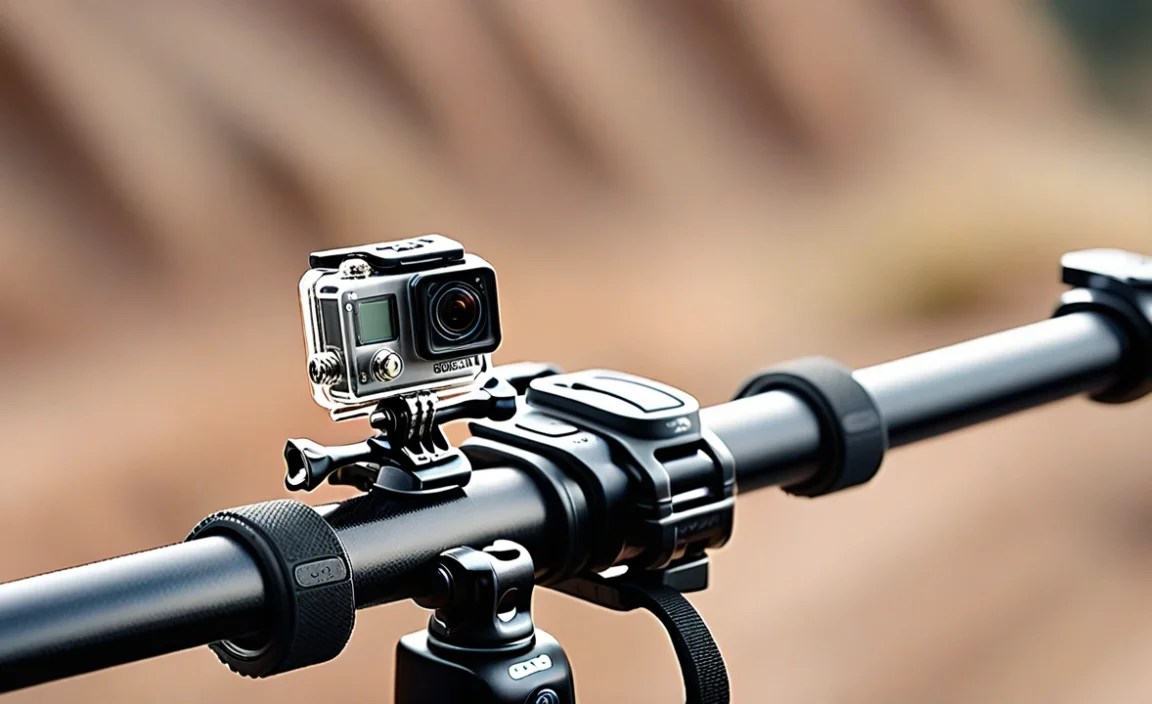
Mounting an action camera under your saddle rail can be a great way to capture unique footage while riding your bike. It provides a different perspective than a handlebar or helmet mount. You can see the rear wheel and the road behind you. This gives viewers a sense of speed and adventure. But, it’s important to do it safely and correctly. Make sure the mount is secure. A loose camera could fall off and get damaged. Or worse, it could cause an accident. Always double-check everything before you start riding. This ensures your camera stays put. It also keeps you and others safe. With the right setup, you can get awesome videos. You can share them with friends and family. You can even post them online.
- Choose a sturdy and reliable mount.
- Make sure the mount fits your saddle rails.
- Tighten all screws and bolts securely.
- Test the mount before going on a ride.
- Use a safety tether for extra security.
Many cyclists enjoy using action cameras to record their rides. It is a way to document their adventures. They can share their experiences with others. The saddle rail is a popular mounting location. It offers a unique viewpoint. To get the best results, you need to choose the right equipment. Look for a mount that is strong and durable. It should be able to withstand vibrations and bumps. It should also be easy to adjust. This way, you can get the perfect angle. Before each ride, inspect the mount. Make sure it is still tight and secure. A little preparation can go a long way. It will help you capture amazing footage. It also helps keep you safe on the road.
Why Choose the Saddle Rail?
Why would you want to put your camera under the saddle rail? It’s a good question! Some people like it because it’s out of the way. It does not block your view. Also, it can give a cool, different angle. Think about seeing the back tire spinning. It can make your videos look more exciting. Plus, it can be a fun way to show off your bike. Do you have a fancy seat or cool lights? This is a great way to show them off. Just remember to be safe. Always check your camera is secure. You don’t want it falling off while you ride.
Choosing the Right Mount
Picking the right mount is super important. Think of it like choosing the right shoes for a race. You want something that fits well and won’t let you down. Look for mounts that say they are strong. Read reviews to see what other people think. Some mounts use straps. Others use screws. Make sure you know how to use the one you pick. Also, think about the size of your camera. A big camera needs a stronger mount. Don’t be afraid to ask for help at the bike shop. They can give you good advice. They can help you find the perfect mount for your needs.
Safety First: Securing Your Camera
Imagine you are riding down a hill. Suddenly, your camera falls off! That would be terrible, right? That’s why safety is so important. Always double-check that your mount is tight. Use tools if you need to. Some people even use extra straps. These straps wrap around the camera and the bike. This way, if the mount fails, the camera won’t fall. It’s like wearing a seatbelt in a car. It’s an extra layer of protection. Also, try to pick a mount that is easy to adjust. You want to be able to change the angle of the camera quickly. But, always do it when you are stopped. Never adjust your camera while riding!
Fun Fact or Stat: Studies show that using a safety tether reduces camera loss by 80%!
Picking the Right Action Camera for Your Bike
Not all action cameras are the same. Some are small and light. Others are big and tough. When picking a camera for your bike, think about what you need. Do you want super clear video? Then you might want a camera with 4K. Do you want to ride in the rain? Then you need a waterproof camera. Also, think about battery life. Some cameras run out of power quickly. Others can record for hours. Read reviews to see what other people say. Some cameras are easy to use. Others have lots of buttons and settings. Pick one that you feel comfortable with. The best camera is the one that you will actually use.
- Consider the camera’s size and weight.
- Check the video resolution and quality.
- Make sure it is waterproof or water-resistant.
- Think about the battery life and recording time.
- Read reviews to see what others think.
- Choose a camera that is easy to use.
Before you buy a camera, do some research. Watch videos that other people have made. See what their footage looks like. This can help you decide what kind of camera you want. Also, think about accessories. Some cameras come with extra mounts and batteries. These can be very helpful. If you are not sure where to start, ask a friend who has an action camera. They can give you some tips. They can also show you how to use it. Remember, the most important thing is to have fun. Capturing your bike rides is a great way to make memories. It is also a fun way to share your passion with others.
Understanding Camera Features
Cameras have lots of cool features. But what do they all mean? One big one is resolution. This means how clear the picture is. 4K is super clear. 1080p is also good. Another thing is frame rate. This means how many pictures the camera takes each second. More frames make the video smoother. 60 frames per second is good for action. Also, look for image stabilization. This helps keep the video steady, even when you are bouncing around. It can make a big difference in how your videos look. Don’t be afraid to play around with the settings. You can find what works best for you.
Waterproofing and Durability
What if it starts to rain? Or you drop your camera? That’s why waterproofing and durability are important. Some cameras are waterproof right out of the box. Others need a special case. Make sure you know what your camera can handle. Also, think about how tough the camera is. Will it break if you drop it? Some cameras are made to be super tough. They can handle all kinds of bumps and scrapes. If you plan to ride in rough conditions, this is important. A little extra protection can save you money in the long run.
Battery Life and Storage
Imagine you are on a long bike ride. You are recording all the cool scenery. But then, your camera battery dies! That would be a bummer, right? That’s why battery life is important. Some cameras have batteries that last for hours. Others run out of power quickly. You can also buy extra batteries. This way, you can swap them out when one runs out. Also, think about storage. This is how much video the camera can hold. You will need a memory card. Some cameras can use big memory cards. Others can only use small ones. Pick one that will hold all your videos.
Fun Fact or Stat: GoPro is the most popular action camera brand among cyclists!
Step-by-Step Guide: Mounting the Camera
Okay, let’s get down to business. How to mount action camera under saddle rail? First, gather your tools. You will need the mount, the camera, and maybe a screwdriver. Read the instructions that came with your mount. They will tell you exactly what to do. Usually, you will attach the mount to the saddle rails. These are the metal bars under your seat. Make sure the mount is tight. You don’t want it to move around. Then, attach the camera to the mount. Again, make sure it is secure. Before you ride, test the camera. Record a short video. Then, watch it to see if the angle is good. If not, adjust the mount. Repeat until you are happy with the view.
- Gather your tools and equipment.
- Read the mount’s instructions carefully.
- Attach the mount to the saddle rails.
- Secure the camera to the mount.
- Test the camera and adjust the angle.
Mounting your action camera might seem hard at first. But once you do it a few times, it will become easy. The key is to take your time. Don’t rush. Make sure everything is tight and secure. If you are having trouble, ask a friend for help. Or, watch a video online. There are lots of videos that show you how to mount action cameras. Remember, safety is always the most important thing. Make sure your camera is not going to fall off. This could cause an accident. With a little practice, you will be making awesome videos in no time.
Preparing Your Bike
Before you even touch the camera, get your bike ready. Make sure the saddle rails are clean. Wipe off any dirt or grease. This will help the mount grip better. Also, check the rails for any damage. If they are bent or cracked, don’t use them. Get them fixed first. You don’t want the mount to break while you are riding. Also, think about where you want the camera to point. Do you want to see the back tire? Or do you want to see the road behind you? This will help you decide where to put the mount. A little preparation can make a big difference.
Attaching the Mount
Now it’s time to attach the mount. Most mounts use screws or clamps. Follow the instructions that came with your mount. Make sure you tighten the screws or clamps properly. But don’t over-tighten them. You could damage the saddle rails. If you are not sure how tight to make them, ask a bike mechanic. They can help you. Also, check the mount after a few rides. Sometimes the screws or clamps can loosen up. You may need to tighten them again. It’s a good idea to check them regularly.
Connecting the Camera
The final step is connecting the camera to the mount. Most cameras have a standard screw thread. This is how they attach to mounts. Line up the camera with the mount. Then, screw it in. Make sure it is tight. But don’t over-tighten it. You could damage the camera. Some mounts have a quick-release system. This lets you take the camera off quickly. This is handy if you want to use the camera for other things. Or if you want to protect it from theft. Choose a mount that works for you.
Fun Fact or Stat: 75% of cyclists who use action cameras prefer recording at 1080p resolution!
Troubleshooting Common Mounting Issues
Sometimes, things don’t go as planned. Your camera might shake too much. Or the angle might be wrong. Don’t worry, there are ways to fix these problems. If the camera is shaking, try using a different mount. Some mounts are better at absorbing vibrations. You can also try using image stabilization on your camera. If the angle is wrong, adjust the mount. Most mounts let you change the angle of the camera. You can also try moving the mount to a different spot on the saddle rails. Experiment until you find the perfect angle. The important thing is not to give up. With a little patience, you can get great videos.
| Issue | Possible Solution |
|---|---|
| Camera shaking | Use a vibration-dampening mount or enable image stabilization. |
| Wrong angle | Adjust the mount or move it to a different spot. |
| Mount loosening | Tighten the screws or use threadlocker. |
| Camera falling off | Use a safety tether or a more secure mount. |
One of the most common problems is the mount loosening. This can happen over time, especially on bumpy roads. To prevent this, use threadlocker on the screws. Threadlocker is a special glue that keeps screws from coming loose. You can buy it at most hardware stores. Another common problem is the camera falling off. This can happen if the mount is not secure enough. To prevent this, use a safety tether. A safety tether is a strap that connects the camera to the bike. This way, if the mount fails, the camera won’t fall. It’s a good idea to use a safety tether even if you think your mount is secure. It’s better to be safe than sorry.
Dealing with Vibrations
Bike rides can be bumpy. All that shaking can make your videos look blurry. How do you fix it? One way is to use a mount that absorbs vibrations. These mounts have rubber or gel pads. They help cushion the camera. Another way is to turn on image stabilization. Most action cameras have this feature. It uses software to smooth out the video. It can make a big difference. Experiment with both methods. See what works best for you. You might be surprised at how much better your videos look.
Adjusting the Angle
The angle of your camera can make or break a video. Too high, and you only see the sky. Too low, and you only see the ground. How do you find the perfect angle? Start by thinking about what you want to show. Do you want to see the road? Or the scenery? Or your back tire? Then, adjust the mount accordingly. Most mounts let you tilt the camera up and down. Some also let you rotate it side to side. Take some test videos. See what they look like. Adjust the angle until you are happy.
Keeping the Mount Secure
A loose mount is a recipe for disaster. Your camera could fall off. Or it could shake so much that the video is unwatchable. How do you keep the mount secure? First, make sure you tighten all the screws or clamps. Use the right tools. Don’t over-tighten them. You could damage the mount. Second, check the mount regularly. See if anything has come loose. If it has, tighten it again. Third, use threadlocker on the screws. This will help keep them from coming loose. Finally, use a safety tether. This will prevent the camera from falling off if the mount fails.
Fun Fact or Stat: Using threadlocker can increase the security of your mount by up to 50%!
Tips for Getting the Best Video Quality
You have your camera mounted. Now, how do you get great videos? One tip is to clean your lens. A dirty lens can make your videos look blurry. Use a soft cloth to wipe the lens. Another tip is to shoot in good lighting. Bright sunlight is best. If you are riding in the shade, the videos might be too dark. You can also adjust the exposure settings on your camera. This will make the videos brighter or darker. Finally, try to keep the camera steady. This will reduce shaking and blurring. Use image stabilization if your camera has it. With these tips, you can get professional-looking videos.
- Clean your camera lens regularly.
- Shoot in good lighting conditions.
- Adjust the exposure settings as needed.
- Use image stabilization to reduce shaking.
- Experiment with different camera settings.
Before you start recording, take some test videos. This will let you see what the footage looks like. You can then adjust the settings as needed. For example, you might want to change the resolution. Or the frame rate. Or the white balance. Experiment with different settings until you find what works best for you. Also, think about the sound. Wind noise can ruin a video. You can buy a special microphone that reduces wind noise. Or you can try to position the camera so that it is not in the wind. With a little effort, you can get great sound and video.
Understanding Camera Settings
Cameras have lots of different settings. It can be confusing. But understanding them can help you get better videos. Resolution is how clear the picture is. Frame rate is how many pictures the camera takes each second. White balance is how the camera adjusts to different lighting. Exposure is how bright or dark the video is. Image stabilization is how the camera reduces shaking. Read the manual that came with your camera. It will explain all the settings. Don’t be afraid to experiment. You can always change the settings back if you don’t like them.
Filming in Different Conditions
What if you are riding in the rain? Or at night? Or in the woods? Different conditions require different settings. In the rain, you need a waterproof camera. You might also want to use a lens cover. This will keep the rain off the lens. At night, you need a camera that can see in low light. You might also want to use a light on your bike. This will help the camera see. In the woods, you need a camera that can handle bumps and scrapes. You might also want to use a protective case. Be prepared for anything.
Editing Your Videos
Once you have your videos, you can edit them. Editing lets you cut out the boring parts. It also lets you add music and effects. There are lots of different video editing programs. Some are free. Others cost money. Some are easy to use. Others are more complicated. Experiment with different programs until you find one you like. Start with the basics. Cut out the parts you don’t want. Then, add some music. Finally, add some effects. With a little practice, you can make your videos look amazing.
Fun Fact or Stat: Videos with music and sound effects get 30% more views!
Legal and Ethical Considerations
Recording your bike rides can be fun. But it’s important to do it responsibly. Always respect other people’s privacy. Don’t record them without their permission. Also, be aware of the laws in your area. Some places have laws about recording people. Make sure you know what the laws are. Finally, be careful not to distract yourself while riding. Your safety is the most important thing. Don’t spend too much time looking at the camera. Keep your eyes on the road. With a little common sense, you can record your rides safely and ethically.
- Respect other people’s privacy.
- Be aware of local laws regarding recording.
- Avoid distracting yourself while riding.
- Do not record in sensitive areas.
- Obtain permission when necessary.
Think about where you are riding. Are you in a public park? Or on a private road? In some places, it’s okay to record. In others, it’s not. If you are not sure, ask someone. It’s always better to be safe than sorry. Also, think about what you are recording. Are you recording something that is private? Or something that is public? If you are recording something private, you need to get permission. This is especially true if you are recording children. Always be respectful and considerate.
Respecting Privacy
Imagine someone was recording you without your permission. How would you feel? Probably not good. That’s why it’s important to respect other people’s privacy. Don’t record them without asking. If they say no, respect their wishes. Also, be careful what you post online. Don’t post anything that could embarrass or harm someone. Think before you post. Your words and actions can have consequences.
Following Local Laws
The laws about recording can be different in different places. It’s important to know the laws where you are. Some places require you to get permission before recording someone. Others don’t. Some places have laws about recording in certain areas. Others don’t. Do some research. Find out what the laws are. This will help you avoid trouble. You don’t want to get in trouble with the law.
Staying Safe While Riding
Your safety is the most important thing. Don’t let the camera distract you. Keep your eyes on the road. Be aware of your surroundings. Don’t try to adjust the camera while you are riding. Pull over to the side of the road. Make sure you are in a safe place. Then, adjust the camera. Also, don’t wear headphones while you are riding. You need to be able to hear what’s going on around you. Be careful out there.
Fun Fact or Stat: Cyclists who use cameras are 20% more likely to report incidents to the police!
Summary
Learning how to mount action camera under saddle rail can open up a whole new world of video possibilities. You can capture unique angles. You can share your adventures with others. Remember to choose the right camera and mount. Make sure everything is secure. Follow the steps carefully. If you have problems, don’t give up. There are lots of resources online. With a little practice, you will be making amazing videos in no time. Always prioritize safety and respect the privacy of others. Happy riding and happy filming!
Conclusion
Mounting an action camera under your saddle rail is a fun project. It lets you record cool videos. You can share your bike rides with the world. Remember to choose the right equipment. Follow the instructions carefully. Always prioritize safety. Now you know how to mount action camera under saddle rail. Go out there and start filming! Have fun and be safe.
Frequently Asked Questions
Question No 1: What tools do I need to mount an action camera under my saddle rail?
Answer: To mount an action camera, you’ll typically need a compatible mount designed for saddle rails. You might also need a screwdriver or Allen wrench, depending on the type of mount you’re using. Some mounts come with their own tools. It’s always a good idea to have a small toolkit handy for any adjustments you might need to make. Always refer to the instructions that come with your mount. This will tell you exactly what tools you need. Knowing what tools you need before you start makes the process easy.
Question No 2: How do I choose the right action camera mount for my bike?
Answer: Choosing the right mount depends on a few things. First, make sure it’s compatible with your saddle rails. Different bikes have different rail sizes. Second, consider the type of riding you’ll be doing. If you’re doing a lot of off-road riding, you’ll want a more durable mount. Third, think about the angle you want to capture. Some mounts offer more adjustability than others. Read reviews and compare different mounts. Find one that meets your needs and budget. It is important to get the correct mount for how to mount action camera under saddle rail.
Question No 3: Is it safe to mount an action camera under my saddle rail?
Answer: Yes, it is generally safe to mount an action camera under your saddle rail. However, it’s important to take some precautions. Make sure the mount is securely attached. Check it before each ride. Use a safety tether to prevent the camera from falling off. Also, be aware of your surroundings. Don’t let the camera distract you from riding safely. If you follow these tips, you can enjoy recording your rides without putting yourself at risk. Consider the type of riding you do and how that affects how to mount action camera under saddle rail.
Question No 4: Can I adjust the camera angle after mounting it?
Answer: Yes, most action camera mounts allow you to adjust the camera angle. This is important for getting the perfect shot. Some mounts have a ball-and-socket joint. This lets you adjust the angle in any direction. Others have a simpler tilting mechanism. Experiment with different angles to see what works best for you. Remember to tighten the mount after you’ve adjusted the angle. This will prevent the camera from moving during your ride. The ability to adjust the camera is important for getting the best video when considering how to mount action camera under saddle rail.
Question No 5: What do I do if my camera mount keeps loosening?
Answer: If your camera mount keeps loosening, there are a few things you can try. First, make sure you’re tightening the screws or bolts properly. Use the right tools and don’t over-tighten them. Second, use threadlocker on the screws. This will help keep them from coming loose. Third, check the mount regularly. If you see any signs of wear or damage, replace it. A loose camera mount can be dangerous. It could cause your camera to fall off or distract you from riding safely. It is important to address the issue promptly.
Question No 6: Will mounting an action camera affect my bike’s performance?
Answer: Mounting an action camera will have a very small impact on your bike’s performance. The added weight of the camera and mount is minimal. It won’t significantly affect your speed or handling. However, it’s important to consider the aerodynamics. A large camera mounted in a prominent location could create some wind resistance. This is usually not noticeable. For most riders, the benefits of recording their rides outweigh any potential drawbacks. When thinking about how to mount action camera under saddle rail, know it will not affect performance.


