
How to Replace Leaking Shock Pump Hose: Easy Guide
Quick Summary: A leaking shock pump hose can make suspension adjustments a real pain. Luckily, replacing it is usually a simple DIY task. You’ll need a new hose, a couple of wrenches or pliers, and possibly a vice. Remove the old hose, making sure to note how it’s connected. Install the new hose, tighten everything securely, and test for leaks. With a few basic tools and some patience, you can get your shock pump working like new again!
Is your shock pump hissing like a grumpy snake every time you try to dial in your suspension? A leaking hose is a common problem, and it means you’re losing pressure before you even get a reading. It’s frustrating, and it makes it tough to get your bike dialed in just right. The good news is, replacing a shock pump hose is a straightforward fix that most cyclists can handle at home.
This guide will walk you through the process step-by-step. We’ll cover everything from gathering the right tools to testing your new hose for leaks. By the end, you’ll have a perfectly functioning shock pump and the confidence to tackle more bike maintenance tasks.
Why Replace Your Shock Pump Hose?
A shock pump is a vital tool for any cyclist with air suspension. But like any tool, parts can wear out over time. Here’s why replacing a leaking hose is important:
- Accurate Pressure Readings: Leaks lead to inaccurate readings, making it impossible to set your suspension correctly.
- Efficient Pumping: A leaking hose wastes energy and makes it harder to reach the desired pressure.
- Prevents Further Damage: Ignoring a leak can put extra strain on the pump’s internals, leading to more costly repairs down the road.
- Saves Money: Replacing a hose is much cheaper than buying a whole new shock pump.
- Peace of Mind: Knowing your equipment is in top condition allows you to focus on enjoying your ride.
Tools and Materials You’ll Need

Before you start, gather these essential tools and materials:
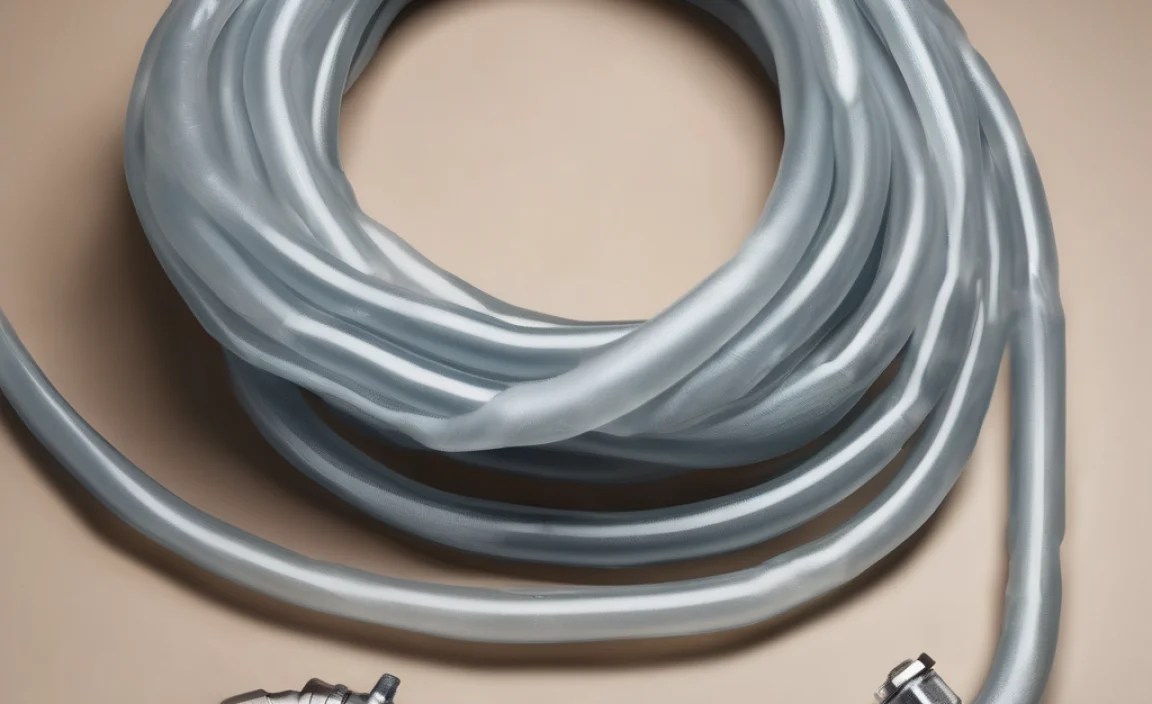
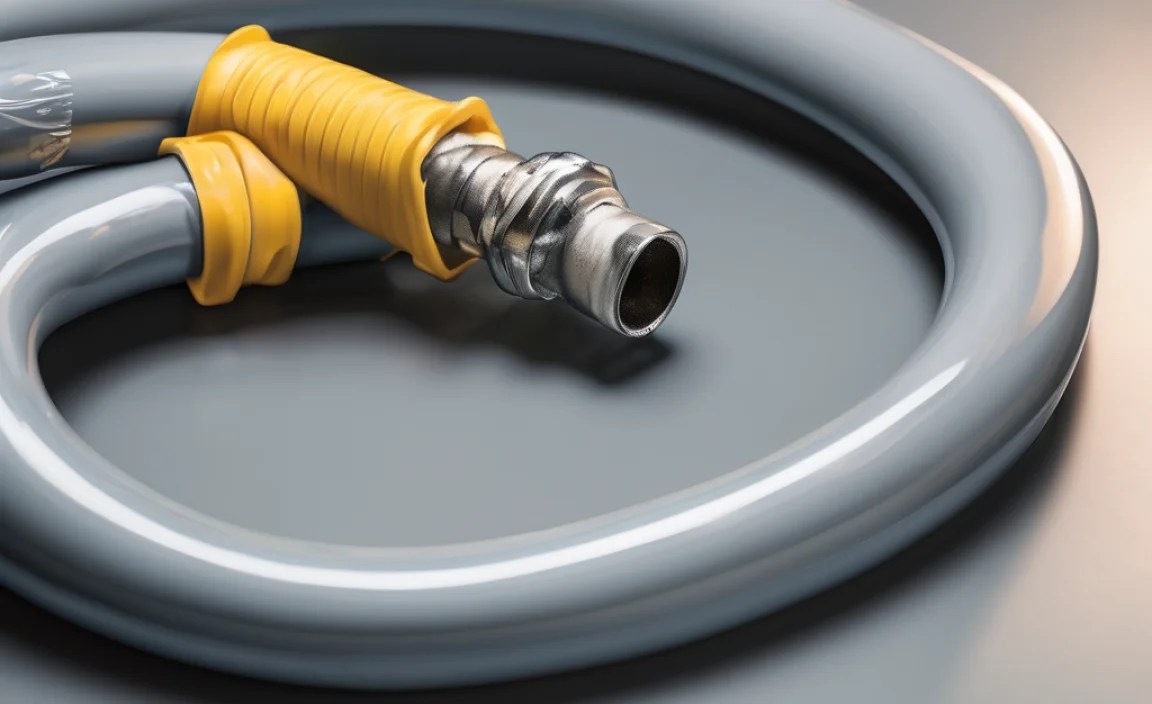
- New Shock Pump Hose: Make sure it’s compatible with your shock pump model. Check the manufacturer’s website or your pump’s manual.
- Two Wrenches or Adjustable Pliers: The size will depend on the fittings on your pump and hose.
- Vice (Optional but Recommended): A vice helps hold the pump body steady while you work.
- Thread Seal Tape (Teflon Tape): For sealing threaded connections.
- Soft Cloth or Rag: To protect the pump’s finish.
- Safety Glasses: To protect your eyes from debris.
- Work Gloves (Optional): To improve grip and protect your hands.
Step-by-Step Guide to Replacing Your Shock Pump Hose

Follow these steps carefully to replace your shock pump hose:
Step 1: Prepare Your Work Area
Choose a clean, well-lit workspace. Lay down a cloth or paper towels to protect your work surface. Gather all your tools and materials within easy reach.
Step 2: Depressurize the Shock Pump
Before you start any disassembly, make sure the shock pump is completely depressurized. Open the bleed valve to release any remaining air. This prevents accidental pressure release during the repair.
Step 3: Secure the Shock Pump (Optional)
If you have a vice, gently clamp the body of the shock pump in the vice. Use a soft cloth to protect the finish. Don’t overtighten the vice, as this could damage the pump. If you don’t have a vice, you’ll need to hold the pump firmly while you work.
Step 4: Disconnect the Old Hose
Using two wrenches or adjustable pliers, loosen the fittings connecting the hose to the pump body and the pump head. Use one wrench to hold the pump body or head steady, and the other to turn the fitting. This prevents you from twisting and damaging the pump. Be careful not to scratch the pump’s finish.
Important: Pay close attention to how the hose is routed and connected. Take a picture or make a sketch to help you remember how to install the new hose.
Step 5: Remove the Old Hose
Once the fittings are loose, carefully unscrew them completely and remove the old hose. Inspect the threads on the fittings for any damage or corrosion. If the threads are damaged, you may need to replace the fittings as well.
Step 6: Prepare the New Hose Fittings
Clean the threads on the new hose fittings with a clean cloth. If the fittings don’t already have thread seal tape, apply a few wraps of Teflon tape to the threads. Wrap the tape in the direction that the fitting will be tightened, so the tape doesn’t unravel.
Step 7: Connect the New Hose
Carefully screw the new hose fittings into the pump body and the pump head. Tighten the fittings snugly with your wrenches or pliers. Again, use two wrenches to prevent twisting the pump. Don’t overtighten the fittings, as this could damage the threads or the pump.
Tip: Refer to the picture or sketch you made earlier to ensure the hose is routed correctly.
Step 8: Tighten the Connections
Double-check that all the fittings are securely tightened. Use your wrenches or pliers to give them a final snugging. Be careful not to overtighten.
Step 9: Test for Leaks
Connect the pump to a shock or tire and pump it up to a moderate pressure (e.g., 100 psi). Listen carefully for any hissing sounds that would indicate a leak. You can also apply a small amount of soapy water to the fittings. If you see bubbles, there’s a leak.
If you find a leak, carefully tighten the fittings a little more. If the leak persists, try re-wrapping the threads with Teflon tape.
Step 10: Final Check and Cleanup
Once you’ve confirmed there are no leaks, disconnect the pump and wipe it down with a clean cloth. Remove the pump from the vice (if you used one). Store your tools and materials in a safe place.
Troubleshooting Common Issues
Even with careful attention, you might encounter a few snags. Here’s how to troubleshoot common problems:
- Leaking Connections: If you have a leak, double-check that the fittings are tight and that the threads are properly sealed with Teflon tape. Sometimes, a small adjustment is all it takes.
- Cross-Threading: Be extremely careful not to cross-thread the fittings when you’re screwing them in. If you feel resistance, stop and realign the threads. Forcing a cross-threaded fitting can damage the threads on the pump body or head.
- Incompatible Hose: Make sure you’re using a hose that’s specifically designed for shock pumps. Other types of hoses may not be able to handle the high pressures involved.
- Damaged Fittings: If the fittings on your old hose are corroded or damaged, consider replacing them along with the hose. You can usually find replacement fittings at a local hardware store or online.
Choosing the Right Replacement Hose

Not all shock pump hoses are created equal. Here’s what to look for when choosing a replacement:
- Compatibility: The most important factor is compatibility with your shock pump model. Check the manufacturer’s website or your pump’s manual to find the correct replacement hose.
- Pressure Rating: Make sure the hose is rated for the pressures you’ll be using. Most shock pump hoses are rated for at least 300 psi, which is sufficient for most suspension systems.
- Material: Look for a hose made from durable, high-quality materials like braided nylon or reinforced rubber. These materials will resist kinking and cracking.
- Length: Choose a hose that’s the same length as your old hose. A hose that’s too short will be difficult to use, while a hose that’s too long can get in the way.
- Fittings: Check that the fittings on the new hose are the same size and type as the fittings on your old hose.
Maintenance Tips to Extend Hose Life
Here are some tips to keep your shock pump hose in good condition and prevent future leaks:
- Store Your Pump Properly: When not in use, store your shock pump in a clean, dry place. Avoid exposing it to extreme temperatures or direct sunlight.
- Avoid Kinking the Hose: Kinking the hose can damage the internal structure and lead to leaks. Be careful not to bend the hose sharply.
- Inspect Regularly: Periodically inspect the hose for cracks, abrasions, or other signs of damage. Replace the hose if you notice any problems.
- Use a Hose Protector: Consider using a hose protector to shield the hose from abrasion and UV damage.
- Lubricate Fittings: Occasionally lubricate the fittings with a light silicone grease to prevent corrosion and make them easier to tighten.
Table: Common Shock Pump Hose Issues and Solutions
| Issue | Possible Cause | Solution |
|---|---|---|
| Leak at Fitting | Loose fitting, damaged threads, worn Teflon tape | Tighten fitting, re-wrap with Teflon tape, replace fitting |
| Hose Kinked or Cracked | Improper storage, excessive bending, age | Replace hose |
| Inaccurate Pressure Readings | Leak in hose, faulty gauge | Replace hose, calibrate or replace gauge |
| Difficult to Attach to Valve | Damaged valve head, worn seal | Replace valve head or seal |
| Pump Overheats | Excessive use, internal friction | Allow pump to cool down, lubricate internal parts |
Table: Recommended Shock Pump Hose Materials
| Material | Pros | Cons |
|---|---|---|
| Braided Nylon | Durable, flexible, resistant to kinking | Can be more expensive |
| Reinforced Rubber | Affordable, good flexibility | Can crack or dry out over time |
| Polyurethane | Lightweight, chemical resistant | Less flexible than rubber or nylon |
| Stainless Steel Braided | Extremely durable, high pressure rating | Less flexible, more expensive |
External Resources
For more information on bike maintenance and repair, check out these resources:
- Park Tool Repair Help – A comprehensive guide to bike repair from a trusted tool manufacturer.
- REI Expert Advice: Bicycle Maintenance – Tips and advice on keeping your bike in top condition.
- BikeRadar Workshop: Bike Maintenance Tips – Expert advice on maintaining your bike from the editors of BikeRadar.
FAQ: Replacing a Leaking Shock Pump Hose
1. How do I know if my shock pump hose is leaking?
A hissing sound when pumping or an inability to reach the desired pressure are common signs. You can also use soapy water to check for bubbles at the hose connections.
2. Can I use any hose to replace my shock pump hose?
No, you should only use a hose specifically designed for shock pumps. These hoses are rated for high pressures and have the correct fittings.
3. What size wrenches do I need for replacing the hose?
The wrench sizes will vary depending on your pump and hose. Adjustable pliers can work, but using correctly sized wrenches is better to prevent damage.
4. Do I need to use Teflon tape on the new hose fittings?
Yes, Teflon tape helps to seal the threads and prevent leaks. Wrap the tape in the direction the fitting will tighten.
5. How tight should I tighten the hose fittings?
Tighten the fittings snugly, but don’t overtighten them. Overtightening can damage the threads or the pump body. If it still leaks, tighten slightly more.
6. What if I can’t find a replacement hose for my shock pump model?
Contact the pump manufacturer or a local bike shop. They may be able to help you find a compatible replacement.
7. How often should I replace my shock pump hose?
It depends on how often you use your pump and the conditions it’s exposed to. Inspect the hose regularly and replace it if you notice any signs of wear or damage.
Conclusion
Replacing a leaking shock pump hose is a simple and rewarding DIY task. By following these steps, you can save money, improve your suspension performance, and gain valuable bike maintenance skills. Don’t let a leaky hose keep you from enjoying your ride. With a little patience and the right tools, you can get your shock pump working like new again. Now get out there and dial in that perfect suspension setup!


