
How to Attach Hand Pump to Schrader Valve: Easy Guide
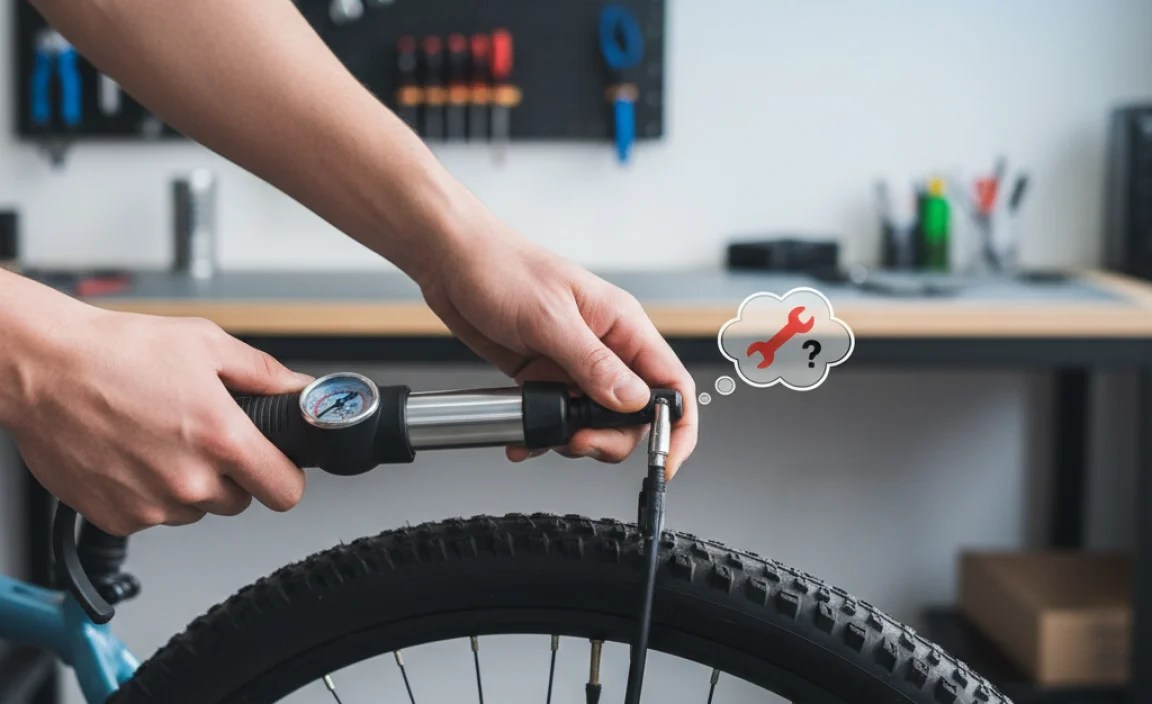
To attach a hand pump to a Schrader valve, first, remove the valve cap. Then, firmly press the pump head straight onto the valve, ensuring a tight seal. Flip the pump’s locking lever (if present) to secure the connection. Begin pumping, using smooth, full strokes until you reach your desired tire pressure. Once done, unlock the lever, carefully remove the pump head, and replace the valve cap.
Ever felt that sinking feeling when you’re about to head out for a ride and discover your tires are flat? It’s a common problem, and knowing how to properly inflate your tires with a hand pump is essential for any cyclist. The Schrader valve is common on many bikes, and getting the pump attached correctly can sometimes be tricky. Don’t worry! This guide will walk you through the process step-by-step, so you can quickly and easily inflate your tires and get back on the road or trail.
Understanding Schrader Valves and Hand Pumps

Before we dive into the how-to, let’s cover the basics of Schrader valves and hand pumps. Knowing these fundamentals will make the process smoother and help you avoid common mistakes.
What is a Schrader Valve?
A Schrader valve is a type of tire valve used on many bicycles, cars, and motorcycles. It consists of a valve stem with a spring-loaded core. When you press down on the core, it opens, allowing air to flow in or out. Here are a few key characteristics:
- Durable: Schrader valves are generally more robust and can withstand higher pressures than other types of valves.
- Common: You’ll find them on most mountain bikes, hybrid bikes, and some road bikes.
- Car Compatible: Because cars use Schrader valves, you can inflate your tires at most gas stations if needed.
Types of Hand Pumps
Hand pumps come in various shapes and sizes, but they all serve the same basic function: to inflate your tires using manual power. Here are a couple of the most common types:
- Mini Pumps: Compact and lightweight, perfect for carrying on rides. They often require more strokes to inflate a tire.
- Frame-Mounted Pumps: These attach directly to your bike frame for easy access.
- Floor Pumps (Track Pumps): Larger pumps with a gauge, designed for home use. They offer more leverage and efficiency.
Step-by-Step Guide: Attaching a Hand Pump to a Schrader Valve

Now, let’s get to the main event: attaching your hand pump to a Schrader valve. Follow these steps carefully to ensure a secure connection and proper inflation.
Step 1: Remove the Valve Cap
The first step is simple: locate the valve cap on your tire’s Schrader valve and unscrew it. Store the cap in a safe place, like your pocket, so you don’t lose it.
Why this is important: The valve cap protects the valve core from dirt and debris. Removing it gives you access to the valve for inflation.
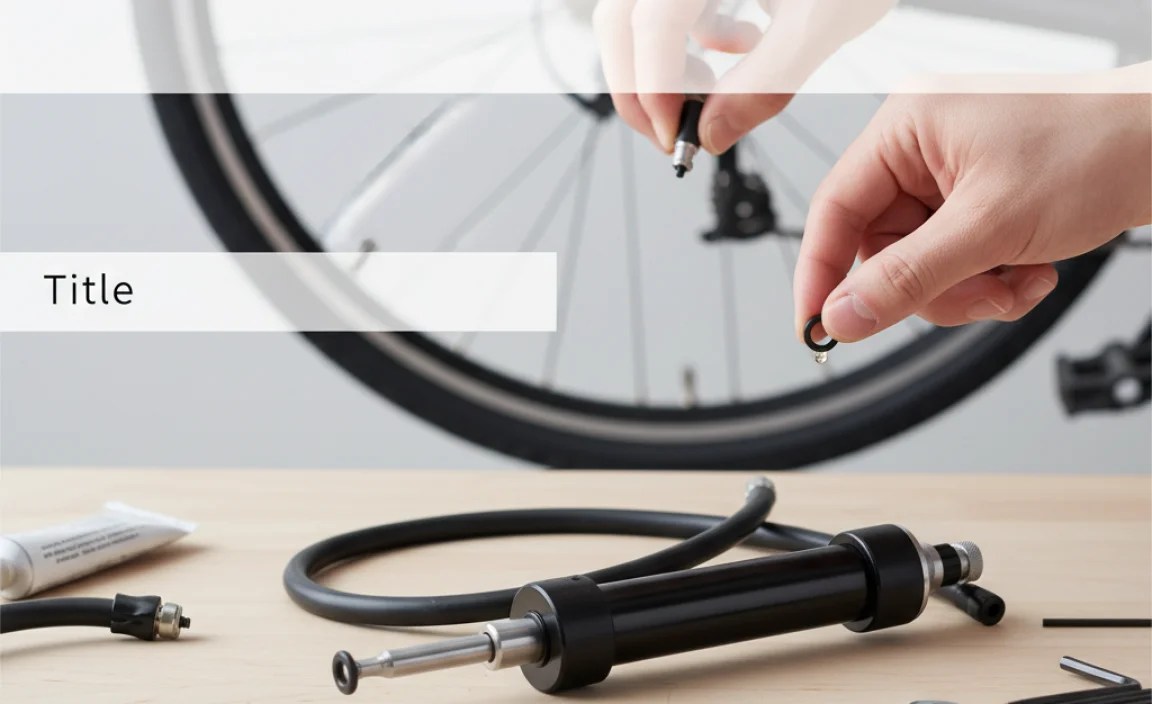
Step 2: Prepare the Hand Pump
Inspect your hand pump to ensure it’s ready for use. Make sure the pump head is clean and free of any obstructions. If your pump has a locking lever, ensure it’s in the open position.
Why this is important: A clean pump head will create a better seal. The locking lever, when open, allows you to attach the pump head to the valve.
Step 3: Align the Pump Head with the Valve
Carefully align the pump head with the Schrader valve. Ensure that the pump head is straight and centered over the valve. This alignment is crucial for a proper seal.
Why this is important: Proper alignment prevents air leakage and ensures efficient inflation.
Step 4: Press the Pump Head onto the Valve
Firmly press the pump head straight onto the Schrader valve. You should feel it make a secure connection. Some air might escape initially, but that’s normal.
Why this is important: A firm press ensures the pump head engages with the valve core, allowing air to flow into the tire.
Step 5: Engage the Locking Lever (If Applicable)
If your pump has a locking lever, now is the time to engage it. Flip the lever to the closed position. This secures the pump head to the valve and creates an airtight seal.
Why this is important: The locking lever provides extra security, preventing the pump head from popping off during inflation.
Step 6: Begin Pumping
With the pump head securely attached, start pumping. Use smooth, full strokes to push air into the tire. Keep an eye on the tire’s pressure if you have a gauge on the pump. If you don’t have a gauge, you can estimate based on feel, but it’s best to use a gauge for accuracy.
Why this is important: Consistent pumping builds pressure inside the tire. Monitoring the pressure prevents over-inflation, which can lead to a blowout.
Step 7: Monitor Tire Pressure
Check the recommended tire pressure on the sidewall of your tire. Use the pump’s gauge (if available) to monitor the pressure as you inflate. If you don’t have a gauge, you can use a separate tire pressure gauge to check periodically.
Why this is important: Proper tire pressure ensures optimal performance, comfort, and safety. Over-inflation can cause blowouts, while under-inflation can lead to pinch flats and poor handling.
Step 8: Disconnect the Pump
Once you’ve reached the desired tire pressure, it’s time to disconnect the pump. If your pump has a locking lever, flip it back to the open position. Then, carefully pull the pump head straight off the Schrader valve.
Why this is important: Disengaging the locking lever before removal prevents damage to the valve. Pulling straight off ensures a clean release.
Step 9: Replace the Valve Cap
Finally, screw the valve cap back onto the Schrader valve. This protects the valve core from dirt and debris.
Why this is important: The valve cap is a small but important component. It keeps the valve clean and prevents slow leaks.
Troubleshooting Common Issues
Sometimes, things don’t go as planned. Here are some common issues you might encounter when attaching a hand pump to a Schrader valve, along with troubleshooting tips.
Air Leaking During Pumping
If you hear or feel air leaking while pumping, it usually indicates a poor seal between the pump head and the valve. Here’s what you can do:
- Check Alignment: Make sure the pump head is properly aligned with the valve.
- Tighten Connection: Press the pump head more firmly onto the valve.
- Inspect Pump Head: Check the pump head for wear or damage. Replace if necessary.
- Engage Locking Lever: Ensure the locking lever (if present) is fully engaged.
Pump Head Won’t Attach
If you’re having trouble attaching the pump head to the valve, consider these possibilities:
- Valve Obstruction: Check the valve for dirt or debris. Clean if necessary.
- Pump Head Compatibility: Ensure your pump head is compatible with Schrader valves. Some pumps have adapters for different valve types.
- Valve Damage: Inspect the valve for damage. If it’s bent or broken, you may need to replace the tube or tire.
Difficulty Pumping
If pumping feels unusually difficult, it could be due to:
- High Tire Pressure: As the tire gets closer to its maximum pressure, pumping will become harder. This is normal.
- Pump Malfunction: Check the pump for any internal issues. Lubricate the pump’s moving parts if necessary.
- Valve Core Issue: A stuck or damaged valve core can restrict airflow. Try depressing the valve core with a small tool to free it up.
Tips for Maintaining Your Hand Pump
A well-maintained hand pump will last longer and perform better. Here are some tips to keep your pump in top condition.
- Clean Regularly: Wipe down your pump with a clean cloth after each use to remove dirt and grime.
- Lubricate Moving Parts: Periodically lubricate the pump’s moving parts with a silicone-based lubricant. This will keep the pump working smoothly.
- Store Properly: Store your pump in a dry place away from direct sunlight. This will prevent the pump from deteriorating.
- Inspect Regularly: Check the pump head, hose, and other components for wear or damage. Replace any worn parts promptly.
Choosing the Right Hand Pump

With so many hand pumps on the market, choosing the right one can be overwhelming. Here are some factors to consider when selecting a hand pump.
- Type of Riding: Consider the type of riding you do most often. A mini pump is great for road cyclists who prioritize weight and portability, while a floor pump is better for home use.
- Valve Compatibility: Make sure the pump is compatible with the type of valves on your bike (Schrader, Presta, or both).
- Pressure Gauge: A built-in pressure gauge is highly recommended for accurate inflation.
- Size and Weight: If you plan to carry the pump on your rides, consider its size and weight.
- Build Quality: Look for a pump made from durable materials that can withstand regular use.
Hand Pump Comparison Table
Here’s a comparison of a few popular hand pump models to help you make an informed decision:
| Model | Type | Valve Compatibility | Pressure Gauge | Max Pressure | Pros | Cons |
|---|---|---|---|---|---|---|
| Lezyne Micro Floor Drive HP | Mini Floor Pump | Presta/Schrader | Yes | 160 PSI | Compact, efficient, stable footpad | Relatively expensive |
| Topeak Road Morph G | Mini Pump | Presta/Schrader | Yes | 160 PSI | Fold-out footpad, integrated gauge | Can be bulky for some riders |
| Blackburn Chamber HV | Floor Pump | Presta/Schrader | Yes | 160 PSI | Durable, stable base, easy to use | Larger, not portable |
| Pro Bike Tool Mini Bike Pump | Mini Pump | Presta/Schrader | No | 120 PSI | Lightweight, compact, affordable | No gauge, requires more effort |
Understanding Tire Pressure
Maintaining the correct tire pressure is crucial for optimal cycling performance, comfort, and safety. Here’s what you need to know.
Why Tire Pressure Matters
- Rolling Resistance: Proper tire pressure reduces rolling resistance, making it easier to pedal and go faster.
- Comfort: Correct pressure provides a smoother, more comfortable ride.
- Grip: Optimal pressure ensures good grip and traction, especially in corners and on uneven surfaces.
- Puncture Resistance: Proper inflation reduces the risk of pinch flats (snakebite punctures).
Finding the Right Tire Pressure
The recommended tire pressure for your bike is usually printed on the sidewall of the tire. This is typically given as a range, such as “50-85 PSI.” Here are some factors to consider when determining the best pressure for you:
- Rider Weight: Heavier riders generally need higher tire pressures.
- Tire Width: Wider tires can be run at lower pressures.
- Terrain: Rougher terrain may require lower pressures for better comfort and grip.
- Personal Preference: Experiment to find the pressure that feels best for you.
Tire Pressure Table Example
This table provides a general guideline for tire pressure based on rider weight. Always refer to the tire manufacturer’s recommendations for the most accurate information.
| Rider Weight (lbs) | Tire Width (mm) | Recommended Pressure (PSI) |
|---|---|---|
| 120-150 | 23 | 90-100 |
| 150-180 | 23 | 100-110 |
| 180-210 | 23 | 110-120 |
| 120-150 | 25 | 80-90 |
| 150-180 | 25 | 90-100 |
| 180-210 | 25 | 100-110 |
Safety Tips
Before you start pumping, keep these safety tips in mind.
- Inspect Your Tires: Always check your tires for cuts, bulges, or wear before inflating.
- Don’t Over-Inflate: Never exceed the maximum pressure listed on the tire sidewall.
- Use a Gauge: Use a pressure gauge to ensure accurate inflation.
- Be Aware of Your Surroundings: When pumping on the road, be aware of traffic and choose a safe location.
FAQ: Attaching Hand Pump to Schrader Valve
Here are some frequently asked questions about attaching a hand pump to a Schrader valve.
Why is air leaking when I try to pump?
Air leakage usually means the pump head isn’t properly sealed against the valve. Ensure the pump head is aligned correctly and pressed firmly onto the valve. If your pump has a locking lever, make sure it’s engaged.
How do I know if my pump is compatible with Schrader valves?
Most hand pumps are designed to work with both Schrader and Presta valves. Look for a dual-head pump or one with an adapter. The pump’s packaging or instructions should indicate valve compatibility.
What is the correct tire pressure for my bike?
The recommended tire pressure is usually printed on the sidewall of your tire. It’s typically given as a range, such as “50-85 PSI.” Adjust the pressure within this range based on your weight, riding style, and terrain.
Can I use a car tire inflator on my bike’s Schrader valve?
Yes, because cars use Schrader valves, you can use a car tire inflator on your bike. However, be very careful not to over-inflate, as car inflators can deliver air quickly. Use a pressure gauge to monitor the pressure closely.
What should I do if the valve core seems stuck?
If the valve core seems stuck, try gently depressing it with a small tool (like the end of a pump head or a valve core tool). This can help free it up. If it’s severely damaged, you may need to replace the valve core or the entire tube.
How often should I check my tire pressure?
It’s a good idea to check your tire pressure before every ride, especially if you haven’t ridden in a while. Tires can slowly lose air over time, so regular checks will ensure optimal performance and safety.
What tools do I need to replace a Schrader valve core?
To replace a Schrader valve core, you’ll need a valve core tool (a small, inexpensive tool specifically designed for this purpose), a new valve core, and a pump to re-inflate the tire. The process is simple: remove the old core with the tool, insert the new core, and inflate.
Conclusion
Attaching a hand pump to a Schrader valve might seem tricky at first, but with a little practice, it becomes second nature. By following these steps and keeping the troubleshooting tips in mind, you’ll be able to maintain your tires and enjoy smooth, safe rides. Remember to check your tire pressure regularly, maintain your pump, and choose the right pump for your needs. Now get out there and enjoy the ride! REI has great resources for learning more about bike maintenance.


