
How to Replace Washer in Hand Pump: Easy Fix!
Replacing the washer in a hand pump is usually a quick fix that can restore its pumping power. By disassembling the pump head, swapping out the old, worn washer for a new one, and reassembling, you can often get your pump working like new again. This simple maintenance can save you from buying a new pump!
Is your trusty hand pump losing pressure? Does it feel like you’re working harder but getting less air into your tires? Chances are, the washer inside the pump head is worn out. This is a common problem, but don’t worry – it’s an easy fix! Replacing the washer is a simple and inexpensive way to keep your pump working perfectly. In this guide, I’ll walk you through each step, from identifying the right washer to putting everything back together. Let’s get pumping!
What You’ll Need

Before we dive in, gather these essential tools and materials. Having everything ready will make the process smooth and efficient.
- New Washer: The correct size and type for your pump (more on this below).
- Screwdrivers: Both Phillips head and flathead, depending on your pump model.
- Pliers: For gripping and gently loosening parts.
- Adjustable Wrench: Useful for larger pump connections.
- Grease: A small amount of bicycle grease to lubricate the new washer.
- Rag: For cleaning parts and wiping away excess grease.
- Safety Glasses: To protect your eyes from debris.
Identifying the Correct Washer
Finding the right replacement washer is crucial. A washer that’s too big or too small won’t seal properly, and your pump will still lose pressure. Here’s how to make sure you get the perfect fit:
- Check Your Pump’s Manual: The manual might list the exact washer size and type.
- Search Online: Look up your pump model online. Often, you can find parts diagrams or discussions about washer replacements.
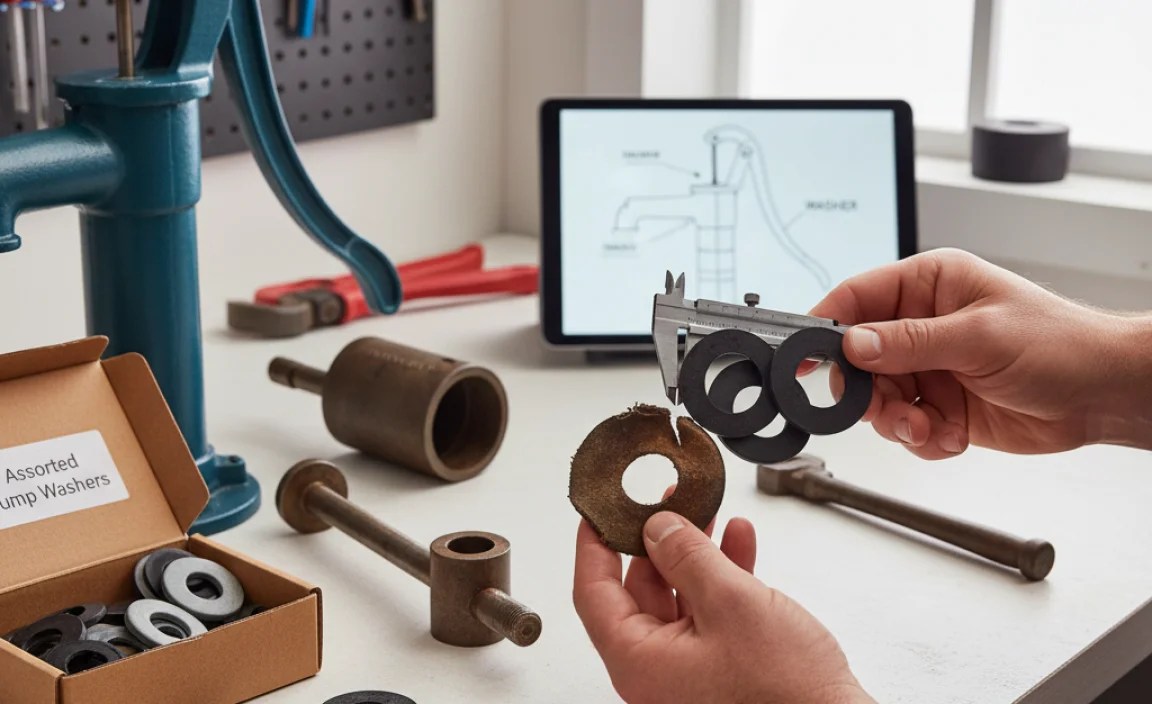
- Measure the Old Washer: If you have the old washer, measure its inner diameter (ID), outer diameter (OD), and thickness. Use calipers for the most accurate measurements.
- Consider Material: Washers are typically made of rubber, leather, or plastic. Replace with the same material or a compatible alternative.
Here’s a table to help you understand common washer materials and their uses:
| Material | Pros | Cons | Typical Use |
|---|---|---|---|
| Rubber | Flexible, good seal, inexpensive | Can degrade over time, less durable than other materials | Most common in basic hand pumps |
| Leather | Durable, conforms well to surfaces, can be treated for longer life | Requires occasional oiling, can dry out and crack | Older pumps, high-pressure applications |
| Plastic (e.g., Teflon) | Very durable, low friction, resistant to chemicals | Less flexible, may not seal as well on imperfect surfaces | High-end pumps, specialized applications |
Step-by-Step Guide to Replacing the Washer

Now, let’s get to the heart of the matter. Follow these steps carefully to replace the washer in your hand pump.
Step 1: Disassemble the Pump Head
The pump head is the part that attaches to your tire valve. This is where the washer is located.
- Release Air Pressure: Make sure there’s no pressure in the pump.
- Remove the Hose: If your pump has a hose, detach it from the pump body.
- Locate Screws: Look for screws on the pump head. These may be Phillips head or flathead screws.
- Remove Screws: Use the appropriate screwdriver to remove the screws. Keep them in a safe place.
- Separate the Halves: Gently separate the two halves of the pump head. You might need to use a small flathead screwdriver to pry them apart.
Step 2: Locate and Remove the Old Washer
Now that the pump head is open, you should see the washer.
- Identify the Washer: It’s usually a small, circular piece of rubber, leather, or plastic. It might be black, but it could also be another color.
- Remove the Washer: Use a small flathead screwdriver or a pick to gently pry the washer out of its seat. Be careful not to scratch the surrounding surfaces.
- Inspect the Washer: Look for signs of wear, such as cracks, tears, or flattening. This will confirm that it needs replacing.
Step 3: Clean the Pump Head
Before installing the new washer, clean the inside of the pump head.
- Wipe Clean: Use a clean rag to wipe away any dirt, debris, or old grease.
- Check for Damage: Inspect the surfaces that the washer seals against. Make sure there are no scratches or imperfections that could prevent a good seal.
Step 4: Install the New Washer
With the pump head clean, it’s time to install the new washer.
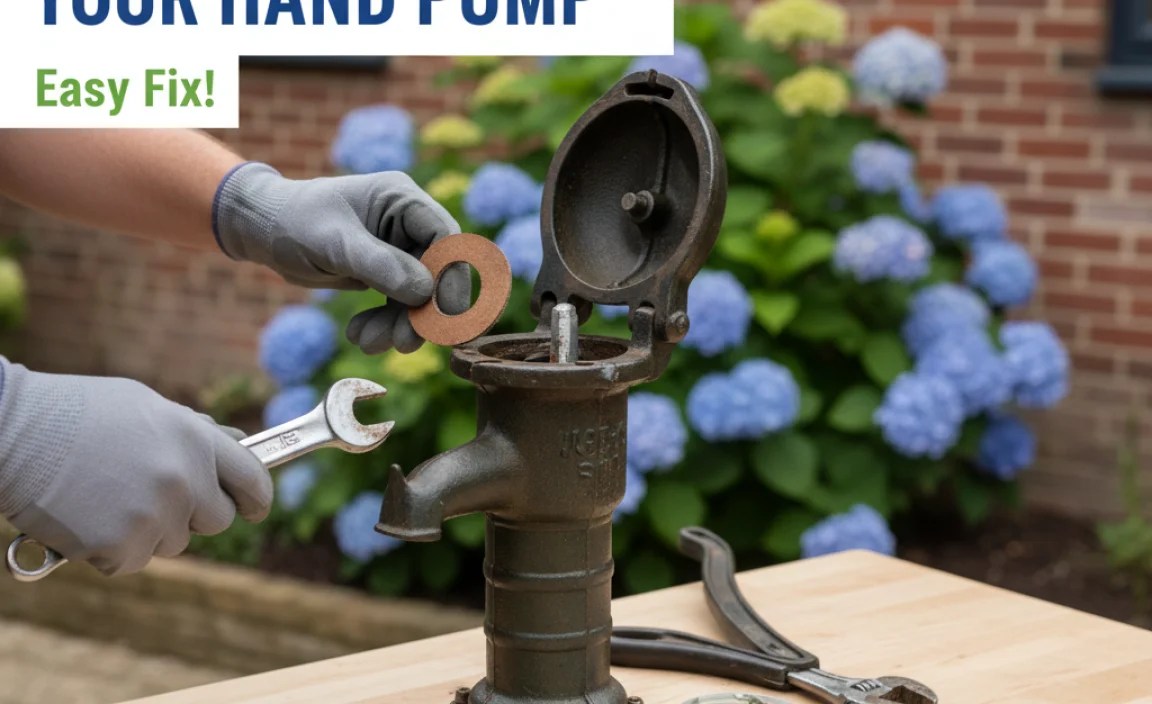
- Lubricate the Washer: Apply a small amount of bicycle grease to the new washer. This will help it slide into place and create a better seal.
- Position the Washer: Place the washer in its seat in the pump head. Make sure it’s seated evenly and fully.
- Press into Place: Use your fingers or a small tool to gently press the washer into place. It should fit snugly.
Step 5: Reassemble the Pump Head
Now, put the pump head back together.
- Align the Halves: Carefully align the two halves of the pump head.
- Press Together: Press the halves together until they snap or fit snugly.
- Reinstall Screws: Reinstall the screws that you removed earlier. Tighten them securely, but don’t overtighten.
Step 6: Reattach the Hose (if applicable)
If your pump has a hose, reattach it to the pump body.
- Thread the Hose: Thread the hose onto the pump body.
- Tighten Securely: Use an adjustable wrench to tighten the hose connection. Don’t overtighten.
Step 7: Test the Pump
Finally, test the pump to make sure it’s working properly.
- Attach to Tire: Attach the pump head to your tire valve.
- Pump: Start pumping. You should feel resistance and see the tire pressure increase.
- Check for Leaks: Listen for air leaks around the pump head. If you hear leaks, tighten the screws or hose connection.
Troubleshooting

Sometimes, things don’t go exactly as planned. Here are some common problems and how to solve them:
- Pump Still Leaks:
- Problem: The washer might not be sealing properly.
- Solution: Make sure the washer is the correct size and properly seated. Try adding more grease.
- Pump is Hard to Push:
- Problem: The washer might be too tight or not lubricated enough.
- Solution: Disassemble the pump head and check the washer. Add more grease.
- Screws Won’t Tighten:
- Problem: The screw threads might be stripped.
- Solution: Try using slightly larger screws or repairing the threads with a thread repair kit.
Maintaining Your Hand Pump
To keep your hand pump working smoothly for years to come, follow these maintenance tips:
- Regular Cleaning: Clean the pump body and hose regularly to remove dirt and debris.
- Lubrication: Lubricate the washer and other moving parts every few months.
- Storage: Store the pump in a clean, dry place.
- Check for Wear: Inspect the washer and other parts regularly for signs of wear.
Choosing the Right Hand Pump
If you’re in the market for a new hand pump, consider these factors:
- Type: Floor pumps are more efficient for inflating tires to high pressures. Mini-pumps are more portable for on-the-road repairs.
- Pressure: Choose a pump that can reach the recommended pressure for your tires.
- Valve Compatibility: Make sure the pump is compatible with both Presta and Schrader valves.
- Build Quality: Look for a pump with a durable construction and high-quality materials.
Here’s a comparison table of different hand pump types:
| Type | Pros | Cons | Best For |
|---|---|---|---|
| Floor Pump | Efficient, high pressure, stable | Less portable, more expensive | Home use, serious cyclists |
| Mini-Pump | Portable, lightweight, inexpensive | Less efficient, lower pressure | On-the-road repairs, casual cyclists |
| Frame-Mounted Pump | Convenient, always available | Can be bulky, may interfere with riding | Everyday commuters, touring cyclists |
FAQ: Replacing Washers in Hand Pumps
Here are some frequently asked questions about replacing washers in hand pumps.
What happens if I don’t replace the washer?
If you don’t replace a worn washer, your pump will lose pressure, making it difficult to inflate your tires. You’ll have to work harder, and it may take much longer to reach the desired pressure. Eventually, the pump may stop working altogether.
How often should I replace the washer?
The frequency depends on how often you use your pump. As a general rule, check the washer every six months to a year. If you notice any signs of wear, such as cracks or flattening, replace it immediately.
Can I use any washer as a replacement?
No, you should only use a washer that is the correct size and material for your pump. Using the wrong washer can damage the pump or prevent it from sealing properly.
Where can I buy replacement washers?
You can buy replacement washers at most bicycle shops or online retailers that sell bicycle parts. Make sure to specify the make and model of your pump when ordering.
Do I need any special tools to replace the washer?
You’ll need a few basic tools, such as screwdrivers, pliers, and an adjustable wrench. A small flathead screwdriver or pick can be helpful for removing the old washer.
Can I upgrade to a better washer material?
Yes, you can often upgrade to a more durable washer material, such as leather or Teflon. However, make sure the new material is compatible with your pump and won’t damage any other parts.
Is it worth replacing the washer, or should I just buy a new pump?
Replacing the washer is almost always worth it, as it’s a simple and inexpensive repair. A new washer typically costs only a few dollars, while a new pump can cost much more. Plus, repairing your pump is more environmentally friendly than throwing it away.
Conclusion
Replacing the washer in your hand pump is a simple and rewarding task. It’s a great way to save money, extend the life of your pump, and keep your tires properly inflated. By following the steps outlined in this guide, you can easily tackle this repair yourself. So, grab your tools, find the right washer, and get your pump back in top shape. Happy pumping!


