
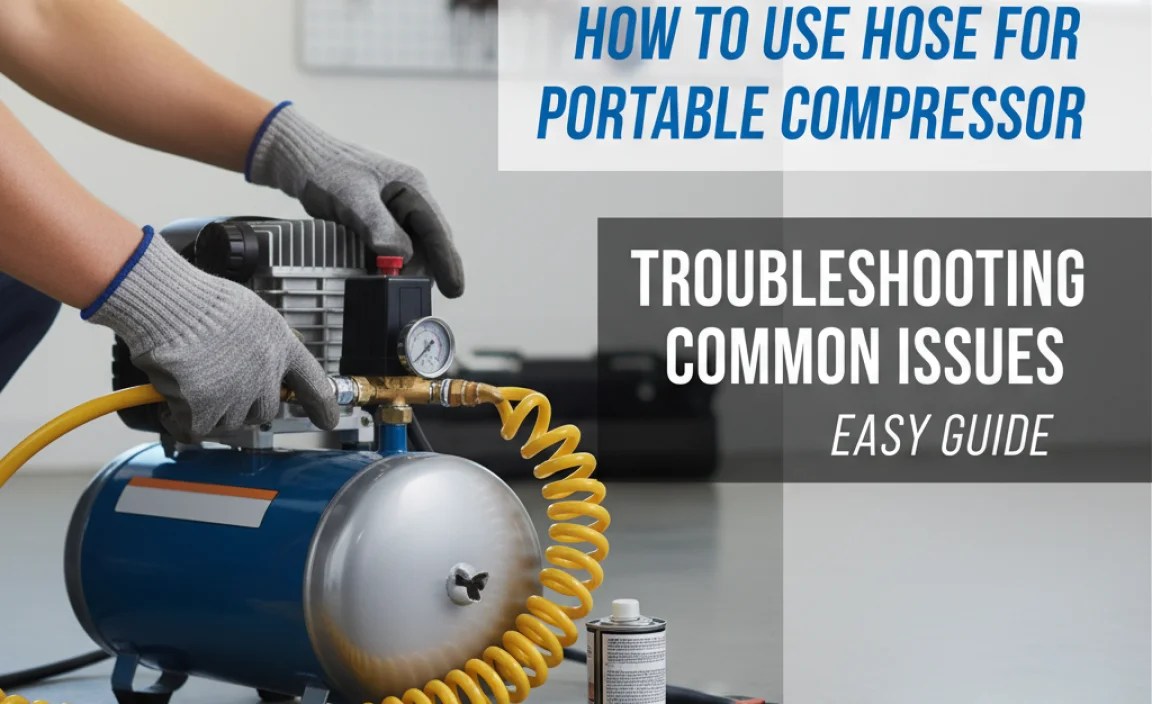
How to Use Hose for Portable Compressor: Easy Guide
Quick Summary: Using a hose with your portable compressor is simple! First, ensure the hose is compatible with your compressor’s fitting. Attach the hose securely, usually by screwing it on or using a quick-connect mechanism. Check for leaks, set the correct pressure, and you’re ready to inflate tires, power air tools, or complete other tasks. Always disconnect and store the hose properly after use to prolong its life.
Portable air compressors are incredibly handy for everything from inflating bike tires to powering pneumatic tools. But to get the most out of them, you need to know how to properly connect and use an air hose. It might seem straightforward, but a few key steps can make the process smoother and safer, and prevent annoying air leaks. Don’t worry, it’s easier than you think, and I’ll guide you through each step.
In this guide, I’ll walk you through selecting the right hose, connecting it to your compressor, using it safely, and maintaining it for long-term use. By the end, you’ll be confidently using your air hose to tackle any task.
Choosing the Right Air Hose

Selecting the correct air hose is crucial for both performance and safety. Here’s what to consider:
Material
Air hoses come in various materials, each with its pros and cons:
- Rubber: Highly durable and flexible, even in cold weather. Great for heavy-duty use but can be heavier and more expensive.
- PVC (Polyvinyl Chloride): Lightweight and affordable. Good for general use but can become stiff in cold conditions and less durable than rubber.
- Polyurethane: Offers a good balance of flexibility and durability. Resistant to abrasion and chemicals, making it a versatile option.
- Hybrid (Rubber/PVC Blend): Combines the best qualities of both materials – lightweight, flexible, and durable.
Length
Consider the distance you’ll need to reach from your compressor to the task at hand. Common lengths include 25, 50, and 100 feet. A longer hose provides greater reach but can reduce air pressure slightly.
Diameter
The diameter of the hose affects airflow. Common diameters are 1/4 inch and 3/8 inch. For most bike-related tasks and light-duty air tools, a 1/4-inch hose is sufficient. For more demanding tools, a 3/8-inch hose is preferable to maintain adequate pressure and airflow. Check your tool’s requirements to ensure compatibility.
Fittings
Air hoses use either threaded or quick-connect fittings. Threaded fittings (usually NPT – National Pipe Thread) require you to screw the hose onto the compressor and tool. Quick-connect fittings allow for fast and easy connections and disconnections. Ensure the fittings are compatible with your compressor and tools.
Pressure Rating (PSI)
Every air hose has a maximum pressure rating, measured in pounds per square inch (PSI). Make sure the hose’s PSI rating exceeds the maximum pressure output of your compressor and the requirements of your air tools. Using a hose with a lower PSI rating can lead to bursts and potential injury. A good rule of thumb is to choose a hose with a PSI rating at least 50% higher than your compressor’s maximum output.
Connecting the Air Hose to Your Compressor

Once you’ve selected the right hose, connecting it to your compressor is the next step. Here’s how to do it:
Step 1: Prepare the Compressor
Before connecting the hose, make sure your compressor is turned off and unplugged. This prevents accidental start-ups while you’re working. Locate the air outlet on the compressor. It’s usually a threaded fitting or a quick-connect port.
Step 2: Attach the Hose
The method for attaching the hose depends on the type of fitting:
- Threaded Fittings: Align the hose fitting with the compressor outlet. Screw the hose onto the outlet, turning it clockwise until it’s snug. Avoid overtightening, which can damage the threads. You may want to use Teflon tape on the threads to ensure a tight, leak-free seal.
- Quick-Connect Fittings: Pull back the collar on the quick-connect coupler on the compressor. Insert the hose fitting into the coupler until it clicks into place. Release the collar to lock the hose in position.
Step 3: Check for Leaks
After connecting the hose, turn on the compressor and let it build pressure. Listen for any hissing sounds near the connection points, which indicate an air leak. If you detect a leak, turn off the compressor, unplug it, and tighten the connection or reapply Teflon tape. You can also use a spray bottle with soapy water to identify leaks. Spray the connections; bubbles will form where air is escaping.
Step 4: Connect to Your Tool or Inflator
Connect the other end of the hose to your air tool or tire inflator using the same method as connecting to the compressor (either threaded or quick-connect). Ensure a secure connection to prevent leaks and maintain consistent airflow.
Using the Air Hose Safely

Safety is paramount when using air compressors and hoses. Here are some guidelines to follow:
Wear Safety Gear
Always wear safety glasses to protect your eyes from debris that can be propelled by the airflow. If you’re using air tools that generate noise, wear hearing protection as well. [https://www.osha.gov/](OSHA) provides detailed guidelines on workplace safety, including the use of personal protective equipment (PPE).
Maintain Hose Condition
Regularly inspect your air hose for cracks, cuts, or abrasions. Damaged hoses can burst under pressure, causing injury. Replace the hose immediately if you find any damage. Also, ensure the hose is free of kinks or twists, which can restrict airflow and damage the hose.
Set the Correct Pressure
Before using any air tool or inflator, check its pressure requirements and adjust the compressor’s regulator accordingly. Over-pressurizing can damage the tool or the item you’re inflating, and it can also be dangerous. Use the compressor’s pressure gauge to monitor the output.
Avoid Overloading the Compressor
Be mindful of the compressor’s duty cycle, which is the amount of time it can run continuously before needing to cool down. Overloading the compressor can cause it to overheat and fail. If you’re using air tools for extended periods, allow the compressor to cool down periodically.
Disconnect Properly
When you’re finished using the air hose, turn off the compressor and bleed the air from the hose before disconnecting it. This reduces the pressure and prevents the hose from whipping around when you disconnect it. To bleed the air, you can use the pressure release valve on the compressor or carefully disconnect the hose from the tool while pointing it away from yourself and others.
Maintaining Your Air Hose

Proper maintenance extends the life of your air hose and ensures safe operation. Here are some tips:
Store the Hose Correctly
When not in use, store the air hose in a cool, dry place away from direct sunlight and extreme temperatures. Coil the hose neatly to prevent kinks and tangles. Consider using a hose reel or hanger to keep it organized and off the floor.
Clean the Hose Regularly
Periodically clean your air hose with a mild soap and water solution to remove dirt, oil, and grime. Rinse thoroughly and allow it to dry completely before storing. Avoid using harsh chemicals or solvents, which can damage the hose material.
Inspect Fittings
Regularly inspect the hose fittings for corrosion, damage, or leaks. Clean the fittings with a wire brush to remove any buildup. If the fittings are damaged, replace them promptly to prevent air leaks and ensure a secure connection.
Drain Moisture from the Compressor
Air compressors generate moisture, which can accumulate in the tank and hoses. Drain the compressor tank regularly to remove this moisture, preventing rust and corrosion. Most compressors have a drain valve at the bottom of the tank. Open the valve and allow the water to drain out completely.
Troubleshooting Common Issues
Even with careful use and maintenance, you may encounter some common issues with your air hose. Here’s how to troubleshoot them:
Air Leaks
Air leaks are a common problem, usually occurring at the hose connections. To fix a leak, first, turn off and unplug the compressor. Tighten the fittings or reapply Teflon tape to the threads. If the leak persists, inspect the hose for damage and replace it if necessary.
Reduced Airflow
Reduced airflow can be caused by kinks in the hose, a clogged air filter on the compressor, or a malfunctioning pressure regulator. Straighten any kinks in the hose and clean or replace the air filter. Check the pressure regulator to ensure it’s set correctly and functioning properly.
Hose Bursting
A hose burst is usually due to exceeding the hose’s pressure rating or using a damaged hose. Always use a hose with a PSI rating that exceeds your compressor’s maximum output. Regularly inspect the hose for damage and replace it if you find any cracks or abrasions.
Fitting Compatibility
If you’re having trouble connecting the hose to your compressor or tools, check the fitting types to ensure they’re compatible. NPT fittings come in different sizes, so make sure you’re using the correct size. If you’re using quick-connect fittings, ensure they’re the same type and size.
Air Hose Types and Their Applications
Here’s a table summarizing different air hose types and their ideal applications:
| Hose Type | Material | Pros | Cons | Ideal Applications |
|---|---|---|---|---|
| Rubber | Rubber | Durable, flexible, resists abrasion | Heavy, more expensive | Heavy-duty use, construction, automotive |
| PVC | Polyvinyl Chloride | Lightweight, affordable | Stiff in cold, less durable | General use, inflating tires, light air tools |
| Polyurethane | Polyurethane | Flexible, durable, chemical resistant | Can be more expensive than PVC | Versatile, indoor/outdoor use |
| Hybrid | Rubber/PVC Blend | Lightweight, flexible, durable | May not be as durable as pure rubber | All-purpose, DIY projects, home use |
Essential Tools for Air Hose Maintenance
Having the right tools on hand makes air hose maintenance easier and more effective. Here’s a list of essential tools:
- Teflon Tape: For creating a tight seal on threaded fittings.
- Wire Brush: For cleaning corrosion and debris from fittings.
- Hose Reel or Hanger: For organized storage and preventing kinks.
- Safety Glasses: For protecting your eyes from debris.
- Adjustable Wrench: For tightening and loosening fittings.
- Soapy Water Spray Bottle: For detecting air leaks.
Understanding Air Compressor Fittings and Connectors
Different types of fittings and connectors are used with air hoses and compressors. Here’s a breakdown of the most common ones:
- NPT (National Pipe Thread): A standard tapered thread used for making tight seals. Requires Teflon tape or pipe sealant.
- Quick-Connect Couplers: Allow for fast and easy connections and disconnections. Come in various sizes and styles.
- Universal Couplers: Compatible with multiple types of quick-connect plugs.
- Air Chucks: Used for inflating tires and other inflatable items. Can be clip-on or threaded.
- Blow Guns: Used for blowing away dust, debris, and liquids.
Step-by-Step Guide: Inflating a Tire with an Air Hose
Inflating a tire is one of the most common uses for an air hose. Here’s a step-by-step guide:
- Connect the Air Hose: Attach the air hose to your compressor and ensure it’s securely connected.
- Attach the Air Chuck: Connect the air chuck to the end of the hose. Make sure it’s compatible with your tire valve (Schrader or Presta).
- Set the Correct Pressure: Check the recommended tire pressure (usually found on the tire sidewall or in your vehicle’s manual) and set the compressor’s regulator accordingly.
- Inflate the Tire: Attach the air chuck to the tire valve and start inflating the tire. Monitor the pressure gauge on the chuck or the compressor.
- Check the Pressure: Once you reach the desired pressure, remove the chuck and check the tire pressure with a separate gauge to ensure accuracy.
- Adjust if Necessary: If the pressure is too high, release some air by pressing the valve core. If it’s too low, add more air until you reach the correct pressure.
Safety Tips for Working with Compressed Air
Working with compressed air can be dangerous if proper precautions aren’t taken. Here are some essential safety tips:
- Never Point the Air Hose at Yourself or Others: Compressed air can cause serious injury if directed at the skin or eyes.
- Avoid Exceeding Pressure Limits: Always stay within the pressure limits of your air tools and hoses.
- Use Proper Ventilation: When using air tools that produce dust or fumes, work in a well-ventilated area.
- Inspect Equipment Regularly: Check your air compressor, hoses, and tools for damage before each use.
- Wear Appropriate Safety Gear: Always wear safety glasses and hearing protection when working with compressed air.
- Disconnect Air Supply When Not in Use: Always disconnect the air hose and bleed the pressure when you’re finished working.
FAQ: Using a Hose for Portable Compressor
1. What size air hose do I need for my portable compressor?
The best size depends on what you’re using it for. For inflating tires and small tasks, a 1/4-inch diameter hose is usually fine. For heavier-duty air tools, go with a 3/8-inch hose to ensure enough airflow.
2. How do I prevent air leaks at the hose connection?
Make sure the fittings are properly tightened. Use Teflon tape on threaded connections to create a better seal. If leaks persist, inspect the hose and fittings for damage and replace if needed.
3. Can I use an extension cord with my portable air compressor?
It’s best to plug your compressor directly into a wall outlet. If you must use an extension cord, choose a heavy-duty one that’s rated for outdoor use and has the correct amperage to handle the compressor’s power requirements. A light-duty cord can cause voltage drop and damage the compressor.
4. How often should I drain the moisture from my air compressor tank?
Drain the tank after each use, or at least once a day if you’re using the compressor frequently. This prevents rust and corrosion and ensures the compressor operates efficiently.
5. What’s the best way to store my air hose when not in use?
Coil the hose neatly and store it in a cool, dry place away from direct sunlight. Use a hose reel or hanger to keep it organized and prevent kinks. Avoid storing it in areas where it can be exposed to extreme temperatures or chemicals.
6. How do I know if my air hose is damaged and needs to be replaced?
Inspect the hose regularly for cracks, cuts, abrasions, or bulges. If you see any of these signs, replace the hose immediately. Also, check the fittings for corrosion or damage.
7. Can I use any type of air hose with my portable compressor?
No, you should only use air hoses that are specifically designed for use with air compressors. These hoses are made to withstand the high pressure and are equipped with the correct fittings. Using a garden hose or other type of hose can be dangerous and may damage your compressor.
Conclusion
Using an air hose with your portable compressor doesn’t have to be complicated. By choosing the right hose, connecting it properly, using it safely, and maintaining it regularly, you can ensure optimal performance and longevity. Remember to always wear safety gear, set the correct pressure, and inspect your equipment before each use. With these tips, you’ll be well-equipped to tackle any task that requires compressed air, from inflating tires to powering air tools. Happy cycling and safe pumping!


