
How to Attach Hose to Dual Head Chuck? Easy Guide
Quick Summary: Attaching a hose to a dual head chuck is straightforward. Ensure the chuck and hose fittings match (threaded or push-on). For threaded connections, screw the hose onto the chuck until snug. For push-on fittings, simply push the hose onto the chuck’s barb until secure. Always check for leaks by inflating a tire briefly.
Ever struggled to get your bike pump hose properly connected to your dual head chuck? It’s a common frustration, especially when you’re eager to hit the road or trail. A loose connection means wasted effort and inaccurate tire pressure readings. But don’t worry, it’s usually a simple fix.
This guide will walk you through the process step-by-step, ensuring a secure and airtight fit every time. We’ll cover different types of connections and troubleshooting tips to get you pumping like a pro in no time. Let’s get started!
Understanding Dual Head Chucks and Hose Connections

Before diving into the “how-to,” let’s clarify what a dual head chuck is and the common types of hose connections you might encounter. This foundational knowledge will make the attachment process much smoother.
What is a Dual Head Chuck?
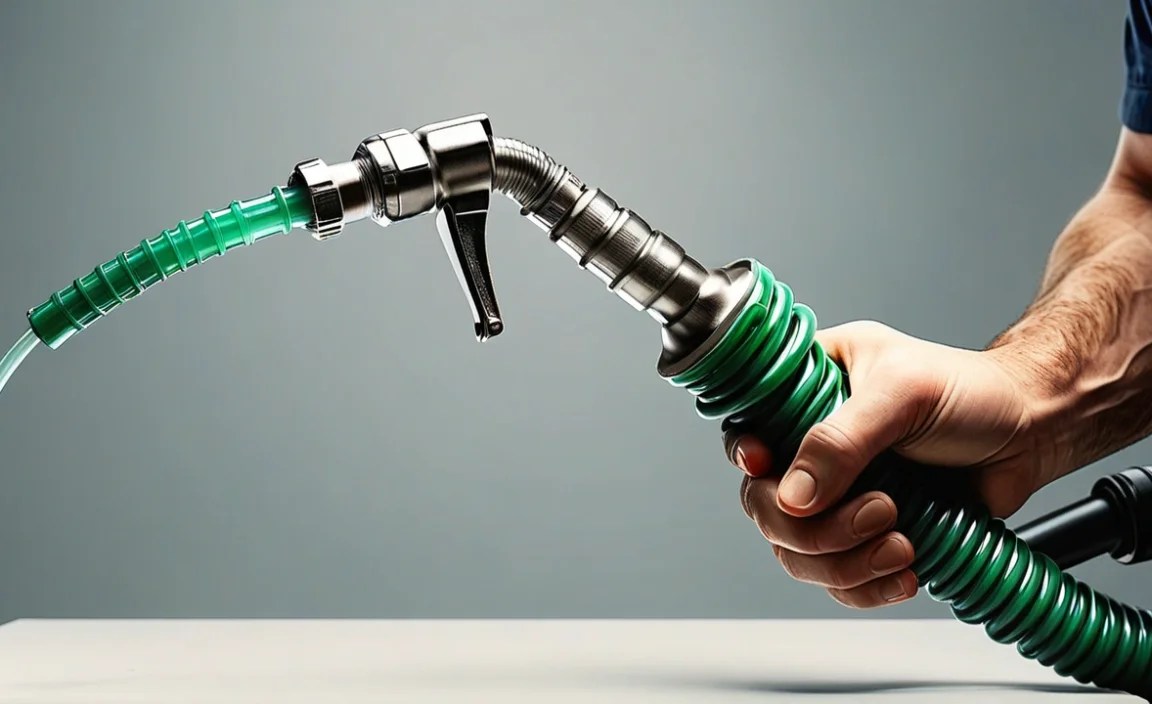
A dual head chuck is a versatile tool found on many bike pumps. It features two openings: one designed for Schrader valves (the same type found on car tires) and another for Presta valves (common on road and high-performance bikes). This eliminates the need for separate chucks or adapters.
The dual head design allows you to quickly switch between valve types, making it ideal for households with multiple bikes or for bike shops that service a variety of wheels.
Types of Hose Connections
The way your hose attaches to the chuck can vary. Here are the most common types:
- Threaded: These connections use screw threads to secure the hose. The hose end and the chuck have matching threads that you tighten to create a seal.
- Push-On (Barb): These connections use a barbed fitting on the chuck. You simply push the hose onto the barb, and the barbs grip the inside of the hose to hold it in place. These often use a hose clamp for extra security.
- Quick-Connect: Found more often on air compressors, these use a spring-loaded mechanism to lock the hose in place. They are less common on bike pumps.
Tools You’ll Need

Fortunately, attaching a hose to a dual head chuck usually doesn’t require many tools. Here’s a basic list:
- Your Bike Pump’s Dual Head Chuck and Hose: Obviously essential!
- Wrench (if needed): Some threaded connections may require a wrench for tightening. An adjustable wrench or the correct size open-end wrench will work.
- Screwdriver or Pliers (if needed): If you’re using a hose clamp, you’ll need a screwdriver (usually flathead or Phillips head) or pliers to tighten it.
- Teflon Tape (optional): For threaded connections, Teflon tape can help create a tighter seal and prevent leaks.
- Soapy Water (for leak testing): A mixture of soap and water in a spray bottle can help you identify leaks after the connection is made.
Step-by-Step Guide: Attaching the Hose

Now, let’s get to the actual process. Follow these steps based on the type of connection you have.
Method 1: Threaded Connection
- Inspect the Threads: Check both the hose end and the chuck for any damage or debris. Clean the threads if necessary.
- Apply Teflon Tape (Optional): Wrap Teflon tape clockwise around the threads of the chuck. Two or three layers should be sufficient. This helps create a tighter, leak-proof seal.
- Align the Hose and Chuck: Carefully align the hose end with the chuck. Make sure the threads are properly aligned to avoid cross-threading.
- Hand-Tighten: Begin tightening the hose onto the chuck by hand. Turn the hose clockwise until it’s snug.
- Use a Wrench (If Needed): If you can’t get the connection tight enough by hand, use a wrench to gently tighten it further. Be careful not to overtighten, as this can damage the threads.
- Test for Leaks: Inflate a tire slightly and listen for any hissing sounds near the connection. You can also spray the connection with soapy water. If bubbles form, there’s a leak. Tighten the connection further or reapply Teflon tape if necessary.
Method 2: Push-On (Barb) Connection
- Prepare the Hose: Ensure the end of the hose is clean and cut squarely. A clean cut will make it easier to push onto the barb.
- Push the Hose onto the Barb: Firmly push the hose onto the barb of the chuck. You may need to use some force to get it all the way on.
- Secure with a Hose Clamp: Position the hose clamp around the hose, close to the end where it connects to the barb.
- Tighten the Hose Clamp: Use a screwdriver or pliers to tighten the hose clamp. The clamp should be snug enough to securely grip the hose without damaging it.
- Test for Leaks: Inflate a tire slightly and listen for any hissing sounds near the connection. Spray the connection with soapy water. If bubbles form, tighten the hose clamp further or reposition it.
Method 3: Quick-Connect (Less Common)
- Inspect the Connection: Check the quick-connect fitting on both the hose and the chuck for any damage or debris.
- Align and Insert: Align the hose end with the quick-connect fitting on the chuck. You’ll usually need to pull back on a collar or sleeve on the fitting.
- Release and Lock: Insert the hose end into the fitting and release the collar or sleeve. It should spring back into place, locking the hose in position.
- Test the Connection: Gently pull on the hose to ensure it’s securely locked in place. It shouldn’t come loose.
- Test for Leaks: Inflate a tire slightly and listen for any hissing sounds near the connection. Spray the connection with soapy water to check for leaks. If there’s a leak, try disconnecting and reconnecting the hose, ensuring it’s fully seated in the fitting.
Troubleshooting Common Issues
Even with the best instructions, you might run into snags. Here are some common problems and how to solve them:
- Leaks at the Connection: The most common issue. Try tightening the connection further, applying Teflon tape (for threaded connections), or repositioning/tightening the hose clamp (for push-on connections).
- Hose Won’t Stay On: For push-on connections, make sure the hose is pushed all the way onto the barb and that the hose clamp is tight enough. If the hose is old or damaged, it may need to be replaced.
- Cross-Threading: If you’re having trouble tightening a threaded connection, stop and check for cross-threading. Forcing it will damage the threads. Carefully realign the threads and try again.
- Damaged Threads: If the threads on the hose or chuck are damaged, you may need to replace the damaged component.
Choosing the Right Hose and Chuck

Sometimes, the problem isn’t the attachment, but the equipment itself. Here’s what to consider when selecting a hose and chuck:
- Compatibility: Ensure the hose and chuck are compatible with your bike pump and your tire valves (Schrader or Presta).
- Material: Look for hoses made from durable materials like reinforced rubber or braided nylon. These will last longer and resist kinking.
- Length: Choose a hose length that’s comfortable for you. A longer hose can be more convenient, but it can also reduce pumping efficiency slightly.
- Chuck Quality: Invest in a high-quality chuck made from durable materials like metal. Plastic chucks can wear out quickly.
Here’s a quick guide to help you select the right hose material:
| Hose Material | Pros | Cons | Best For |
|---|---|---|---|
| Rubber | Flexible, inexpensive | Can crack over time, less durable | Basic pumps, occasional use |
| Reinforced Rubber | More durable than standard rubber, resists kinking | Slightly more expensive | Mid-range pumps, regular use |
| Braided Nylon | Very durable, resists kinking and abrasion | More expensive | High-end pumps, frequent use |
Maintaining Your Hose and Chuck
Proper maintenance will extend the life of your hose and chuck and ensure reliable performance. Here are some tips:
- Inspect Regularly: Check the hose and chuck for any signs of damage, such as cracks, cuts, or worn threads.
- Clean Periodically: Clean the hose and chuck with a damp cloth to remove dirt and grime.
- Store Properly: Store your bike pump in a cool, dry place to protect the hose and chuck from the elements.
- Replace When Necessary: If the hose or chuck is damaged or worn, replace it promptly to avoid leaks and ensure accurate tire pressure readings.
FAQ: Attaching Hose to Dual Head Chuck
Here are some frequently asked questions to further clarify the process:
Q: What if my hose is too short?
A: You can purchase a longer replacement hose that is compatible with your pump and chuck. Make sure the fittings match.
Q: How do I know if my chuck is compatible with my valve?
A: Dual head chucks are designed to work with both Schrader and Presta valves. One head is specifically sized for each valve type. Look for markings or diagrams on the chuck to identify the correct head.
Q: Can I use Teflon tape on a push-on connection?
A: No, Teflon tape is only for threaded connections. It won’t help with push-on connections and may even interfere with the seal.
Q: My hose keeps kinking. What can I do?
A: Try using a hose with a swivel fitting, which allows the hose to rotate freely and prevents kinking. Alternatively, be mindful of how you route the hose when pumping.
Q: How often should I replace my bike pump hose?
A: It depends on how frequently you use your pump and the quality of the hose. Inspect the hose regularly for signs of wear and tear. Replace it if you notice any cracks, cuts, or leaks.
Q: What type of wrench should I use for a threaded connection?
A: An adjustable wrench or the correct size open-end wrench will work. Be careful not to overtighten the connection, as this can damage the threads.
Q: Can I convert a threaded connection to a push-on connection?
A: It’s generally not recommended to convert connection types, as it can compromise the seal and potentially damage the pump or chuck. It’s best to use the type of connection that’s designed for your pump and chuck.
Conclusion
Attaching a hose to a dual head chuck doesn’t have to be a headache. By understanding the different types of connections and following these simple steps, you can ensure a secure and leak-free fit every time. Remember to inspect your equipment regularly and replace any worn or damaged parts. With a little practice, you’ll be pumping up your tires like a seasoned pro, ready to tackle any road or trail! Now get out there and enjoy the ride!


