
How to Attach Chuck to Shop Compressor: Easy Guide
Quick Summary: Attaching a chuck to your shop compressor is easy! First, figure out the size of your compressor’s air outlet and your air chuck’s inlet. Then, pick the right fittings or adapters to connect them securely. Wrap threads with Teflon tape, tighten the connection with wrenches, and check for air leaks with soapy water. That’s it—you’re ready to inflate tires and power air tools!
Ever struggled to get the right air pressure in your tires or use your air tools because your air chuck just won’t connect to your shop compressor? It’s a common headache! Getting the right connection is key for inflating tires, powering nail guns, and a bunch of other jobs. Don’t worry, it’s easier than you think. This guide will walk you through each step, so you can get your compressor up and running smoothly. We’ll cover everything from figuring out the right fittings to making sure you’ve got a leak-proof seal. Let’s get started!
Understanding Air Compressor Fittings and Chucks

Before diving in, let’s get familiar with the parts we’re dealing with. Knowing the different types of fittings and chucks will make the whole process much smoother.
What is an Air Compressor Fitting?
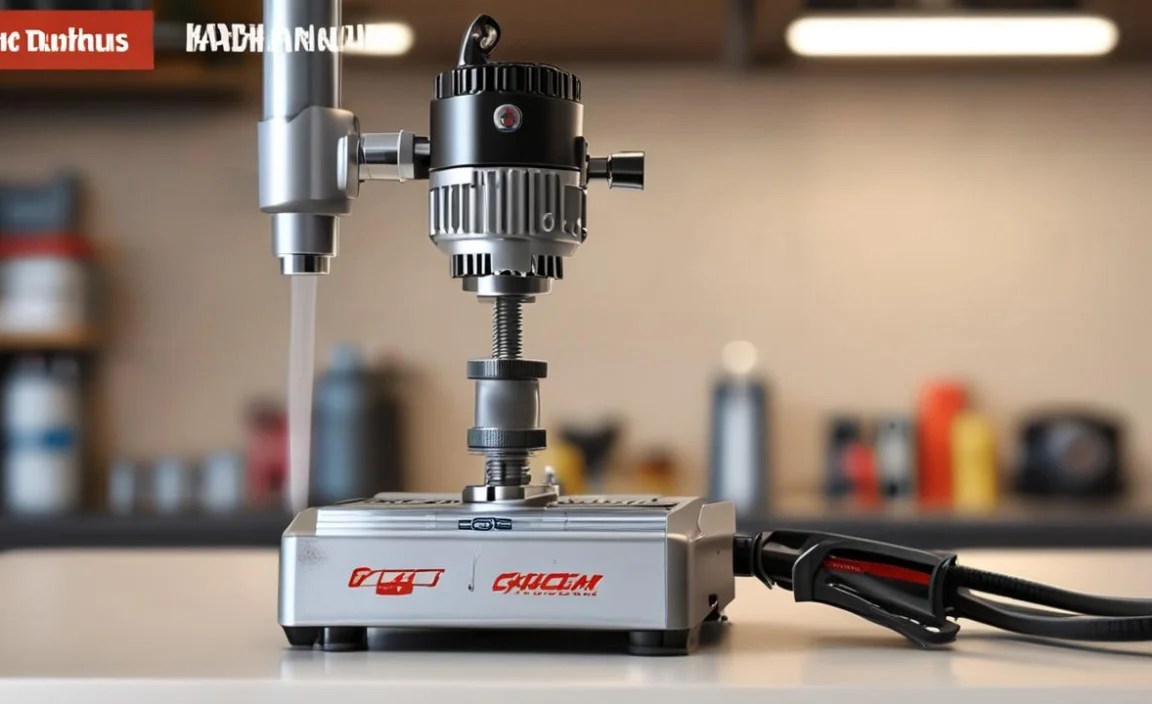
An air compressor fitting is a connector that joins the air compressor to hoses, tools, and accessories. They come in various sizes and types to ensure a tight, leak-proof seal.
- NPT (National Pipe Thread): A common tapered thread used in North America. NPT fittings seal as they are tightened.
- BSP (British Standard Pipe): Similar to NPT but not interchangeable. BSP fittings are more common outside of North America.
- Quick-Connect Fittings: Allow for fast and easy attachment and detachment of hoses and tools.
Types of Air Chucks
An air chuck is what you attach to a tire valve or air tool to deliver compressed air. Here are a few common types:
- Clip-on Chuck: Attaches to the valve stem with a clip, allowing hands-free inflation.
- Thread-on Chuck: Screws onto the valve stem for a secure connection.
- Dual-Foot Chuck: Designed for use on dual wheels, like those found on trucks and RVs.
Common Sizes and Threads
Knowing the sizes and threads of your fittings is crucial for a proper fit. Here are some common sizes:
- 1/4″ NPT: A very common size for air compressors and tools.
- 3/8″ NPT: Used for higher volume applications.
- 1/2″ NPT: Typically found on larger compressors and equipment.
Tools and Materials You’ll Need

Before you start, gather all the necessary tools and materials. Having everything on hand will make the process go much faster and smoother.
- Air Chuck: Choose the right type for your needs (clip-on, thread-on, etc.).
- Fittings and Adapters: To match the compressor outlet to the air chuck inlet.
- Teflon Tape (Thread Seal Tape): To create a leak-proof seal.
- Two Wrenches: To tighten the fittings securely.
- Soapy Water in a Spray Bottle: To check for leaks.
- Safety Glasses: To protect your eyes.
- Gloves: To protect your hands.
Step-by-Step Guide: Attaching a Chuck to Your Shop Compressor

Now, let’s get to the main event! Follow these steps to attach your air chuck to your shop compressor.
Step 1: Identify the Compressor Outlet Size
First, you need to know the size and type of the outlet on your air compressor. This is usually an NPT fitting, but it’s good to double-check.
- Check the Compressor Manual: The manual should specify the outlet size and thread type.
- Measure the Outlet: If you don’t have the manual, use a ruler or measuring tape to estimate the diameter of the outlet.
- Identify the Thread Type: NPT threads are tapered, while BSP threads are parallel.
Step 2: Select the Correct Fittings and Adapters
Based on the compressor outlet size and the air chuck inlet size, choose the appropriate fittings and adapters. You might need a combination of fittings to make the connection.
- Matching Sizes: If both the compressor outlet and air chuck inlet are the same size and thread type, you can connect them directly with a fitting.
- Adapters: If the sizes or thread types are different, use an adapter to bridge the gap. For example, you might need a 1/4″ NPT to 3/8″ NPT adapter.
- Quick-Connect Fittings: Consider using quick-connect fittings for easy attachment and detachment.
Step 3: Prepare the Threads
Before connecting the fittings, prepare the threads with Teflon tape. This will help create a tight, leak-proof seal.
- Clean the Threads: Make sure the threads are clean and free of any debris.
- Wrap with Teflon Tape: Wrap the male threads with Teflon tape in a clockwise direction (when looking at the end of the fitting). Apply two to three layers.
- Smooth the Tape: Press the tape into the threads with your finger to ensure it adheres properly.
Step 4: Connect the Fittings
Now, it’s time to connect the fittings to the compressor outlet and the air chuck inlet.
- Hand-Tighten: Start by hand-tightening the fittings. This will help prevent cross-threading.
- Use Wrenches: Use two wrenches to tighten the fittings securely. One wrench should hold the compressor outlet or air chuck, while the other tightens the fitting.
- Tighten Snugly: Tighten the fittings until they are snug, but don’t overtighten. Overtightening can damage the threads or the fitting itself.
Step 5: Check for Leaks
After connecting the fittings, it’s important to check for leaks. Leaks can reduce the efficiency of your compressor and waste energy.
- Prepare Soapy Water: Mix some dish soap with water in a spray bottle.
- Spray the Connections: Spray the soapy water on all the connections.
- Look for Bubbles: If there are any leaks, you’ll see bubbles forming in the soapy water.
- Tighten or Re-Tape: If you find any leaks, tighten the fittings a bit more. If the leak persists, disconnect the fittings, re-apply Teflon tape, and try again.
Troubleshooting Common Issues
Sometimes, things don’t go as planned. Here are some common issues you might encounter and how to fix them.
Leaking Connections
If you’re experiencing leaks, here’s what to do:
- Check Teflon Tape: Make sure the Teflon tape is applied correctly and is not damaged.
- Tighten Fittings: Ensure the fittings are tightened securely, but not overtightened.
- Inspect Fittings: Check the fittings for any cracks or damage. Replace them if necessary.
Incorrect Fitting Sizes
If the fittings don’t seem to fit, double-check the sizes and thread types.
- Verify Sizes: Use a ruler or measuring tape to accurately measure the outlet and inlet sizes.
- Check Thread Types: Make sure you’re using the correct thread type (NPT, BSP, etc.).
- Use Adapters: If necessary, use adapters to bridge the gap between different sizes or thread types.
Cross-Threading
Cross-threading can damage the threads and prevent a tight seal. Here’s how to avoid it:
- Start by Hand: Always start tightening the fittings by hand to prevent cross-threading.
- Apply Even Pressure: When using wrenches, apply even pressure to avoid damaging the threads.
- Clean Threads: Make sure the threads are clean and free of any debris before connecting the fittings.
Advanced Tips for Air Compressor Maintenance

Keeping your air compressor in good condition will prolong its life and ensure it operates efficiently. Here are some advanced maintenance tips.
Regularly Drain the Tank
Condensation can build up in the air compressor tank, leading to rust and corrosion. Drain the tank regularly to remove this moisture.
- Locate the Drain Valve: The drain valve is usually located at the bottom of the tank.
- Open the Valve: Open the drain valve and let the water drain out completely.
- Close the Valve: Close the drain valve tightly after draining the tank.
Check and Replace the Air Filter
The air filter prevents dust and debris from entering the compressor. A dirty air filter can reduce the compressor’s efficiency and lifespan.
- Locate the Air Filter: The air filter is usually located near the compressor’s intake.
- Inspect the Filter: Check the filter for dirt and debris.
- Clean or Replace: Clean the filter if it’s lightly soiled, or replace it if it’s heavily soiled.
Inspect Hoses and Fittings
Regularly inspect the hoses and fittings for any signs of wear and tear. Replace them if necessary to prevent leaks and maintain optimal performance.
- Check for Cracks: Look for any cracks or damage in the hoses.
- Inspect Fittings: Check the fittings for leaks or corrosion.
- Replace as Needed: Replace any damaged hoses or fittings promptly.
Table: Common Air Compressor Fitting Sizes and Uses
| Fitting Size | Common Uses | Typical Applications |
|---|---|---|
| 1/4″ NPT | Air tools, smaller hoses | Inflating tires, powering airbrushes |
| 3/8″ NPT | Larger air tools, longer hoses | Operating impact wrenches, spray painting |
| 1/2″ NPT | High-volume applications, large compressors | Running multiple tools simultaneously, industrial use |
Table: Troubleshooting Air Compressor Connections
| Issue | Possible Cause | Solution |
|---|---|---|
| Leaking connection | Insufficient Teflon tape, loose fitting, damaged threads | Apply more Teflon tape, tighten the fitting, inspect and replace damaged parts |
| Incorrect fitting size | Mismatched sizes, wrong thread type | Verify sizes and thread types, use adapters |
| Cross-threading | Starting at an angle, applying too much force | Start by hand, apply even pressure, clean threads |
FAQ: Attaching Chuck to Shop Compressor
What size fitting do I need for my air compressor?
The fitting size depends on your compressor’s outlet and the tool or hose you’re connecting. 1/4″ NPT is common, but check your manual or measure to be sure.
How much Teflon tape should I use?
Wrap the male threads with two to three layers of Teflon tape, going clockwise when looking at the end of the fitting. Smooth it down for good contact.
Why is my air compressor leaking after I attached the chuck?
Leaks usually happen because of loose fittings, damaged Teflon tape, or cross-threading. Tighten the connection, re-tape, and make sure you’re starting the threads straight.
Can I use thread sealant instead of Teflon tape?
Yes, thread sealant is an alternative to Teflon tape. Apply it evenly to the male threads for a leak-proof seal.
How do I know if I’ve overtightened the fittings?
Overtightening can damage the threads or fitting. If it feels excessively tight or you hear creaking, you may have gone too far. Loosen slightly and retighten carefully.
What’s the difference between NPT and BSP fittings?
NPT (National Pipe Thread) is a tapered thread standard in North America, while BSP (British Standard Pipe) is common elsewhere. They’re not interchangeable due to different thread angles.
Do I need to drain my air compressor tank regularly?
Yes, drain the tank regularly to remove condensation. This prevents rust and corrosion, extending the life of your compressor.
Conclusion
Attaching an air chuck to your shop compressor doesn’t have to be a daunting task. By understanding the different types of fittings, preparing the threads properly, and checking for leaks, you can ensure a secure and efficient connection. Remember to take your time, use the right tools, and follow the steps outlined in this guide. With a little patience and attention to detail, you’ll have your compressor up and running in no time, ready to tackle any job. So, grab your tools, get to work, and enjoy the convenience of a properly connected air compressor!


