
How to Use Hose for Shock Pump: Easy Guide
Quick Summary
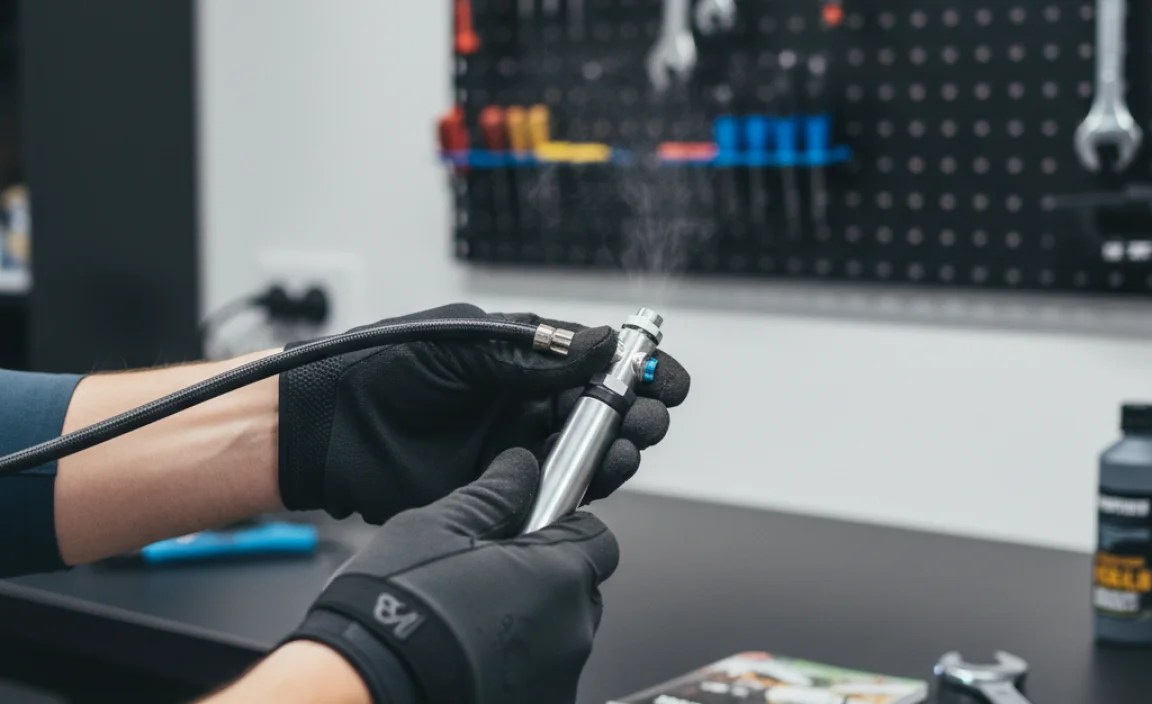
Using a hose with your shock pump is easy! First, securely attach the hose to your shock pump. Then, connect the other end of the hose to your bike’s air valve. Gently tighten until snug. Now, you can pump air into your suspension. The hose makes it easier to reach the valve and reduces stress on the valve stem. Always check the pressure with the pump’s gauge to avoid over-inflation.
Ever struggled to get your shock pump lined up just right? It’s a common headache for cyclists. Fumbling with the pump, worrying about damaging the valve – it can take the fun out of bike maintenance. A hose for your shock pump solves this! It gives you flexibility and makes inflating your shocks and forks a breeze.
In this guide, I’ll walk you through how to use a hose with your shock pump. I’ll cover everything from connecting the hose to getting the perfect pressure. Get ready for smoother rides and easier adjustments!
Understanding Shock Pumps and Hoses

Let’s start with the basics. A shock pump is a special high-pressure pump designed for inflating suspension forks and shocks on bikes. These components need precise air pressure to work correctly.
What is a Shock Pump?
A shock pump differs from a regular tire pump. It delivers a small volume of air at high pressure, often up to 300 PSI (pounds per square inch). This allows you to fine-tune the stiffness and performance of your suspension.
Key features of a shock pump include:
- High-Pressure Gauge: Displays the current pressure in the suspension component.
- Bleed Valve: A small button or screw to release small amounts of air for precise pressure adjustments.
- Specialized Nozzle: Designed to fit securely onto the Schrader valve of your fork or shock.
Why Use a Hose?
Adding a hose to your shock pump setup offers several advantages:
- Easier Access: Many suspension valves are in tight spots. A hose gives you the reach you need.
- Reduced Stress: Pumping directly onto the valve can bend or damage it. The hose reduces this risk.
- Improved Accuracy: You can focus on the gauge without awkwardly holding the pump.
Basically, a hose makes the whole process smoother and more reliable.
Essential Tools and Materials

Before you get started, gather these items:
- Shock Pump: A reliable shock pump with a pressure gauge.
- Hose Attachment: A compatible hose for your shock pump. Most pumps come with one, but you can also buy them separately.
- Clean Rags: To wipe down the valve and pump.
- Bike Stand (Optional): Makes it easier to work on your bike.
Having everything ready will make the process go much faster.
Step-by-Step Guide: Using a Hose with Your Shock Pump

Now, let’s get down to business. Here’s how to use a hose with your shock pump:
Step 1: Prepare Your Bike and Pump
First, make sure your bike is stable. If you have a bike stand, now’s the time to use it. If not, lean the bike against a wall or have someone hold it steady.
Next, inspect your shock pump. Make sure the gauge is working and the pump feels smooth. Check the hose for any cracks or damage.
Step 2: Attach the Hose to the Shock Pump
Most shock pumps have a threaded connection for the hose. Simply screw the hose onto the pump’s nozzle. Tighten it snugly by hand. Avoid using tools, which can damage the threads.
Make sure the connection is secure. You don’t want any air leaks!
Step 3: Locate the Suspension Valve
Find the Schrader valve on your suspension fork or shock. It usually has a small cap on it. Unscrew the cap and set it aside in a safe place. These caps are small and easy to lose.
Clean the valve with a clean rag to remove any dirt or debris. This will ensure a good seal.
Step 4: Connect the Hose to the Valve
Carefully attach the hose to the Schrader valve. Most hoses have a threaded connector. Screw it onto the valve until it’s snug. Be gentle – you don’t want to cross-thread it.
Some hoses have a lever or clamp to secure the connection. If yours does, engage it now.
Step 5: Start Pumping
Now, start pumping the shock pump. Watch the pressure gauge as you pump. It will take a few strokes to register any pressure. Don’t panic if it seems like nothing is happening at first.
Pump in smooth, even strokes. Avoid jerky movements, which can affect the pressure reading.
Step 6: Monitor the Pressure
Keep a close eye on the pressure gauge. Refer to your bike or suspension manufacturer’s recommendations for the correct pressure. It’s usually printed on a sticker on the fork or shock.
If you’re not sure what pressure to use, start with a lower pressure and gradually increase it until you get the desired feel.
Step 7: Fine-Tune the Pressure
If you over-inflate, use the bleed valve on the shock pump to release small amounts of air. Press the bleed valve gently and watch the gauge. Release air in short bursts to avoid letting out too much.
If you under-inflate, simply pump more air until you reach the correct pressure.
Step 8: Disconnect the Hose
Once you’ve reached the correct pressure, carefully disconnect the hose from the valve. If your hose has a lever or clamp, disengage it first.
Unscrew the hose from the valve. Be prepared for a small hiss of air as you disconnect. This is normal.
Step 9: Replace the Valve Cap
Screw the valve cap back onto the Schrader valve. Tighten it by hand. This will protect the valve from dirt and damage.
Step 10: Check Your Work
Bounce the suspension a few times to make sure it feels right. If it’s too stiff or too soft, repeat steps 5-8 to adjust the pressure.
Double-check all connections to make sure everything is secure.
Tips for Accurate Pressure Readings

Getting an accurate pressure reading is crucial for optimal suspension performance. Here are some tips:
- Use a Quality Pump: A cheap pump may not have an accurate gauge.
- Check the Gauge: Make sure the gauge is calibrated correctly. Some pumps have a calibration feature.
- Pump Slowly: Pumping too quickly can affect the pressure reading.
- Bleed Carefully: Releasing too much air at once can throw off the reading.
- Repeat if Needed: If you’re not sure about the reading, disconnect and reconnect the pump and try again.
Troubleshooting Common Issues
Sometimes, things don’t go as planned. Here are some common issues and how to fix them:
- Air Leaks: Check the hose connections. Make sure they’re tight. If the hose is damaged, replace it.
- Pump Won’t Build Pressure: Make sure the pump is properly connected to the valve. Check the pump’s seals for damage.
- Gauge Not Working: Try a different pump. The gauge may be faulty.
- Difficulty Connecting the Hose: Clean the valve and hose threads. Use a small amount of grease on the threads.
Maintaining Your Shock Pump and Hose
To keep your shock pump and hose in good condition, follow these tips:
- Clean Regularly: Wipe down the pump and hose with a clean rag after each use.
- Store Properly: Store the pump and hose in a clean, dry place.
- Inspect Regularly: Check the hose for cracks or damage. Replace it if needed.
- Lubricate: Lubricate the pump’s seals occasionally with a silicone-based lubricant.
Choosing the Right Hose and Attachments
Not all hoses are created equal. Here’s what to look for when choosing a hose:
- Compatibility: Make sure the hose is compatible with your shock pump and suspension valves.
- Length: Choose a length that’s convenient for you. A longer hose is more flexible but can be more cumbersome.
- Material: Look for a durable, high-quality material that won’t crack or leak.
- Connections: Make sure the connections are secure and easy to use.
Here’s a table to help you compare different types of hoses:
| Hose Type | Pros | Cons | Best For |
|---|---|---|---|
| Standard Hose | Affordable, widely available | Can be stiff, less flexible | General use |
| Flexible Hose | Easy to maneuver, reduces stress on valves | More expensive, may be less durable | Tight spaces, delicate valves |
| Swivel Hose | Rotates to prevent kinking, very flexible | Most expensive, can be overkill for some users | Professional mechanics, frequent adjustments |
Advanced Techniques
Once you’re comfortable with the basics, you can try these advanced techniques:
- Using a Digital Gauge: A digital gauge provides more precise pressure readings.
- Setting Sag: Sag is the amount the suspension compresses under your weight. Setting sag correctly is crucial for optimal performance.
- Experimenting with Pressure: Don’t be afraid to experiment with different pressures to find what works best for you.
Safety Precautions
Working with high-pressure air can be dangerous. Follow these safety precautions:
- Wear Eye Protection: Protect your eyes from flying debris.
- Don’t Over-Inflate: Exceeding the recommended pressure can damage your suspension components.
- Inspect Equipment: Check your pump and hose for damage before each use.
- Release Pressure Slowly: When releasing air, do it slowly and carefully.
Understanding Schrader Valves
Schrader valves are the standard type of valve used on most bike suspension systems. They’re similar to the valves used on car tires.
Key features of a Schrader valve include:
- Spring-Loaded Core: The valve core is spring-loaded, which prevents air from escaping unless it’s depressed.
- Threaded Exterior: The exterior is threaded, which allows you to attach a pump or other device.
- Valve Cap: The valve cap protects the valve from dirt and damage.
Alternatives to Using a Hose
While a hose is the best option for most situations, there are some alternatives:
- Direct Connection: You can connect the pump directly to the valve, but this can be awkward and put stress on the valve.
- Angle Adapters: These adapters allow you to connect the pump at an angle, which can be helpful in tight spaces.
Real-World Examples
Let’s look at some real-world examples of how a hose can make a difference:
- Mountain Biking: On a mountain bike, the suspension valves are often located in tight spots. A hose makes it easier to adjust the pressure on the trail.
- Road Biking: On a road bike, precise pressure adjustments can improve comfort and performance. A hose allows you to make these adjustments more accurately.
- E-Biking: E-bikes often have more complex suspension systems. A hose makes it easier to maintain these systems.
Recommended Products
Here are some recommended shock pumps and hoses:
| Product | Description | Price Range |
|---|---|---|
| RockShox High-Pressure Shock Pump | A reliable and accurate shock pump with a built-in gauge. | $40-$60 |
| Topeak PocketShock DXG | A compact and lightweight shock pump with a flexible hose. | $50-$70 |
| Lezyne Digital Shock Drive | A digital shock pump with a precise pressure reading. | $80-$100 |
| Fox Racing Shox Digital Pressure Gauge | A standalone digital gauge for accurate pressure measurements. | $60-$80 |
External Resources
For more information, check out these external resources:
- Park Tool – Suspension Fork Service
- SRAM Service Manuals
- FOX Bike Help Center
FAQ: Using a Hose with Your Shock Pump
What is the correct PSI for my shocks?
The correct PSI varies depending on your weight, riding style, and the specific shocks. Check your bike or suspension manufacturer’s recommendations. Start with the recommended pressure and adjust from there.
Can I use a regular tire pump for my shocks?
No, you should not use a regular tire pump for your shocks. Tire pumps deliver a large volume of air at low pressure, while shocks require a small volume of air at high pressure. Using a tire pump can damage your shocks.
How often should I check my shock pressure?
Check your shock pressure before each ride. Suspension components can lose air over time, so it’s important to keep them properly inflated.
What do I do if my shock pump is leaking air?
Check the hose connections. Make sure they’re tight. If the hose is damaged, replace it. If the pump itself is leaking, it may need to be repaired or replaced.
Is it normal for air to escape when I disconnect the pump?
Yes, it’s normal for a small amount of air to escape when you disconnect the pump. This is because the valve core is briefly opened when you disconnect the pump.
How do I know if my shock pump is accurate?
Compare the pressure reading with another pump or gauge. If the readings are significantly different, your pump may not be accurate.
Can I use a shock pump on my car tires?
While technically possible, it’s not recommended. Shock pumps are designed for small volumes and high pressure. It would take a very long time to inflate a car tire with a shock pump, and it could damage the pump.
Conclusion
Using a hose with your shock pump makes bike maintenance easier and more precise. It reduces stress on delicate valves and improves the accuracy of your pressure readings. By following this guide, you’ll be able to keep your suspension components properly inflated and enjoy smoother, more controlled rides.
Remember to choose the right hose, maintain your equipment, and follow safety precautions. With a little practice, you’ll be a pro at adjusting your suspension like a seasoned mechanic. Now, get out there and enjoy the ride!


