
How to Use Hose for Air Tank Inflator: Easy Guide
Quick Summary:
To use a hose for an air tank inflator, first, ensure the hose is compatible with both the air tank and the tire valve. Connect the hose securely to the air tank’s outlet valve, then attach the other end to your tire’s valve stem. Open the air tank valve slowly to inflate the tire, monitoring the pressure with a gauge. Once inflated to the desired PSI, close the tank valve and carefully detach the hose.
Ever struggled to get your tires inflated just right? It’s a common frustration for cyclists! Whether you’re topping off before a ride or fixing a flat, using an air tank inflator with a hose can seem tricky. Many riders find themselves wrestling with connections or unsure about the proper inflation process. But don’t worry – inflating your tires with an air tank and hose doesn’t have to be a hassle.
In this guide, I’ll walk you through each step, from connecting the hose to safely inflating your tires to the perfect pressure. We’ll cover everything you need to know to confidently use your air tank inflator and keep your tires in top shape. Let’s get started!
Understanding Air Tank Inflators and Hoses

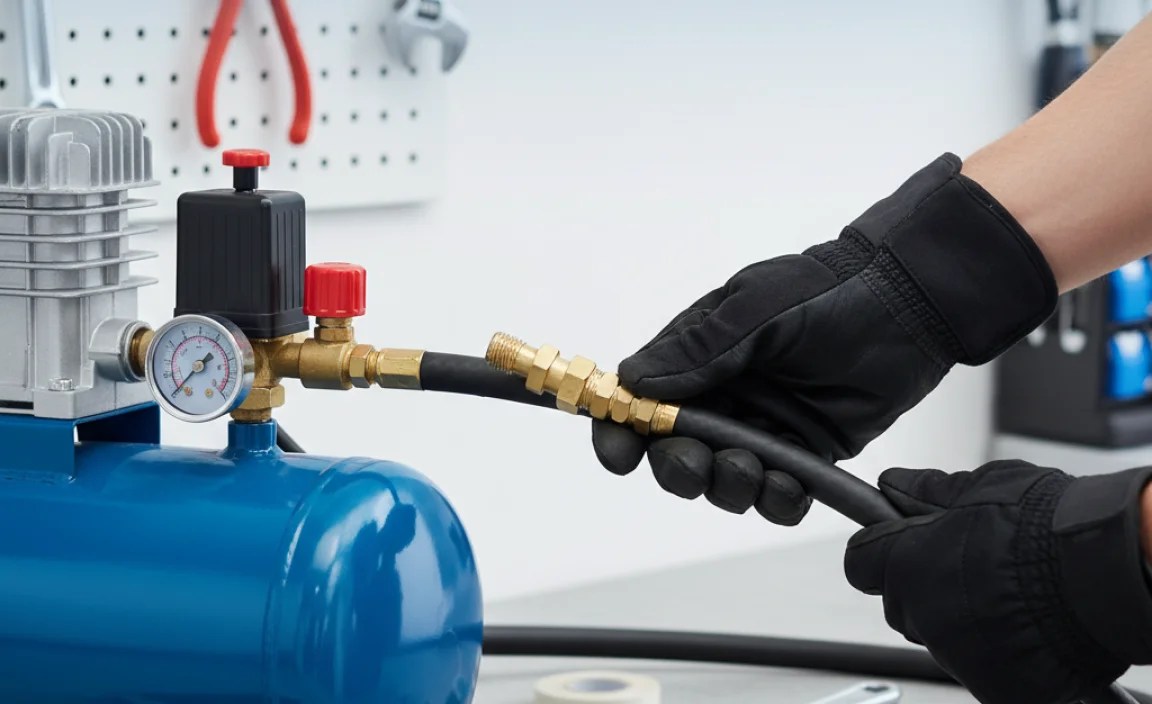
Before we jump into the how-to, let’s cover the basics. An air tank inflator provides a portable source of compressed air, perfect for inflating tires quickly and efficiently. The hose is the crucial link that delivers the air from the tank to your tire. Knowing the components and their functions will make the whole process smoother.
Components of an Air Tank Inflator System
- Air Tank: The reservoir that stores compressed air. Tanks come in various sizes, from small portable ones to larger stationary units.
- Hose: A flexible tube that connects the air tank to the tire valve. Hoses are usually made of rubber or reinforced polymer.
- Inflator Nozzle (Chuck): The end of the hose that attaches to the tire valve. Different types exist, including Schrader and Presta.
- Pressure Gauge: A device that measures the air pressure in the tank and/or the tire. Essential for accurate inflation.
- Valve: Controls the release of air from the tank.
- Safety Valve: This valve will automatically release air if the pressure gets too high, preventing dangerous over-pressurization.
Types of Hoses and Nozzles (Chucks)
Choosing the right hose and nozzle is essential for compatibility and ease of use. Here’s a breakdown:
- Rubber Hoses: Durable and flexible, but can degrade over time.
- Polymer Hoses: Lightweight and resistant to wear, but may be less flexible.
- Schrader Valve Nozzle: Designed for Schrader valves, commonly found on car tires and some bike tires.
- Presta Valve Nozzle: Designed for Presta valves, common on high-performance road bikes. Some nozzles are dual-head, fitting both types.
- Thread-on Nozzles: These screw onto the valve for a secure connection.
- Clip-on Nozzles: These clip onto the valve, offering quick attachment and detachment.
Safety First: Important Precautions
Working with compressed air requires caution. Here are some key safety tips:
- Wear Safety Glasses: Protect your eyes from debris.
- Check Hose Condition: Look for cracks or wear before each use.
- Never Exceed Tank Pressure: Know the maximum pressure rating of your tank and tires.
- Release Pressure Slowly: Avoid sudden bursts of air.
- Store Tank Properly: Keep the tank in a cool, dry place away from direct sunlight.
Step-by-Step Guide: Using a Hose for Air Tank Inflator

Now, let’s get to the main event: a detailed guide on how to use a hose with your air tank inflator.
Step 1: Gather Your Tools and Equipment
Before you start, make sure you have everything you need.
- Air Tank Inflator
- Hose with appropriate nozzle (Schrader or Presta)
- Pressure Gauge (if not integrated into the inflator)
- Safety Glasses
- Your Bike
Step 2: Prepare the Air Tank
Ensure your air tank is ready for use.
- Check Air Level: Make sure the tank has sufficient air. If it’s low, refill it using an air compressor according to the manufacturer’s instructions.
- Inspect the Tank: Look for any signs of damage, such as rust or leaks. If you notice any issues, do not use the tank until it has been inspected and repaired.
- Position the Tank: Place the tank on a stable, flat surface to prevent it from tipping over during use.
Step 3: Connect the Hose to the Air Tank
Attaching the hose correctly is crucial for a secure connection.
- Locate the Outlet Valve: Find the outlet valve on the air tank. It’s usually threaded.
- Attach the Hose: Screw the hose fitting onto the outlet valve. Tighten it securely by hand to ensure a good seal. Avoid using tools that could damage the fitting.
- Check the Connection: Gently tug on the hose to make sure it’s firmly attached. Listen for any air leaks. If you hear a leak, tighten the connection further.
Step 4: Prepare the Tire Valve
Getting the tire valve ready ensures a smooth inflation process.
- Remove Valve Cap: Unscrew the valve cap from the tire valve and set it aside in a safe place.
- Clean the Valve: Wipe the valve stem with a clean cloth to remove any dirt or debris.
- For Presta Valves: Loosen the valve nut by unscrewing it slightly. Press the valve core briefly to ensure it’s not stuck.
Step 5: Attach the Hose to the Tire Valve
Connecting the hose to the tire valve is where precision matters.
- Select the Correct Nozzle: Ensure you have the right nozzle for your valve type (Schrader or Presta).
- Attach the Nozzle:
- Thread-on Nozzle: Screw the nozzle onto the valve stem until it’s snug.
- Clip-on Nozzle: Press the nozzle onto the valve stem until it clicks into place. Ensure it’s securely attached.
- Check the Connection: Listen for any hissing sounds, which indicate a leak. Readjust the nozzle if necessary to ensure a tight seal.
Step 6: Inflate the Tire
Now, carefully inflate the tire to the correct pressure.
- Open the Air Tank Valve: Slowly open the valve on the air tank to release air into the hose.
- Monitor the Pressure: Watch the pressure gauge closely. Inflate the tire to the recommended PSI (pounds per square inch) indicated on the tire sidewall.
- Avoid Over-Inflation: Do not exceed the maximum PSI. Over-inflating can cause the tire to burst.
- Pause and Check: If you don’t have a gauge on your hose, pause inflation periodically to check the pressure with a separate gauge.
Step 7: Detach the Hose and Secure the Valve
Once the tire is inflated, detach the hose and secure the valve.
- Close the Air Tank Valve: Turn off the valve on the air tank to stop the airflow.
- Detach the Nozzle:
- Thread-on Nozzle: Unscrew the nozzle from the valve stem.
- Clip-on Nozzle: Release the clip and remove the nozzle from the valve stem.
- For Presta Valves: Tighten the valve nut by screwing it down.
- Replace Valve Cap: Screw the valve cap back onto the tire valve to protect it from dirt and debris.
Step 8: Store Your Equipment
Proper storage keeps your equipment in good condition.
- Disconnect the Hose: Unscrew the hose from the air tank outlet valve.
- Release Remaining Air: Bleed any remaining air from the hose.
- Store the Hose: Coil the hose neatly and store it in a dry place.
- Store the Tank: Store the air tank in a cool, dry place away from direct sunlight.
Troubleshooting Common Issues
Even with the best preparation, you might encounter some common issues. Here’s how to troubleshoot them.
Problem: Air Leaks
Solution: Check all connections to ensure they are tight. Replace worn-out hoses or nozzles. Use Teflon tape on threaded connections to improve the seal.
Problem: Nozzle Won’t Attach
Solution: Make sure you’re using the correct nozzle for your valve type (Schrader or Presta). Clean the valve stem and nozzle to remove any debris. If the nozzle is damaged, replace it.
Problem: Tire Not Inflating
Solution: Ensure the air tank has sufficient air. Check for kinks or blockages in the hose. Make sure the valve core is not stuck. If using a Presta valve, ensure the valve nut is loosened.
Problem: Over-Inflation
Solution: Immediately stop inflating the tire. Release air slowly by pressing the valve core (for Presta valves) or using a valve tool (for Schrader valves). Monitor the pressure gauge closely as you release air.
Tips for Maintaining Your Air Tank Inflator and Hose

Regular maintenance will keep your air tank inflator and hose in top working condition.
- Inspect Regularly: Check the hose, nozzle, and tank for any signs of wear or damage before each use.
- Clean Components: Wipe down the hose and nozzle with a clean cloth to remove dirt and debris.
- Lubricate Connections: Apply a small amount of silicone grease to threaded connections to keep them smooth and prevent corrosion.
- Drain Moisture: Periodically drain any moisture that accumulates in the air tank to prevent rust and corrosion.
- Store Properly: Store the tank and hose in a cool, dry place away from direct sunlight and extreme temperatures.
Benefits of Using an Air Tank Inflator

Why choose an air tank inflator over other methods? Here are some key advantages:
- Portability: Air tanks are easy to transport, making them ideal for roadside repairs or trips.
- Speed: Inflates tires much faster than manual pumps.
- Convenience: No need to rely on an electrical outlet or car adapter.
- Versatility: Can be used for various inflation tasks, such as bike tires, car tires, and sports equipment.
- Accuracy: When used with a gauge, ensures precise inflation to the recommended PSI.
Air Tank Inflator vs. Other Inflation Methods
Let’s compare air tank inflators to other common methods like hand pumps and electric pumps.
| Method | Pros | Cons |
|---|---|---|
| Air Tank Inflator | Portable, fast, convenient, accurate | Requires refilling, can be bulky |
| Hand Pump | Lightweight, no power needed | Slow, requires physical effort |
| Electric Pump | Fast, easy to use | Requires power source, less portable |
Choosing the Right Air Tank Inflator and Hose
Selecting the right equipment depends on your needs and preferences. Here’s what to consider.
Tank Size
- Small Tanks (1-3 gallons): Ideal for occasional use and easy portability.
- Medium Tanks (3-6 gallons): Good balance of portability and capacity.
- Large Tanks (6+ gallons): Suitable for frequent use and multiple inflation tasks.
Hose Length and Material
- Length: Choose a length that allows you to reach the tire valve comfortably without being too cumbersome.
- Material: Rubber hoses are durable and flexible, while polymer hoses are lightweight and resistant to wear.
Nozzle Type
- Dual-Head Nozzles: Offer compatibility with both Schrader and Presta valves.
- Thread-on Nozzles: Provide a secure, leak-free connection.
- Clip-on Nozzles: Allow for quick and easy attachment and detachment.
Additional Features
- Pressure Gauge: Essential for accurate inflation.
- Safety Valve: Prevents over-pressurization.
- Carrying Handle: Makes the tank easier to transport.
- Storage Compartment: Provides a convenient place to store the hose and accessories.
FAQ: Common Questions About Air Tank Inflators
What is the ideal PSI for my bike tires?
The ideal PSI for your bike tires is usually printed on the sidewall of the tire. It varies depending on the tire type, size, and your riding conditions, but is typically between 80-130 PSI for road bikes and 30-50 PSI for mountain bikes.
How often should I check my tire pressure?
It’s best to check your tire pressure before every ride. Tires can lose pressure over time, and maintaining the correct PSI ensures optimal performance and reduces the risk of flats.
Can I use an air tank inflator for car tires?
Yes, you can use an air tank inflator for car tires, but make sure the tank has sufficient capacity and the hose is compatible with Schrader valves. Check your car’s recommended tire pressure and inflate accordingly.
What should I do if my air tank inflator stops working?
First, check the air level in the tank and make sure all connections are secure. If the inflator still doesn’t work, inspect the hose and nozzle for damage. If the problem persists, consult the manufacturer’s instructions or seek professional repair.
How do I know if my air tank is overfilled?
Most air tanks have a pressure gauge that indicates the air level. Never exceed the maximum pressure rating of the tank, which is usually printed on the tank itself. If the pressure exceeds the maximum rating, release air slowly using the valve or safety valve.
Is it safe to leave an air tank in my car during hot weather?
It’s not recommended to leave an air tank in your car during hot weather. High temperatures can cause the pressure inside the tank to increase, potentially leading to a rupture. Store the tank in a cool, dry place whenever possible.
How long does an air tank hold pressure?
An air tank can hold pressure for several weeks or even months, depending on the quality of the tank and the seal of the valve. However, it’s best to check the pressure regularly and refill as needed to ensure it’s ready for use.
Conclusion
Using a hose for an air tank inflator is a straightforward process once you understand the basics. From gathering the right tools to inflating your tires to the perfect pressure, each step is essential for safe and efficient operation. By following this guide, you’ll be able to confidently maintain your tires and enjoy a smoother, more reliable ride. Remember to prioritize safety, perform regular maintenance, and choose the right equipment for your needs. Happy cycling!


