
Easy: How to Use Standalone Pressure Gauge for Bikes
Did you ever ride your bike and feel the tires were too soft? Or too hard? It’s important to have the right tire pressure. This makes riding safer and more fun. Knowing how to use standalone pressure gauge for bikes helps a lot. Let’s learn about keeping your bike tires just right.
Having the correct tire pressure is super important. It affects how well your bike rides. It also helps prevent flats. So, how do you know what the right pressure is? And how to use standalone pressure gauge for bikes to check it? Keep reading to find out!
A standalone pressure gauge is a small tool. It helps you measure the air in your bike tires. It’s easy to use once you know how. This guide will teach you everything you need to know. You’ll be a bike tire expert in no time! Let’s get started with how to use standalone pressure gauge for bikes.
Key Takeaways
- Using a standalone pressure gauge ensures optimal bike tire performance.
- Check your bike tires before each ride for safety and efficiency.
- A pressure gauge helps prevent flats and extends tire lifespan.
- Learning how to use standalone pressure gauge for bikes is easy.
- Proper tire pressure improves speed, comfort, and control.
Why Use a Standalone Pressure Gauge for Bikes?

Using a standalone pressure gauge for your bike is very important. It helps you keep your tires at the right pressure. This makes riding safer and more fun. When your tires have the right amount of air, your bike works better. You can ride faster and easier. Also, the right pressure helps your tires last longer. Too little air can cause flats. Too much air can make the ride bumpy. A pressure gauge helps you avoid these problems. It’s a small tool that makes a big difference. Knowing how to use standalone pressure gauge for bikes is a skill every biker should have. It will help you enjoy every ride more.
- A gauge helps you avoid flats.
- It improves your bike’s performance.
- It makes your ride more comfortable.
- It extends the life of your tires.
- It helps you ride faster and easier.
- It makes your bike safer to ride.
A standalone pressure gauge is easy to carry with you. You can check your tires before each ride. This way, you always know your tires are ready. Some gauges are small enough to fit in your pocket. Others attach to your bike pump. No matter which one you choose, a pressure gauge is a great tool. It helps you take care of your bike. It also helps you enjoy your rides more. Learning how to use standalone pressure gauge for bikes is worth the effort. It keeps you safe and makes biking more fun.
Why is Tire Pressure Important?
Have you ever wondered why tire pressure matters so much? Imagine trying to run with shoes that are too loose or too tight. It would be hard, right? Bike tires are the same. If they don’t have the right pressure, your bike won’t work as well. Too little air, and it’s like running in sand. Too much air, and every bump feels huge. The right tire pressure makes riding smooth and easy. It also helps you go faster. Plus, it protects your tires from damage. So, checking your tire pressure is like taking care of your shoes before a big race. It helps you perform your best and stay safe.
What Happens with Wrong Pressure?
What happens if you don’t pay attention to your tire pressure? Well, a lot of things can go wrong. If your tires are too soft, you might get a flat. This is because the tire can get pinched against the wheel. Also, it takes more effort to pedal. It’s like trying to run uphill all the time. If your tires are too hard, the ride can be bumpy and uncomfortable. You might even lose control on rough roads. So, keeping your tire pressure just right is super important. It’s like making sure your helmet fits properly before you start riding. It keeps you safe and makes the ride more enjoyable.
How Often Should You Check?
How often should you check your bike tire pressure? A good rule is to check it before every ride. This only takes a few seconds. It’s like checking your brakes to make sure they work. Even if the tires look okay, they might be low on air. Tires can slowly lose air over time. This is especially true if it’s cold outside. So, a quick check with a pressure gauge can save you from problems later. It’s a simple habit that makes a big difference. Think of it as part of your pre-ride checklist. Just like putting on your helmet and checking your lights.
Fun Fact or Stat: Did you know that properly inflated tires can improve your cycling speed by up to 10%?
Understanding Different Types of Gauges

There are different types of pressure gauges you can use for your bike. Some are digital, and some are analog. Digital gauges show the pressure on a screen. Analog gauges have a needle that points to the pressure. Both types work well. Digital gauges are often easier to read. They give you an exact number. Analog gauges are simple and don’t need batteries. Some gauges are built into bike pumps. Others are standalone tools. Standalone gauges are small and easy to carry. They let you check your pressure anywhere. No matter which type you choose, knowing how to use standalone pressure gauge for bikes is key. This knowledge ensures your tires are always at the right pressure.
- Digital gauges are easy to read.
- Analog gauges don’t need batteries.
- Some gauges are built into pumps.
- Standalone gauges are portable.
- Choose the type that works best for you.
- All types help you keep your tires inflated.
When choosing a pressure gauge, think about what’s important to you. Do you want something easy to read? Then a digital gauge might be best. Do you want something simple and reliable? Then an analog gauge could be a good choice. Consider also if you want a gauge built into your pump, or a separate one. A separate gauge lets you check the pressure without pumping more air. This can be helpful if you just need to check. Learning how to use standalone pressure gauge for bikes ensures you can always maintain optimal tire pressure, no matter the gauge type. This will make your rides safer and more enjoyable.
Digital vs. Analog Gauges: Which is Better?
Have you ever wondered if digital or analog gauges are better? Digital gauges are like having a calculator. They give you a precise number. This can be helpful if you want to be very exact. Analog gauges are like a clock. They show you the pressure with a needle. Some people find them easier to read at a glance. Digital gauges need batteries. Analog gauges don’t. So, it really depends on what you prefer. Both types of gauges can help you keep your tires at the right pressure. It’s like choosing between a digital watch and an analog watch. Both tell time, but they do it in different ways.
Built-in vs. Standalone Gauges
What’s the difference between a built-in gauge and a standalone gauge? A built-in gauge is part of your bike pump. It’s always there when you need to pump up your tires. A standalone gauge is a separate tool. You can carry it with you and use it anytime. Built-in gauges are convenient. But sometimes they aren’t as accurate. Standalone gauges can be more precise. They also let you check the pressure without pumping air. So, it depends on what you need. A built-in gauge is like having a Swiss Army knife. A standalone gauge is like having a specialized tool for the job.
Features to Look for in a Gauge
What should you look for when buying a pressure gauge? First, make sure it’s easy to read. The numbers should be clear and big enough to see. Second, check if it’s accurate. A good gauge will give you the right pressure every time. Third, think about how easy it is to use. Can you attach it to your tire valve easily? Does it fit comfortably in your hand? Fourth, consider the price. You don’t need to spend a lot of money to get a good gauge. There are many affordable options. It’s like shopping for a new bike helmet. You want it to be safe, comfortable, and not too expensive.
Fun Fact or Stat: Some high-end digital gauges can measure pressure with an accuracy of +/- 1 PSI (Pounds per Square Inch)!
Steps on How to Use Standalone Pressure Gauge for Bikes

Learning how to use standalone pressure gauge for bikes is simple. First, remove the cap from your tire valve. Next, press the gauge onto the valve. Make sure it’s on tight, so no air escapes. The gauge will show the pressure in your tire. Compare this number to the recommended pressure. You can find this number on the side of your tire. If the pressure is too low, add air with a pump. If it’s too high, let some air out. Check the pressure again with the gauge. Repeat until the pressure is just right. Then, remove the gauge and put the cap back on the valve. Now your tires are ready to go. This process ensures your tires are perfectly inflated for a safe and enjoyable ride.
- Remove the valve cap from your tire.
- Press the gauge onto the valve tightly.
- Read the pressure on the gauge.
- Compare it to the recommended pressure.
- Add or release air as needed.
- Replace the valve cap after checking.
It’s important to be gentle when using the gauge. Don’t push too hard on the valve. This could damage it. Also, make sure the gauge is clean. Dirt can affect the accuracy. If you’re not sure what the right pressure is, ask a bike shop. They can help you find the best pressure for your tires. Remember, checking your tire pressure is a key part of bike maintenance. Knowing how to use standalone pressure gauge for bikes will help you keep your bike in top shape. This ensures you can ride safely and comfortably every time you hit the road or trail.
Preparing Your Bike for Pressure Check
Before you start checking your tire pressure, get your bike ready. First, find a safe place to work. A flat surface is best. Next, gather your tools. You’ll need your pressure gauge and a bike pump. Make sure the pump fits your tire valves. There are two main types of valves: Schrader and Presta. Schrader valves are like the ones on car tires. Presta valves are thinner and have a small nut at the top. Also, check your tires for any damage. Look for cuts or bulges. If you see any damage, don’t ride the bike. Get the tires fixed first. Preparing your bike properly makes the pressure check easier and safer.
Attaching the Gauge Correctly
Attaching the gauge correctly is super important. If you don’t, air will leak out. This can give you a wrong reading. First, line up the gauge with the valve. Then, press it straight on. Make sure it’s snug. You should hear a slight hiss of air. This means the gauge is connected. If you don’t hear a hiss, try again. Sometimes you need to wiggle the gauge a little. If air is still leaking, check the gauge. The rubber seal inside might be worn out. You might need to replace the gauge. Attaching the gauge properly ensures you get an accurate pressure reading.
Reading the Pressure Accurately
Reading the pressure accurately is key to getting your tires just right. Look at the gauge carefully. Digital gauges show the pressure in numbers. Analog gauges have a needle that points to the pressure. Make sure you understand the units. Most gauges show pressure in PSI (pounds per square inch). Some also show it in BAR. Compare the reading to the recommended pressure on your tire. If the pressure is too low, add air. If it’s too high, let some air out. Check the pressure again after each adjustment. Reading the pressure accurately helps you keep your tires in top condition.
Fun Fact or Stat: The ideal tire pressure for a road bike is often between 80 and 130 PSI, while mountain bikes usually range from 25 to 35 PSI!
Adjusting Tire Pressure Based on Gauge Reading

After you read the pressure on your gauge, you might need to make some adjustments. If the pressure is too low, use your bike pump to add air. Pump until the gauge shows the right pressure. If the pressure is too high, you need to let some air out. Most pumps have a small button or lever for this. Press it gently to release air. Check the pressure again after each adjustment. It’s better to add or release small amounts of air at a time. This way, you won’t overinflate or underinflate your tires. Knowing how to use standalone pressure gauge for bikes means knowing how to adjust the pressure correctly. This will make your rides safer and more comfortable.
- Use a pump to add air if needed.
- Release air if the pressure is too high.
- Adjust the pressure in small amounts.
- Check the gauge after each adjustment.
- Aim for the recommended pressure.
- Proper adjustment improves ride quality.
The recommended tire pressure is usually printed on the side of your tire. It’s a range, like “30-50 PSI.” This means the pressure should be somewhere between 30 and 50 PSI. The best pressure depends on your weight and the type of riding you’re doing. If you’re heavier, you might want to use a higher pressure. If you’re riding on rough roads, you might want a lower pressure. Experiment to find what works best for you. But always stay within the recommended range. Understanding how to use standalone pressure gauge for bikes and adjust the pressure is essential for optimal performance and safety.
Adding Air with a Bike Pump
Adding air to your tires with a bike pump is easy. First, make sure the pump is compatible with your valve type. Schrader pumps work with Schrader valves. Presta pumps work with Presta valves. Some pumps can work with both. To add air, attach the pump to the valve. Make sure it’s on tight. Then, start pumping. You’ll feel some resistance. This is normal. Keep pumping until the gauge shows the right pressure. Check the pressure with your standalone gauge to be sure. It’s like blowing up a balloon. You keep going until it’s the right size.
Releasing Air from the Tire
Sometimes you need to let air out of your tires. This is called “bleeding” the tire. Most pumps have a special button or lever for this. To release air, press the button or lever gently. You’ll hear a hissing sound. This means air is escaping. Only release a little air at a time. Then, check the pressure with your gauge. Repeat until the pressure is just right. If your pump doesn’t have a release valve, you can use a small tool. Gently press the tool on the valve core to release air. Be careful not to damage the valve. It’s like letting air out of a balloon slowly.
Fine-Tuning for Optimal Ride
Fine-tuning your tire pressure can make a big difference in how your bike rides. A little more air can make you faster on smooth roads. A little less air can make you more comfortable on rough roads. Experiment with different pressures to find what works best for you. But always stay within the recommended range. Also, remember to check your pressure regularly. Tires can lose air over time. Especially in cold weather. Keeping your tire pressure just right is like adjusting the volume on your music. It helps you enjoy the ride even more.
Fun Fact or Stat: Lowering your tire pressure by just 5 PSI can significantly improve comfort on bumpy roads!
Troubleshooting Common Gauge Problems
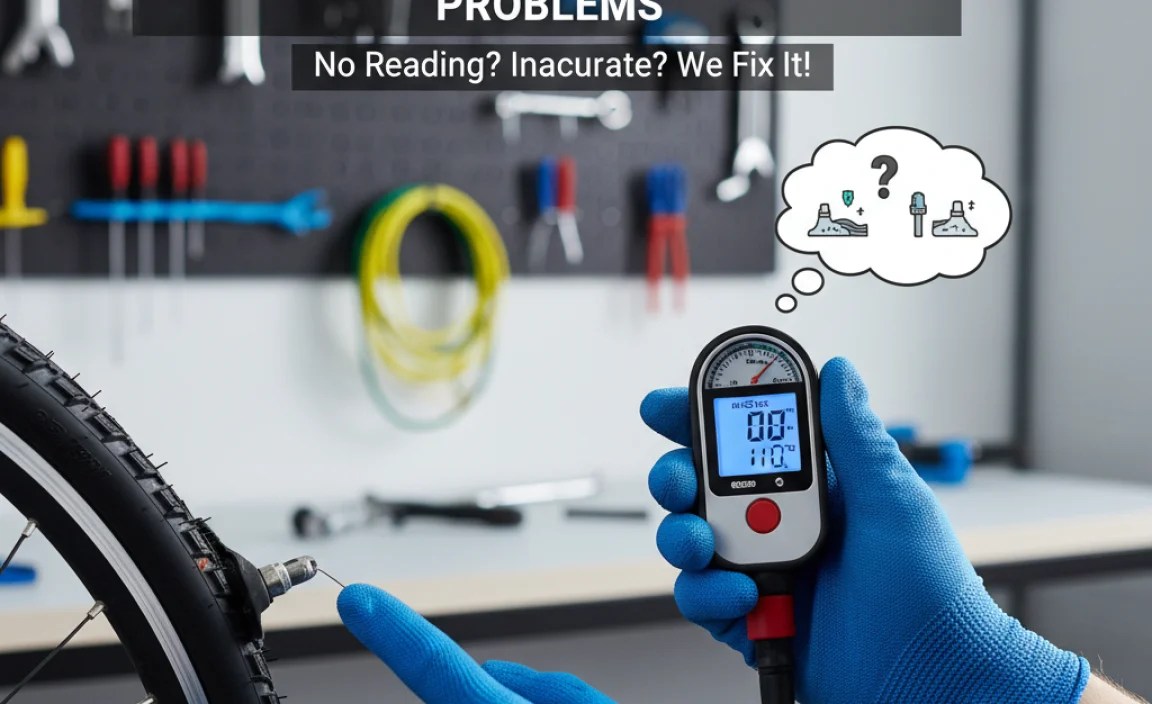
Sometimes, you might have problems when using your pressure gauge. The gauge might not give a reading. Or the reading might seem wrong. Here are some common problems and how to fix them. First, make sure the gauge is attached tightly to the valve. If it’s loose, air will leak out. Second, check the battery if you’re using a digital gauge. A low battery can cause inaccurate readings. Third, make sure the valve is clean. Dirt can block the air flow. Fourth, check the gauge itself. The seal inside might be worn out. If so, you might need a new gauge. Knowing how to use standalone pressure gauge for bikes also means knowing how to troubleshoot common issues. This helps you keep your tires properly inflated.
| Problem | Possible Cause | Solution |
|---|---|---|
| No Reading | Loose connection | Ensure tight connection |
| Inaccurate Reading | Low battery (digital) | Replace the battery |
| Air Leakage | Dirty valve | Clean the valve |
| Gauge Not Working | Worn-out seal | Replace the gauge |
If you’ve tried these steps and your gauge still isn’t working, don’t worry. You can always take your bike to a shop. A bike mechanic can help you diagnose the problem. They can also show you how to use standalone pressure gauge for bikes properly. Remember, regular maintenance is important for your bike. Checking your tire pressure is just one part of it. Keeping your bike in good shape will make your rides safer and more enjoyable. It will also help your bike last longer. So, take care of your bike, and it will take care of you.
Gauge Not Showing a Reading
What if your gauge isn’t showing a reading at all? First, check the connection. Make sure the gauge is pressed firmly onto the valve. If it’s not on tight, air won’t flow through. This means the gauge can’t measure the pressure. Second, check the valve itself. Sometimes the valve can get stuck. Try pressing the valve core gently with a small tool. This might free it up. Third, if you’re using a digital gauge, check the battery. A dead battery can prevent the gauge from working. It’s like trying to use a flashlight with no batteries. It just won’t turn on.
Inaccurate Pressure Readings
What if your gauge is showing a pressure reading, but you don’t think it’s right? First, compare it to another gauge. If you have a built-in gauge on your pump, check that reading too. If the readings are very different, one of the gauges might be faulty. Second, make sure you’re using the gauge correctly. Are you pressing it straight onto the valve? Are you reading the pressure at eye level? Small mistakes can lead to inaccurate readings. It’s like trying to weigh yourself on a scale that’s not level. The reading won’t be right.
Air Leaking When Using Gauge
Is air leaking out when you use your gauge? This is a common problem. It usually means the gauge isn’t sealed properly against the valve. Try pressing the gauge harder onto the valve. Wiggle it a little to see if you can get a better seal. If air is still leaking, check the gauge itself. The rubber seal inside might be worn out. You might need to replace the gauge. It’s like trying to fill a balloon with a hole in it. The air just keeps escaping.
Fun Fact or Stat: A worn-out valve core can also cause air leaks. Replacing the valve core is a simple and inexpensive fix!
Maintaining Your Standalone Pressure Gauge
Taking care of your pressure gauge is important. It will help it last longer and work better. First, keep your gauge clean. Wipe it with a soft cloth after each use. This will remove dirt and grime. Second, store your gauge in a safe place. Don’t leave it in direct sunlight or extreme temperatures. This can damage the gauge. Third, check the battery regularly if you have a digital gauge. Replace the battery when it gets low. Fourth, inspect the gauge for damage. Look for cracks or worn-out parts. If you find any damage, replace the gauge. Knowing how to use standalone pressure gauge for bikes includes knowing how to maintain it. This ensures accurate readings and a longer lifespan.
- Keep the gauge clean and dry.
- Store it in a safe place.
- Check the battery regularly (digital gauges).
- Inspect for damage regularly.
- Replace the gauge if needed.
- Proper care ensures accurate readings.
A well-maintained pressure gauge is a reliable tool. It will help you keep your tires properly inflated for years to come. Think of it like taking care of your bike helmet. You want it to be in good condition so it can protect you. Similarly, a well-maintained gauge will help you keep your tires at the right pressure. This will make your rides safer and more enjoyable. Remember, knowing how to use standalone pressure gauge for bikes is just the first step. Taking care of your gauge is the next step in ensuring your bike is always ready for a ride.
Cleaning Your Gauge Regularly
Why is cleaning your gauge so important? Dirt and grime can build up over time. This can affect the accuracy of the gauge. It can also make it harder to attach the gauge to the valve. To clean your gauge, use a soft cloth. Wipe the outside of the gauge gently. If there’s any dirt inside the gauge, try using a cotton swab. Be careful not to damage the internal parts. Cleaning your gauge regularly is like brushing your teeth. It helps keep it in good condition.
Storing Your Gauge Properly
Where you store your gauge matters. Leaving it in direct sunlight can damage the plastic parts. Extreme temperatures can also affect the accuracy. The best place to store your gauge is in a cool, dry place. A toolbox or drawer is ideal. You can also keep it in a small bag to protect it from dust and dirt. Storing your gauge properly is like storing your bike indoors. It helps protect it from the elements.
Replacing the Gauge When Needed
Even with the best care, your gauge might eventually wear out. If you notice that the readings are consistently inaccurate, it’s time to replace it. Also, if you see any cracks or damage to the gauge, replace it. A faulty gauge can give you wrong information. This can lead to overinflated or underinflated tires. Replacing your gauge is like replacing your bike tires when they get worn out. It’s a necessary part of bike maintenance.
Fun Fact or Stat: High-quality pressure gauges can last for many years with proper care and storage!
Summary
Using a standalone pressure gauge for your bike is a smart idea. It helps you keep your tires at the right pressure. This makes your rides safer, faster, and more comfortable. Learning how to use standalone pressure gauge for bikes is easy. Just follow the steps we’ve discussed. Remember to check your tire pressure before each ride. Adjust the pressure as needed. Choose the right type of gauge for you. Digital or analog, built-in or standalone – it’s up to you. Take care of your gauge, and it will take care of you. With a little practice, you’ll be a bike tire expert in no time!
By keeping your tires properly inflated, you’ll enjoy biking even more. You’ll also protect your tires from damage. A pressure gauge is a small tool that makes a big difference. So, invest in a good gauge and learn how to use standalone pressure gauge for bikes. Your bike will thank you for it! Happy riding!
Conclusion
Learning how to use standalone pressure gauge for bikes is a valuable skill for any cyclist. Proper tire pressure improves safety, comfort, and performance. A standalone gauge provides accurate readings. This helps you fine-tune your tires for optimal riding conditions. Remember to check your tires regularly and adjust the pressure as needed. With a little practice, you’ll become confident in maintaining your bike’s tire pressure. Enjoy the ride!
Frequently Asked Questions
Question No 1: Why should I use a standalone pressure gauge instead of just squeezing the tire?
Answer: Squeezing the tire is not accurate. It’s hard to tell the exact pressure. A standalone pressure gauge gives you a precise reading. This is important for safety and performance. Guessing the pressure can lead to underinflated or overinflated tires. Underinflated tires can cause flats. Overinflated tires can make the ride bumpy. Using a gauge ensures your tires are always at the right pressure. Learning how to use standalone pressure gauge for bikes is much better than guessing.
Question No 2: How do I know what the right tire pressure is for my bike?
Answer: The recommended tire pressure is usually printed on the side of your tire. Look for a range, like “30-50 PSI.” This means the pressure should be somewhere between 30 and 50 PSI. The best pressure depends on your weight and the type of riding you’re doing. If you’re heavier, you might want to use a higher pressure. If you’re riding on rough roads, you might want a lower pressure. Experiment to find what works best for you. But always stay within the recommended range. Knowing how to use standalone pressure gauge for bikes helps you get it just right.
Question No 3: Can I use a car tire pressure gauge on my bike?
Answer: You can use a car tire pressure gauge on your bike if you have Schrader valves. Schrader valves are like the ones on car tires. However, many bikes have Presta valves. These valves are thinner and require a different type of gauge. Also, car tire gauges are often not as accurate at low pressures. Bike tires usually require lower pressures than car tires. So, it’s best to use a gauge specifically designed for bikes. This will give you a more accurate reading. Learning how to use standalone pressure gauge for bikes ensures you have the right tool for the job.
Question No 4: How often should I replace my standalone pressure gauge?
Answer: You should replace your standalone pressure gauge if it becomes inaccurate or damaged. If you notice that the readings are consistently wrong, it’s time for a new gauge. Also, if the gauge is cracked or broken, replace it. A faulty gauge can give you misleading information. This can lead to overinflated or underinflated tires. With proper care, a good gauge can last for several years. But it’s important to replace it when it’s no longer reliable. Regular maintenance and knowing how to use standalone pressure gauge for bikes will help extend its life.
Question No 5: What are the signs of overinflated or underinflated tires?
Answer: Signs of overinflated tires include a harsh, bumpy ride. The tires will feel very hard. You might also have less traction. This can make it harder to control the bike. Signs of underinflated tires include a slow, sluggish ride. The tires will feel soft. You might also get more flats. Checking your tire pressure regularly with a gauge can help you avoid these problems. Knowing how to use standalone pressure gauge for bikes allows you to maintain the correct pressure and enjoy a smoother, safer ride.
Question No 6: Is it okay to ride my bike with slightly overinflated or underinflated tires?
Answer: Riding with slightly overinflated or underinflated tires is not ideal. It can affect your bike’s performance and safety. Overinflated tires can make the ride uncomfortable and reduce traction. Underinflated tires can increase the risk of flats and make pedaling harder. It’s always best to keep your tires within the recommended pressure range. Use a standalone pressure gauge to check and adjust the pressure as needed. Knowing how to use standalone pressure gauge for bikes will help you maintain the optimal tire pressure for a safe and enjoyable ride.


