
How to Fill Air in Cycle Tyre with a Hand Pump: A Simple Guide
Quick Summary: Filling your bike tire with a hand pump is easy! First, make sure your pump fits your tire valve (Presta or Schrader). Connect the pump head securely to the valve. Then, brace the pump on the ground and use steady strokes to inflate the tire. Check the pressure with a gauge, and you’re ready to ride!
Flat tires are a cyclist’s worst enemy. It always seems to happen at the most inconvenient time! But don’t worry, learning how to properly inflate your tires with a hand pump is a simple skill that can save you time and frustration. It’s also a great way to keep your tires in good condition and ensure a smooth, safe ride. We’ll walk you through each step. Soon, you’ll be pumping like a pro!
This guide will cover everything from identifying your valve type to achieving the correct tire pressure. Let’s get started!
Understanding Your Bike Tire Valves

Before you start pumping, you need to know what kind of valve your bike has. There are two main types: Schrader and Presta. Knowing the difference is key to using the right pump and avoiding damage.
Schrader Valves
Schrader valves are the same type you find on car tires. They are wider and sturdier, with a spring-loaded pin in the center. To inflate, you simply press the pump head onto the valve.
- Common on: Mountain bikes, hybrid bikes, and kids’ bikes.
- Pros: Durable, easy to use, and widely compatible with pumps.
- Cons: Can be less precise for high-pressure inflation.
Presta Valves
Presta valves are narrower and have a locking nut at the tip. Before inflating, you need to unscrew the nut to allow air to flow. After inflating, screw it back on to seal the valve.
- Common on: Road bikes, high-performance bikes.
- Pros: Better for high-pressure inflation, lighter.
- Cons: More delicate, requires unscrewing before inflation.
Here’s a quick reference table:
<
| Feature | Schrader Valve | Presta Valve |
|---|---|---|
| Width | Wider | Narrower |
| Locking Mechanism | Spring-loaded pin | Locking nut |
| Common Bikes | Mountain, Hybrid, Kids’ | Road, High-Performance |
| Pressure | Lower to Medium | High |
Essential Tools You’ll Need
To fill your bike tire with air, you’ll need a few basic tools. Having the right equipment makes the process much easier and more efficient.
- Hand Pump: A good quality hand pump is essential. Look for one that is compatible with both Schrader and Presta valves, or get one specifically designed for your valve type.
- Pressure Gauge: Many pumps have a built-in gauge. If not, a separate gauge ensures accurate inflation. Accurate pressure is crucial for performance and safety. A digital tire pressure gauge will give you the most accurate reading.
- Valve Adaptor (if needed): Some pumps require an adaptor to switch between Schrader and Presta valves. Make sure you have the correct adaptor if your pump isn’t universally compatible.
Step-by-Step Guide to Filling Your Tire with a Hand Pump

Now, let’s get to the actual pumping! Follow these steps to inflate your bike tire quickly and correctly.
Step 1: Prepare the Valve
Depending on your valve type, the preparation will differ slightly.
- Schrader Valve: Simply remove the valve cap by unscrewing it counter-clockwise. Keep the cap in a safe place so you don’t lose it.
- Presta Valve: Remove the valve cap and then unscrew the locking nut at the tip of the valve. Press the valve tip briefly to ensure it’s not stuck. This releases any residual air and makes it easier to inflate.
Step 2: Attach the Pump Head
Connecting the pump head correctly is vital for an airtight seal.
- Schrader Valve: Press the pump head straight onto the valve. You should feel it click into place. Ensure it’s firmly attached to prevent air leakage.
- Presta Valve: Fit the pump head onto the valve. Most pumps have a lever to lock the head in place. Ensure the connection is tight and secure.
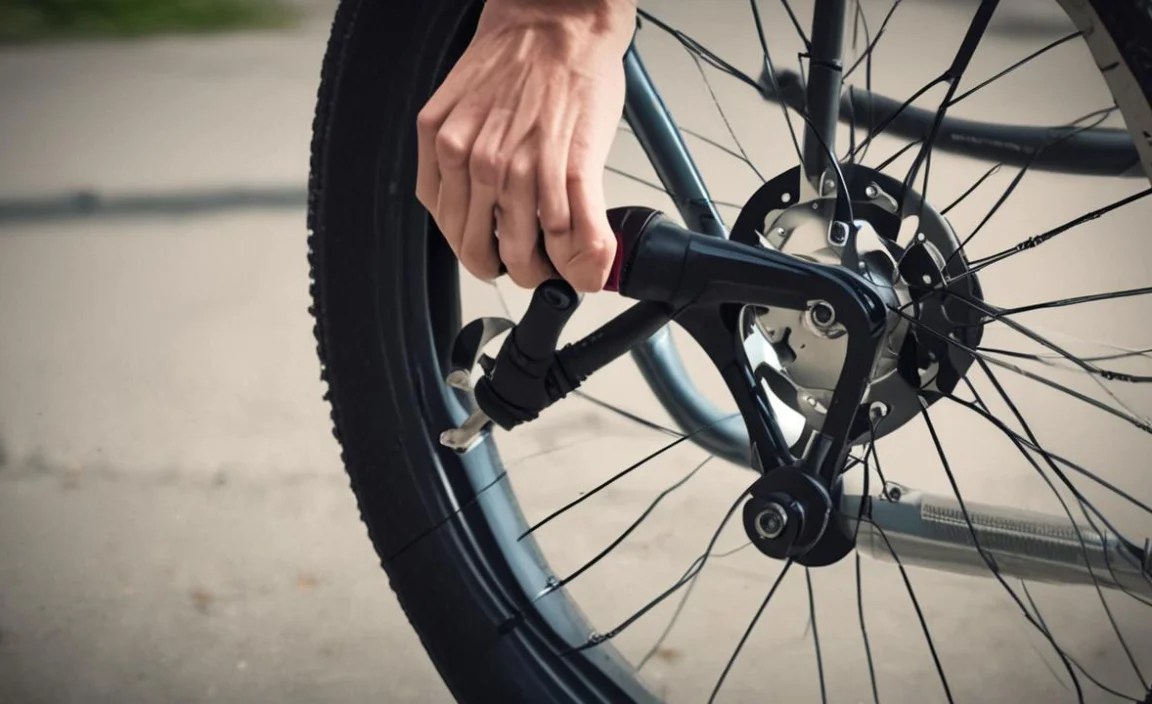
Step 3: Start Pumping
<
Now for the main event! Use proper technique to efficiently inflate your tire.
- Place the pump on the ground and stabilize it with one foot on the base.
- Grip the pump handle firmly with both hands.
- Use a steady, full-stroke motion to pump air into the tire. Avoid quick, jerky movements.
- Continue pumping until you reach the desired pressure. Check the pressure gauge regularly.
Step 4: Check the Tire Pressure
Accurate tire pressure is essential for optimal performance and safety. Refer to the recommended pressure range printed on the sidewall of your tire. This is usually indicated in PSI (pounds per square inch) or BAR.
- Use the built-in gauge on your pump or a separate pressure gauge.
- Ensure the pressure is within the recommended range. Over-inflation can cause blowouts, while under-inflation can lead to pinch flats and poor handling.
Step 5: Remove the Pump Head and Secure the Valve
Once you’ve reached the correct pressure, it’s time to disconnect the pump and secure the valve.
- Schrader Valve: Remove the pump head with a straight, gentle pull. Replace the valve cap by screwing it on clockwise.
- Presta Valve: Unlock the pump head and carefully remove it from the valve. Screw the locking nut back down until it’s snug, but not overly tight. Replace the valve cap.
Troubleshooting Common Issues
Sometimes, things don’t go as planned. Here are some common issues and how to fix them.
- Air Leaking While Pumping:
- Ensure the pump head is securely attached to the valve.
- Check the pump head’s rubber seal. If it’s worn or damaged, replace it.
- Pump Head Won’t Attach:
- Make sure you’re using the correct side of the pump head for your valve type.
- Check for any debris or damage to the valve or pump head.
- Tire Not Inflating:
- Ensure the Presta valve is unlocked.
- Check for punctures or damage to the tire.
Choosing the Right Hand Pump

With so many hand pumps on the market, selecting the right one can be overwhelming. Here are some factors to consider:
- Valve Compatibility: Choose a pump that works with both Schrader and Presta valves, or select one specifically designed for your valve type.
- Pressure Capacity: Road bikes require higher pressure (100+ PSI), while mountain bikes need less (30-50 PSI). Ensure your pump can reach the required pressure for your tires.
- Size and Portability: Consider a mini-pump for on-the-go repairs or a larger frame-mounted pump for home use.
- Gauge Accuracy: A built-in gauge is convenient, but a separate, high-quality gauge provides the most accurate readings.
Here’s a comparison table of different hand pump types:
| Type | Pros | Cons | Best For |
|---|---|---|---|
| Mini-Pump | Compact, lightweight, easy to carry | Requires more strokes, lower pressure output | Emergency repairs on the road |
| Frame-Mounted Pump | More efficient than mini-pumps, higher pressure | Less portable than mini-pumps | Regular use, home maintenance |
| Floor Pump | Easy to use, highest pressure output, stable | Not portable | Home use, workshop |
Maintaining Your Hand Pump
A little maintenance goes a long way in extending the life of your hand pump. Here are some tips:
- Clean Regularly: Wipe down your pump with a clean cloth to remove dirt and grime. Pay attention to the pump head and valve connectors.
- Lubricate Moving Parts: Apply a small amount of lubricant to the piston and other moving parts to keep them working smoothly. Use a silicone-based lubricant to avoid damaging rubber seals.
- Replace Worn Parts: Check the rubber seals in the pump head regularly. If they’re cracked or worn, replace them to maintain an airtight seal. Many pumps come with replacement parts.
- Store Properly: Store your pump in a dry place to prevent rust and corrosion. Avoid exposing it to extreme temperatures or direct sunlight.
The Importance of Correct Tire Pressure
Maintaining the correct tire pressure is crucial for a comfortable, efficient, and safe ride. Here’s why:
- Rolling Resistance: Properly inflated tires reduce rolling resistance, making it easier to pedal and increasing your speed. According to research, optimal tire pressure can significantly improve cycling efficiency.
- Handling: Correct tire pressure improves handling and stability, especially when cornering or riding on uneven surfaces. Under-inflated tires can feel sluggish and unstable, while over-inflated tires can be harsh and prone to skidding.
- Puncture Resistance: Proper inflation reduces the risk of pinch flats, which occur when the tire is compressed against the rim, pinching the inner tube. Over-inflation, however, can make the tire more susceptible to punctures from sharp objects.
- Tire Wear: Maintaining the correct pressure helps distribute the load evenly across the tire, reducing uneven wear and extending the tire’s lifespan.
- Comfort: Correct tire pressure contributes to a more comfortable ride by absorbing bumps and vibrations. Experiment with different pressures within the recommended range to find the sweet spot for your riding style and terrain.
FAQ: Filling Bike Tires with a Hand Pump
1. How often should I check my tire pressure?
Ideally, check your tire pressure before every ride. At a minimum, check it once a week. Tires lose pressure over time, so regular checks ensure optimal performance and safety.
2. What PSI should my bike tires be?
The recommended PSI is printed on the sidewall of your tire. This range varies depending on the tire size, type, and your weight. Start within the recommended range and adjust to your preference.
3. Can I use a car tire pump on my bike?
Yes, if your bike has Schrader valves. However, car pumps often deliver air very quickly, so be careful not to over-inflate. For Presta valves, you’ll need an adapter.
4. Why is my pump not working?
Check that the pump head is securely attached to the valve. Make sure you’re using the correct side of the pump head for your valve type (Schrader or Presta). Also, ensure the Presta valve is unlocked. If air is leaking, the pump head’s rubber seal may be worn and need replacing.
5. How do I know if my tire is fully inflated?
Use a pressure gauge to check the tire pressure. The gauge will give you an accurate reading in PSI or BAR. Ensure the pressure is within the recommended range printed on the tire sidewall.
6. What is the difference between a floor pump and a hand pump?
A floor pump is larger, more stable, and easier to use for inflating tires to higher pressures. A hand pump is smaller and portable, making it ideal for on-the-go repairs. Floor pumps are best for home use, while hand pumps are essential for cyclists on the road.
7. Can I over-inflate my bike tire with a hand pump?
Yes, it’s possible to over-inflate your tire with a hand pump. Always check the pressure regularly using a gauge to avoid exceeding the maximum recommended PSI printed on the tire sidewall. Over-inflation can lead to blowouts and a dangerous riding experience.
Conclusion
Filling your bike tire with a hand pump is a fundamental skill that every cyclist should master. By understanding your valve type, using the right tools, and following the steps outlined in this guide, you can easily maintain your tire pressure and enjoy a smoother, safer ride. Regular maintenance and attention to detail will not only extend the life of your tires but also enhance your overall cycling experience. So, grab your pump, get familiar with your bike, and keep those tires properly inflated! Happy cycling!


