
How to Pump a Cycle Tire: A Beginner’s Guide
Quick Summary: Pumping your cycle tire is easy! First, find the valve type (Presta or Schrader). Connect the correct pump head, making sure it’s secure. Open the pump lever (if applicable). Pump until you reach the recommended PSI (printed on the tire sidewall). Close the lever and remove the pump head. Now you’re ready to ride!
Flat tires happen. It’s a cycling fact of life. But don’t let a little air loss ruin your ride! Knowing how to properly inflate your cycle tires is a simple skill that keeps you rolling smoothly and safely. It might seem intimidating at first, but with the right tools and a little know-how, you’ll be pumping like a pro in no time. We’ll walk you through each step, so you can confidently inflate your tires and get back on the road. Let’s get started!
Understanding Your Tire and Pump

Before you start pumping, it’s important to understand the basics. This includes knowing your valve type and the recommended pressure for your tires.
Identifying Your Valve Type
There are two main types of valves you’ll find on cycle tires:
- Presta: These valves are narrow and have a small nut at the top that you need to unscrew to inflate. They’re common on road bikes and higher-end bicycles.
- Schrader: These are the same type of valves you find on car tires. They’re wider and have a spring-loaded pin in the center. They are commonly found on mountain bikes, hybrid bikes, and some commuter bikes.
Take a close look at your tire valve to determine which type you have. This will determine the type of pump you need or the adapter required.
Understanding Tire Pressure (PSI)
PSI stands for pounds per square inch, and it’s the unit used to measure tire pressure. The recommended PSI range for your tires is usually printed on the tire sidewall. It will look something like “Min. 60 PSI – Max. 80 PSI.”
It’s crucial to stay within this range. Underinflated tires can lead to pinch flats (where the tube gets pinched between the tire and the rim), reduced efficiency, and poor handling. Overinflated tires can result in a harsh ride and increase the risk of a blowout.
Here’s a table showing general PSI ranges for different bike types:
| Bike Type | Typical PSI Range | Considerations |
|---|---|---|
| Road Bike | 80-130 PSI | Higher PSI for speed and efficiency on smooth surfaces. |
| Mountain Bike | 25-40 PSI | Lower PSI for better grip and comfort on rough terrain. |
| Hybrid Bike | 40-70 PSI | Moderate PSI for a balance of comfort and efficiency on mixed surfaces. |
| Gravel Bike | 30-60 PSI | Lower PSI for comfort and grip on gravel roads. |
| E-Bike | 40-80 PSI | Often higher PSI due to the added weight of the motor and battery. Check the tire sidewall. |
Note: These are general guidelines. Always refer to the specific recommendations printed on your tire sidewall.
Choosing the Right Pump
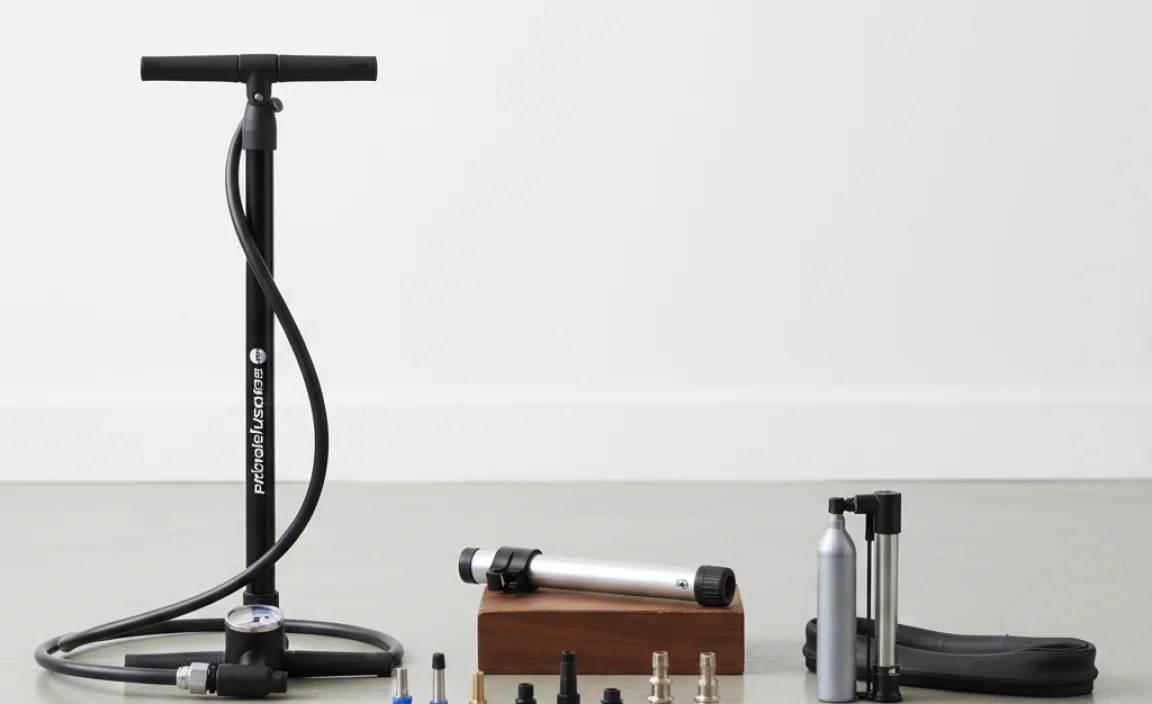
Having the right pump makes a huge difference. There are two main types of pumps you’ll use for cycle tires:
- Floor Pump: These pumps are larger and stand on the floor. They provide more leverage and are ideal for inflating tires quickly and easily at home.
- Hand Pump: These pumps are smaller and portable, making them great for carrying with you on rides in case of a flat. However, they require more effort to use.
Some pumps are designed specifically for Presta or Schrader valves, while others have dual heads that can accommodate both. Make sure your pump is compatible with your valve type.
Recommended Pumps
Here are a few highly-rated pumps:
- For Floor Pumps:
- Topeak JoeBlow Sport III: A reliable and durable floor pump with a dual head for Presta and Schrader valves.
- Lezyne Classic Floor Drive: Known for its high-quality construction and accurate gauge.
- For Hand Pumps:
- Lezyne Road Drive: A compact and efficient hand pump with a Presta/Schrader compatible design.
- Topeak RaceRocket HP: A lightweight and powerful hand pump for road cyclists.
Step-by-Step Guide to Pumping Your Cycle Tire

Now, let’s get to the actual pumping process. Follow these steps for both Presta and Schrader valves:
Step 1: Prepare the Valve
For Presta Valves:
- Remove the valve cap.
- Unscrew the small nut at the top of the valve.
- Tap the valve stem briefly to loosen it. This helps prevent the valve from sticking when you remove the pump head.
For Schrader Valves:
- Remove the valve cap.
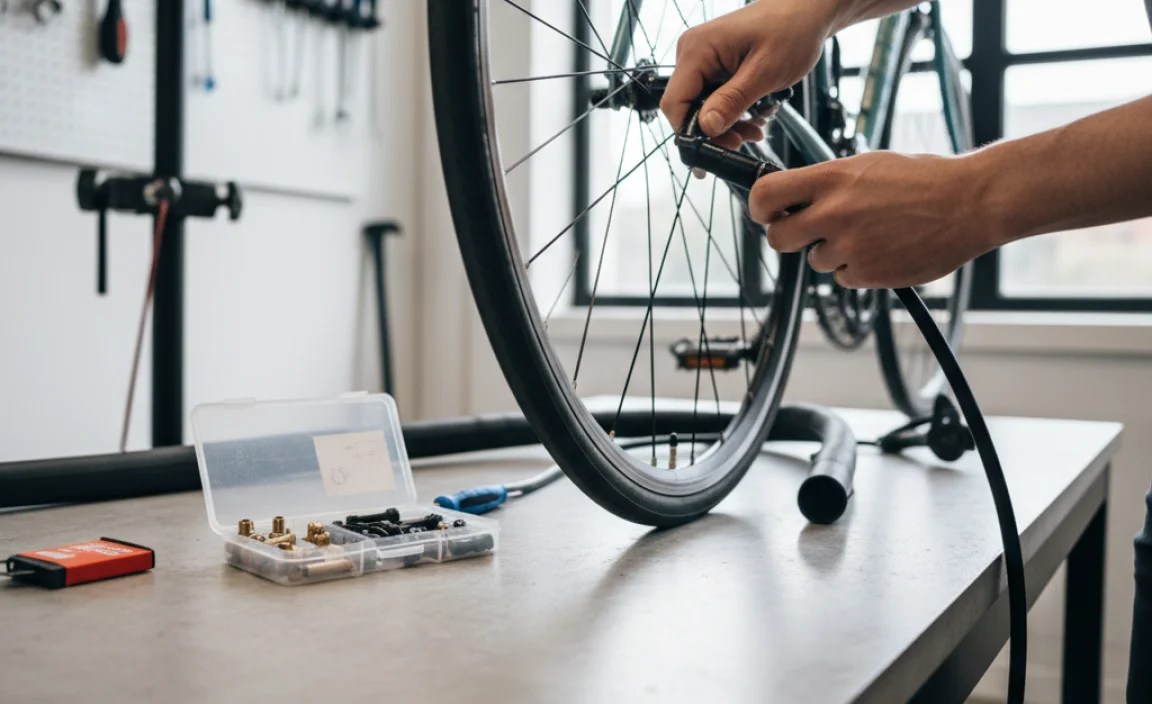
Step 2: Attach the Pump Head
For Floor Pumps:
- Place the pump head over the valve. Make sure it’s seated securely.
- Flip the lever on the pump head to lock it in place. This creates an airtight seal.
For Hand Pumps:
- Place the pump head over the valve. You may need to press it firmly to create a seal. Some hand pumps have a lever to lock the head in place.
Step 3: Start Pumping
For Floor Pumps:
- Stand with your feet on the base of the pump for stability.
- Grip the handle firmly and pump up and down in a smooth, consistent motion.
- Watch the pressure gauge on the pump.
For Hand Pumps:
- Place the pump head over the valve. You may need to press it firmly to create a seal. Some hand pumps have a lever to lock the head in place.
- Grip the handle firmly and pump up and down.
This can be more difficult than using a floor pump, so be patient.
Step 4: Reach the Correct Pressure
Keep pumping until the pressure gauge reaches the recommended PSI for your tires. Refer to the tire sidewall for the correct range. If you don’t have a gauge on your pump, you can use a separate tire pressure gauge to check the pressure.
Step 5: Remove the Pump Head
For Floor Pumps:
- Flip the lever on the pump head to release the lock.
- Gently remove the pump head from the valve.
For Hand Pumps:
- Carefully remove the pump head from the valve.
Step 6: Finish Up
For Presta Valves:
- Screw the small nut at the top of the valve back down. This helps prevent air from leaking out.
- Replace the valve cap.
For Schrader Valves:
- Replace the valve cap.
That’s it! You’ve successfully pumped your cycle tire. Now, double-check the tire pressure to be sure it is correct, and you’re ready to ride.
Troubleshooting Common Issues
Sometimes, things don’t go as smoothly as planned. Here are some common issues you might encounter and how to fix them:
- Pump Not Sealing: Make sure the pump head is properly seated on the valve and the lever (if applicable) is locked. Check the rubber seal inside the pump head for damage.
- Air Leaking Out: Ensure the valve core is tightened (especially on Presta valves). Check the tire and tube for punctures.
- Pump is Hard to Push: You may be exceeding the tire’s maximum pressure. Stop pumping and check the gauge. Also, make sure the pump is properly lubricated.
Maintaining Your Pump
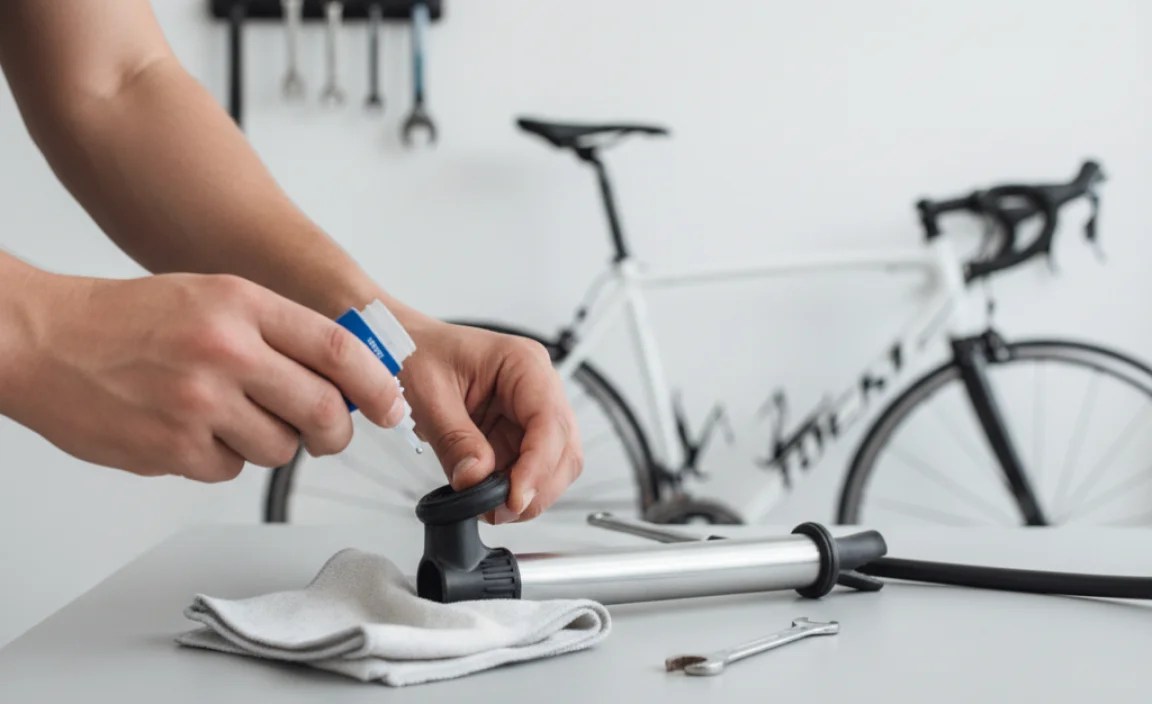
To keep your pump working properly, it’s important to maintain it regularly. This includes:
- Cleaning: Wipe down the pump with a clean cloth after each use.
- Lubrication: Apply a small amount of lubricant (such as silicone spray) to the pump’s moving parts.
- Inspection: Check the pump head and hose for cracks or damage. Replace parts as needed.
Safety Tips
Follow these safety tips when pumping your cycle tires:
- Always check the tire pressure before each ride.
- Never exceed the maximum PSI listed on the tire sidewall.
- Use caution when pumping tires, especially with hand pumps.
- If you’re unsure about anything, consult a professional bike mechanic.
Essential Tools
Here’s a list of essential tools for maintaining your cycle tires:
- Floor Pump: For easy and accurate inflation at home.
- Hand Pump: For on-the-go inflation during rides.
- Tire Pressure Gauge: To ensure accurate tire pressure.
- Tire Levers: To remove tires for tube replacement.
- Patch Kit: For repairing punctures in inner tubes.
- Multi-Tool: A compact tool with various wrenches and screwdrivers for basic bike maintenance.
The Science of Tire Pressure
The relationship between tire pressure and performance is complex. Too much pressure, and the tire becomes hard, minimizing the contact patch with the road. This can reduce grip and increase rolling resistance on uneven surfaces. Too little pressure, and the tire deforms excessively, increasing rolling resistance and the risk of pinch flats.
Several factors influence the ideal tire pressure: the rider’s weight, the type of terrain, and the tire width. Lighter riders can often run lower pressures, as can riders on wider tires. Wider tires have a larger volume of air, which means they don’t need as much pressure to support the same weight.
Experimentation is key to finding the optimal tire pressure for your specific needs. Start with the recommended pressure range on the tire sidewall and adjust from there, paying attention to how the bike feels and handles.
You can use online tire pressure calculators from reputable cycling sites like Silca and SRAM as a starting point. These calculators take into account various factors such as rider weight, bike type, and tire width to suggest an ideal pressure range.
FAQ: Pumping Cycle Tires
Here are some frequently asked questions about pumping cycle tires:
- Q: How often should I pump my bike tires?
- A: Ideally, you should check and inflate your tires before every ride. Tires lose pressure over time, so regular inflation ensures optimal performance and reduces the risk of flats.
- Q: Can I use a car tire pump on my bike?
- A: Yes, if your bike has Schrader valves. However, car tire pumps often deliver air too quickly, making it difficult to reach the correct pressure. It’s best to use a bike-specific pump for more control.
- Q: What happens if I overinflate my tires?
- A: Overinflating your tires can lead to a harsh ride, reduced grip, and an increased risk of tire blowout. Always stay within the recommended PSI range printed on the tire sidewall.
- Q: What happens if I underinflate my tires?
- A: Underinflating your tires can cause pinch flats (where the tube gets pinched between the tire and the rim), increased rolling resistance, and poor handling. It can also damage your rims.
- Q: How do I know if my tire is properly inflated without a gauge?
- A: Squeeze the tire. It should feel firm and have minimal give. If it feels soft or squishy, it needs more air. It’s always best to use a gauge for accurate inflation, but this can help in a pinch.
- Q: My Presta valve is stuck. What should I do?
- A: Gently try to wiggle the valve stem back and forth to loosen it. You can also try using a valve core tool to remove the valve core and clean it before reinserting it.
- Q: Can I use CO2 inflators instead of a pump?
- A: Yes, CO2 inflators are a quick and convenient way to inflate tires on the go. However, they are single-use and can be expensive. They are best used for emergencies, while a pump is more economical for regular inflation.
Conclusion
Knowing how to properly pump your cycle tires is a fundamental skill for any cyclist. It ensures a safe, comfortable, and efficient ride. By understanding your valve type, choosing the right pump, and following these simple steps, you can confidently inflate your tires and keep them rolling smoothly. Regular tire maintenance not only prolongs the life of your tires but also enhances your overall cycling experience. So, grab your pump, check your pressure, and get ready to enjoy the ride! I’m Raymond Ammons, and I hope this guide from BicyclePumper.com has helped you get rolling!
“`


