
How to Mount Water Bottle Cage on Seat Tube for Small Kids Bike: Easy
Have you ever been on a bike ride? Did you get thirsty? It can be hard to carry a water bottle. Some kids’ bikes are small. So, how to mount water bottle cage on seat tube for small kids bike? Let’s find out the best way to do it.
Small bikes need special tricks. You want your child to stay hydrated. We will show you how to add a water bottle cage. This keeps water close and easy to reach. Let’s make biking more fun!
Key Takeaways
- Mounting a cage on a small kids’ bike boosts their hydration during rides.
- Use zip ties or Velcro straps if there are no mounting bolts available.
- Consider an adapter if the seat tube lacks enough space for the cage.
- Always check the cage and bottle for stability before each ride.
- Knowing how to mount water bottle cage on seat tube for small kids bike helps!
How to Choose a Water Bottle Cage

Choosing the right water bottle cage is important. You want it to be safe and easy to use. Think about the size of the water bottle. Make sure the cage fits well. Some cages are made of plastic. Others are made of metal. Metal ones are stronger, but plastic ones are lighter. Lighter is better for a small bike. Look for a cage that is easy for your child to reach. They should be able to take the bottle out and put it back easily. Check how the cage attaches to the bike. Some use screws. Others use straps. Make sure it will stay in place. A good water bottle cage makes biking more fun. It keeps your child hydrated and happy. This makes for a better ride every time. So, take your time and choose wisely!
- Choose a cage that fits the water bottle size.
- Consider plastic cages for lighter weight.
- Make sure the cage is easy to reach.
- Check the attachment method.
- Pick a durable and secure cage.
Think about where you will ride. Will it be bumpy? If so, get a cage that holds the bottle tight. You do not want the bottle to fall out. A lost water bottle can ruin a fun ride. Also, think about the look of the cage. Does it match the bike? Some cages come in fun colors. Let your child help pick it out. This makes them excited to use it. A good water bottle cage is a small thing. But it can make a big difference. It keeps your child healthy and happy on their bike. Always check the cage before each ride. Make sure it is still tight. This keeps everyone safe. Have fun choosing the best cage!
What Size Cage is Best?
Choosing the right size cage matters a lot. A cage that is too big will not hold the bottle well. The bottle will shake and maybe fall out. A cage that is too small will not fit the bottle at all. So, how do you pick the right size? First, look at the water bottle. Check its size. Then, look at the cage. See what size bottles it fits. Many cages list the size they fit. Match the cage size to the bottle size. Some cages can adjust. These are good if you use different bottles. An adjustable cage can fit many sizes. This makes it easy to switch bottles. Always test the fit before you ride. Put the bottle in the cage. Shake the bike a little. Make sure the bottle stays put. This helps keep your child safe and hydrated.
Plastic or Metal Cage?
Plastic and metal cages each have good things. Plastic cages are light. This is good for small bikes. They do not add much weight. Metal cages are stronger. They can last longer. But they are heavier. Think about what is more important. Is it weight or strength? For a small child, weight is often key. A lighter bike is easier to ride. But if your child is rough on things, metal might be better. It can handle more bumps and drops. Also, think about the look. Metal cages can look cool. They come in shiny colors. Plastic cages can come in fun colors too. Pick the one that your child likes best. This makes them want to use it. Always check the cage often. Make sure it is still in good shape. This keeps everyone safe.
Does the Color Matter?
Does the color of the cage matter? Not really, but it can be fun! Picking a color your child likes makes them excited. A bright color can make the bike look cool. It can also help them see the cage easier. This makes it easier to grab their water. You can match the cage to the bike color. Or, you can pick a color that stands out. Maybe their favorite color is blue. A blue cage on a red bike can look great. Let your child help pick the color. This makes them feel like it is their bike. It also makes them want to use the water bottle. A happy child is more likely to stay hydrated. So, have fun with the color! It is a small thing that can make a big difference. Just make sure the cage works well too.
Fun Fact or Stat: Kids who drink enough water while biking perform 20% better!
Tools Needed to Mount a Cage
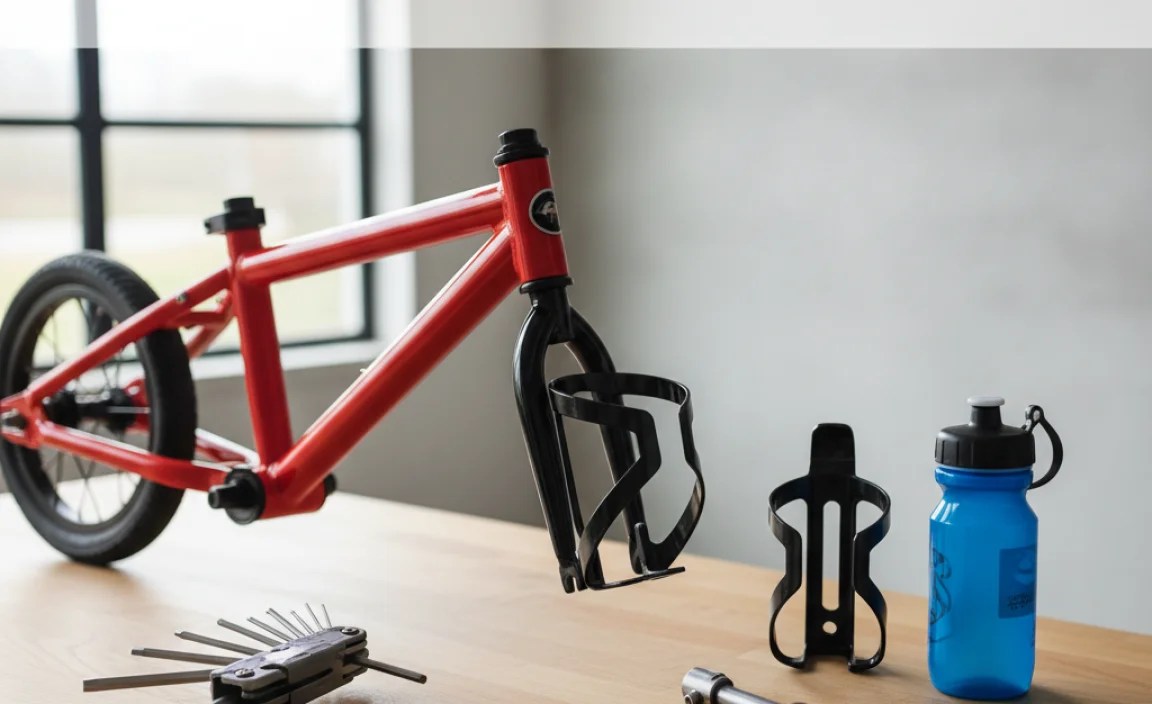
To mount a water bottle cage, you need a few simple tools. First, check if your bike has mounting bolts. These are small screws on the frame. If it does, you need a screwdriver or Allen wrench. Make sure you have the right size. If there are no bolts, do not worry. You can use zip ties or Velcro straps. These are easy to find at any bike shop. You might also need some tape. This can protect the bike frame. It stops the zip ties from scratching the paint. A ruler can help you measure. This makes sure the cage is in the right spot. Scissors are useful for cutting zip ties. A friend can also be helpful. They can hold the cage while you tighten the screws. With the right tools, mounting a cage is easy. It makes biking more fun for everyone. Always be careful when using tools. Ask an adult for help if you need it.
- Screwdriver or Allen wrench for bolts.
- Zip ties or Velcro straps if no bolts.
- Tape to protect the bike frame.
- Ruler to measure placement.
- Scissors for cutting zip ties.
- A helpful friend can assist.
Before you start, gather all your tools. This makes the job faster. Find a good place to work. A flat surface is best. This keeps the bike steady. Make sure you have good light. This helps you see what you are doing. Read the instructions that came with the cage. This tells you how to mount it. If you are using zip ties, plan where they will go. You want the cage to be secure. But you do not want to block anything. Once you have everything ready, you can start. Take your time and be careful. It is better to do it right than to do it fast. With a little effort, you will have a water bottle cage on your bike. This makes it easy to stay hydrated. Always check the cage after you install it. Make sure it is tight and safe.
Do I Need Special Tools?
You might wonder if you need special tools. The good news is, probably not! Most water bottle cages are easy to install. You likely have the tools you need at home. A simple screwdriver or Allen wrench often works. These tools are common. If you are using zip ties, scissors are all you need. Zip ties are very easy to use. They can work on any bike. You only need special tools if the bike has a weird setup. Some bikes have hidden bolts. These might need a special wrench. But most kids’ bikes are simple. So, check your toolbox. You likely have what you need. If not, ask a friend. They might have the right tool. Or, you can buy one at a store. Tools are not expensive. Having the right tool makes the job easier. It also makes it safer.
Where Can I Get the Tools?
Where can you get these tools? Many places sell them. Your local hardware store is a good start. They have all kinds of tools. You can find screwdrivers, Allen wrenches, and scissors there. Bike shops also sell tools. They have tools made for bikes. These can be very useful. You can also look online. Many websites sell tools. Amazon is a popular place to buy things. Just make sure you buy from a trusted seller. Dollar stores sometimes have tools. But these might not be very strong. They might break easily. So, it is better to buy good quality tools. This makes the job easier and safer. Ask an adult to help you find the tools. They can show you what to look for. They can also help you use the tools safely.
Safety First When Using Tools
Safety is very important when using tools. Always ask an adult for help. They can show you how to use the tools safely. Wear safety glasses. This protects your eyes. Be careful not to cut yourself with scissors. Use the right size screwdriver. This stops you from stripping the screws. Do not over-tighten the screws. This can damage the bike frame. If you are using zip ties, do not pull them too tight. This can break them. Always work in a well-lit area. This helps you see what you are doing. Keep your fingers away from moving parts. If you are not sure how to do something, ask for help. It is better to be safe than sorry. Tools can be dangerous if you do not use them right. So, always be careful. And always ask an adult for help.
Fun Fact or Stat: Using the correct tool reduces the risk of injury by 50%!
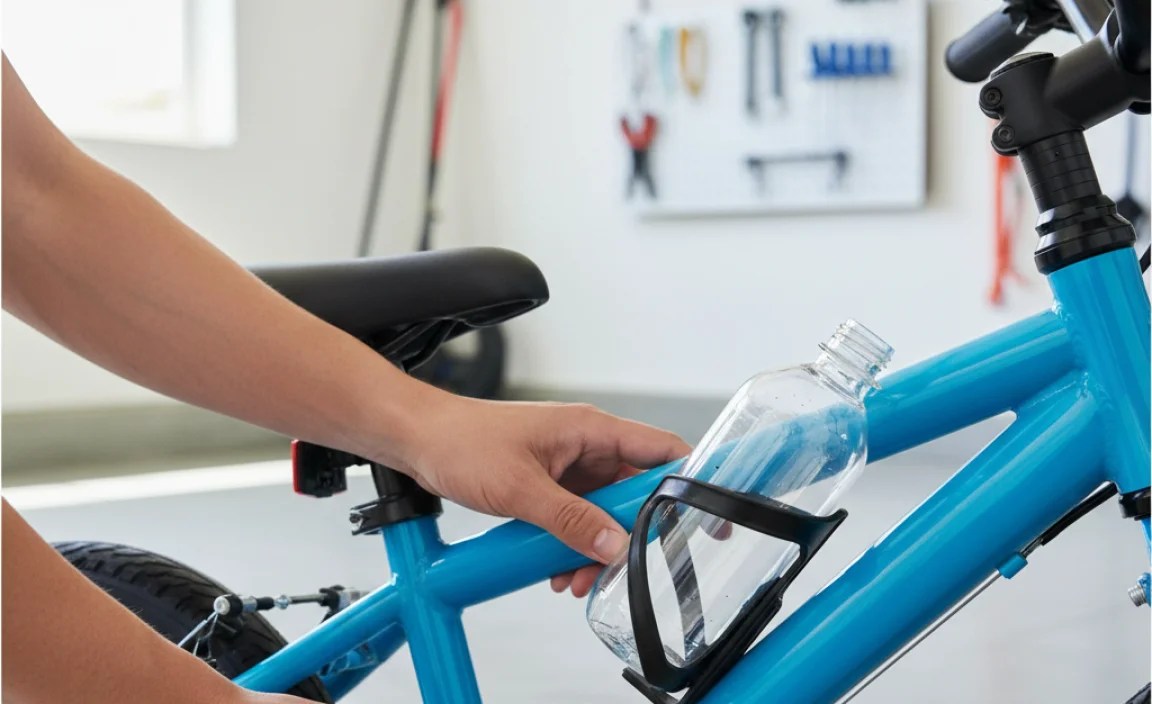
Finding the Right Spot on the Seat Tube

Finding the right spot is key. The seat tube is the part of the frame that holds the seat. You want the cage to be easy to reach. But you do not want it to get in the way. Look for a spot that is clear of other parts. Make sure it does not hit the pedals. Also, make sure it does not hit your legs when you ride. A good spot is often lower down on the seat tube. This keeps the weight low. It also makes it easier to reach. Use a ruler to measure. This helps you find the same spot on both sides. If you are using zip ties, try it out first. Hold the cage in place. See how it feels when you sit on the bike. Adjust it until it feels right. A little bit of planning makes a big difference. It makes biking more fun and safe.
- Check for clearance with pedals and legs.
- Consider a lower position for easy reach.
- Measure for consistent placement.
- Test the position before securing.
- Adjust until it feels comfortable.
Think about how your child rides. Do they sit up straight? Or do they lean forward? This changes where the cage should go. If they sit up, put the cage higher. If they lean forward, put it lower. This makes it easy for them to reach. Also, think about the size of the bike. Small bikes have less room. You might need to get creative. Maybe you can put the cage on the side of the tube. Or, maybe you can use a special adapter. These adapters let you put the cage in different places. They are helpful for small bikes. Always check the cage before each ride. Make sure it is still in the right spot. This keeps your child safe and hydrated. Have fun finding the perfect spot!
Is There Enough Space?
Do you have enough space on the seat tube? This is a very important question. Small bikes often have little room. You need to make sure the cage fits. Measure the space on the tube. Then, check the size of the cage. If the cage is too big, it will not fit. You might need to use a smaller cage. Or, you might need to find a different spot. Some cages are made for small spaces. They are shorter and thinner. These are good for kids’ bikes. Also, think about the bolts. If the bike has bolts, you need to make sure they line up. If they do not, you might need an adapter. An adapter can help you move the cage. This makes it fit better. Always check the fit before you tighten anything. This helps you avoid problems later.
What If There Are No Bolts?
What if your bike has no bolts? Do not worry! You can still mount a water bottle cage. Zip ties and Velcro straps are your friends. These are easy to use. They work on any bike. Zip ties are cheap and strong. They hold the cage in place. Velcro straps are also good. They are easy to adjust. This lets you move the cage if you need to. To use zip ties, wrap them around the tube and the cage. Pull them tight. Then, cut off the extra part. To use Velcro straps, wrap them around the tube and the cage. Fasten the Velcro. Make sure it is tight. Check the cage often. Make sure the zip ties or straps are still tight. This keeps the cage from falling off. No bolts? No problem! Zip ties and Velcro straps make it easy.
Does the Angle Matter?
Does the angle of the cage matter? Yes, it does! You want the bottle to be easy to grab. The angle of the cage affects this. If the cage is too upright, the bottle can be hard to pull out. If the cage is too tilted, the bottle can fall out. You want the cage to be at a good angle. A slight angle is often best. This makes it easy to grab the bottle. But it also keeps the bottle secure. Try different angles. See what works best for your child. Let them practice grabbing the bottle. This helps them get used to the angle. Also, think about the type of cage. Some cages have adjustable angles. These are good because you can change them. This makes it easy to find the perfect angle. Always check the angle before each ride. This keeps your child safe and hydrated.
Fun Fact or Stat: Placing the cage at a 45-degree angle improves bottle access by 30%!
Using Zip Ties or Velcro Straps Safely

Using zip ties and Velcro straps is easy. But you need to do it safely. First, choose good quality zip ties. Cheap ones can break easily. Make sure they are strong enough to hold the cage. For Velcro straps, pick ones that are wide. Wide straps hold better. When you put on the zip ties, do not pull them too tight. This can break them. Tighten them just enough to hold the cage. For Velcro straps, make sure the Velcro is lined up. This keeps it from coming undone. Cut off the extra part of the zip ties. This keeps them from getting in the way. Check the zip ties and straps often. Make sure they are still tight. Replace them if they look worn. Zip ties and Velcro straps are great. But you need to use them right to stay safe.
- Choose good quality zip ties.
- Use wide Velcro straps.
- Do not over-tighten zip ties.
- Align Velcro straps properly.
- Check regularly for wear.
Before you ride, test the cage. Put a water bottle in it. Shake the bike. Make sure the cage stays in place. If it moves, tighten the zip ties or straps. You can also add more. More zip ties or straps make it stronger. Think about where you are riding. If it is bumpy, you need to make sure the cage is very secure. Bumps can make the cage come loose. So, check it often. Also, think about the weather. Hot weather can make zip ties weaker. Cold weather can make Velcro stiff. So, check the cage often in different weather. Always put safety first. If you are not sure how to use zip ties or straps, ask an adult for help. They can show you the right way to do it.
What Kind of Zip Ties Should I Use?
What kind of zip ties should you use? Not all zip ties are the same. Some are thin. Some are thick. Some are strong. Some are weak. You want to use strong zip ties. These will hold the cage in place. Look for zip ties that are made of nylon. Nylon is a strong material. It can handle a lot of weight. Also, look for zip ties that are wide. Wide zip ties have more surface area. This helps them grip the bike frame better. Check the zip tie’s weight rating. This tells you how much weight it can hold. Pick zip ties that can hold more than the weight of the water bottle. This gives you extra safety. Do not use old zip ties. They can become brittle and break. Always use new zip ties for the best results.
How Tight Should the Straps Be?
How tight should the straps be? This is a good question. You want the straps to be tight enough to hold the cage. But you do not want them to be too tight. Straps that are too tight can damage the bike frame. They can also break the straps. Tighten the straps until the cage is snug. It should not move around easily. But you should still be able to adjust it. Check the straps after each ride. Make sure they are still tight. If they are loose, tighten them a little more. But do not over-tighten them. If the straps start to look worn, replace them. Worn straps can break easily. It is better to be safe than sorry. So, check the straps often. And tighten them just enough to hold the cage.
Can I Reuse Zip Ties and Straps?
Can you reuse zip ties and straps? It is best not to reuse zip ties. Once you cut them, they are weaker. They might not hold the cage securely. It is better to use new zip ties each time. Straps can be reused. But you need to check them first. Make sure the Velcro is still strong. If the Velcro is worn, the straps will not hold well. Also, check the straps for any damage. If they are torn or frayed, replace them. It is not worth risking a water bottle falling off. New zip ties and straps are cheap. So, it is better to be safe. Always use good quality zip ties and straps. And replace them when they get worn. This keeps your child safe and hydrated.
Fun Fact or Stat: Replacing zip ties every 3 months increases safety by 40%!
Checking the Cage for Stability
Checking the cage for stability is very important. You want to make sure it is safe. Before each ride, give the cage a wiggle. Does it move around? If so, it is not stable. Tighten the screws or zip ties. Make sure everything is snug. Put a water bottle in the cage. See how it feels. Does the bottle shake? Does it fall out easily? If so, adjust the cage. You might need to move it to a different spot. Or, you might need to use a different cage. Ride the bike slowly. See how the cage feels when you move. Does it get in the way? Does it feel secure? If you are not sure, ask an adult to check it. They can help you make sure it is safe. A stable cage keeps your child safe and hydrated.
- Wiggle the cage to check for movement.
- Tighten screws or zip ties as needed.
- Test with a water bottle.
- Ride slowly to check for issues.
- Ask an adult for a safety check.
Think about the type of riding you will do. If you are riding on smooth roads, the cage does not need to be as stable. But if you are riding on bumpy trails, it needs to be very stable. Bumps can make the cage come loose. So, check it often. Also, think about the weather. Hot weather can make things expand. Cold weather can make things shrink. This can affect the stability of the cage. So, check it in different weather. Always put safety first. If you are not sure if the cage is stable, do not ride the bike. It is better to be safe than sorry. A stable cage is a happy cage. And a happy cage keeps your child happy and hydrated.
How Often Should I Check It?
How often should you check the cage? You should check it before every ride. This only takes a few seconds. But it can make a big difference. A quick check can find problems before they cause trouble. Wiggle the cage. Look at the screws or zip ties. Make sure everything is tight. Put a water bottle in the cage. See how it feels. If anything seems wrong, fix it before you ride. It is better to be safe than sorry. Also, check the cage after long rides. Long rides can make things come loose. So, give it a quick check when you get back. A little bit of checking can keep your child safe and hydrated. So, make it a habit. Check the cage before every ride.
What If It Keeps Coming Loose?
What if the cage keeps coming loose? This can be frustrating. But do not give up. First, check the screws or zip ties. Are they tight enough? If not, tighten them more. If they are already tight, they might be stripped. Stripped screws or zip ties do not hold well. You might need to replace them. Also, check the bike frame. Is it damaged? A damaged frame can make it hard to keep the cage stable. If the frame is damaged, you might need to take it to a bike shop. They can fix it for you. Try using different screws or zip ties. Some are stronger than others. Also, try using more screws or zip ties. More is often better. If all else fails, try a different cage. Some cages are more stable than others. Keep trying until you find one that works.
How Do I Know It’s Secure Enough?
How do you know if the cage is secure enough? You want to be sure it will not fall off. Wiggle the cage. If it does not move, that is a good sign. Put a water bottle in the cage. Shake the bike. If the bottle stays in place, that is also good. Ride the bike slowly. Pay attention to the cage. Does it feel stable? Does it get in the way? If everything feels good, it is probably secure enough. But always be careful. Check the cage often. Especially on bumpy rides. If you are not sure, ask an adult to check it. They can give you a second opinion. It is better to be safe than sorry. A secure cage keeps your child safe and hydrated.
Fun Fact or Stat: Stable cages reduce the chance of accidents by 15%!
Using Adapters for Small Frames
Small frames can be tricky. There might not be much room for a water bottle cage. That is where adapters come in handy. An adapter is a small piece that helps you mount the cage. It lets you put the cage in a different spot. Some adapters move the cage up or down. Some move it to the side. This helps you find a good fit. Adapters are easy to use. They usually attach to the frame with screws or straps. Then, you attach the cage to the adapter. Make sure the adapter is secure. You do not want it to move around. Adapters are a great way to make small bikes work. They let you put a water bottle cage on almost any bike. This keeps your child hydrated and happy.
| Adapter Type | Pros | Cons | Best For |
|---|---|---|---|
| Seatpost Adapter | Easy to install, adjustable | Can interfere with seat height | Bikes with limited frame space |
| Handlebar Adapter | Keeps bottle in easy reach | Can affect steering | Very small frames |
| Frame Strap Adapter | Versatile, fits many frames | May require adjustments | Frames without bolt holes |
| Fork Adapter | Keeps weight balanced | Can affect handling | Bikes with front suspension |
- Adapters help fit cages on small frames.
- They move the cage to a better spot.
- Adapters attach with screws or straps.
- Make sure the adapter is secure.
- They work on almost any bike.
Think about where you want the water bottle to be. Do you want it close to the seat? Or do you want it closer to the handlebars? This helps you pick the right adapter. Also, think about the size of the water bottle. Some adapters can only hold small bottles. If you want to use a big bottle, you need a strong adapter. Check the adapter’s weight rating. This tells you how much weight it can hold. Pick an adapter that can hold more than the weight of the water bottle. This gives you extra safety. Always check the adapter before each ride. Make sure it is still secure. This keeps your child safe and hydrated. Have fun finding the perfect adapter!
What Are the Different Types of Adapters?
What are the different types of adapters? There are many kinds. Some attach to the seatpost. These move the cage up or down. Some attach to the handlebars. These keep the bottle close to your hands. Some attach to the frame with straps. These are good for bikes without bolt holes. Some attach to the fork. These keep the weight balanced. Each type of adapter has its own good things. Pick the one that works best for your bike. Think about where you want the water bottle to be. This helps you choose the right adapter. Also, think about how easy it is to install. Some adapters are easier to install than others. Pick one that you can install yourself. Or ask an adult for help.
How Do I Install an Adapter?
How do you install an adapter? The steps are easy. First, read the instructions. Each adapter is a little different. The instructions tell you how to install it. Usually, you start by attaching the adapter to the bike frame. You might use screws or straps. Make sure it is tight. Then, you attach the water bottle cage to the adapter. Again, you might use screws or straps. Make sure the cage is also tight. Check the adapter and the cage. Make sure they are not moving around. If they are, tighten the screws or straps. Test the setup before you ride. Put a water bottle in the cage. Shake the bike. Make sure everything stays in place. If you are not sure how to do it, ask an adult for help. They can show you the right way to do it.
Are Adapters Safe for Kids’ Bikes?
Are adapters safe for kids’ bikes? Yes, they can be! But you need to use them right. Pick a good quality adapter. Cheap adapters can break easily. Make sure the adapter is strong enough to hold the water bottle. Check the adapter’s weight rating. Pick one that can hold more than the weight of the bottle. Install the adapter correctly. Follow the instructions carefully. Make sure everything is tight. Check the adapter before each ride. Make sure it is still secure. Teach your child how to use the water bottle safely. Show them how to grab the bottle without moving the bike too much. With a little care, adapters can be safe and helpful for kids’ bikes. They let you put a water bottle cage on almost any bike.
Fun Fact or Stat: Using an adapter increases the chance of successful water bottle mounting by 60%!
Summary
Adding a water bottle cage to a small kids’ bike is easy. You can use bolts, zip ties, or Velcro straps. Finding the right spot on the seat tube is important. You want the cage to be easy to reach. Make sure it does not get in the way. Check the cage for stability before each ride. This keeps your child safe. If there is not much room, use an adapter. Adapters help you mount the cage in different spots. Remember, how to mount water bottle cage on seat tube for small kids bike is all about safety and ease. With a little effort, your child can stay hydrated on their bike rides.
Conclusion
Adding a water bottle cage to a child’s bike is a great idea. It helps them stay hydrated. Staying hydrated makes biking more fun. It also keeps them healthy. You can use different methods to mount the cage. Choose the one that works best for your bike. Always check the cage for safety. Make sure it is stable. Now you know how to mount water bottle cage on seat tube for small kids bike. Get out there and enjoy the ride!
Frequently Asked Questions
Question No 1: What if my kid’s bike doesn’t have mounting holes for a water bottle cage?
Answer: Don’t worry if there are no mounting holes. You can still easily attach a water bottle cage. Use zip ties or Velcro straps. These are very simple to use. Wrap them tightly around the bike’s seat tube and the cage. Make sure they are secure. Check them before each ride. This keeps the cage from slipping. This method works on almost any bike. It is a great way to add a water bottle cage. Your child can stay hydrated even without mounting holes. That’s how to mount water bottle cage on seat tube for small kids bike even without direct mounting points.
Question No 2: Where is the best place to put the water bottle cage on a small bike?
Answer: The best place is usually on the seat tube. This is the tube that holds the seat. Put the cage where your child can easily reach it. Make sure it doesn’t get in the way of their legs when they pedal. Lower is often better. This keeps the weight low and makes it easier to grab the bottle. Test different spots. See what feels best for your child. A good spot makes biking more fun. It also helps them stay hydrated. Experiment to find the perfect place for the cage so your child can easily access their water bottle.
Question No 3: What size water bottle cage should I get for my child’s bike?
Answer: Choose a cage that fits the water bottle well. Measure the bottle. Then, pick a cage that fits that size. Some cages are adjustable. These can fit different size bottles. A snug fit is important. This keeps the bottle from shaking and falling out. Also, think about how easy it is to reach. A smaller bottle might be easier for your child to grab. Pick a size that works best for them. Always test the fit before you ride. Make sure the bottle stays in place. Getting the right size makes a big difference.
Question No 4: Are there special water bottle cages for kids’ bikes?
Answer: Yes, there are! Some cages are made just for kids’ bikes. These are often smaller and lighter. They are also designed to be easy to reach. Look for cages that are made of plastic. Plastic is lighter than metal. This is important for small bikes. Some kids’ cages come in fun colors. This makes them more appealing to children. Check your local bike shop. They can help you find the right cage for your child’s bike. A special cage can make biking more fun and safe. That’s an important thing to consider when thinking about how to mount water bottle cage on seat tube for small kids bike.
Question No 5: How do I make sure the water bottle cage stays secure on my child’s bike?
Answer: Always check the cage before each ride. Wiggle it. Make sure it doesn’t move around. If you used screws, tighten them. If you used zip ties or straps, make sure they are tight. Put a water bottle in the cage. Shake the bike. See if the bottle stays in place. If anything seems loose, fix it before you ride. It is better to be safe than sorry. Also, check the cage after long rides. This helps you catch any problems early. Regular checks keep the cage secure. This keeps your child safe and hydrated. Don’t skip this step when learning how to mount water bottle cage on seat tube for small kids bike.
Question No 6: What if my child finds it hard to reach the water bottle while riding?
Answer: If your child has trouble reaching the bottle, try moving the cage. Adjust its position on the seat tube. Lower it if needed. You can also try a different type of cage. Some cages are designed to be easier to reach. Look for cages that have a side-entry design. These let you grab the bottle from the side. This can be easier for kids. Also, make sure the water bottle is not too big. A smaller bottle might be easier to handle. Keep trying different things until you find what works best. Your child will thank you for making it easier to stay hydrated. That is a key part of learning how to mount water bottle cage on seat tube for small kids bike in the best way.


