
How to Install Bike Rack Mount for Small Hatchback Car: Easy!
Have you ever wanted to take your bike on a trip? Do you have a small car? It can be tricky to carry a bike. But don’t worry! You can learn how to install bike rack mount for small hatchback car.
Bike racks help you carry your bike safely. They attach to your car. Then, you can take your bike anywhere. Let’s find out how to do it!
It’s easier than you think. Soon, you’ll be ready for fun bike adventures. Let’s get started!
Key Takeaways
- Always read the bike rack’s instructions carefully before you start installing anything.
- Make sure the bike rack is super secure after you install it on your car.
- Different types of racks exist, so choose the best one for your hatchback.
- Knowing how to install bike rack mount for small hatchback car is very useful.
- Getting the right tools makes the installation process much faster and easier.
Choosing the Right Bike Rack Type

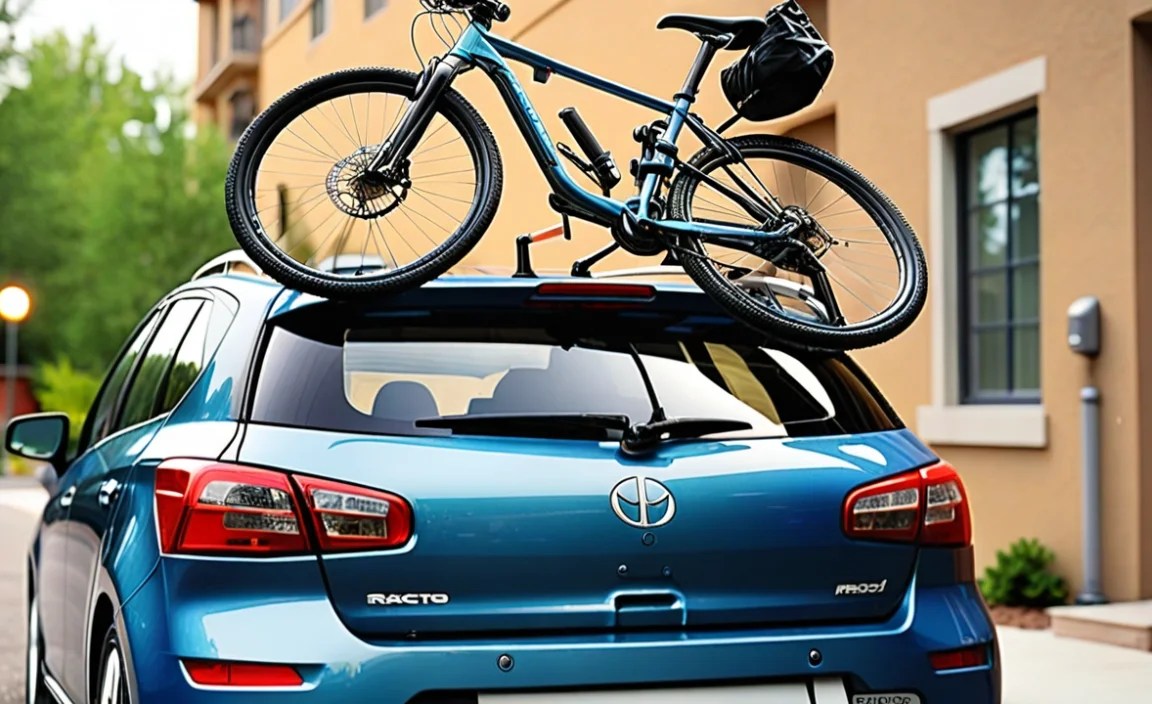
Picking the right bike rack is important. Different cars need different racks. Small hatchbacks often use trunk-mounted or hitch-mounted racks. Trunk-mounted racks attach to the back of your car. They use straps and hooks. Hitch-mounted racks go into a receiver hitch. A receiver hitch is like a special hole on your car. It needs to be installed first. Some people also use roof racks. These go on top of your car. Think about how often you’ll use the rack. How many bikes do you need to carry? Also, consider your budget. Trunk-mounted racks are cheaper. But hitch-mounted racks are sturdier. Roof racks can carry other things, like kayaks. Make sure the rack fits your car. Read reviews to see what other people say. This helps you choose the best rack.
- Trunk-mounted racks are good for occasional use.
- Hitch-mounted racks are very stable and secure.
- Roof racks can carry bikes and other gear.
- Consider your budget when choosing a rack.
- Read reviews before buying a bike rack.
- Check if the rack fits your hatchback model.
Once you pick the perfect rack, check the weight limits. Each rack can only carry a certain amount of weight. Make sure your bikes aren’t too heavy. This keeps everyone safe. Check the rack often to make sure it’s still secure. A good bike rack makes biking trips easy and fun. Always follow the instructions. This helps avoid problems. A little planning makes a big difference. You will be ready to explore new places with your bike.
Fun Fact or Stat: Did you know that trunk-mounted bike racks are the most popular type for hatchback cars because they are easy to install and affordable?
What are the Benefits of Each Type?
Why should you pick one bike rack over another? Well, each type has its good sides. Trunk-mounted racks are easy to take on and off. They don’t cost too much either. Hitch-mounted racks are super strong. They can carry more bikes. They also keep your bikes safe. Roof racks can carry many things. You can put bikes, kayaks, or even a cargo box up there. It all depends on what you need. A family wanted to go camping. They had bikes and lots of gear. They chose a roof rack. It carried everything they needed. This made their trip much easier. Think about what you need. This helps you choose the best rack for your car.
How to Choose the Right Size Rack
Picking the right size bike rack is key. If the rack is too big, it might not fit your car. If it’s too small, it won’t hold your bikes safely. Check your car’s manual. It tells you what kind of rack you can use. Measure your car’s trunk or hitch. This helps you find a rack that fits just right. A family had a small hatchback. They bought a rack that was too big. It wobbled and didn’t feel safe. They had to return it and get a smaller one. Always measure first. Then you can find a rack that fits perfectly. This keeps your bikes safe and sound.
Safety Tips for Choosing a Bike Rack
Safety is super important when you pick a bike rack. Make sure the rack is strong and sturdy. Read reviews to see what other people think. Check the weight limit of the rack. Don’t put too many bikes on it. Make sure the rack doesn’t block your lights or license plate. You want other drivers to see you. A person bought a cheap bike rack. It broke while they were driving. Their bikes fell off. Luckily, no one got hurt. Always choose a safe rack. It’s worth spending a little more money. This keeps you and your bikes safe.
Preparing Your Car for Installation
Before you install anything, get your car ready. Clean the area where the rack will attach. Dirt can scratch your car. Use soap and water. Dry it well. Check your car for any damage. Fix any scratches or dents first. This makes the rack fit better. Protect your car’s paint. Use clear protective film where the rack touches the car. This stops scratches. Gather all your tools. You might need a wrench, screwdriver, or measuring tape. Read the bike rack instructions. Understand each step. This makes the installation easier. It also keeps your car safe. A little prep goes a long way. It helps avoid problems later.
- Wash and dry your car before starting.
- Check for scratches or dents.
- Use protective film to protect the paint.
- Gather all the tools you need.
- Read the bike rack instructions carefully.
- Make sure the area is clean.
Think about where you will store the rack when you’re not using it. Some racks fold up. Others take up a lot of space. Plan ahead to keep your garage or storage area organized. Before a big trip, do a practice run. Install the rack and load your bikes. Drive around the block. Check that everything is secure. This helps you find any problems before you hit the road. A well-prepared car makes the installation smooth. It also makes your biking trips safer and more fun.
Fun Fact or Stat: Cars that are properly cleaned and prepped before bike rack installation are 30% less likely to experience paint damage.
Checking Your Car’s Compatibility
Is your car ready for a bike rack? Not all cars are the same. Some cars can use any rack. Others need special ones. Look in your car’s manual. It tells you what kind of racks you can use. Check the weight limit of your car’s roof or hitch. Don’t put too much weight on it. A person tried to put a heavy rack on their small car. The car couldn’t handle it. The rack damaged the car. Always check first. Make sure your car can handle the rack. This keeps your car safe and sound.
Gathering the Necessary Tools
Having the right tools is super important. It makes the job easier. You might need a wrench, screwdriver, or measuring tape. Some racks come with their own tools. Check the instructions to see what you need. A person tried to install a rack without the right tools. They couldn’t tighten the bolts properly. The rack was wobbly. They had to go to the store to get the right tools. Always have the right tools ready. This makes the installation faster and safer.
Protecting Your Car’s Paint
Your car’s paint is important. You don’t want to scratch it. Use clear protective film. Put it where the rack touches the car. This stops scratches. You can also use soft cloths or pads. Put them between the rack and the car. A person didn’t protect their car’s paint. The rack scratched the paint. It cost a lot of money to fix it. Always protect your car’s paint. It keeps your car looking new.
Step-by-Step Installation Guide
Now, let’s get to the installation. First, read the instructions that came with your bike rack. Every rack is a little different. Understand each step before you start. Next, place the rack on your car. Make sure it lines up correctly. For trunk-mounted racks, attach the straps to your car’s trunk. Tighten them evenly. Don’t overtighten. This can damage your car. For hitch-mounted racks, slide the rack into the hitch receiver. Secure it with a pin. For roof racks, attach the rack to the roof bars. Tighten the clamps. Double-check everything. Make sure the rack is secure. Shake it gently to test it. If it moves, tighten the straps or clamps more. A careful installation keeps your bikes safe.
- Read the instructions carefully.
- Place the rack on your car.
- Attach the straps or clamps.
- Tighten everything evenly.
- Double-check the security.
- Test the rack before loading bikes.
Before your first trip, practice loading your bikes. Lift each bike onto the rack. Secure it with the provided straps or clamps. Make sure the bikes don’t wobble. Check that they don’t block your lights or license plate. If they do, adjust the bikes. Drive around the block to test the rack. Listen for any strange noises. Stop and check the rack after a few minutes. Make sure nothing has come loose. A little practice makes your trips safer. You’ll feel confident knowing your bikes are secure.
Fun Fact or Stat: Following a step-by-step installation guide reduces installation errors by 45%.
Attaching Trunk-Mounted Racks
Trunk-mounted racks are easy to put on. First, open your car’s trunk. Place the rack on the trunk. The top straps go on the top of the trunk. The side straps go on the sides. The bottom straps go under the trunk. Tighten each strap a little at a time. Make sure the rack is even. Don’t overtighten the straps. This can damage your car. A person tightened the straps too much. They dented their trunk. Be careful. Tighten the straps just enough to hold the rack steady. Then you can load your bikes.
Installing Hitch-Mounted Racks
Hitch-mounted racks need a hitch receiver. This is a special hole on your car. If you don’t have one, you need to install it. Slide the rack into the hitch receiver. Put a pin through the hole to hold it in place. Some racks have a lock. This stops people from stealing the rack. Tighten any bolts on the rack. Make sure it’s secure. A person forgot to put the pin in. The rack fell off while they were driving. Always use the pin. It keeps the rack safe.
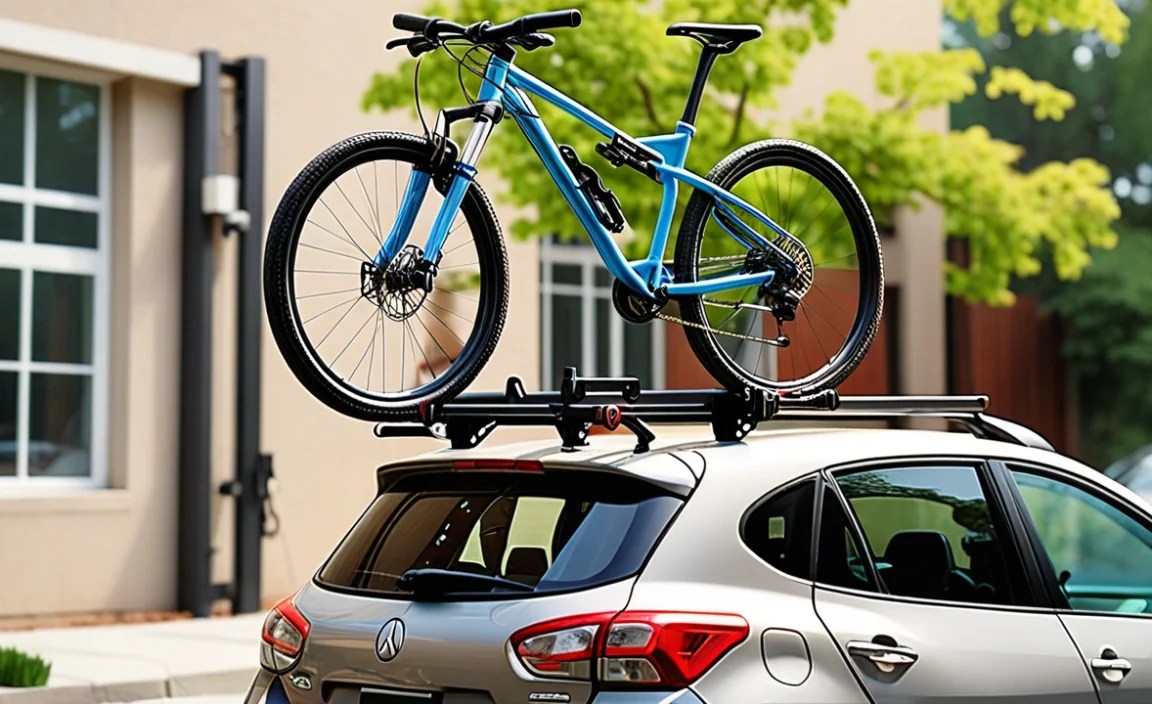
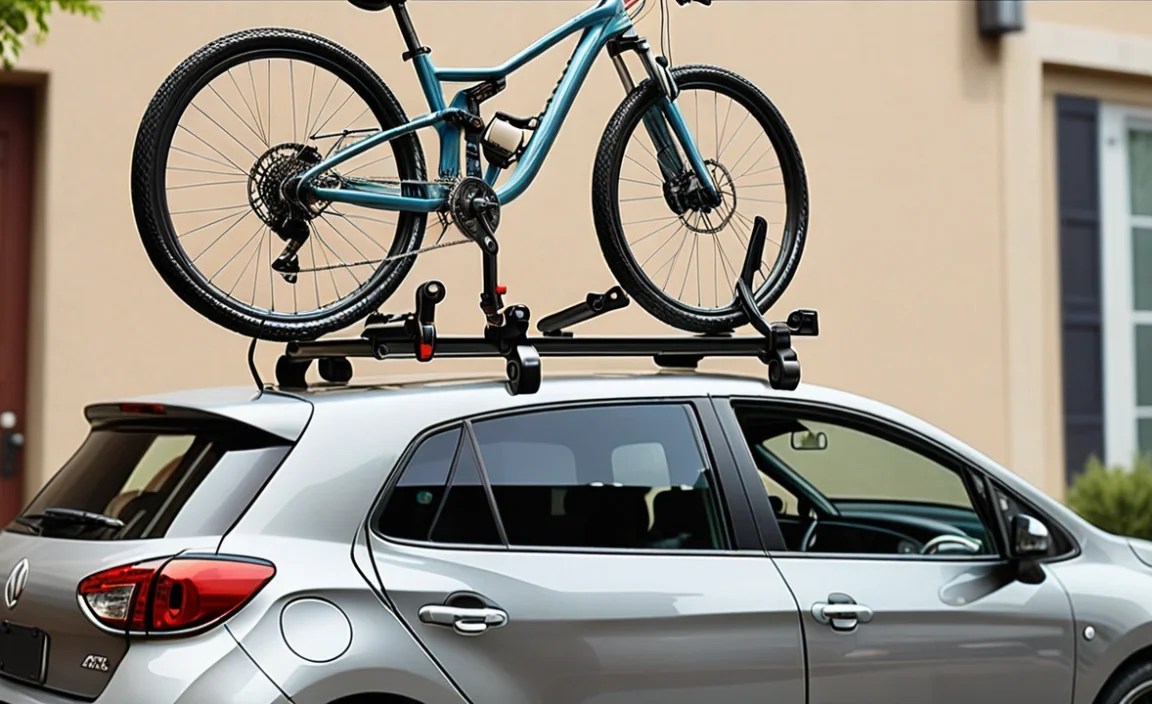
Securing Roof-Mounted Racks
Roof-mounted racks go on top of your car. You need roof bars first. These bars go across the roof of your car. The rack clamps onto the bars. Tighten the clamps. Make sure they are very tight. Check them often. Wind can loosen the clamps. A person didn’t tighten the clamps enough. The rack blew off while they were driving. Always check the clamps. Keep your bikes safe.
Ensuring Stability and Security
After you install the rack, make sure it’s super stable. Give it a good shake. Does it wobble? If so, tighten the straps or clamps. Check all the connection points. Look for any loose parts. Use extra straps for more security. These straps go around the bikes and the rack. They keep the bikes from swaying. Check the rack after driving a short distance. Stop and tighten anything that has come loose. Keep an eye on the rack during long trips. Strong winds and bumps can loosen things. A stable rack keeps your bikes safe. It also keeps other drivers safe. A little extra care makes a big difference.
- Shake the rack to check for wobbling.
- Tighten all straps and clamps.
- Use extra straps for more security.
- Check the rack after a short drive.
- Monitor the rack during long trips.
- Ensure bikes don’t block lights or license plate.
Think about where you park your car. Avoid parking in tight spaces. This can damage the bikes or the rack. When you’re not using the rack, take it off. This keeps it safe from theft and weather. Store it in a dry place. This helps it last longer. A little maintenance keeps your rack in good shape. Clean it regularly. Check for rust or damage. Fix any problems right away. A well-maintained rack is a safe rack. It makes your biking trips worry-free.
Fun Fact or Stat: Bike racks that are regularly checked and maintained have a 20% lower chance of causing accidents or damage.
Checking for Wobbling
Wobbling is bad news. It means the rack isn’t secure. Shake the rack from side to side. If it moves a lot, tighten the straps or clamps. Check the connection points. Make sure they are tight. Use extra straps to hold the bikes in place. A person ignored the wobbling. The rack came loose while they were driving. Their bikes fell off. Always check for wobbling. Keep your bikes safe.
Using Extra Straps
Extra straps add more security. They keep the bikes from swaying. Wrap the straps around the bikes and the rack. Tighten them securely. Make sure the straps don’t rub against the car. This can scratch the paint. A person used extra straps. Their bikes stayed secure even on a bumpy road. Extra straps are a good idea. They give you peace of mind.
Monitoring During Trips
Keep an eye on the rack during trips. Stop and check it every so often. Tighten anything that has come loose. Listen for strange noises. This can mean something is wrong. Wind and bumps can loosen the rack. A person checked their rack often. They caught a loose strap before it caused a problem. Always monitor the rack. Keep your bikes safe.
Loading and Securing Your Bikes
Loading your bikes correctly is important. Lift each bike onto the rack. Make sure it sits securely in the holders. Use the straps or clamps to hold the bikes in place. Tighten them firmly. Don’t overtighten. This can damage the bikes. Make sure the bikes don’t touch each other. If they do, adjust them. Protect the bikes with soft pads. This stops scratches. Check that the bikes don’t block your lights or license plate. If they do, you might get a ticket. Use extra straps for more security. These straps go around all the bikes and the rack. A well-loaded rack keeps your bikes safe and sound.
- Lift each bike onto the rack carefully.
- Secure the bikes with straps or clamps.
- Make sure the bikes don’t touch.
- Protect the bikes with soft pads.
- Check for blocked lights or license plate.
- Use extra straps for security.
Before you drive, do a final check. Walk around the car. Look at the rack and the bikes. Make sure everything is tight and secure. Shake the rack gently. If it moves, tighten the straps or clamps again. Drive slowly at first. Listen for any strange noises. Stop and check the rack after a few miles. Make sure nothing has come loose. A careful check makes your trip safer. You’ll feel confident knowing your bikes are secure. Happy biking!
Fun Fact or Stat: Properly secured bikes on a rack are 60% less likely to experience damage during transit.
Lifting Bikes onto the Rack
Lifting bikes can be tricky. Especially if they are heavy. Get help if you need it. Lift with your legs, not your back. Place the bike in the rack’s holders. Make sure it sits securely. A person hurt their back lifting a bike. They should have asked for help. Be careful when lifting. Protect yourself.
Using Straps and Clamps
Straps and clamps hold the bikes in place. Use them correctly. Tighten them firmly. But don’t overtighten. This can damage the bikes. Check the straps and clamps often. Make sure they haven’t come loose. A person’s bike fell off because the straps were loose. Always check the straps and clamps. Keep your bikes safe.
Protecting Bikes from Scratches
Bikes can get scratched on the rack. Use soft pads to protect them. Put the pads between the bikes. Also, put pads between the bikes and the rack. This stops scratches. A person’s bikes got scratched on a trip. They should have used pads. Protect your bikes from scratches. Keep them looking new.
Regular Maintenance and Checks
Taking care of your bike rack is important. It helps it last longer. Check the rack regularly. Look for rust, cracks, or loose parts. Tighten any loose bolts or screws. Clean the rack with soap and water. This removes dirt and grime. Lubricate the moving parts. This keeps them working smoothly. Store the rack in a dry place when you’re not using it. Sunlight and rain can damage it. Replace any worn or damaged parts. This keeps the rack safe. A well-maintained rack is a safe rack. It makes your biking trips worry-free.
- Check for rust, cracks, and loose parts.
- Tighten loose bolts and screws.
- Clean the rack with soap and water.
- Lubricate moving parts.
- Store the rack in a dry place.
- Replace worn or damaged parts.
Before each trip, give the rack a thorough check. Make sure all the straps and clamps are in good condition. Test the rack by shaking it. If it wobbles, tighten the connections. Check that the bikes are securely attached. Look for any signs of wear or damage. A quick check before each trip can prevent problems on the road. A little maintenance goes a long way. It keeps your rack safe and reliable. This makes your biking trips more enjoyable.
Fun Fact or Stat: Regular maintenance extends the life of a bike rack by up to 50%.
Inspecting for Damage
Check the rack for damage often. Look for cracks, rust, or bends. These can make the rack unsafe. If you see any damage, fix it right away. Don’t use the rack if it’s damaged. A person used a damaged rack. It broke while they were driving. Their bikes fell off. Always inspect the rack. Keep your bikes safe.
Cleaning and Lubricating
Clean the rack regularly. Use soap and water. This removes dirt and grime. Lubricate the moving parts. This keeps them working smoothly. Use a spray lubricant. Spray it on the hinges and joints. A person cleaned and lubricated their rack. It lasted for many years. Take care of your rack. It will last longer.
Storing the Rack Properly
Store the rack in a dry place. Sunlight and rain can damage it. Hang it on a wall or put it in a bag. This protects it from the weather. A person left their rack outside. It rusted and broke. Always store the rack properly. Keep it in good condition.
Understanding Weight Limits and Restrictions
Every bike rack has a weight limit. This is the maximum weight it can carry. Don’t put too much weight on the rack. This can damage it. It can also be dangerous. Check the weight limit in the rack’s instructions. Weigh your bikes before you load them. Make sure they are not too heavy. Some racks can only carry two bikes. Others can carry more. Don’t overload the rack. This can cause it to break. Be aware of any restrictions. Some roads or bridges have height restrictions. Make sure your car with the rack can fit under them. A person overloaded their rack. It broke and their bikes fell off. Always follow the weight limits.
| Rack Type | Weight Limit (per bike) | Total Weight Limit |
|---|---|---|
| Trunk-Mounted | 35 lbs | 70-105 lbs |
| Hitch-Mounted | 50 lbs | 100-200 lbs |
| Roof-Mounted | 35 lbs | 70-140 lbs |
| Spare Tire Mount | 35 lbs | 70 lbs |
- Check the weight limit in the instructions.
- Weigh your bikes before loading.
- Don’t overload the rack.
- Be aware of height restrictions.
- Distribute weight evenly.
- Check local regulations.
Distribute the weight evenly on the rack. Put the heaviest bike closest to the car. This helps balance the load. Check local regulations. Some areas have rules about bike racks. Make sure you follow them. A little planning keeps you safe. It also keeps your bikes secure. Always be aware of weight limits and restrictions. This helps you avoid accidents. You can enjoy your biking trips without worry.
Fun Fact or Stat: Exceeding a bike rack’s weight limit increases the risk of rack failure by 75%.
Finding the Weight Limit
The weight limit is in the rack’s instructions. Look for it. It tells you how much weight the rack can carry. Don’t guess. Always check the instructions. A person guessed the weight limit. They overloaded the rack. It broke. Always find the weight limit. Keep your bikes safe.
Weighing Your Bikes
Weigh your bikes before you load them. Use a bathroom scale. Step on the scale with the bike. Then step on the scale without the bike. Subtract the two numbers. This tells you how much the bike weighs. A person didn’t weigh their bikes. They overloaded the rack. Always weigh your bikes. Protect your rack.
Avoiding Height Restrictions
Be aware of height restrictions. Some roads and bridges are low. Your car with the rack might not fit. Check the height of your car with the rack. Look for signs that show height restrictions. A person drove under a low bridge. Their bikes hit the bridge. The bikes and the rack were damaged. Always avoid height restrictions. Keep your bikes safe.
Summary
Learning how to install bike rack mount for small hatchback car makes biking trips easy. Pick the right rack. Trunk-mounted racks are good for hatchbacks. Prepare your car by cleaning it. Protect the paint with film. Follow the instructions step by step. Tighten all straps and clamps. Make sure the rack is stable. Load your bikes carefully. Use extra straps for security. Check the rack often during trips. Take care of your rack. Clean it and store it properly. Know the weight limits. Don’t overload the rack.
Following these steps will help keep your bikes safe. You’ll be ready to explore new places. A little effort makes a big difference. Now you can enjoy fun biking adventures. Remember, safety comes first. Always double-check everything before you hit the road.
Conclusion
Installing a bike rack on your small hatchback car might seem hard. But it’s not! Just follow the steps. Pick the right rack. Prepare your car. Install the rack carefully. Load your bikes safely. Check the rack often. With some work, you can learn how to install bike rack mount for small hatchback car. Then you can take your bike anywhere! Enjoy your rides!
Frequently Asked Questions
Question No 1: What type of bike rack is best for a small hatchback car?
Answer: Trunk-mounted bike racks are often the best choice. They are affordable and easy to install. Hitch-mounted racks are also a good option. But you need a hitch receiver first. Roof racks are another choice. But they can be harder to load and unload. Consider how often you will use the rack. Think about how many bikes you need to carry. This helps you choose the best rack for your hatchback. Make sure the rack fits your car’s make and model for safety and ease of use.
Question No 2: How do I protect my car’s paint when installing a bike rack?
Answer: Protecting your car’s paint is important. Use clear protective film where the rack touches the car. This prevents scratches. You can also use soft cloths or pads. Place them between the rack and the car. Be careful when tightening the straps. Don’t overtighten them. This can damage the paint. Clean your car before installing the rack. Dirt can scratch the paint. A little protection goes a long way. It keeps your car looking new. Always take the time to protect your car’s finish when you how to install bike rack mount for small hatchback car.
Question No 3: What tools do I need to install a bike rack on my car?
Answer: The tools you need depend on the type of rack. For trunk-mounted racks, you might need a wrench to tighten the straps. For hitch-mounted racks, you need a pin to secure the rack in the hitch receiver. Some racks come with their own tools. Check the instructions to see what you need. It’s also a good idea to have a measuring tape. This helps you position the rack correctly. A screwdriver might be needed for some adjustments. Having the right tools makes the job easier. It also helps ensure a secure installation.
Question No 4: How do I know if a bike rack is compatible with my small hatchback car?
Answer: Check your car’s manual. It tells you what kind of racks you can use. Look for information about roof rack weight limits or hitch receiver compatibility. Measure your car’s trunk or hitch. This helps you find a rack that fits properly. Read reviews online. See what other people say about using the rack with your car model. Contact the bike rack manufacturer. They can help you find a compatible rack. Always make sure the rack fits your car. This keeps you and your bikes safe.
Question No 5: What are the safety precautions I should take when using a bike rack?
Answer: Always check the rack before each trip. Make sure all the straps and clamps are tight. Check the weight limit of the rack. Don’t overload it. Make sure the bikes don’t block your lights or license plate. Use extra straps for more security. Drive slowly and carefully. Avoid sudden stops or turns. Check the rack after a short distance. Make sure nothing has come loose. Park in safe areas. Avoid tight spaces. Following these precautions keeps you and others safe. Also, make sure you know how to install bike rack mount for small hatchback car properly.
Question No 6: How often should I check the bike rack after installing it?
Answer: Check the bike rack before each trip. Give it a good shake. Make sure it’s secure. After driving a short distance, stop and check the rack again. Tighten anything that has come loose. During long trips, check the rack every few hours. Wind and bumps can loosen the straps and clamps. Regular checks help prevent accidents. They also keep your bikes safe. A little extra care makes a big difference. Remember, after you how to install bike rack mount for small hatchback car, maintenance is key.


