
How to Test Suction Power of Hand Pump: Easy Guide
To test the suction power of a hand pump, start by checking the pump’s components for any visible damage or wear. Ensure the hose is securely connected, and then use a vacuum gauge to measure the pump’s suction capability. Compare the reading to the manufacturer’s specifications to determine if the pump is performing adequately. If the suction is weak, inspect and clean or replace the necessary parts.
Is your hand pump not performing like it used to? Are you finding it harder to get the suction you need for various tasks? It’s a common issue, and you’re not alone! Many users experience a decline in their hand pump’s suction power over time. The good news is that testing and diagnosing the problem is straightforward. In this guide, I’ll walk you through simple steps to test your hand pump’s suction, identify potential issues, and keep it working efficiently. Let’s get started and restore your pump’s performance!
Why Test the Suction Power of a Hand Pump?

Regularly testing the suction power of your hand pump is essential for several reasons. A pump with weak suction can lead to inefficiencies and frustrations, whether you’re using it for inflating tires, transferring fluids, or any other application. Here’s why testing is important:
- Ensuring Optimal Performance: A hand pump should provide consistent and reliable suction. Testing helps you confirm that it’s working as expected.
- Preventing Damage: Identifying a weak pump early can prevent further damage to the pump itself or the items you’re using it on.
- Saving Time and Effort: A pump with good suction gets the job done faster and with less effort, making your tasks more efficient.
- Maintaining Equipment: Regular testing allows you to catch minor issues before they become major problems, prolonging the pump’s lifespan.
Tools and Materials Needed
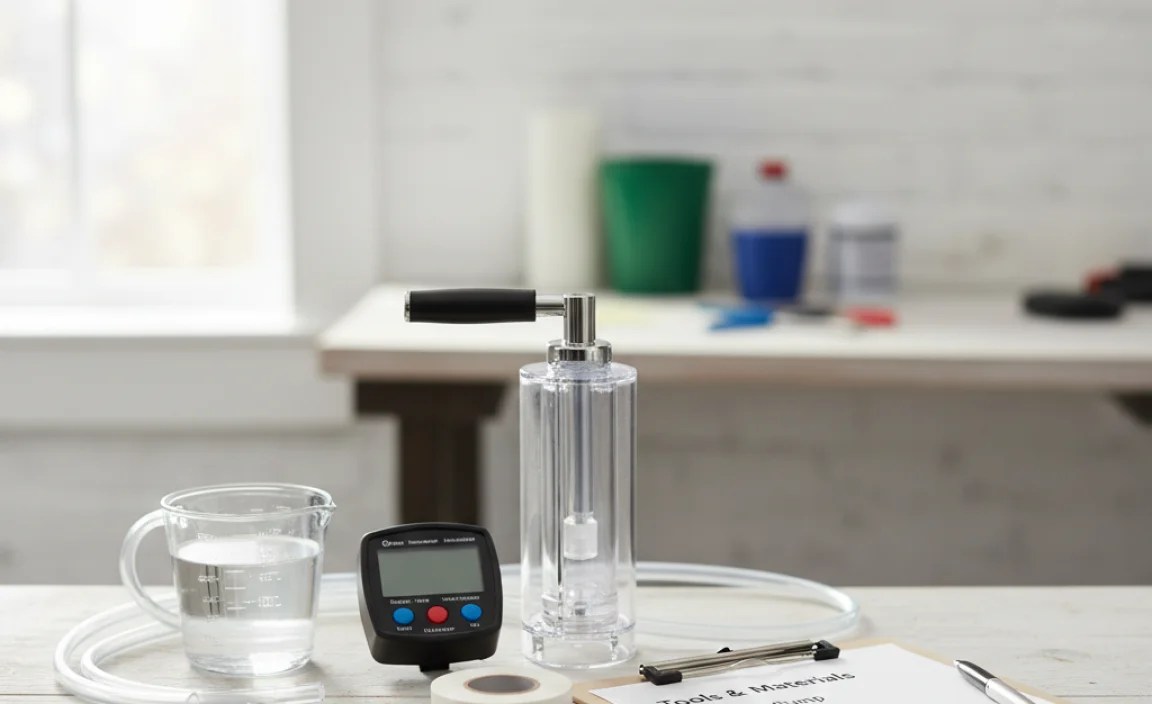
Before you start testing your hand pump, gather the necessary tools and materials. Having everything on hand will make the process smoother and more efficient.
- Vacuum Gauge: A vacuum gauge is essential for measuring the suction power accurately. Look for one with a range suitable for your pump.
- Hose Clamps: You might need hose clamps to ensure a secure connection between the pump and the gauge.
- Cleaning Supplies: A clean cloth, mild soap, and water can help clean the pump and its components.
- Screwdrivers: A set of screwdrivers might be needed to disassemble parts of the pump for inspection.
- Lubricant: A silicone-based lubricant can help maintain the pump’s moving parts.
- Spare Parts: Keep some common spare parts like O-rings and seals handy, in case you need to replace them.
Step-by-Step Guide to Testing Suction Power
Follow these steps to effectively test the suction power of your hand pump. Each step is designed to help you identify potential issues and ensure accurate results.
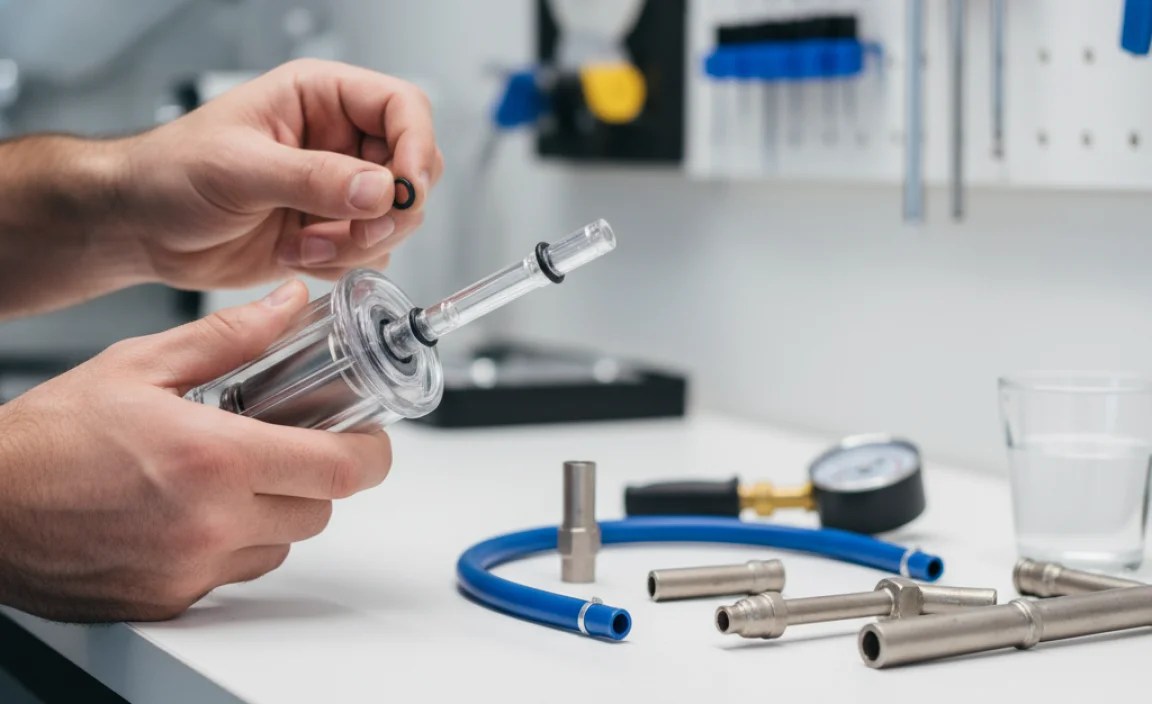
Step 1: Inspect the Pump
Begin by visually inspecting the hand pump. Look for any signs of damage, wear, or leaks. Pay close attention to the following areas:
- Hose Connections: Check if the hose is securely connected to the pump and free from cracks or holes.
- Pump Body: Look for any visible cracks or damage to the pump body.
- Seals and O-rings: Inspect the seals and O-rings for wear, cracks, or dryness.
- Handle and Piston: Ensure the handle moves smoothly and the piston is in good condition.
Step 2: Connect the Vacuum Gauge
Connect the vacuum gauge to the hand pump. This will allow you to measure the suction power accurately. Here’s how to do it:
- Attach the Hose: Connect the hose from the vacuum gauge to the pump’s outlet. Use hose clamps to ensure a tight seal if necessary.
- Secure the Connection: Make sure the connection is secure to prevent any air leaks during the test.
- Position the Gauge: Position the gauge so you can easily read the measurements.
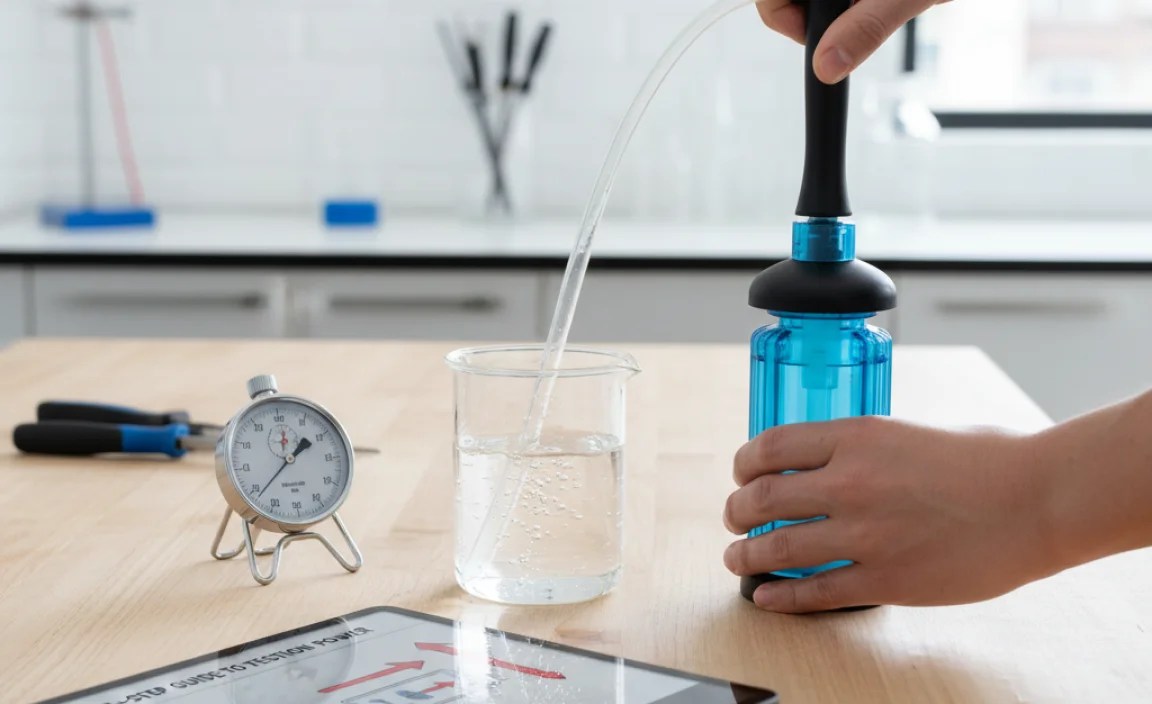
Step 3: Perform the Suction Test
Now, perform the suction test to measure the pump’s performance. Follow these steps:
- Operate the Pump: Operate the hand pump as you normally would. Observe the vacuum gauge as you pump.
- Read the Gauge: Note the highest vacuum reading the gauge reaches. This reading indicates the pump’s suction power.
- Repeat the Test: Repeat the test several times to ensure consistent readings.
Step 4: Compare the Readings
Compare the vacuum readings you obtained to the manufacturer’s specifications. This will help you determine if the pump is performing adequately.
- Check the Manual: Refer to the pump’s manual for the expected vacuum range.
- Evaluate Performance: If the reading is significantly lower than the specified range, the pump’s suction power is weak.
- Consider Factors: Keep in mind that altitude and temperature can affect the readings, so adjust accordingly. You may also want to check out online resources such as engineeringtoolbox.com to learn how to adjust your readings.
Step 5: Identify Potential Issues
If the suction power is weak, identify the potential causes. Common issues include:
- Air Leaks: Check for air leaks in the hose connections, seals, or pump body.
- Worn Seals: Inspect the seals and O-rings for wear, cracks, or dryness.
- Clogged Filters: Check for any clogs in the pump’s filters or intake.
- Piston Problems: Ensure the piston is moving smoothly and not damaged.
Step 6: Clean and Lubricate the Pump
Cleaning and lubricating the pump can often improve its performance. Follow these steps:
- Disassemble the Pump: Carefully disassemble the pump, referring to the manual if needed.
- Clean Components: Clean all components with a mild soap and water solution. Remove any dirt, debris, or old lubricant.
- Dry Thoroughly: Ensure all components are completely dry before reassembling.
- Lubricate Moving Parts: Apply a silicone-based lubricant to the moving parts, such as the piston and seals.
- Reassemble the Pump: Reassemble the pump, ensuring all parts are correctly aligned and securely fastened.
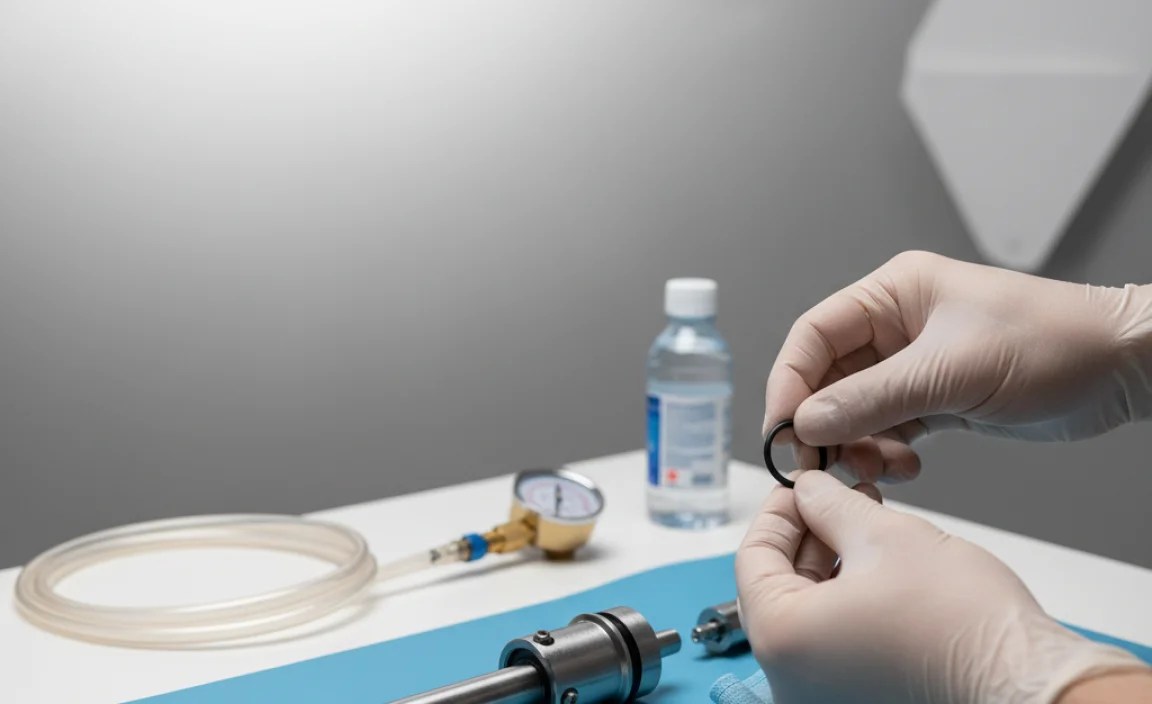
Step 7: Replace Worn Parts
If cleaning and lubricating don’t improve the suction power, replace any worn or damaged parts. Common parts to replace include:
- Seals and O-rings: Replace any worn or cracked seals and O-rings.
- Hoses: Replace any hoses with cracks or leaks.
- Filters: Replace clogged or damaged filters.
- Piston Components: Replace any damaged piston components.
Step 8: Retest the Suction Power
After cleaning, lubricating, and replacing any worn parts, retest the suction power to ensure the pump is working correctly. Follow the steps outlined in Step 3 and compare the new readings to the manufacturer’s specifications.
Troubleshooting Common Issues
Even after following the steps above, you might encounter some common issues. Here’s how to troubleshoot them:
Issue 1: Low Vacuum Reading
Problem: The vacuum gauge shows a low reading, indicating weak suction.
Solution:
- Check for Air Leaks: Ensure all connections are tight and there are no cracks or holes in the hose or pump body.
- Inspect Seals: Replace any worn or damaged seals and O-rings.
- Clean Filters: Clean or replace any clogged filters.
Issue 2: Inconsistent Readings
Problem: The vacuum readings fluctuate or are inconsistent.
Solution:
- Secure Connections: Ensure all connections are securely fastened.
- Check Piston: Inspect the piston for smooth movement and any signs of damage.
- Lubricate Components: Apply lubricant to the moving parts to ensure smooth operation.
Issue 3: Pump Not Building Vacuum
Problem: The pump fails to build any vacuum at all.
Solution:
- Inspect Valve: Check the valve to ensure it’s functioning correctly and not stuck open or closed.
- Check Piston Seal: Verify that the piston seal is properly seated and not damaged.
- Ensure Proper Assembly: Make sure the pump is correctly assembled, with all parts in their proper positions.
Tips for Maintaining Suction Power
To keep your hand pump working efficiently, follow these maintenance tips:
- Regular Cleaning: Clean the pump regularly to remove dirt and debris.
- Proper Lubrication: Lubricate the moving parts to ensure smooth operation.
- Inspect Regularly: Inspect the pump regularly for signs of wear or damage.
- Store Properly: Store the pump in a clean, dry place to prevent damage.
- Replace Parts: Replace worn parts promptly to maintain optimal performance.
When to Seek Professional Help
While many issues can be resolved with DIY maintenance, some problems require professional help. Consider seeking assistance if:
- You’re Unsure: You’re unsure about disassembling or repairing the pump.
- The Problem Persists: The problem persists after attempting basic troubleshooting.
- Specialized Tools Needed: Specialized tools or knowledge are required for the repair.
- Extensive Damage: The pump has extensive damage that you can’t repair yourself.
Table: Common Issues and Solutions
| Issue | Possible Causes | Solutions |
|---|---|---|
| Low Vacuum Reading | Air leaks, worn seals, clogged filters | Check connections, replace seals, clean filters |
| Inconsistent Readings | Loose connections, piston problems, lack of lubrication | Secure connections, inspect piston, lubricate components |
| Pump Not Building Vacuum | Valve issues, piston seal problems, improper assembly | Inspect valve, check piston seal, ensure proper assembly |
Table: Maintenance Schedule
| Task | Frequency | Description |
|---|---|---|
| Cleaning | Monthly | Clean pump body and components with mild soap and water. |
| Lubrication | Every 3 Months | Lubricate moving parts with silicone-based lubricant. |
| Inspection | Every 6 Months | Inspect for wear, damage, and loose connections. |
| Parts Replacement | As Needed | Replace worn seals, hoses, and filters. |
FAQ: Testing Hand Pump Suction Power
Here are some frequently asked questions about testing the suction power of hand pumps.
Q1: How often should I test the suction power of my hand pump?
A: You should test the suction power of your hand pump every 6 months or whenever you notice a decrease in performance. Regular testing helps identify issues early and prevents further damage.
Q2: Can altitude affect the suction power of a hand pump?
A: Yes, altitude can affect the suction power of a hand pump. Higher altitudes have lower air pressure, which can reduce the pump’s efficiency. Adjust your readings accordingly.
Q3: What type of lubricant should I use on my hand pump?
A: Use a silicone-based lubricant on your hand pump. Silicone lubricants are safe for rubber and plastic components and provide excellent lubrication.
Q4: How do I know if my hand pump needs new seals?
A: If your hand pump has weak suction and you notice cracks, dryness, or wear on the seals, it’s time to replace them. New seals can significantly improve the pump’s performance.
Q5: What should I do if my hand pump still has weak suction after cleaning and lubricating it?
A: If cleaning and lubricating don’t improve the suction, inspect and replace any worn parts, such as seals, hoses, or filters. If the problem persists, consider seeking professional help.
Q6: Can I use a regular pressure gauge to test suction power?
A: No, you should use a vacuum gauge to test suction power. A pressure gauge measures positive pressure, while a vacuum gauge measures negative pressure (suction).
Q7: Where can I find replacement parts for my hand pump?
A: You can find replacement parts for your hand pump at local hardware stores, online retailers, or directly from the pump manufacturer. Make sure to choose parts that are compatible with your specific pump model.
Conclusion
Testing the suction power of your hand pump is a straightforward process that can save you time and frustration. By following these steps, you can identify potential issues, maintain your pump’s performance, and extend its lifespan. Regular maintenance, including cleaning, lubrication, and parts replacement, will keep your hand pump working efficiently for years to come. So, grab your tools, follow this guide, and ensure your hand pump is always ready to deliver optimal suction power!


