
How to Test If Hand Pump Works: Easy Powerful Guide
To test if your hand pump works, start by ensuring the hose and nozzle are securely attached. Connect the nozzle to your bike tire valve, making sure it’s a snug fit. Then, pump the handle and observe if air flows into the tire, checking the pressure with a gauge. Listen for air leaks, and if the pump feels resistant, it’s likely working correctly. If no air flows or you hear leaks, the pump needs maintenance or replacement.
Is your bike tire looking a little flat? A trusty hand pump is a cyclist’s best friend, but what happens when you’re not sure if it’s doing its job? It can be frustrating to pump away, only to realize your efforts are fruitless. Don’t worry! Testing your hand pump is easier than you think. This guide will walk you through simple steps to ensure your pump is inflating your tires effectively. We’ll cover everything from checking for leaks to understanding pressure readings, so you can get back on the road with confidence. Let’s get started and make sure your tires are ready to roll!
Gather Your Tools and Prepare

Before you start testing your hand pump, it’s important to gather the necessary tools and ensure you have a suitable environment. This preparation will make the testing process smoother and more accurate.
Essential Tools
Having the right tools on hand is crucial for effectively testing your hand pump. Here’s what you’ll need:
- Hand Pump: The pump you want to test.
- Bike Tire: A tire that needs inflation.
- Pressure Gauge: To measure the tire pressure accurately. A separate gauge is helpful if your pump doesn’t have one built-in.
- Valve Adapters: If your pump doesn’t fit your tire valve type (Presta or Schrader) directly.
- Water bottle with soapy water: To test for air leaks.
Preparation Steps
Follow these steps to set up your testing environment:
- Inspect the Pump: Look for any visible damage, such as cracks in the hose or handle.
- Check the Hose Connection: Make sure the hose is securely attached to the pump body.
- Prepare the Tire: Ensure the tire valve is accessible and free of debris.
- Gather Additional Tools: Keep your pressure gauge and any necessary valve adapters within easy reach.
Step-by-Step Testing Procedure
Now that you’re prepared, follow these steps to test your hand pump effectively.
Connect the Pump to the Tire Valve
Connecting the pump correctly to the tire valve is the first critical step. Here’s how to do it:
- Identify Your Valve Type: Determine whether your tire has a Presta or Schrader valve. Presta valves are narrow with a locking nut at the top, while Schrader valves are wider and similar to those on car tires.
- Prepare the Valve: For Presta valves, unscrew the locking nut and depress the valve briefly to ensure it’s not stuck. For Schrader valves, simply remove the valve cap.
- Attach the Pump Nozzle: Firmly press the pump nozzle onto the valve. Ensure it’s a snug fit to prevent air leaks. Some pumps have a lever to lock the nozzle in place.
- Secure the Connection: If your pump has a locking lever, engage it to create a tight seal.
Pump the Handle and Observe
Once the pump is connected, it’s time to start pumping and observe the results:
- Begin Pumping: Use a smooth, consistent motion to pump the handle. Avoid jerky movements.
- Listen for Airflow: Pay attention to whether you can hear air flowing into the tire. If there’s no sound, the pump may not be working correctly.
- Feel for Resistance: A functional pump will provide some resistance as you push the handle. If the handle moves too easily, it could indicate a problem.
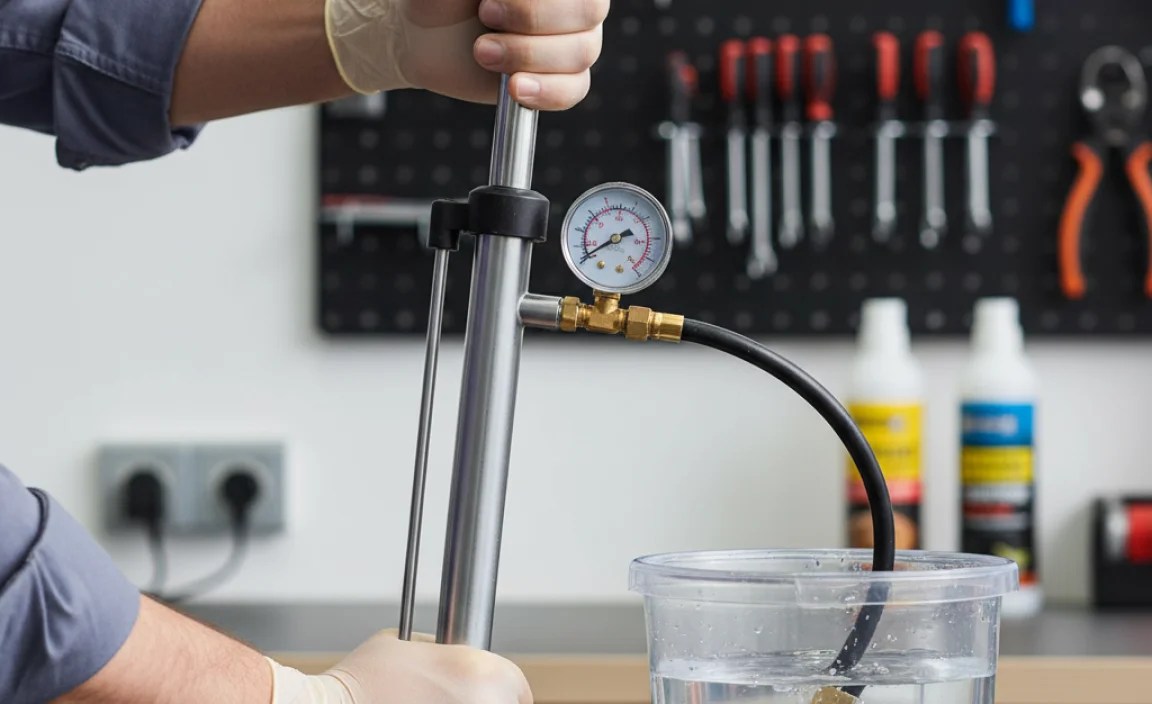
- Check the Pressure Gauge: If your pump has a built-in gauge, monitor the pressure as you pump. If not, use a separate pressure gauge to check the tire pressure periodically.
Check for Air Leaks
Air leaks can prevent your tire from inflating properly. Here’s how to check for them:
- Listen for Hissing Sounds: Pay close attention to any hissing sounds around the valve and pump nozzle.
- Apply Soapy Water: Mix a small amount of dish soap with water and apply it to the valve and nozzle connection. Look for bubbles forming, which indicate a leak.
- Inspect the Hose: Check the pump hose for any cracks or damage that could be causing leaks.
Evaluate the Pump’s Performance
After pumping and checking for leaks, evaluate how well the pump is performing:
- Achieve Target Pressure: Determine the recommended tire pressure (usually printed on the tire sidewall) and try to reach it with the pump.
- Monitor Pressure Retention: After inflating the tire, check the pressure again after a few minutes to see if it holds steady. A significant drop in pressure indicates a leak.
- Assess Overall Effort: Consider how much effort it took to inflate the tire. If it required excessive pumping, the pump may not be efficient.
Troubleshooting Common Issues
If your hand pump isn’t working as expected, here are some common issues and how to address them.
No Airflow
If you’re not feeling any air flowing into the tire, consider these solutions:
- Check Valve Connection: Ensure the pump nozzle is securely attached to the valve. Try reattaching it to make sure.
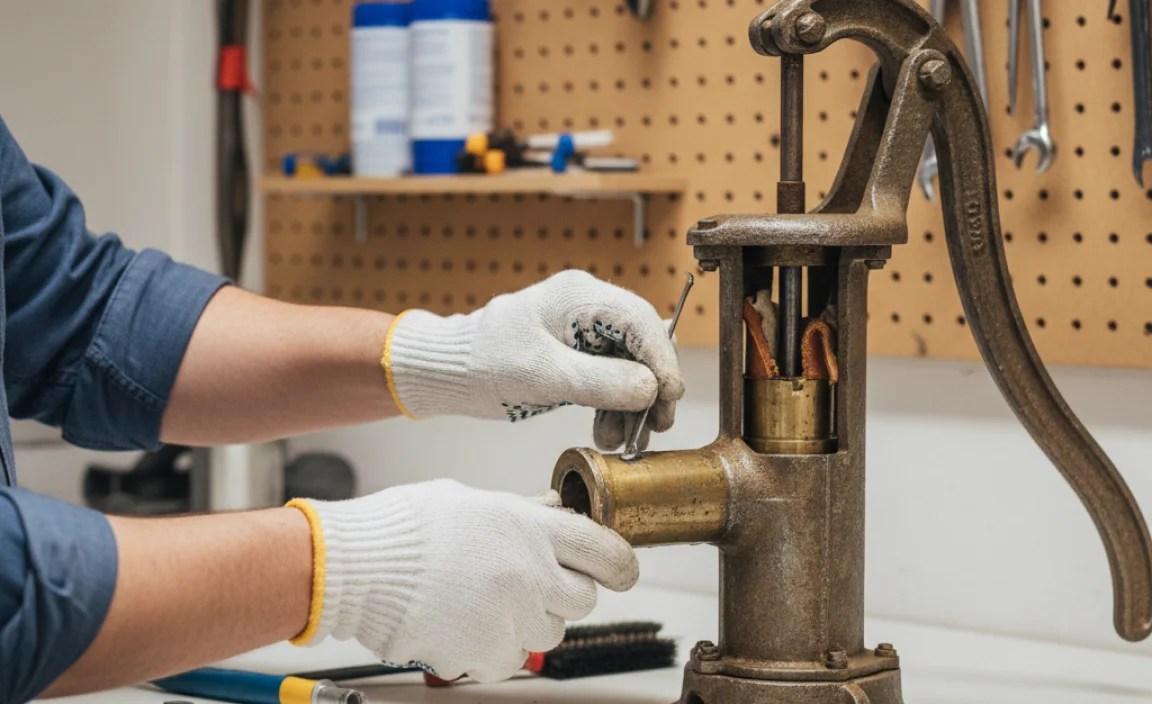
- Inspect Valve Core: The valve core might be clogged or damaged. Clean or replace the valve core if necessary.
- Check Pump Internals: The pump’s internal seals or piston may be worn out. Disassemble the pump (if you’re comfortable) and inspect the parts. Replace any damaged components.
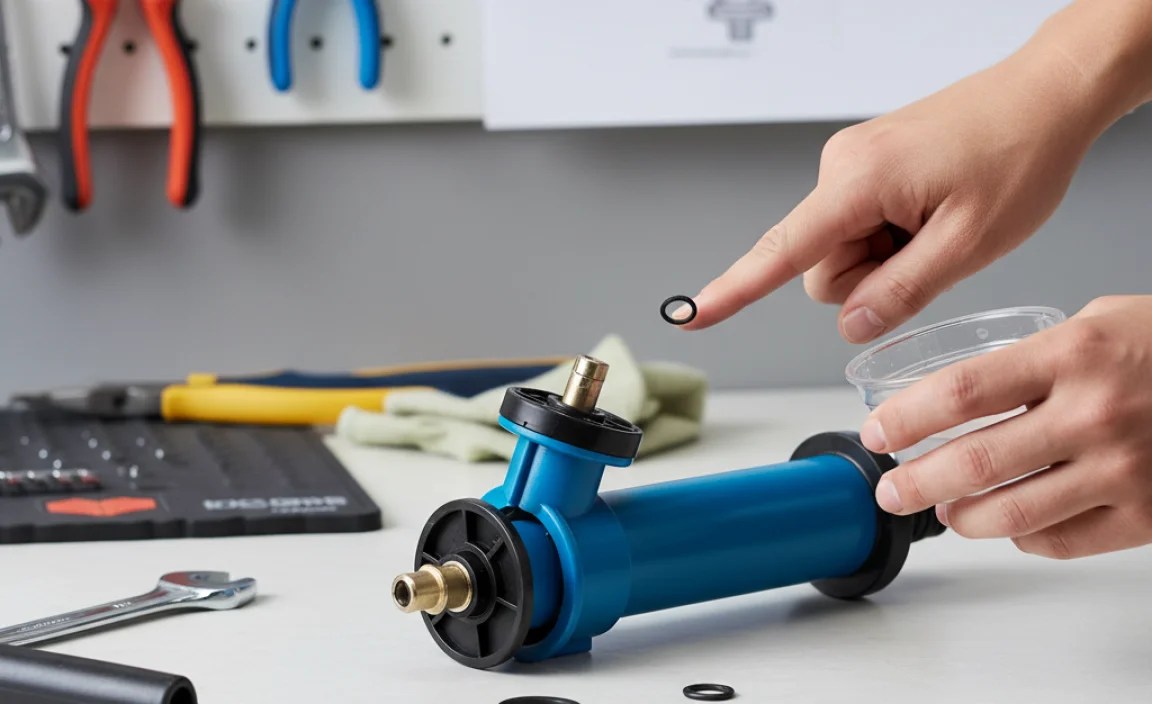
Air Leaks
If you detect air leaks, try these fixes:
- Tighten Connections: Make sure all connections are tight, including the hose and nozzle.
- Replace O-Rings: The O-rings inside the pump nozzle may be worn. Replace them to create a better seal.
- Use Teflon Tape: Apply Teflon tape to the valve threads to help seal any small leaks.
Low Pressure
If you’re struggling to reach the desired pressure, consider the following:
- Check Pump Capacity: Ensure your pump is capable of reaching the required pressure for your tires. Some pumps are designed for high-volume, low-pressure tires, while others are for high-pressure, low-volume tires.
- Inspect Pump Condition: A worn-out pump may not be able to generate enough pressure. Consider replacing it if it’s old or heavily used.
- Adjust Pumping Technique: Use a smooth, full range of motion when pumping. Avoid short, quick strokes that may not be as effective.
Handle Issues
If you’re experiencing problems with the pump handle, here’s what to do:
- Lubricate the Handle: Apply a small amount of lubricant (such as silicone grease) to the handle mechanism to make it move more smoothly.
- Check for Obstructions: Inspect the handle and pump body for any obstructions that may be preventing smooth movement.
- Tighten Loose Parts: Tighten any loose screws or bolts on the handle or pump body.
Maintaining Your Hand Pump
Regular maintenance can extend the life of your hand pump and keep it working efficiently. Here are some tips:
Cleaning
Keep your pump clean to prevent dirt and debris from damaging its internal components:
- Wipe Down Regularly: Use a damp cloth to wipe down the pump body and hose after each use.
- Clean the Nozzle: Periodically clean the pump nozzle with a small brush or cotton swab to remove any dirt or debris.
Lubrication
Proper lubrication ensures smooth operation and prevents wear:
- Lubricate Moving Parts: Apply a small amount of silicone grease to the handle mechanism and other moving parts every few months.
- Check O-Rings: Inspect the O-rings regularly and apply a thin coat of silicone grease to keep them pliable.
Storage
Proper storage protects your pump from damage:
- Store in a Dry Place: Keep the pump in a dry place to prevent rust and corrosion.
- Protect from Extreme Temperatures: Avoid storing the pump in direct sunlight or extreme temperatures, which can damage the seals and hose.
Understanding Tire Pressure

Maintaining the correct tire pressure is essential for a comfortable and efficient ride. Here’s what you need to know.
Why Tire Pressure Matters
Proper tire pressure affects several aspects of your cycling experience:
- Ride Comfort: Correct pressure absorbs bumps and vibrations, providing a smoother ride.
- Rolling Resistance: Optimal pressure reduces rolling resistance, making it easier to pedal.
- Tire Wear: Proper inflation prevents premature wear and tear on your tires.
- Puncture Resistance: Correct pressure reduces the risk of pinch flats (snakebite punctures).
Finding the Right Pressure
Follow these steps to determine the correct tire pressure for your bike:
- Check Tire Sidewall: Look for the recommended pressure range printed on the tire sidewall. This is usually given in PSI (pounds per square inch) or BAR.
- Consider Rider Weight: Heavier riders may need to inflate their tires towards the higher end of the recommended range.
- Adjust for Riding Conditions: Lower the pressure slightly for rough or slippery conditions to improve traction.
Using a Pressure Gauge
A pressure gauge is essential for accurately measuring tire pressure:
- Analog Gauges: These are simple and reliable, but can be less precise.
- Digital Gauges: These provide accurate readings and are easy to read.
To use a gauge, press it firmly onto the tire valve and read the pressure. Adjust the pressure as needed to match the recommended range.
Hand Pump Types and Features
Choosing the right hand pump can make a big difference in your cycling experience. Here’s an overview of the different types and features available.
Types of Hand Pumps
There are several types of hand pumps, each designed for specific purposes:
- Mini Pumps: Compact and lightweight, ideal for carrying on rides.
- Frame-Mounted Pumps: Attached to the bike frame for easy access.
- Floor Pumps (Track Pumps): Larger and more efficient, best for home use.
- Hybrid Pumps: Combine features of mini and floor pumps, offering a balance of portability and efficiency.
Key Features to Consider
When choosing a hand pump, consider these features:
- Pressure Capacity: Ensure the pump can reach the required pressure for your tires.
- Valve Compatibility: Check whether the pump works with Presta, Schrader, or both types of valves.
- Gauge Accuracy: A built-in gauge can be very convenient, but make sure it’s accurate.
- Build Quality: Look for a pump made from durable materials that can withstand regular use.
- Ergonomics: Choose a pump with a comfortable handle and easy-to-use design.
Recommended Hand Pumps
Here are a few highly-rated hand pumps to consider:
| Pump Name | Type | Key Features | Pros | Cons |
|---|---|---|---|---|
| Lezyne Micro Floor Drive HP | Hybrid | High pressure, foot peg, gauge | Efficient, stable, accurate | More expensive |
| Topeak Road Morph G | Hybrid | Fold-out footpad, inline gauge | Easy to use, versatile | Gauge can be small |
| Blackburn Mammoth 2FL | Mini | High volume, durable | Affordable, reliable | Less efficient at high pressures |
Tips for Efficient Pumping
Effective pumping technique can make inflating your tires easier and faster. Here are some tips to help you pump like a pro.
Proper Body Position
Your body position can affect how efficiently you pump:
- Stand Squarely: Position yourself directly in front of the tire and pump.
- Use Your Body Weight: Lean into the pump handle to use your body weight for leverage.
- Maintain a Straight Back: Keep your back straight to avoid strain and fatigue.
Using the Full Range of Motion
Maximize each pump stroke by using the full range of motion:
- Full Strokes: Extend the handle fully on each stroke to move the maximum amount of air.
- Smooth Motion: Use a smooth, consistent motion rather than jerky movements.
Pacing Yourself
Avoid fatigue by pacing yourself while pumping:
- Take Breaks: If you’re inflating a tire to a high pressure, take short breaks to rest your arms.
- Stay Hydrated: Keep a water bottle handy and drink regularly to stay hydrated.
FAQ: Testing Your Hand Pump
Q: How do I know if my hand pump is compatible with my bike’s valve?
A: Check the pump head. Many pumps have dual heads that fit both Presta and Schrader valves. Some require you to reverse the internal parts to switch between valve types. If needed, use a valve adapter.
Q: What should I do if the pump nozzle won’t attach to the valve properly?
A: Ensure the valve is clean and free from debris. Try pressing the pump nozzle firmly onto the valve, making sure it’s aligned correctly. If the nozzle has a locking lever, engage it to secure the connection.
Q: How often should I lubricate my hand pump?
A: Lubricate your hand pump every few months, or whenever you notice the handle becoming stiff or difficult to move. Use a small amount of silicone grease on the moving parts.
Q: Can I use a hand pump to inflate tubeless tires?
A: While possible, it’s often difficult to seat tubeless tires with a hand pump alone due to the high initial air volume required. A floor pump or a special tubeless inflator is usually more effective.
Q: Why is it so hard to pump when the tire pressure gets high?
A: As the tire pressure increases, it requires more force to push air into the tire. This is normal. Make sure you are using your body weight to help push the pump handle and take breaks if needed.
Q: What does PSI mean, and how does it relate to tire pressure?
A: PSI stands for pounds per square inch, and it’s a common unit for measuring tire pressure. The recommended PSI range is usually printed on the tire sidewall. Use a pressure gauge to ensure your tires are inflated within this range for optimal performance and safety.
Q: Is it okay to use a car tire inflator on my bike tires?
A: Yes, but with caution. Car tire inflators can quickly overinflate a bike tire due to their high volume output. Use short bursts and a reliable pressure gauge to avoid damaging your tires. It’s generally safer to use a pump designed specifically for bikes.
Conclusion
Testing your hand pump is a straightforward process that can save you from frustrating situations on the road. By following the steps outlined in this guide, you can quickly determine if your pump is working effectively and troubleshoot any common issues. Remember to maintain your pump regularly, keep your tires properly inflated, and choose the right type of pump for your needs. With a little care and attention, your hand pump will be a reliable companion for all your cycling adventures, ensuring you’re always ready to hit the road with confidence.


