
How to Repair Hand Pump Plunger: Easy Fix!
Quick Summary
Repairing a hand pump plunger usually involves disassembling the pump, inspecting the plunger for wear or damage (like cracks or a dry seal), cleaning all parts, lubricating the plunger seal, and then reassembling the pump. If the seal is damaged, you’ll need to replace it with a new one of the correct size. Regular maintenance can prevent future issues.
Is your hand pump losing pressure or not pumping at all? Don’t worry, you’re not alone! A faulty plunger is a common problem with hand pumps, but it’s often an easy fix. Instead of tossing your pump and buying a new one, you can often repair it yourself with a few simple tools and steps. This guide will walk you through the process, step-by-step, so you can get your pump working like new again. We’ll cover everything from identifying the problem to replacing worn parts, so you can get back to enjoying your ride.
Tools and Materials You’ll Need

Before you start, gather these essential tools and materials. Having everything ready will make the repair process smoother and more efficient.
- Screwdrivers: Both flathead and Phillips head screwdrivers in various sizes.
- Pliers: For gripping and manipulating small parts.
- Adjustable Wrench: To loosen or tighten nuts and bolts.
- Allen Wrench Set: Metric sizes are most common for bike pumps.
- New Plunger Seal or Repair Kit: Make sure it matches your pump model.
- Silicone Grease: For lubricating the plunger and other parts.
- Clean Rags: For wiping away dirt and grease.
- Small Container: To hold small parts during disassembly.
- Work Gloves: To protect your hands.
Step-by-Step Guide to Repairing Your Hand Pump Plunger

Follow these steps carefully to diagnose and repair your hand pump plunger. Work in a clean, well-lit area to avoid losing small parts.
Step 1: Disassemble the Hand Pump
Carefully take apart your hand pump. This usually involves removing the base, handle, and any connecting rods or hoses.
- Remove the Base: Most hand pumps have a base that screws or clips onto the main cylinder. Unscrew or unclip it carefully.
- Detach the Handle: The handle is usually attached with screws or bolts. Remove these and set the handle aside.
- Disconnect Any Hoses or Gauges: If your pump has a hose or pressure gauge, disconnect it from the cylinder.
Step 2: Access the Plunger
Once the pump is disassembled, you can access the plunger. This is usually located inside the main cylinder.
- Remove the Cylinder Cap: Most pumps have a cap or end piece that holds the plunger in place. Unscrew or remove this cap.
- Extract the Plunger: Carefully slide the plunger out of the cylinder. Note its orientation for reassembly.
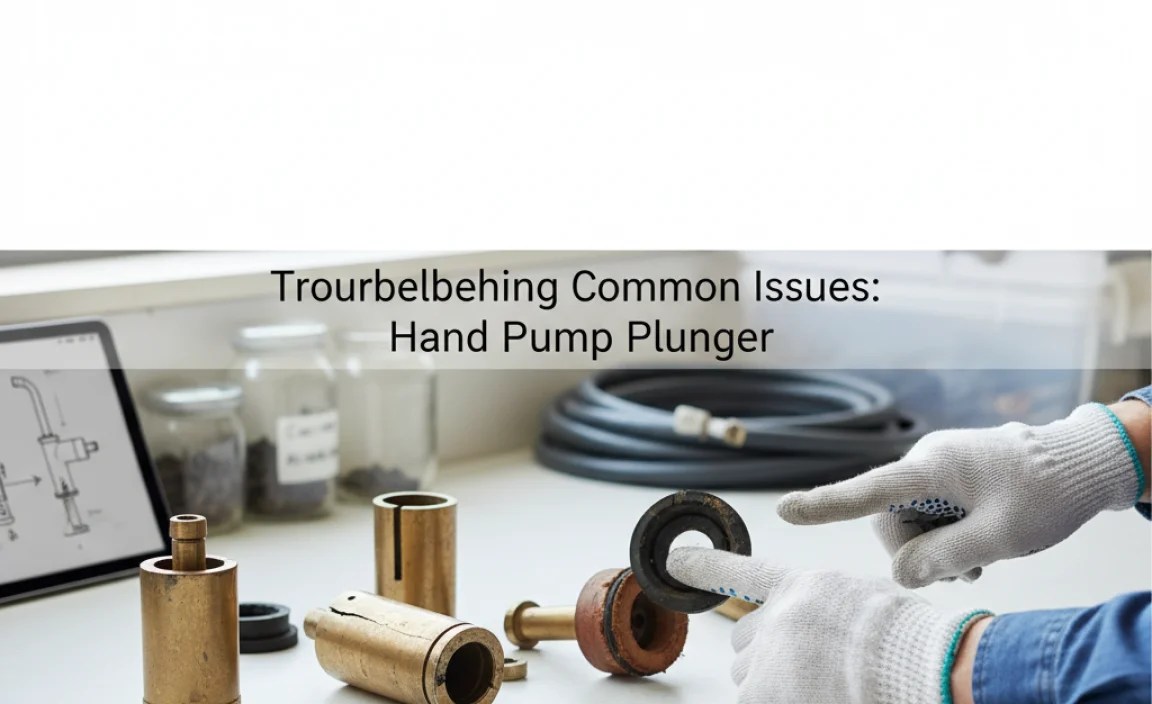
Step 3: Inspect the Plunger
Examine the plunger for signs of wear, damage, or dirt. Pay close attention to the seal or O-ring.
- Check for Cracks or Tears: Look for any visible damage to the plunger body or seal.
- Examine the Seal: The seal should be flexible and in good condition. If it’s dry, cracked, or deformed, it needs to be replaced.
- Clean the Plunger: Use a clean rag to wipe away any dirt, grease, or debris from the plunger and cylinder.
Step 4: Clean the Cylinder
A clean cylinder is essential for proper pump function. Use a clean rag to wipe the inside of the cylinder thoroughly.
- Wipe the Inside: Insert a clean rag into the cylinder and twist it around to remove any dirt or residue.
- Check for Scratches: Inspect the cylinder walls for any scratches or damage that could affect the seal.
Step 5: Replace the Plunger Seal (if needed)
If the plunger seal is damaged, replace it with a new one. This is a crucial step in restoring your pump’s performance.
- Remove the Old Seal: Use a small tool or your fingers to carefully remove the old seal from the plunger.
- Install the New Seal: Stretch the new seal over the plunger and seat it properly in the groove.
- Ensure Proper Fit: Make sure the new seal fits snugly and is not twisted or misaligned.
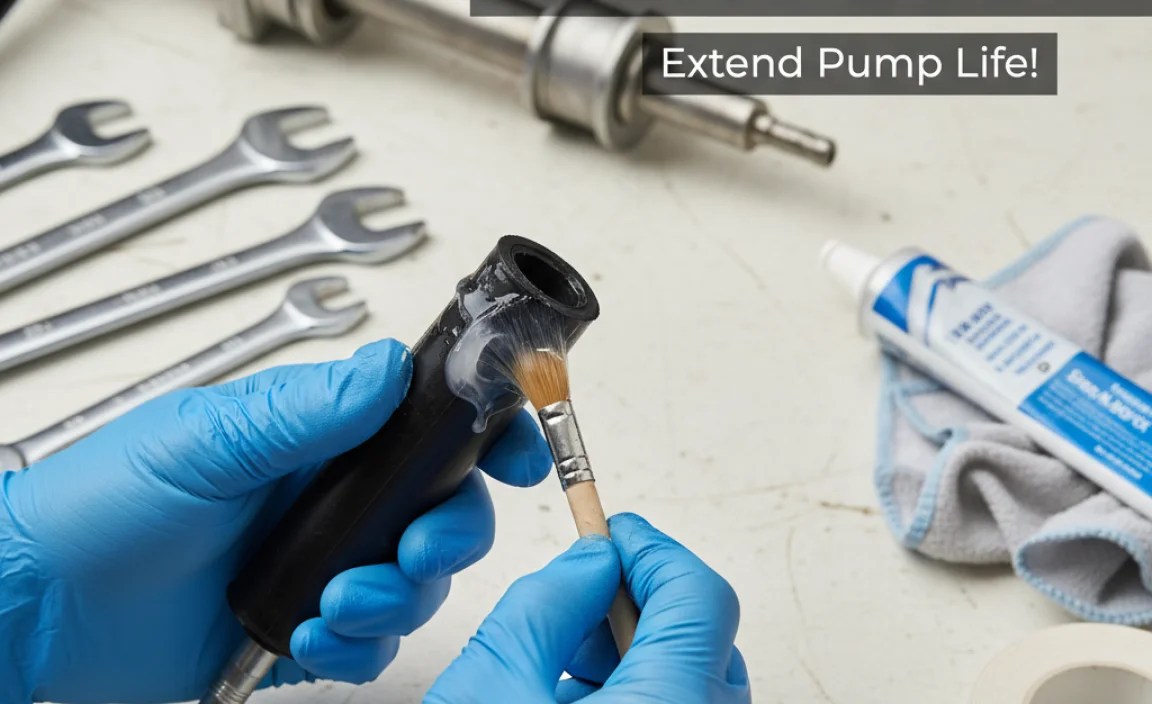
Step 6: Lubricate the Plunger
Proper lubrication is key to smooth pump operation and prolonging the life of the plunger seal. Use silicone grease for best results.
- Apply Silicone Grease: Apply a thin, even layer of silicone grease to the plunger seal and the inside of the cylinder.
- Avoid Over-Lubrication: Too much grease can attract dirt and debris, so use it sparingly.
Step 7: Reassemble the Hand Pump
Carefully reassemble the hand pump in the reverse order of disassembly.
- Insert the Plunger: Slide the lubricated plunger back into the cylinder.
- Replace the Cylinder Cap: Screw or clip the cylinder cap back into place, ensuring it’s secure.
- Reattach the Handle: Reconnect the handle with the screws or bolts you removed earlier.
- Reattach the Base: Screw or clip the base back onto the cylinder.
- Reconnect Any Hoses or Gauges: If your pump has a hose or pressure gauge, reconnect it.
Step 8: Test the Hand Pump
Before you declare victory, test the pump to make sure it’s working properly. Check for leaks and ensure it’s building pressure.
- Check for Leaks: Listen for any hissing sounds that could indicate a leak.
- Pump Air: Attach the pump to a tire or tube and pump air to check if it’s building pressure.
- Adjust as Needed: If the pump is not working properly, recheck your work and make any necessary adjustments.
Troubleshooting Common Issues
Even with careful repair, you might encounter some issues. Here’s how to troubleshoot common problems.
Pump Not Building Pressure
- Check the Seal: Make sure the plunger seal is properly seated and lubricated.
- Inspect for Leaks: Look for any leaks in the cylinder, hose, or connections.
- Tighten Connections: Ensure all screws, bolts, and connections are tight.
Pump is Hard to Push
- Lubricate the Plunger: Apply more silicone grease to the plunger seal and cylinder.
- Check for Obstructions: Make sure there are no obstructions in the cylinder or hose.
- Inspect for Damage: Look for any damage to the plunger or cylinder that could be causing friction.
Pump Leaks Air
- Check the Seal: Make sure the plunger seal is in good condition and properly seated.
- Inspect Connections: Look for leaks at the hose connections, valve, or cylinder cap.
- Replace Worn Parts: If necessary, replace any worn or damaged parts, such as the hose or valve.
Preventative Maintenance Tips
Regular maintenance can prevent many common hand pump problems and extend the life of your pump.
- Clean Regularly: Wipe down your pump after each use to remove dirt and debris.
- Lubricate Periodically: Apply silicone grease to the plunger seal every few months.
- Store Properly: Store your pump in a clean, dry place to prevent corrosion and damage.
- Check for Wear: Inspect your pump regularly for signs of wear or damage, and replace parts as needed.
Choosing the Right Replacement Parts

When replacing parts, it’s essential to choose the right ones for your pump model. Here’s what to consider.
- Check the Model Number: Look for the model number on your pump and use it to find compatible replacement parts.
- Consult the Manufacturer: Check the manufacturer’s website or contact them directly for information on replacement parts.
- Read Reviews: Look for reviews from other users to ensure the replacement parts are of good quality.
Types of Hand Pump Plungers
Hand pump plungers come in various designs and materials, each with its own advantages and disadvantages. Understanding these differences can help you choose the right plunger for your needs.
Rubber Plungers
Rubber plungers are common due to their flexibility and sealing properties. They are generally more affordable but may wear out faster than other materials.
- Pros: Affordable, good sealing
- Cons: Shorter lifespan, susceptible to drying and cracking
Leather Plungers
Leather plungers offer excellent durability and sealing. They require regular lubrication to maintain their flexibility and performance. They are commonly used in older or high-end pumps.
- Pros: Durable, excellent sealing
- Cons: Requires regular lubrication, can dry out if not maintained
Plastic Plungers
Plastic plungers are lightweight and resistant to corrosion. They are a good option for general use but may not provide as tight a seal as rubber or leather.
- Pros: Lightweight, corrosion-resistant
- Cons: May not seal as well as rubber or leather, can become brittle over time
Hybrid Plungers
Hybrid plungers combine different materials to offer a balance of durability, sealing, and cost. For example, a plastic plunger with a rubber seal.
- Pros: Balanced performance, good durability
- Cons: Performance varies depending on materials used
Hand Pump Types and Plunger Compatibility
Different types of hand pumps require specific plunger designs. Here’s a quick guide to help you choose the right plunger for your pump type.
| Pump Type | Typical Plunger Material | Notes |
|---|---|---|
| Floor Pumps | Rubber, Leather, or Hybrid | Often use larger plungers for high volume |
| Mini Pumps | Rubber or Plastic | Compact and lightweight designs |
| Frame Pumps | Rubber or Leather | Designed to mount on the bike frame |
| High-Pressure Pumps | Rubber or Hybrid | Engineered for road bikes and high PSI |
Advanced Repair Techniques
For more complex issues, consider these advanced repair techniques. These may require more specialized tools and knowledge.
Replacing the Check Valve
The check valve prevents air from flowing backward. If it’s faulty, your pump won’t build pressure.
- Locate the Check Valve: It’s usually located near the base of the cylinder.
- Remove the Old Valve: Use a small tool to carefully remove the old valve.
- Install the New Valve: Insert the new valve, ensuring it’s oriented correctly.
Repairing the Hose Connection
A damaged hose connection can cause leaks and reduce pump efficiency.
- Inspect the Hose: Look for cracks or damage to the hose.
- Replace the Hose: If necessary, replace the entire hose or just the damaged section.
- Tighten Connections: Ensure all connections are tight and secure.
Hand Pump Maintenance Schedule
Keep your hand pump in top condition with a regular maintenance schedule. Here’s a suggested schedule to follow.
| Frequency | Task | Description |
|---|---|---|
| After Each Use | Wipe Down | Wipe the pump with a clean rag to remove dirt and debris. |
| Monthly | Lubricate Plunger | Apply silicone grease to the plunger seal. |
| Quarterly | Inspect for Wear | Check for signs of wear or damage, and replace parts as needed. |
| Annually | Deep Clean | Disassemble the pump and clean all parts thoroughly. |
Benefits of DIY Hand Pump Repair
Repairing your hand pump yourself offers several benefits. Here’s why it’s worth learning how to do it.
- Save Money: Avoid the cost of buying a new pump or paying for professional repairs.
- Extend Pump Life: Regular maintenance and timely repairs can prolong the life of your pump.
- Gain Knowledge: Learn valuable skills that can help you maintain other equipment.
- Be Self-Reliant: Be prepared to handle pump issues on the road or trail.
When to Consider Professional Repair
While many hand pump issues can be resolved with DIY repairs, some problems may require professional attention.
- Extensive Damage: If the pump is severely damaged or corroded, it may be beyond repair.
- Complex Issues: If you’re not comfortable disassembling the pump or troubleshooting complex problems, seek professional help.
- Specialized Tools: Some repairs may require specialized tools that you don’t have.
FAQ: Repairing Hand Pump Plungers
Q1: Why is my hand pump not building pressure?
A1: The most common cause is a worn or damaged plunger seal. Check the seal for cracks or tears and replace it if needed. Also, ensure all connections are tight and there are no leaks in the hose or valve.
Q2: How often should I lubricate my hand pump plunger?
A2: It’s a good idea to lubricate your hand pump plunger every few months, or whenever you notice the pump becoming harder to use. Use a silicone grease for best results.
Q3: Can I use any type of grease on my hand pump plunger?
A3: No, you should only use silicone grease. Other types of grease can damage the rubber or plastic components of the plunger and seal.
Q4: Where can I buy replacement parts for my hand pump?
A4: You can find replacement parts at most bike shops, online retailers that specialize in bike parts, or directly from the pump manufacturer’s website.
Q5: How do I know what size plunger seal to buy?
A5: Check your pump’s model number and consult the manufacturer’s website or a bike shop. They can help you identify the correct size seal for your specific pump.
Q6: What tools do I need to repair a hand pump plunger?
A6: You’ll typically need screwdrivers (both flathead and Phillips), pliers, an adjustable wrench, an Allen wrench set, and silicone grease. A small container to hold parts is also helpful.
Q7: Is it worth repairing a hand pump, or should I just buy a new one?
A7: In many cases, repairing a hand pump is worth it. It’s often a simple and inexpensive fix, especially if the problem is just a worn plunger seal. However, if the pump is severely damaged or very old, it may be more cost-effective to replace it.
Conclusion
Repairing your hand pump plunger is a straightforward process that can save you money and extend the life of your pump. By following these steps and tips, you can keep your pump working smoothly and efficiently for years to come. Remember to clean and lubricate your pump regularly, and don’t hesitate to replace worn parts when needed. With a little care and attention, you can ensure that your hand pump is always ready to keep your tires properly inflated, so you can enjoy every ride with confidence.


