
How to Test Homemade Hand Pump: Easy Guide
Quick Summary: Testing your homemade hand pump ensures it’s safe and effective. Start by visually inspecting for leaks or weak points. Then, connect it to a tire or container and check for pressure buildup. Use a pressure gauge to confirm accuracy. Adjust or reinforce as needed, and always prioritize safety when experimenting with homemade equipment.
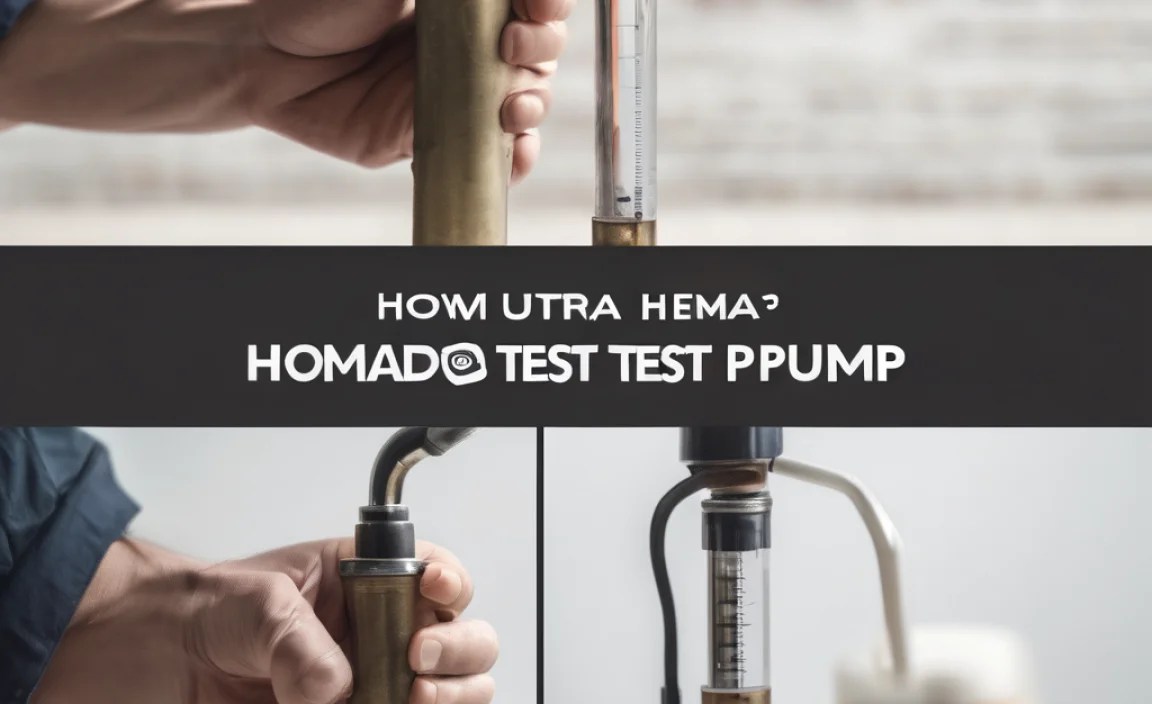
Building your own hand pump can be a rewarding project, giving you a custom tool tailored to your needs. But before you rely on it, you need to make sure it works properly and, most importantly, that it’s safe to use. Many cyclists try to make their own pumps, only to find they’re not as effective as they hoped, or worse, they’re prone to failure. Don’t worry! This guide will walk you through the steps to thoroughly test your homemade hand pump, ensuring it delivers the performance you expect and keeps you safe while using it. Let’s get started and ensure your DIY pump is up to the task!
Why Testing Your Homemade Hand Pump Is Crucial

Before diving into the “how,” let’s cover the “why.” Testing your homemade hand pump is essential for several key reasons:
- Safety: A poorly constructed pump can burst or fail under pressure, potentially causing injury.
- Effectiveness: You want to know if your pump can actually inflate a tire or other item to the desired pressure.
- Durability: Testing helps identify weak points that need reinforcement before they cause problems down the road.
- Peace of Mind: Knowing your pump works reliably gives you confidence when you need it most.
Think of testing as quality control for your DIY project. It’s your chance to refine your design and make sure your pump is a dependable tool.
Tools and Materials You’ll Need

Before you start testing, gather these essential tools and materials:
- Pressure Gauge: A reliable pressure gauge is essential for measuring the output of your pump. A digital gauge offers precise readings.
- Test Tire or Container: You’ll need something to pump air into. An old bike tire or a pressure-rated container works well.
- Safety Glasses: Protect your eyes from potential debris in case of a pump failure.
- Gloves: Protect your hands, especially if your pump has any sharp edges.
- Soapy Water: Use this to check for leaks in the pump’s connections.
- Wrench or Pliers: Keep these handy for tightening connections or making adjustments.
- Notebook and Pen: Record your observations and test results for future reference.
Step-by-Step Guide to Testing Your Homemade Hand Pump

Follow these steps to thoroughly test your homemade hand pump:
Step 1: Visual Inspection
Start with a careful visual inspection of your pump. Look for:
- Cracks or Weak Points: Check the pump body, handle, and any connections for visible damage.
- Loose Fittings: Make sure all fittings are securely tightened.
- Hose Condition: Inspect the hose for cracks, kinks, or wear.
- Valve Integrity: Check the valve mechanism for smooth operation and proper sealing.
Address any obvious issues before moving on to the next step. It’s better to fix a problem now than to have it fail during testing.
Step 2: Leak Test
Next, check for leaks using soapy water. Here’s how:
- Mix a small amount of dish soap with water in a spray bottle.
- Apply the soapy water to all connections, fittings, and the pump body.
- Operate the pump a few times and watch for bubbles. Bubbles indicate air leaks.
- Tighten any leaking connections or replace faulty parts.
Addressing leaks early will improve the pump’s efficiency and accuracy.
Step 3: Pressure Test
Now it’s time to see if your pump can actually build pressure. Here’s the process:
- Connect the pump to your test tire or container.
- Begin pumping, using a smooth and steady motion.
- Watch the pressure gauge to see if the pressure increases.
- Note the maximum pressure the pump can achieve.
- Check if the pressure holds steady or if it leaks back down.
If the pressure doesn’t increase or leaks quickly, there may be internal leaks or valve issues.
Step 4: Accuracy Test
To ensure your pump is providing accurate readings, compare it against a known standard. Here’s how:
- Use a calibrated pressure gauge to measure the pressure in your test tire or container.
- Use your homemade pump to inflate the same tire or container to a specific pressure (e.g., 40 PSI).
- Immediately use the calibrated gauge to re-measure the pressure.
- Compare the readings. If there’s a significant difference, your pump’s gauge may be inaccurate.
If your pump’s gauge is inaccurate, you may need to replace it with a more reliable one.
Step 5: Durability Test
This test assesses how well your pump holds up under repeated use. Here’s what to do:
- Inflate and deflate your test tire or container multiple times (e.g., 20-30 cycles).
- Monitor the pump for any signs of wear, loosening, or performance degradation.
- Check for leaks or any other issues that develop during the test.
If the pump shows signs of weakness, reinforce the affected areas or consider using more durable materials.
Step 6: Safety Check
Before you declare your pump ready for use, perform a final safety check:
- Handle Grip: Make sure the handle is secure and comfortable to grip.
- Foot Placement: If your pump has a footrest, ensure it’s stable and provides good support.
- Hose Routing: Check that the hose is routed safely and won’t get tangled or pinched during use.
- Pressure Relief: If your pump has a pressure relief valve, test it to ensure it functions properly.
Addressing these safety concerns will help prevent accidents and injuries.
Troubleshooting Common Problems
Even with careful construction, you might encounter some issues during testing. Here are some common problems and their solutions:
| Problem | Possible Cause | Solution |
|---|---|---|
| Pump doesn’t build pressure | Leaks, faulty valve, or piston seal | Check for leaks, replace valve, or repair piston seal |
| Pressure leaks back down | Faulty valve or loose connection | Replace valve or tighten connections |
| Inaccurate pressure readings | Faulty gauge | Replace gauge with a calibrated one |
| Pump is difficult to operate | Lack of lubrication or binding parts | Lubricate moving parts or adjust for smoother operation |
| Pump body cracks or breaks | Weak materials or excessive pressure | Reinforce with stronger materials or reduce maximum pressure |
Tips for Improving Your Homemade Hand Pump

Want to make your homemade hand pump even better? Here are some tips:
- Use Quality Materials: Invest in durable materials that can withstand pressure and wear.
- Precise Construction: Pay attention to detail and ensure all parts fit together snugly.
- Proper Lubrication: Lubricate moving parts to reduce friction and wear.
- Ergonomic Design: Design the handle and footrest for comfortable and efficient use.
- Regular Maintenance: Clean and inspect your pump regularly to keep it in top condition.
Safety Precautions
Working with pressurized systems can be dangerous. Always follow these safety precautions:
- Wear Safety Glasses: Protect your eyes from potential debris.
- Avoid Over-Pressurizing: Don’t exceed the maximum pressure rating of your pump or the item you’re inflating.
- Inspect Regularly: Check your pump for wear or damage before each use.
- Use in a Safe Area: Test and use your pump in a well-ventilated area away from flammable materials.
- If in Doubt, Seek Expert Advice: Consult with a qualified professional if you’re unsure about any aspect of pump construction or testing.
Alternatives to Homemade Hand Pumps
If building your own pump seems too daunting, there are many excellent commercially available hand pumps. Here are a few options to consider:
- Mini Pumps: Compact and lightweight, ideal for carrying on rides.
- Floor Pumps: Provide more leverage and volume, making them great for home use.
- CO2 Inflators: Use compressed CO2 cartridges for quick and easy inflation.
Each type has its pros and cons, so choose the one that best suits your needs and riding style.
Cost Analysis: Homemade vs. Store-Bought
One of the main reasons people consider building their own hand pump is to save money. Let’s compare the costs:
| Item | Homemade Pump Cost | Store-Bought Pump Cost |
|---|---|---|
| Materials (PVC pipe, fittings, etc.) | $20 – $50 | N/A |
| Pressure Gauge | $10 – $30 | Included in pump price |
| Labor (Your Time) | Priceless (But time-consuming!) | N/A |
| Commercially Available Hand Pump | N/A | $20 – $100+ (Depending on quality) |
While a homemade pump can potentially save you money on materials, it requires a significant investment of time and effort. A store-bought pump offers convenience and guaranteed performance, but at a higher upfront cost.
FAQ: Testing Your Homemade Hand Pump
Q: How do I know if my homemade pump is safe to use?
A: Thoroughly inspect for leaks, cracks, or weak points. Test its pressure output and ensure all connections are secure. If you have any doubts, consult a professional.
Q: What’s the best way to check for leaks in my pump?
A: Apply soapy water to all connections and fittings. If bubbles form when you operate the pump, you have a leak.
Q: How accurate does my pump’s pressure gauge need to be?
A: Ideally, your gauge should be within +/- 2 PSI of a calibrated gauge. Inaccurate readings can lead to over- or under-inflation.
Q: Can I use my homemade pump for high-pressure tires (e.g., road bike tires)?
A: It depends on your pump’s design and materials. Make sure it’s capable of reaching the required pressure safely. Road bike tires often need 80-120 PSI.
Q: What should I do if my pump is difficult to operate?
A: Lubricate all moving parts with a silicone-based lubricant. Also, check for any binding or misaligned parts.
Q: How often should I test my homemade hand pump?
A: Test it before each use, especially if it’s been stored for a while. Regular inspection can catch potential problems early.
Q: What type of container should I use for testing the pump?
A: Use a pressure-rated container, such as a spare tire or a purpose-built pressure vessel. Ensure it can safely handle the maximum pressure your pump can generate.
Conclusion
Testing your homemade hand pump is a critical step in ensuring its safety, effectiveness, and durability. By following these steps, you can confidently use your DIY pump for years to come. Remember to prioritize safety, use quality materials, and regularly inspect your pump for any signs of wear or damage. Building your own hand pump can be a fun and rewarding project, and with proper testing, you can enjoy the satisfaction of using a tool you created yourself. Happy pumping!


