
Easy: How to Make Water Hand Pump at Home
Quick Summary:
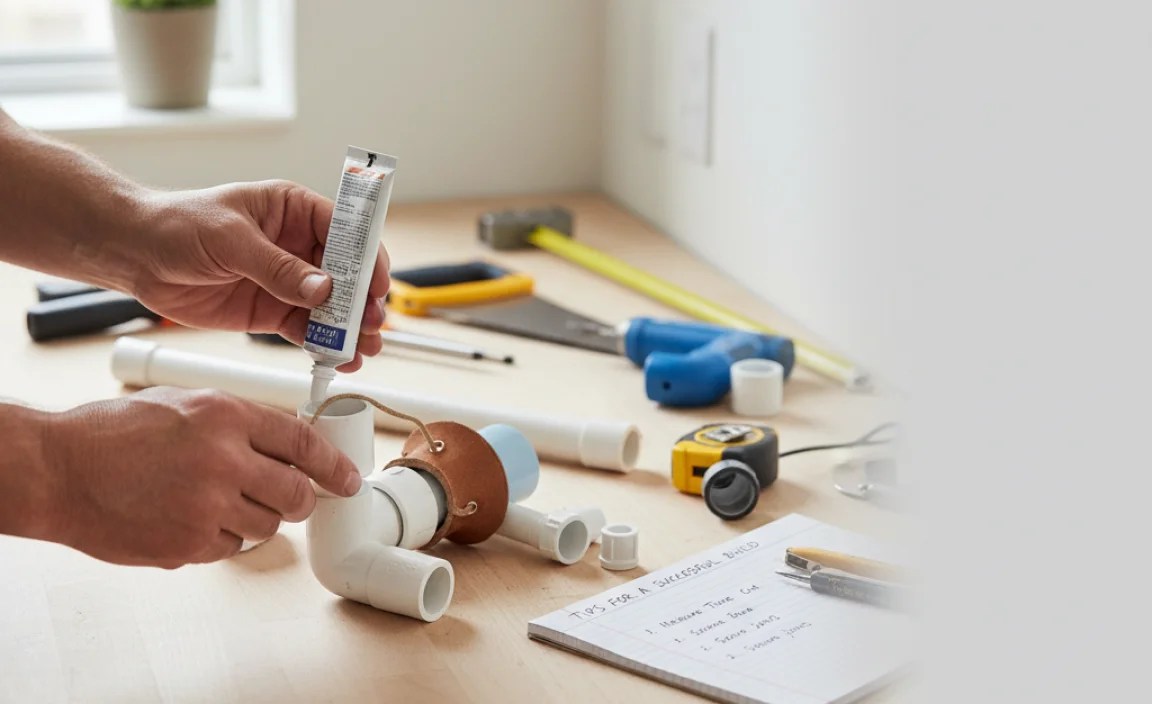
Building a basic water hand pump at home is achievable with some PVC pipes, valves, and basic tools. You’ll need to create a piston and cylinder system, using a one-way valve to draw water up and another to release it. With careful assembly, you can have a functional pump for shallow wells or water sources.
Want to get water from a shallow well or stream without electricity? Building your own hand pump is a great DIY project! It might seem complicated, but with the right materials and a little patience, you can create a functional water pump using simple parts.
This guide will walk you through each step, from gathering materials to assembling the pump. We’ll break it down so it’s easy to understand, even if you’re new to DIY projects. Get ready to roll up your sleeves and build something useful!
Let’s dive in and learn how to make your very own water hand pump at home!
What You’ll Need

Before you start, gather these materials and tools. Having everything ready will make the process smoother and more efficient.
- PVC Pipe: A length of PVC pipe for the cylinder (e.g., 2-inch diameter).
- Smaller PVC Pipe: For the piston rod and spout (e.g., 1/2-inch and 3/4-inch diameter).
- PVC End Caps: To seal the cylinder.
- Check Valves (One-Way Valves): Two valves that allow water to flow in only one direction.
- Rubber Washers or O-Rings: For sealing the piston.
- PVC Cement: To glue PVC parts together.
- Drill: With various drill bits for making holes.
- Saw: For cutting PVC pipes.
- Measuring Tape: For accurate measurements.
- Sandpaper: To smooth rough edges.
- Thread Seal Tape (Teflon Tape): To seal threaded connections.
- Bucket or Water Source: To test the pump.
Step-by-Step Guide: Building Your Water Hand Pump

Step 1: Prepare the Cylinder
The cylinder is the main body of your pump. It’s where the piston will move up and down to draw water.
- Cut the PVC Pipe: Cut the 2-inch PVC pipe to your desired length. A good length is around 2 to 3 feet. Use a saw for a clean cut.
- Smooth the Edges: Use sandpaper to smooth the cut edges. This ensures a good seal when you attach the end caps.
- Attach the Bottom End Cap: Apply PVC cement to the inside of one end cap and the outside of one end of the PVC pipe. Slide the end cap onto the pipe and hold it firmly until the cement sets.
Step 2: Create the Piston
The piston is what moves inside the cylinder to create suction and pump water.
- Cut the Piston Rod: Cut a length of the smaller PVC pipe (e.g., 1/2-inch) to be longer than the cylinder. This will be the piston rod.
- Prepare the Piston Head: You can use a PVC fitting or a stack of large washers as the piston head. It should fit snugly inside the cylinder but still be able to move freely.
- Attach the Piston Head to the Rod: Drill a hole through the center of the piston head and attach it to the piston rod using a bolt or strong adhesive.
- Add Rubber Washers or O-Rings: Place rubber washers or O-rings around the piston head to create a tight seal against the cylinder walls.
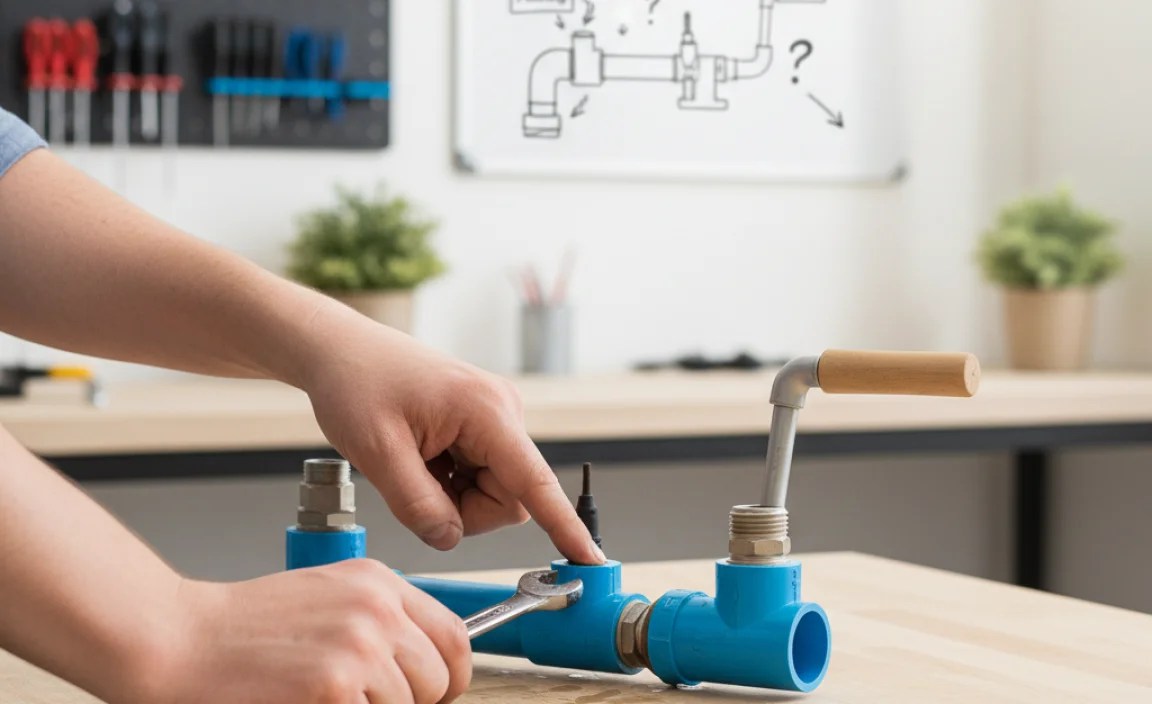
Step 3: Install the Check Valves
Check valves are crucial for ensuring water flows in the right direction.
- Prepare the Valve Housing: You’ll need a way to connect the check valves to the cylinder. This can be done using PVC fittings and short lengths of pipe.
- Install the Inlet Valve: Attach one check valve to the bottom of the cylinder. This valve should allow water to flow into the cylinder but not back out. Use thread seal tape on any threaded connections to prevent leaks.
- Install the Outlet Valve: Attach the other check valve to the top of the cylinder, near the spout. This valve should allow water to flow out of the cylinder but not back in.
Step 4: Assemble the Pump
Now it’s time to put all the parts together.
- Insert the Piston: Slide the piston into the open end of the cylinder. The rubber washers or O-rings should create a tight seal.
- Attach the Top End Cap: Drill a hole in the center of the remaining end cap. The piston rod should pass through this hole.
- Seal the Top End Cap: Apply PVC cement to the inside of the end cap and slide it onto the cylinder, making sure the piston rod goes through the hole. Seal around the rod with silicone caulk to prevent air leaks.
- Attach the Spout: Connect a length of PVC pipe to the outlet valve to create a spout. This is where the water will come out.
Step 5: Test the Pump
Time to see if your pump works!
- Submerge the Inlet: Place the bottom of the pump into a bucket of water or your water source, ensuring the inlet valve is submerged.
- Operate the Piston: Move the piston rod up and down. You should feel suction as you pull the piston up and water flowing out of the spout as you push it down.
- Check for Leaks: Inspect all connections for leaks. If you find any, tighten the connections or apply more thread seal tape or PVC cement as needed.
Tips for a Successful Build
- Accurate Measurements: Measure and cut the PVC pipes accurately to ensure a good fit.
- Tight Seals: Use plenty of PVC cement and thread seal tape to create tight seals and prevent leaks.
- Smooth Movement: Make sure the piston moves smoothly inside the cylinder. If it’s too tight, sand down the piston head slightly.
- Proper Valves: Use high-quality check valves that seal properly.
- Secure Connections: Ensure all connections are secure and won’t come apart under pressure.
Choosing the Right Materials

Selecting the right materials is crucial for the durability and efficiency of your hand pump. Here’s a breakdown of what to consider:
PVC Pipe
PVC (Polyvinyl Chloride) is a common and affordable material for plumbing. It’s durable, lightweight, and resistant to corrosion.
- Diameter: A 2-inch diameter pipe is suitable for the cylinder, providing enough space for water displacement.
- Schedule: Choose Schedule 40 PVC, which is thicker and more durable than Schedule 20.
Check Valves
Check valves, or one-way valves, are essential for controlling the direction of water flow. They allow water to flow in only one direction, preventing backflow.
- Type: Spring check valves or swing check valves are commonly used. Spring check valves are more compact and can be installed in any orientation.
- Material: Brass or PVC check valves are good options. Brass is more durable but can be more expensive.
- Size: Ensure the valve size matches the diameter of your PVC pipe.
Sealing Materials
Proper sealing is critical to prevent leaks and maintain pressure within the pump.
- PVC Cement: Use PVC cement to create a strong, permanent bond between PVC pipes and fittings.
- Thread Seal Tape (Teflon Tape): Apply thread seal tape to threaded connections to ensure a watertight seal.
- Rubber Washers or O-Rings: Use rubber washers or O-rings to create a tight seal around the piston head.
- Silicone Caulk: Use silicone caulk to seal any gaps or openings, such as around the piston rod where it exits the top end cap.
Other Components
- Piston Material: You can use PVC, rubber, or even leather for the piston head. Rubber and leather provide a good seal.
- Piston Rod: A solid rod made of PVC, metal, or wood can be used for the piston rod. Ensure it’s strong enough to withstand repeated use.
Troubleshooting Common Issues
Even with careful construction, you might encounter some issues with your hand pump. Here are some common problems and how to fix them:
Pump Not Drawing Water
- Check Valves: Ensure the check valves are installed correctly and are functioning properly. They should allow water to flow in one direction only.
- Air Leaks: Check for air leaks in the cylinder or around the piston rod. Seal any leaks with silicone caulk or thread seal tape.
- Submerged Inlet: Make sure the inlet valve is fully submerged in water.
- Piston Seal: Ensure the piston has a tight seal against the cylinder walls. Replace the rubber washers or O-rings if they are worn out.
Weak Water Flow
- Piston Movement: Ensure the piston is moving smoothly inside the cylinder. If it’s too tight, sand down the piston head slightly.
- Valve Obstruction: Check the check valves for any debris or obstructions that might be blocking the flow of water.
- Cylinder Size: A larger cylinder will displace more water with each stroke. If the flow is too weak, consider using a larger cylinder.
Leaks
- Connections: Check all connections for leaks. Tighten any loose connections and apply more thread seal tape or PVC cement as needed.
- Cracks: Inspect the PVC pipes and fittings for cracks. Replace any damaged parts.
Hard to Operate
- Piston Fit: If the piston is too tight, it will be difficult to move. Sand down the piston head until it moves smoothly.
- Lubrication: Apply a small amount of silicone grease to the piston and cylinder walls to reduce friction.
Advantages and Disadvantages
Building your own water hand pump has its pros and cons. Understanding these can help you decide if it’s the right project for you.
Advantages
- Cost-Effective: Building your own pump can be cheaper than buying a commercial one.
- DIY Satisfaction: It’s rewarding to build something yourself and learn new skills.
- Customization: You can customize the pump to fit your specific needs and water source.
- Off-Grid Solution: Hand pumps don’t require electricity, making them ideal for off-grid situations or emergencies.
- Simple Maintenance: DIY pumps are often easier to repair and maintain than complex electric pumps.
Disadvantages
- Labor-Intensive: Building a pump requires time and effort.
- Limited Depth: Hand pumps are typically only effective for shallow wells or water sources.
- Physical Effort: Pumping water by hand requires physical effort, which can be tiring for some people.
- Potential for Failure: DIY pumps may not be as reliable as commercial pumps, especially if not built properly.
- Material Quality: The lifespan of the pump depends heavily on the quality of materials used.
Alternative Designs and Upgrades
Once you’ve built a basic hand pump, you might want to explore alternative designs or upgrades to improve its performance. Here are a few ideas:
Double-Acting Pump
A double-acting pump delivers water on both the upstroke and downstroke, increasing its efficiency. This design requires more complex valve arrangements but can significantly increase water output.
Deep Well Pump
For deeper wells, you can modify the design to include a foot valve at the bottom of the well. This valve keeps the water column primed, allowing the pump to draw water from greater depths. You may need to use a narrower cylinder and piston for better suction.
Using Different Materials
Experiment with different materials for the piston and cylinder. For example, using a leather piston inside a brass cylinder can create a very efficient and durable pump.
Adding a Filter
Install a filter at the inlet to prevent debris from entering the pump. This can help prolong the life of the pump and improve the quality of the water.
Improving the Handle
Design a more ergonomic handle to make pumping easier and more comfortable. A longer handle can provide more leverage.
Here’s a table summarizing some potential upgrades and their benefits:
| Upgrade | Benefits | Considerations |
|---|---|---|
| Double-Acting Design | Increased water output | More complex valve system |
| Deep Well Modification | Ability to draw water from greater depths | Requires a foot valve |
| Different Piston/Cylinder Materials | Improved durability and efficiency | May be more expensive |
| Inlet Filter | Prevents debris from entering the pump | Requires regular cleaning |
| Ergonomic Handle | Easier and more comfortable pumping | Design considerations for leverage and grip |
Safety Precautions
When building and using a hand pump, it’s important to take safety precautions to prevent injuries and ensure the pump operates safely.
- Wear Safety Glasses: Protect your eyes from flying debris when cutting or drilling.
- Use Proper Tools: Use the right tools for the job and follow the manufacturer’s instructions.
- Secure Work Area: Work in a well-lit and organized area.
- Handle Sharp Objects Carefully: Be careful when handling saws, knives, and other sharp objects.
- Test the Pump in a Safe Location: Test the pump away from electrical hazards and potential slip hazards.
- Use Clean Water: Only use the pump with clean water sources. Do not use it to pump hazardous materials.
- Regular Maintenance: Inspect the pump regularly for wear and tear. Replace any damaged parts.
FAQ: Building a Water Hand Pump
Q1: What is the best material for the cylinder?
PVC (Polyvinyl Chloride) is a great option. It’s cheap, durable, and easy to work with. Schedule 40 PVC is recommended for its durability.
Q2: How deep can a DIY hand pump draw water from?
DIY hand pumps are generally effective for shallow wells, up to about 25 feet. For deeper wells, you’ll need a more specialized design.
Q3: What kind of check valves should I use?
Spring check valves or swing check valves made of brass or PVC are good choices. Ensure they are the correct size for your PVC pipes.
Q4: How do I prevent leaks in my hand pump?
Use plenty of PVC cement on all PVC connections and apply thread seal tape to threaded connections. Ensure all parts fit snugly.
Q5: Can I use this pump for drinking water?
Ensure all materials are food-grade and the water source is safe. It’s always a good idea to filter the water before drinking it.
Q6: How often should I maintain my hand pump?
Inspect your pump regularly, at least once a month, and replace any worn or damaged parts. Lubricate the piston as needed.
Q7: What tools do I need to build a hand pump?
You’ll need a saw, drill, measuring tape, sandpaper, and PVC cement.
Conclusion
Building your own water hand pump is a rewarding project that can provide you with a reliable source of water, especially in off-grid situations or during emergencies. By following these steps and tips, you can create a functional and efficient pump using simple materials. Remember to take safety precautions and troubleshoot any issues that arise during the construction process. With a little patience and effort, you’ll have a hand pump that you can be proud of. Happy building!


