
How to Install New Chuck Onto Hose: Easy Guide
Quick Summary: Replacing a worn-out chuck on your bike pump hose is straightforward. First, detach the old chuck using pliers or a wrench. Then, prepare the hose by trimming any frayed ends. Slide the hose clamp onto the hose, firmly push the hose onto the new chuck’s barb, and tighten the clamp securely. This ensures an airtight connection for easy inflation.
Is your bike pump hissing like a grumpy cat instead of filling your tires? A faulty chuck (the part that connects to your tire valve) is often the culprit. Don’t toss that pump! Replacing the chuck is a simple, cost-effective fix that can save you money and keep you rolling. It might seem daunting, but with a few basic tools and these easy-to-follow steps, you’ll be back to pumping with confidence in no time. Let’s dive into how to install a new chuck onto your hose and get that pump working like new!
Tools and Materials You’ll Need

Before you start, gather these essential tools and materials. Having everything ready will make the process smooth and efficient.
- New Chuck: Make sure it’s compatible with your pump and valve types (Presta, Schrader, or both).
- Hose Clamp: A new clamp ensures a tight, secure fit.
- Pliers or Wrench: For removing the old chuck.
- Hose Cutter or Utility Knife: To trim the hose for a clean connection.
- Screwdriver or Nut Driver: To tighten the hose clamp.
- Warm Water (Optional): To soften the hose for easier installation.
Step-by-Step Guide to Installing a New Chuck

Follow these steps carefully to ensure a proper and airtight installation.
Step 1: Remove the Old Chuck
The first step is to remove the old, damaged chuck from the hose. This might require some force, especially if it’s been on there for a while.
- Loosen the Old Clamp: If there’s a hose clamp on the old chuck, use a screwdriver or nut driver to loosen it.
- Grip and Twist: Use pliers or a wrench to grip the old chuck firmly. Twist and pull the chuck away from the hose. If it’s stuck, try wiggling it back and forth.
- Persistent Chuck: If the chuck refuses to budge, carefully cut the hose lengthwise along the chuck’s barb with a utility knife to relieve pressure. Be cautious not to damage the hose excessively.
Step 2: Prepare the Hose
A clean, properly prepared hose is crucial for a secure connection with the new chuck.
- Inspect the Hose: Check the hose for any cracks, fraying, or damage. If the hose is damaged too far down, you may need to replace the entire hose.
- Trim the Hose: Use a hose cutter or a sharp utility knife to trim the end of the hose, creating a clean, square cut. This ensures a tight seal.
- Soften the Hose (Optional): If the hose seems stiff, dip the end in warm water for a few seconds to soften it. This makes it easier to slide onto the new chuck.
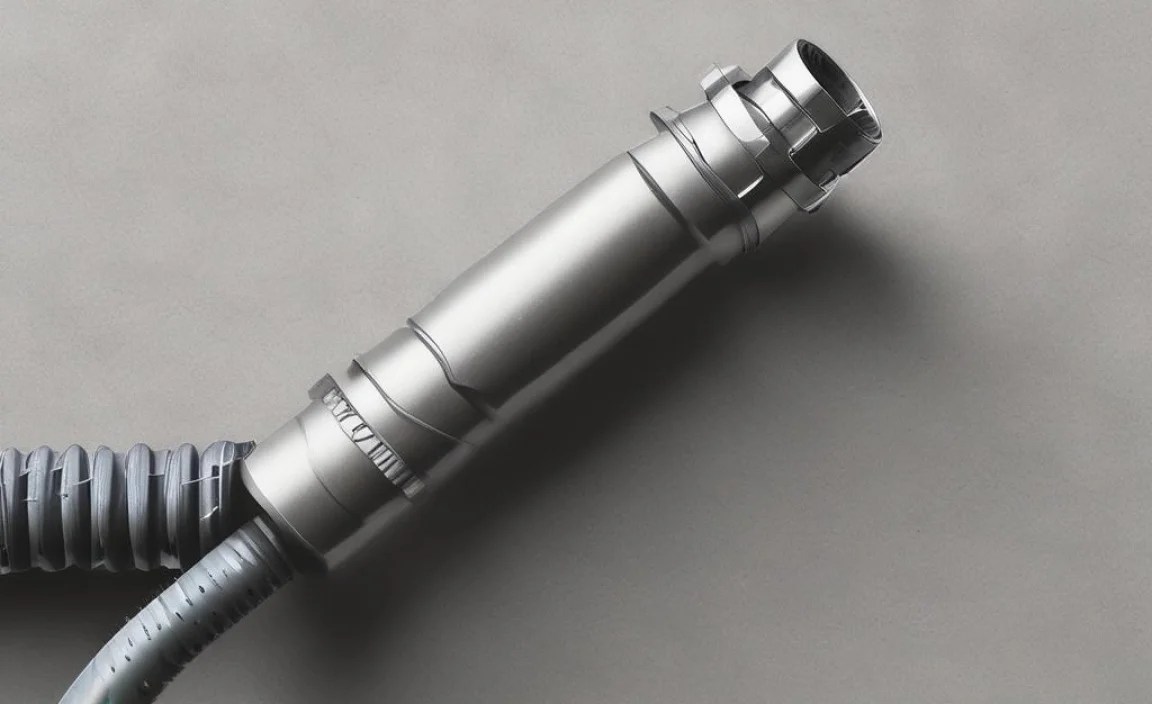
Step 3: Install the New Chuck
Now it’s time to install the new chuck. This step requires a bit of force to ensure the hose is securely attached.
- Slide on the Hose Clamp: Slide the new hose clamp onto the hose before attaching the chuck. Make sure the clamp is oriented correctly so you can tighten it later.
- Attach the Chuck: Firmly push the hose onto the barb of the new chuck. You may need to twist and push simultaneously. Ensure the hose is pushed on far enough to create a secure connection.
- Secure the Clamp: Position the hose clamp over the barbed section of the chuck. Tighten the clamp using a screwdriver or nut driver until it’s snug. Avoid overtightening, which could damage the hose.
Step 4: Test the Connection
After installation, it’s essential to test the connection to ensure there are no leaks.
- Attach to Tire Valve: Connect the new chuck to your bike tire valve.
- Inflate and Listen: Inflate the tire and listen for any hissing sounds near the chuck. If you hear air escaping, the connection may not be tight enough.
- Adjust if Necessary: If there’s a leak, try tightening the hose clamp a bit more. If the leak persists, remove the chuck, inspect the hose and chuck for damage, and repeat the installation process.
Choosing the Right Chuck

Selecting the right chuck for your bike pump is crucial for compatibility and performance. Here’s what to consider.
Types of Chucks
- Dual Head Chucks: These chucks have two openings, one for Presta valves and one for Schrader valves. They are versatile and convenient if you have bikes with both valve types.
- Presta-Specific chucks: Designed exclusively for Presta valves, these chucks often provide a more precise and secure fit for high-pressure inflation.
- Schrader-Specific Chucks: These chucks are designed for Schrader valves, commonly found on car tires and some mountain bikes.
- Thread-On Chucks: These chucks screw onto the valve stem, providing a very secure connection. They are less common but can be useful for high-pressure applications.
Compatibility
Ensure that the chuck you choose is compatible with your bike pump hose and the type of valves you use. Most bike pumps use a standard hose size, but it’s always good to double-check.
Material
Chucks are typically made from plastic, metal, or a combination of both. Metal chucks are generally more durable and provide a better seal, but they can be more expensive. Plastic chucks are more affordable but may wear out faster.
Features
Some chucks come with additional features, such as pressure release buttons or swivel heads. These features can make inflation easier and more convenient.
Troubleshooting Common Issues
Even with careful installation, you might encounter some issues. Here’s how to troubleshoot them.
Air Leaks
Problem: Air is leaking around the chuck while inflating.
Solution:
- Tighten the Hose Clamp: Ensure the hose clamp is securely tightened.
- Check Hose Connection: Make sure the hose is fully seated on the chuck’s barb.
- Inspect the Hose: Look for cracks or damage in the hose near the connection.
- Replace the Hose: If the hose is damaged, replace it.
Chuck Not Fitting Valve
Problem: The chuck doesn’t fit snugly on the valve.
Solution:
- Check Valve Type: Ensure you’re using the correct chuck for the valve type (Presta or Schrader).
- Clean the Valve: Make sure the valve is clean and free of debris.
- Replace the Chuck: If the chuck is worn out, replace it with a new one.
Difficulty Attaching Chuck
Problem: The chuck is hard to attach to the valve.
Solution:
- Lubricate the Chuck: Apply a small amount of silicone grease to the chuck’s interface.
- Check for Damage: Inspect the chuck for any damage or deformation.
- Replace the Chuck: If the chuck is damaged, replace it.
Maintenance Tips for Your Bike Pump Chuck

Proper maintenance can extend the life of your bike pump chuck and ensure reliable performance.
- Regular Cleaning: Clean the chuck regularly with a damp cloth to remove dirt and debris.
- Lubrication: Apply a small amount of silicone grease to the chuck’s moving parts to keep them operating smoothly.
- Storage: Store your bike pump in a clean, dry place to prevent corrosion and damage.
- Inspection: Periodically inspect the chuck for signs of wear and tear, such as cracks or leaks.
- Replacement: Replace the chuck as soon as you notice any issues to prevent further damage to your pump or tires.
The Importance of a Good Bike Pump
A reliable bike pump is an essential tool for any cyclist. Here’s why investing in a good pump is worth it.
- Proper Tire Inflation: Maintaining the correct tire pressure improves your bike’s performance, handling, and efficiency.
- Preventing Flats: Properly inflated tires are less susceptible to pinch flats and other types of tire damage.
- Safety: Riding with properly inflated tires ensures better control and reduces the risk of accidents.
- Cost Savings: Regularly checking and maintaining your tire pressure can extend the life of your tires and prevent costly repairs.
- Convenience: Having a reliable bike pump at home or on the road allows you to quickly and easily inflate your tires whenever needed.
Table: Comparing Different Types of Bike Pump Chucks
| Chuck Type | Valve Compatibility | Material | Pros | Cons |
|---|---|---|---|---|
| Dual Head | Presta and Schrader | Plastic/Metal | Versatile, convenient | Can be less precise |
| Presta-Specific | Presta | Metal/Plastic | Precise, secure fit | Only works with Presta valves |
| Schrader-Specific | Schrader | Metal/Plastic | Designed for Schrader valves | Only works with Schrader valves |
| Thread-On | Presta and Schrader | Metal | Very secure connection | Less common, can be slower |
Table: Common Problems and Solutions
| Problem | Possible Cause | Solution |
|---|---|---|
| Air Leak at Chuck | Loose hose clamp, damaged hose | Tighten clamp, inspect/replace hose |
| Chuck Won’t Attach | Incorrect chuck type, debris in valve | Use correct chuck, clean valve |
| Difficulty Inflating | Worn chuck, valve issues | Replace chuck, inspect valve |
| Hose Detaches | Loose clamp, worn hose | Tighten clamp, replace hose |
FAQ: Installing a New Chuck onto a Hose
What is a bike pump chuck?
A bike pump chuck is the part of the pump that attaches to your bike tire’s valve, allowing you to inflate the tire.
Why would I need to replace my bike pump chuck?
Chucks wear out over time, can become damaged, or may not fit the type of valves you have on your bike tires. Replacing it restores your pump’s functionality.
Can I use any chuck with my bike pump?
No, you need to ensure the chuck is compatible with your pump’s hose and the type of valves (Presta or Schrader) on your bike tires.
What tools do I need to replace a bike pump chuck?
You’ll typically need pliers or a wrench to remove the old chuck, a hose cutter or utility knife to trim the hose, and a screwdriver or nut driver to tighten the hose clamp.
How do I know if my bike pump chuck needs replacing?
Signs include air leaks around the chuck, difficulty attaching the chuck to the valve, or visible damage to the chuck.
Is it difficult to replace a bike pump chuck myself?
No, it’s a relatively simple task that can be done in a few minutes with the right tools and a little patience. Just follow the step-by-step guide.
Where can I buy a replacement bike pump chuck?
You can purchase replacement chucks at most bike shops or online retailers that sell bike parts and accessories. Check out reputable online retailers like Amazon or visit your local bike shop.
Conclusion
Installing a new chuck onto your bike pump hose is a simple yet crucial maintenance task that can save you money and keep your tires properly inflated. By following these step-by-step instructions, you can easily replace a worn-out chuck and ensure your bike pump is always ready when you need it. Don’t let a faulty chuck keep you off the road—take control and get back to enjoying your ride with confidence!


