
How to Use Hose for Tubeless Tyre Setup: Easy Guide
Setting up tubeless tires with a hose clamp makes seating the bead easier. First, fit the tire on the rim. Then, position the hose clamp around the tire’s circumference, tightening it to push the tire beads against the rim. Inflate the tire until you hear the beads snap into place. Remove the clamp carefully and check for leaks. Add sealant and reinflate if necessary for a secure, airtight fit.
Tubeless tires offer a smoother ride, better grip, and fewer flats. But getting them properly seated on the rim can sometimes be a real headache. The tire bead needs to lock securely into place, and that often requires a burst of air that a standard pump can’t deliver. Many cyclists struggle with this, ending up frustrated and needing a trip to the bike shop.
Fortunately, there’s a simple trick that can make tubeless setup much easier: using a hose clamp. With this affordable tool, you can apply even pressure around the tire, helping the bead seat correctly with minimal fuss. In this guide, I’ll walk you through the process step-by-step, so you can get your tubeless tires up and running in no time. We’ll cover everything from the tools you’ll need to troubleshooting common issues. Let’s get started!
Tools and Materials You’ll Need

Before you begin, gather these essential items. Having everything ready will make the process smoother and more efficient.
- Tubeless-Ready Wheels and Tires: Make sure your rims and tires are specifically designed for tubeless use.
- Hose Clamp: A sturdy hose clamp of appropriate size for your tire width.
- Tubeless Sealant: Choose a quality sealant to prevent leaks.
- Tubeless Valves: These valves have a removable core for easy sealant injection.
- Valve Core Removal Tool: For removing and tightening the valve core.
- Floor Pump or Air Compressor: A high-volume pump or compressor is essential for seating the bead.
- Tire Levers: Use these to carefully mount the tire onto the rim.
- Soapy Water: A mixture of water and mild soap to lubricate the tire bead.
- Rag: To clean up any spills or excess sealant.
Step-by-Step Guide: Using a Hose Clamp for Tubeless Tire Setup
Follow these steps carefully to ensure a successful tubeless tire setup. Each step is crucial for achieving an airtight seal and optimal performance.
Step 1: Prepare the Rim
Start by ensuring your rim is clean and ready for tubeless setup. This involves removing any old tape or sealant and applying fresh tubeless tape.
- Clean the Rim: Use a clean rag and isopropyl alcohol to wipe down the rim bed. This removes any dirt, grease, or old sealant residue.
- Apply Tubeless Tape: Start opposite the valve hole and carefully apply tubeless tape around the rim. Overlap the tape by a few inches for a secure seal. Make sure the tape is smooth and free of wrinkles or air bubbles. [https://www.globalcyclingnetwork.com/](https://www.globalcyclingnetwork.com/)
- Pierce the Valve Hole: Use a sharp object to carefully pierce the tape over the valve hole.
Step 2: Install the Tubeless Valve
Next, install the tubeless valve into the rim. This valve is specifically designed for tubeless systems and has a removable core for easy sealant injection.
- Insert the Valve: Push the tubeless valve through the hole in the tubeless tape.
- Secure the Valve: Tighten the valve nut by hand until it’s snug. Avoid overtightening, which can damage the rim or valve.
Step 3: Mount the Tire
Mounting the tire correctly is crucial for a successful tubeless setup. Use tire levers carefully to avoid damaging the rim or tire.
- Seat One Side of the Tire: Start by seating one side of the tire bead onto the rim. Use your hands to work the tire around the rim until it’s fully seated.
- Mount the Second Side: Use tire levers to carefully mount the second side of the tire onto the rim. Start opposite the valve and work your way around. Be careful not to pinch the inner tube (if you were using one) or damage the tire bead.
Step 4: Apply Soapy Water
Lubricating the tire bead with soapy water helps it slide into place and create a better seal. This is a simple but effective step.
- Mix Soapy Water: Mix a small amount of mild soap with water in a spray bottle or small container.
- Apply to Tire Bead: Use a brush or rag to apply the soapy water to both sides of the tire bead, where it meets the rim.
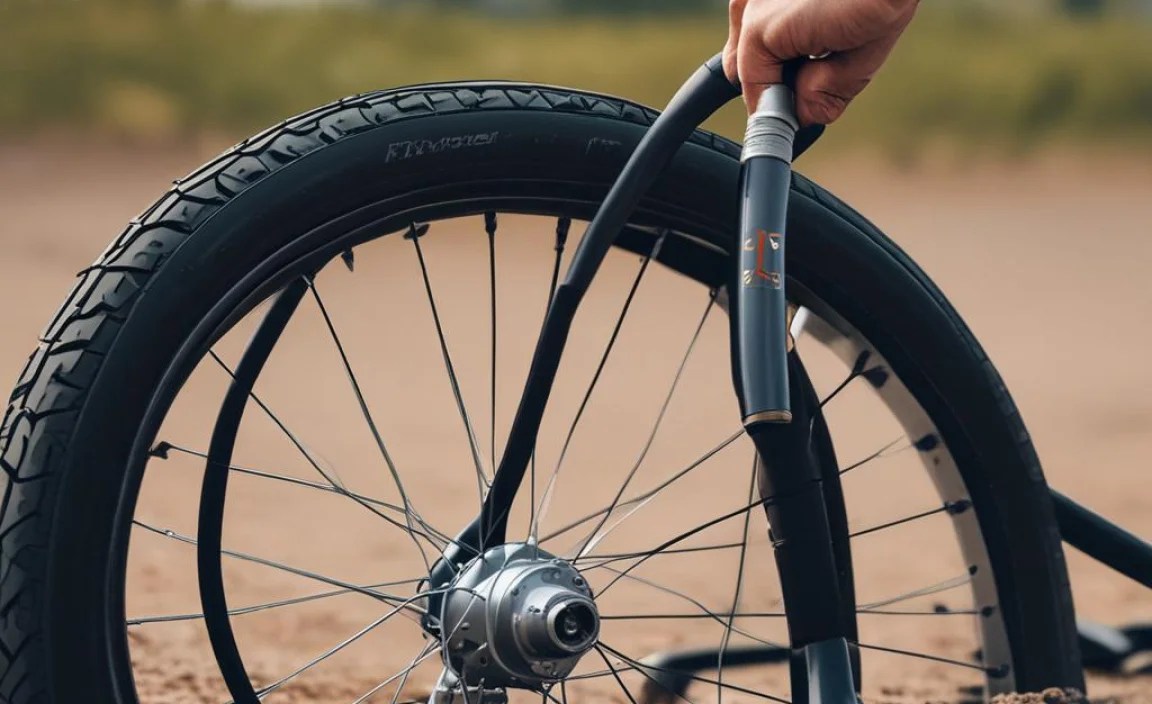
Step 5: Position the Hose Clamp
This is where the hose clamp comes into play. The clamp applies even pressure around the tire, helping the bead seat properly.
- Place the Hose Clamp: Position the hose clamp around the circumference of the tire, near the area where the bead is not seating properly.
- Tighten the Clamp: Gradually tighten the hose clamp, applying even pressure to push the tire bead against the rim. Be careful not to overtighten, which can damage the tire or rim.
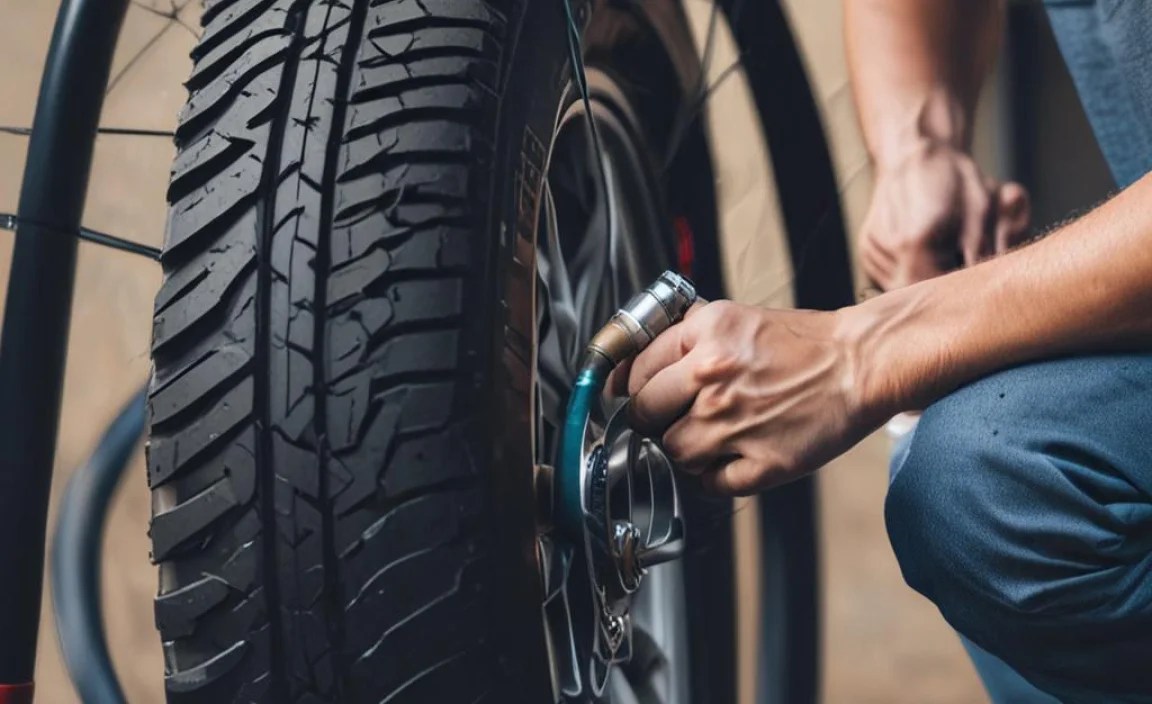
Step 6: Inflate the Tire
Inflating the tire with a floor pump or air compressor is the next crucial step. The goal is to seat the tire bead quickly and evenly.
- Remove the Valve Core: Use the valve core removal tool to remove the valve core. This allows more air to flow into the tire, helping to seat the bead.
- Inflate the Tire: Quickly inflate the tire with a floor pump or air compressor. You should hear a popping sound as the tire bead snaps into place.
- Check the Bead: Inspect the tire to ensure the bead is evenly seated around the entire rim. Look for a consistent gap between the tire and the rim.
Step 7: Remove the Hose Clamp
Once the tire bead is seated, carefully remove the hose clamp.
- Loosen the Clamp: Loosen the hose clamp gradually.
- Remove the Clamp: Carefully remove the hose clamp from the tire.
Step 8: Add Tubeless Sealant
Adding tubeless sealant is essential for sealing any small leaks and preventing flats. Choose a quality sealant for best results.
- Reinstall the Valve Core: Reinstall the valve core using the valve core removal tool.
- Inject Sealant: Use a sealant injector or bottle to inject the recommended amount of sealant through the valve. Refer to the sealant manufacturer’s instructions for the correct amount.
- Reinflate the Tire: Inflate the tire to the recommended pressure.
- Rotate the Wheel: Rotate the wheel and shake it gently to distribute the sealant evenly inside the tire.
Step 9: Check for Leaks
After adding sealant, check the tire for any leaks. Pay close attention to the valve and the tire bead.
- Inspect the Tire: Look for any signs of sealant leaking from the tire or valve.
- Listen for Leaks: Listen for any hissing sounds that may indicate a leak.
- Address Leaks: If you find a leak, rotate the wheel so that the leak is at the bottom. The sealant should eventually seal the leak. You may need to reinflate the tire and repeat the process.
Troubleshooting Common Issues
Even with careful preparation, you might encounter some common issues during tubeless setup. Here’s how to troubleshoot them:
- Tire Won’t Seat:
- Problem: The tire bead refuses to snap into place on the rim.
- Solution: Ensure the tire bead is properly lubricated with soapy water. Double-check the tubeless tape for any air bubbles or wrinkles. Try using a more powerful air compressor or a tubeless inflator pump. The hose clamp can also help to apply even pressure.
- Sealant Leaking:
- Problem: Sealant is leaking from the tire bead or valve.
- Solution: Rotate the wheel so that the leak is at the bottom. The sealant should eventually seal the leak. If the leak persists, you may need to add more sealant or replace the tubeless tape.
- Valve Leaking:
- Problem: Air is leaking from the valve.
- Solution: Make sure the valve core is properly tightened. Check the valve stem for any damage. You may need to replace the valve if it’s faulty.
- Tire Burping:
- Problem: Air is suddenly escaping from the tire during a ride, often due to a hard impact.
- Solution: Increase the tire pressure slightly. Ensure the tire is properly seated on the rim. Consider using a tire with a tighter bead or a wider rim.
Tips for Success
Here are some additional tips to ensure a successful tubeless tire setup:
- Use Fresh Sealant: Sealant can dry out over time, so use a fresh bottle for best results.
- Check Tire Pressure Regularly: Tubeless tires tend to lose air more slowly than tubed tires, so check the pressure regularly and top off as needed.
- Ride Regularly: Riding the bike helps to keep the sealant distributed and prevents it from drying out.
- Clean the Valve: Periodically clean the valve with a small brush or pipe cleaner to remove any dried sealant.
Advantages and Disadvantages of Using a Hose Clamp
Using a hose clamp for tubeless tire setup has its pros and cons. Understanding these can help you decide if this method is right for you.
Advantages
- Improved Bead Seating: The hose clamp applies even pressure around the tire, helping the bead seat properly, especially on stubborn tires.
- Cost-Effective: Hose clamps are relatively inexpensive and readily available at most hardware stores.
- Simple to Use: The hose clamp is easy to use and requires no special tools or skills.
- Reduces Frustration: By making it easier to seat the tire bead, the hose clamp can reduce frustration and save time during tubeless setup.
Disadvantages
- Potential for Damage: Overtightening the hose clamp can damage the tire or rim.
- Limited Size Range: You may need different size hose clamps for different tire widths.
- Not Always Necessary: Some tires seat easily without a hose clamp, making it an unnecessary step.
Table: Comparing Tubeless Setup Methods
Here’s a comparison of different methods for seating tubeless tires, including using a hose clamp:
| Method | Pros | Cons | Best For |
|---|---|---|---|
| Floor Pump | Simple, readily available | May not provide enough air volume | Easy-seating tires |
| Air Compressor | High air volume, quick seating | Requires compressor, can be noisy | Stubborn tires |
| Tubeless Inflator Pump | Designed for tubeless, portable | More expensive than floor pump | All tubeless tires |
| Hose Clamp | Improves bead seating, cost-effective | Potential for damage, not always necessary | Stubborn tires, DIYers |
Table: Recommended Tire Pressures for Tubeless Setups
Finding the right tire pressure for your tubeless setup is essential for comfort, grip, and performance. Here’s a general guide:
| Riding Style | Tire Width | Recommended Pressure (PSI) |
|---|---|---|
| Road Cycling | 23-25mm | 80-100 PSI |
| Road Cycling | 28-32mm | 60-80 PSI |
| Gravel Cycling | 35-45mm | 40-60 PSI |
| Mountain Biking | 2.2-2.5″ | 20-30 PSI |
Note: These are general recommendations. Adjust the pressure based on your weight, riding conditions, and personal preferences. Always stay within the tire manufacturer’s recommended pressure range.
FAQ: Common Questions About Tubeless Tire Setup
Here are some frequently asked questions about setting up tubeless tires, along with concise answers to help you navigate the process.
What does “tubeless-ready” mean?
“Tubeless-ready” means that the rims and tires are designed to work together without an inner tube. The rim has a special shape to lock the tire bead in place, and the tire is made with an airtight casing.
Can I convert any wheelset to tubeless?
No, only wheels and tires specifically designed as “tubeless-ready” should be used for tubeless setups. Using non-tubeless components can be dangerous and lead to tire failure.
How often should I replace tubeless sealant?
Tubeless sealant should be replaced every 3-6 months, depending on the climate and riding conditions. Check the sealant regularly and add more as needed to maintain its effectiveness.
What type of sealant should I use?
Choose a high-quality tubeless sealant specifically designed for bicycle tires. There are many brands available, each with its own unique formula. Consider factors like sealing ability, longevity, and compatibility with your tires.
Is tubeless setup messy?
Tubeless setup can be a bit messy, especially when adding sealant. Work in a well-ventilated area and use a rag to clean up any spills. Wear gloves to protect your hands from the sealant.
What if my tire keeps losing air?
If your tire keeps losing air, check for leaks around the valve and tire bead. Rotate the wheel so that the leak is at the bottom, allowing the sealant to seal the leak. If the leak persists, you may need to add more sealant or replace the tubeless tape.
Do I need special tools for tubeless setup?
Yes, you’ll need a few essential tools, including tubeless valves, a valve core removal tool, tire levers, a floor pump or air compressor, and tubeless sealant. A hose clamp can also be helpful for seating stubborn tires.
Conclusion
Setting up tubeless tires with a hose clamp can seem daunting at first, but with the right tools and a step-by-step approach, it’s a manageable task for any cyclist. By following this guide, you can improve your chances of a successful setup, enjoy the benefits of tubeless tires, and save money by doing it yourself.
Remember to take your time, be patient, and don’t be afraid to experiment. Each tire and rim combination is unique, so what works for one setup may not work for another. With practice and persistence, you’ll become a pro at tubeless tire setup, ready to tackle any challenge on the road or trail. Now, go ahead and give it a try – your next ride will be smoother and more enjoyable than ever!


