How to Fill Air in Cycle Tyre with a Pump: A Beginner’s Guide
Quick Summary: Adding air to your cycle tires is easy! First, find the valve type (Presta or Schrader). Then, connect the correct pump head, making sure it’s secure. Inflate to the recommended PSI (printed on the tire sidewall). Disconnect the pump and check the pressure. Now you’re ready to ride!
A flat or under-inflated tire can ruin a perfectly good bike ride. It makes pedaling harder, slows you down, and can even lead to a pinch flat. But don’t worry, pumping up your tires is a simple skill anyone can learn. This guide will walk you through each step, so you can keep your tires properly inflated and enjoy a smooth, safe ride. We’ll cover everything from identifying your valve type to reaching the right pressure, so you’ll be a pro in no time!
Understanding Your Bike Tire Valves

Before you grab your pump, it’s important to know what type of valve your bike has. The two most common types are Schrader and Presta.
Schrader Valves
Schrader valves are the same type you find on car tires. They’re wider, sturdier, and have a spring-loaded pin in the center. To inflate, you simply press the pump nozzle onto the valve.
Presta Valves
Presta valves are narrower and typically found on road bikes and higher-end bicycles. They have a small nut at the top that you need to unscrew before inflating. After inflating, remember to screw the nut back down.
Here’s a quick comparison:
| Feature | Schrader Valve | Presta Valve |
|---|---|---|
| Appearance | Wider, like a car tire valve | Narrower, with a locking nut |
| Durability | More robust | More fragile |
| Typical Bikes | Mountain bikes, hybrid bikes, kids’ bikes | Road bikes, high-performance bikes |
| Inflation | Easier to inflate | Requires unscrewing the nut |
Choosing the Right Bike Pump

Using the right pump makes inflating your tires much easier. There are two main types of bike pumps:
Floor Pumps
Floor pumps are larger and stand on the ground. They provide more leverage and are ideal for inflating tires quickly and easily. They usually have a built-in pressure gauge, so you can see how much air you’re adding.
Hand Pumps
Hand pumps are smaller and portable, perfect for carrying on rides in case of a flat tire. They require more effort to use than floor pumps, but they’re essential for on-the-go inflation.
Consider these factors when choosing a pump:
- Valve Compatibility: Make sure the pump head works with both Schrader and Presta valves, or choose one specifically for your valve type.
- Pressure Gauge: A gauge helps you inflate your tires to the correct pressure.
- Portability: If you need a pump for emergencies on the road, a hand pump is a must.
- Build Quality: Look for a durable pump that will last.
Step-by-Step Guide to Inflating Your Bike Tires

Now, let’s get to the main event: inflating your tires! Follow these steps for a perfect inflation every time.
Step 1: Prepare Your Bike and Pump
First, position your bike so the valve is easily accessible. Remove any valve caps. Make sure your pump is in good working order. Check the hose for any cracks or leaks.
Step 2: Connect the Pump to the Valve (Schrader Valve)
- Remove the valve cap by twisting it counter-clockwise. Store it somewhere safe so you don’t lose it.
- Push the pump head straight onto the Schrader valve. Make sure it’s firmly seated to create a good seal.
- Flip the lever on the pump head (if it has one) to lock it in place.
Step 3: Connect the Pump to the Valve (Presta Valve)
- Unscrew the small nut at the top of the Presta valve by turning it counter-clockwise.
- Gently push the valve stem in to loosen it. You might hear a little air escaping – that’s normal.
- Push the pump head straight onto the Presta valve. Make sure it’s firmly seated.
- Flip the lever on the pump head (if it has one) to lock it in place.
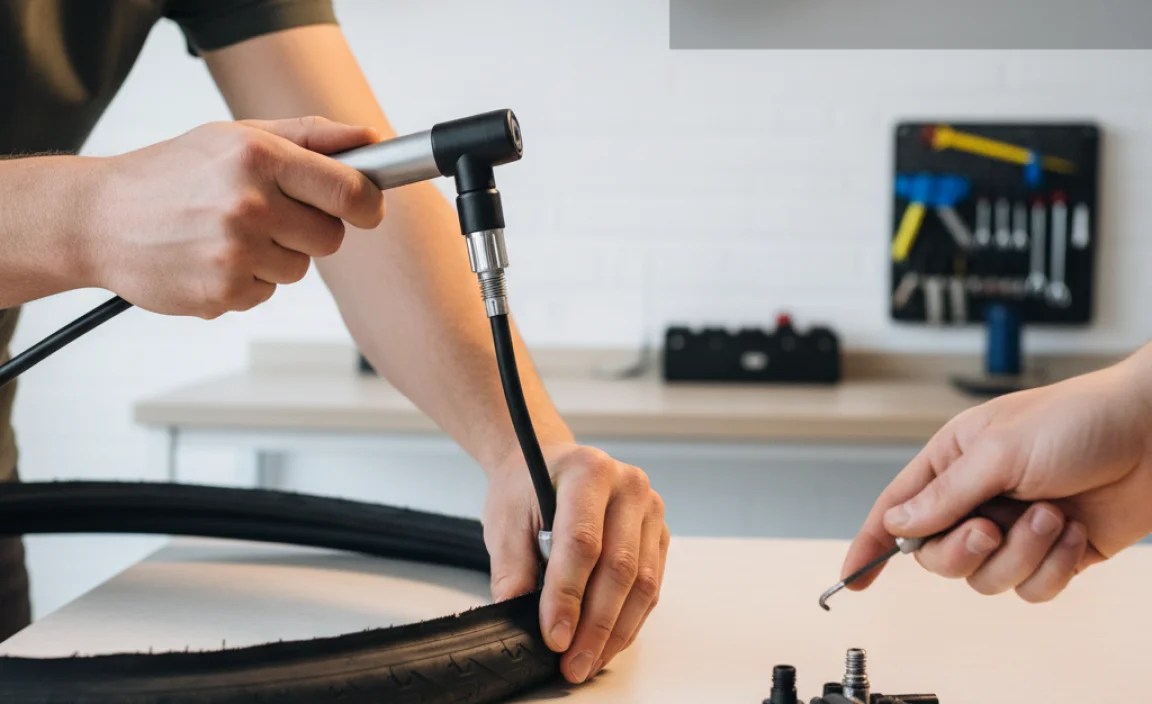
Step 4: Inflate the Tire
- Hold the pump handle firmly and start pumping. Use smooth, consistent strokes.
- Watch the pressure gauge (if your pump has one) to monitor the tire pressure.
- Refer to the recommended PSI (Pounds per Square Inch) printed on the sidewall of your tire.
Step 5: Check the Tire Pressure
If your pump doesn’t have a gauge, you can use a separate tire pressure gauge to check the pressure. Press the gauge onto the valve, and it will display the current PSI.
Step 6: Disconnect the Pump
- Flip the lever on the pump head (if it has one) to unlock it.
- Gently pull the pump head straight off the valve.
- For Presta valves, screw the nut back down to the closed position.
- Replace the valve cap.
Step 7: Repeat for the Other Tire
Don’t forget to inflate both tires! Repeat the process for the other tire, ensuring it’s also inflated to the correct pressure.
Understanding Tire Pressure (PSI)

Maintaining the correct tire pressure is crucial for a comfortable and efficient ride. Under-inflated tires can lead to pinch flats, while over-inflated tires can result in a harsh ride and reduced grip.
Finding the Recommended PSI
The recommended PSI range is usually printed on the sidewall of your tire. It will look something like “50-85 PSI” or “3.5-5.8 BAR”.
Factors Affecting Tire Pressure
Several factors can influence the ideal tire pressure:
- Rider Weight: Heavier riders need higher pressure.
- Tire Width: Wider tires can handle lower pressures.
- Terrain: Rougher terrain may benefit from slightly lower pressure for better grip.
- Riding Style: Aggressive riders might prefer higher pressure for faster rolling.
Here’s a general guideline for tire pressure based on rider weight:
| Rider Weight (lbs) | Recommended PSI (Road Bike) | Recommended PSI (Mountain Bike) |
|---|---|---|
| 120-150 | 90-100 | 25-35 |
| 150-180 | 100-110 | 30-40 |
| 180-220 | 110-120 | 35-45 |
| 220+ | 120-130 | 40-50 |
Note: These are just guidelines. Always refer to the PSI range printed on your tire sidewall.
Troubleshooting Common Problems
Sometimes, things don’t go as planned. Here are some common problems you might encounter and how to fix them:
- Pump Not Sealing: Make sure the pump head is securely attached to the valve. Check the rubber seal inside the pump head for wear or damage.
- Air Leaking: Ensure the valve core is tightened. For Presta valves, make sure the nut is screwed down after inflation.
- Difficulty Pumping: Check for any obstructions in the pump hose. Make sure the pump is properly lubricated.
- Incorrect Pressure Reading: Calibrate your pressure gauge or try a different gauge to verify the reading.
Maintaining Your Bike Pump
A well-maintained pump will last longer and perform better. Here are some tips for keeping your pump in top condition:
- Clean the Pump Head: Regularly clean the pump head to remove dirt and debris that can interfere with the seal.
- Lubricate the Piston: Apply a small amount of lubricant to the pump piston to keep it moving smoothly.
- Check the Hose: Inspect the hose for cracks or leaks and replace it if necessary.
- Store Properly: Store your pump in a dry place to prevent rust and corrosion.
Essential Tools for Tire Maintenance
Having the right tools on hand can make tire maintenance much easier. Here are some essential tools to consider:
- Bike Pump: A floor pump for home use and a hand pump for on-the-go repairs.
- Tire Pressure Gauge: To accurately check tire pressure.
- Tire Levers: For removing and installing tires.
- Patch Kit: For repairing punctures.
- Multi-Tool: A compact tool with various wrenches and screwdrivers for basic repairs.
Tips for Preventing Flat Tires
Prevention is always better than cure. Here are some tips to help you avoid flat tires:
- Maintain Proper Tire Pressure: Regularly check and maintain the correct tire pressure.
- Inspect Tires Regularly: Look for cuts, embedded objects, or signs of wear.
- Avoid Road Hazards: Steer clear of potholes, glass, and other debris.
- Use Tire Liners: Tire liners provide an extra layer of protection against punctures.
- Choose Durable Tires: Invest in high-quality tires with puncture-resistant features.
FAQ: Common Questions About Inflating Bike Tires
Here are some frequently asked questions about inflating bike tires:
- What’s the difference between PSI and BAR?
- PSI (Pounds per Square Inch) and BAR are both units of pressure. 1 BAR is equal to approximately 14.5 PSI. They both measure the same thing, just in different units.
- How often should I inflate my bike tires?
- Ideally, you should check and inflate your tires before every ride. Tires can lose pressure over time, even when they’re not being used.
- Can I use a car air pump to inflate my bike tires?
- Yes, you can use a car air pump with a Schrader valve adapter. However, be careful not to over-inflate, as car pumps can deliver air very quickly.
- What happens if I over-inflate my tires?
- Over-inflating your tires can lead to a harsh ride, reduced grip, and an increased risk of tire blowout.
- What happens if I under-inflate my tires?
- Under-inflating your tires can make pedaling harder, increase the risk of pinch flats, and damage your rims.
- Why does my tire keep losing air?
- A tire that consistently loses air may have a slow leak, a damaged valve, or a poorly seated tire bead. Inspect the tire and valve carefully.
- Can I mix and match tire and tube brands?
- Yes, you can generally use different brands of tires and tubes as long as they are the correct size for your rims.
Conclusion
Inflating your bike tires is a fundamental skill that every cyclist should master. By understanding the different valve types, choosing the right pump, and following the step-by-step instructions in this guide, you’ll be able to keep your tires properly inflated and enjoy a smooth, safe, and efficient ride. Remember to check your tire pressure regularly and maintain your pump for optimal performance. Happy cycling!
“`