
How to Connect Bike Hose to Air Compressor: Easy Guide
Connecting your bike hose to an air compressor is straightforward. First, identify the correct adapter for your tire valve (Presta or Schrader). Attach the adapter to the air compressor hose, then firmly press it onto your bike’s valve. Ensure a secure connection to avoid air leaks, and inflate to the recommended pressure.
Ever struggled to get your bike tires properly inflated? You’re not alone! Many cyclists find it tricky to use an air compressor, especially with different valve types. It’s frustrating when you can’t get the right pressure, leading to a less enjoyable ride or even a flat tire. But don’t worry, it’s easier than you think!
In this guide, I’ll walk you through each step to connect your bike hose to an air compressor like a pro. We’ll cover everything from identifying your valve type to choosing the right adapter and inflating your tires safely. Get ready to say goodbye to flat tires and hello to smooth rides!
Understanding Bike Tire Valves


Before you start connecting anything, it’s important to know what type of valve your bike has. The two most common types are Presta and Schrader. Knowing the difference will save you a lot of hassle.
Presta Valves
Presta valves are typically found on road bikes and high-performance bikes. They are narrower than Schrader valves and have a small locking nut at the tip.
- Appearance: Slim, with a locking nut.
- Usage: Road bikes, high-performance bikes.
- Pros: Holds higher pressure, easier to inflate to precise levels.
- Cons: More fragile, requires unscrewing the locking nut before inflation.
To use a Presta valve, you’ll need to unscrew the small nut at the top. Press it in briefly to loosen it before attaching the air compressor.
Schrader Valves
Schrader valves are similar to those found on car tires. They are wider and more robust, commonly used on mountain bikes, hybrid bikes, and some commuter bikes.
- Appearance: Wider, similar to car tire valves.
- Usage: Mountain bikes, hybrid bikes, commuter bikes.
- Pros: Durable, easy to inflate, compatible with most air compressors.
- Cons: Can be harder to inflate to very high pressures, less precise.
Schrader valves are straightforward to use. Just attach the air compressor nozzle directly to the valve.
Gathering Your Tools and Equipment

Having the right tools on hand makes the process much smoother. Here’s what you’ll need:
- Air Compressor: A standard air compressor with an air hose.
- Adapter (if needed): Depending on your valve type and the compressor nozzle, you might need an adapter.
- Bike Pump (optional): For checking pressure and making small adjustments.
- Rag or Cloth: To wipe away any dirt or debris.
- Valve Core Tool (optional): Useful for tightening or replacing valve cores.
Step-by-Step Guide: Connecting Your Bike Hose to an Air Compressor


Now, let’s get into the actual process. Follow these steps to connect your bike hose to an air compressor safely and effectively.
Step 1: Prepare Your Bike and Valve
First, make sure your bike is stable. You can use a bike stand or simply lean it against a wall. Remove the valve cap to expose the valve.
- For Presta valves: Unscrew the locking nut at the top of the valve. Press it in briefly to loosen it.
- For Schrader valves: Simply remove the cap.
Step 2: Choose the Correct Adapter
Inspect your air compressor nozzle. If it doesn’t fit your bike’s valve, you’ll need an adapter.
- Presta to Schrader Adapter: If your compressor has a Schrader nozzle, use this adapter to inflate Presta valves.
- Dual-Head Nozzle: Some compressors have a dual-head nozzle that fits both valve types.
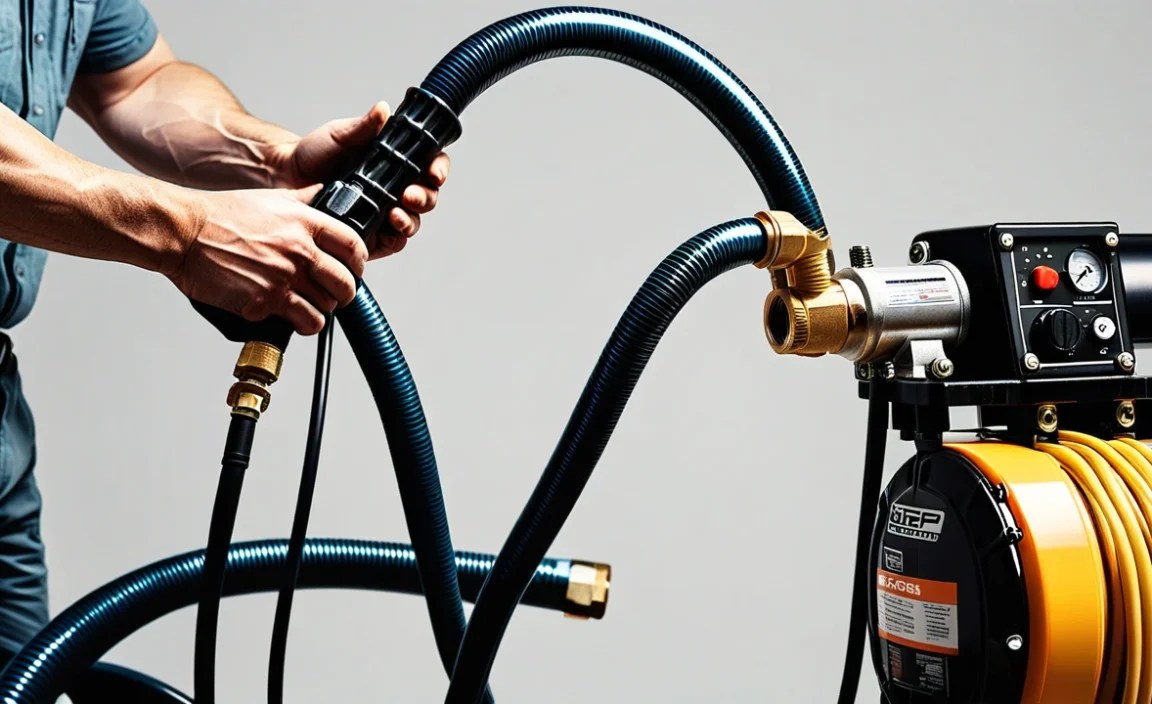
Step 3: Attach the Adapter to the Air Compressor Hose
If you’re using an adapter, screw it onto the end of the air compressor hose. Make sure it’s securely attached to prevent air leaks.
Step 4: Connect the Hose to the Valve
Now, it’s time to connect the hose to your bike’s valve. This step requires a bit of finesse to ensure a good seal.
- For Presta valves: Gently press the adapter onto the valve. Make sure it’s snug to prevent air from escaping.
- For Schrader valves: Press the nozzle directly onto the valve. You should feel it engage.
Step 5: Inflate to the Correct Pressure
With the hose connected, start inflating your tire. Keep an eye on the pressure gauge on the air compressor or use a separate pressure gauge.
- Check Recommended Pressure: Look for the recommended pressure (PSI) printed on the sidewall of your tire.
- Inflate in Short Bursts: Avoid over-inflation by inflating in short bursts and checking the pressure frequently.
Step 6: Remove the Hose and Secure the Valve
Once you’ve reached the correct pressure, carefully remove the hose from the valve.
- For Presta valves: Screw the locking nut back on to seal the valve.
- For Schrader valves: Replace the valve cap.
Troubleshooting Common Issues
Sometimes, things don’t go as planned. Here are some common issues and how to fix them.
Air Leaks
If you hear air hissing, it means there’s a leak. Here’s what to do:
- Check the Connection: Make sure the adapter is securely attached to both the hose and the valve.
- Tighten the Adapter: If the adapter is loose, tighten it.
- Replace the Adapter: If the adapter is damaged, replace it.
Difficulty Connecting the Hose
If you’re having trouble connecting the hose, try these tips:
- Clean the Valve: Use a rag to clean the valve. Dirt can prevent a good seal.
- Lubricate the Valve: A tiny bit of silicone lubricant can help.
- Try a Different Adapter: Some adapters fit better than others.
Over-Inflation
If you accidentally over-inflate your tire, don’t panic. Here’s how to fix it:
- Use a Pressure Gauge: Check the exact pressure.
- Release Air: Gently press the valve core to release small amounts of air until you reach the correct pressure.
Choosing the Right Air Compressor
Not all air compressors are created equal. Here’s what to look for when choosing one for your bike.
Types of Air Compressors
- Portable Air Compressors: Compact and easy to store, ideal for home use.
- Shop Air Compressors: Larger and more powerful, suitable for frequent use and multiple tasks.
- Cordless Air Compressors: Convenient for on-the-go use, but may have limited power.
Key Features to Consider
- Pressure Range: Make sure it can reach the pressure you need for your tires.
- Nozzle Compatibility: Look for a compressor with a nozzle that fits both Presta and Schrader valves, or one that comes with adapters.
- Portability: Consider how easy it is to move and store.
- Noise Level: Some compressors are louder than others.
| Feature | Portable Air Compressor | Shop Air Compressor | Cordless Air Compressor |
|---|---|---|---|
| Size | Compact | Large | Compact |
| Power | Moderate | High | Moderate |
| Portability | High | Low | High |
| Noise Level | Moderate | High | Moderate |
| Best Use | Home use, occasional inflation | Frequent use, multiple tasks | On-the-go inflation |
Safety Tips
Safety should always be your top priority. Here are some important safety tips to keep in mind.
- Wear Eye Protection: Protect your eyes from debris.
- Check Tire Condition: Before inflating, inspect your tires for damage.
- Do Not Over-Inflate: Over-inflation can cause the tire to explode.
- Keep Away from Children: Air compressors can be dangerous if misused.
Maintaining Your Bike Tires
Proper tire maintenance is crucial for a safe and enjoyable ride. Here are some tips to keep your tires in good condition.
- Check Pressure Regularly: Check your tire pressure before each ride.
- Inspect for Wear and Tear: Look for cuts, bulges, and excessive wear.
- Clean Your Tires: Keep your tires clean to improve grip and prevent punctures.
- Replace Worn Tires: Replace your tires when they show signs of wear.
Alternatives to Air Compressors
If you don’t have an air compressor, don’t worry. There are other ways to inflate your tires.
- Hand Pumps: Reliable and portable, great for on-the-go inflation.
- Floor Pumps: More efficient than hand pumps, ideal for home use.
- CO2 Inflators: Quick and easy, but require CO2 cartridges.
| Method | Pros | Cons |
|---|---|---|
| Hand Pump | Portable, reliable | Requires effort, slower |
| Floor Pump | Efficient, easy to use | Less portable |
| CO2 Inflator | Fast, convenient | Requires cartridges, can be wasteful |
Recommended Tools and Accessories
Here are some tools and accessories that can make tire inflation and maintenance easier.
- Digital Pressure Gauge: For accurate pressure readings.
- Valve Core Tool: For tightening or replacing valve cores.
- Tire Levers: For removing and installing tires.
- Patch Kit: For repairing punctures on the road.
Advanced Tips and Tricks
Ready to take your tire inflation skills to the next level? Here are some advanced tips.
- Use Tire Sealant: Tire sealant can prevent flats by sealing small punctures.
- Adjust Pressure for Conditions: Lower pressure for off-road riding, higher pressure for road riding.
- Learn to Feel the Pressure: With practice, you can estimate tire pressure by feel.
Understanding Tire Pressure and Its Impact
Maintaining the correct tire pressure is essential for optimal performance and safety. Under-inflated tires can lead to increased rolling resistance, making it harder to pedal, and can also increase the risk of pinch flats. Over-inflated tires, on the other hand, can result in a harsh ride and reduced grip, especially on uneven surfaces.
The ideal tire pressure depends on several factors, including your weight, riding style, and the type of terrain you’ll be riding on. As a general rule, heavier riders may need to increase the pressure slightly, while lighter riders can decrease it. Off-road riding typically requires lower pressures for better traction, while road riding benefits from higher pressures for efficiency.
Always refer to the recommended pressure range printed on the sidewall of your tire. Use a reliable pressure gauge to ensure accurate inflation. Experiment with different pressures to find the sweet spot that provides the best balance of comfort, grip, and rolling resistance for your specific needs.
FAQ: Connecting Bike Hose to Air Compressor
What if my air compressor nozzle doesn’t fit my bike valve?
You’ll need an adapter. Presta-to-Schrader adapters are common and easy to use. Screw the adapter onto your Presta valve, then use a Schrader-compatible nozzle.
How do I know the correct tire pressure for my bike?
Look for the recommended pressure (PSI) printed on the sidewall of your tire. Inflate within that range, adjusting based on your weight and riding conditions.
What should I do if I over-inflate my bike tire?
Carefully release some air by pressing the valve core. Use a pressure gauge to check until you reach the correct pressure. Do this slowly to avoid going under the recommended value.
Why is air leaking when I try to inflate my tire?
Check the connection between the hose and the valve. Make sure the adapter (if used) is tightly secured. A loose connection is the most common cause of air leaks.
Can I use any air compressor for my bike tires?
Yes, but make sure it has a compatible nozzle or adapter. Portable and shop compressors work well. Avoid over-powering the tire, inflate in short bursts, and monitor the pressure.
How often should I check my bike tire pressure?
Ideally, check before each ride. Tires lose pressure over time, so regular checks ensure optimal performance and safety.
What’s the difference between Presta and Schrader valves?
Presta valves are narrow with a locking nut, found on road bikes. Schrader valves are wider, like car tires, and used on mountain and hybrid bikes. They require different adapters.
Conclusion
Connecting your bike hose to an air compressor doesn’t have to be a daunting task. With the right tools and a little know-how, you can easily inflate your tires to the perfect pressure for a smooth and safe ride. Remember to identify your valve type, choose the correct adapter, and always prioritize safety.
By following the steps outlined in this guide, you’ll be able to maintain your bike tires like a pro. Regular tire maintenance not only improves your riding experience but also extends the life of your tires. So, grab your air compressor, get your bike ready, and enjoy the ride!


