
How to Attach Flexible Extension Hose: Easy Guide
Quick Summary:
Attaching a flexible extension hose is easy! First, identify the hose and the valve or fitting you want to connect it to. Make sure the threads match. Then, simply screw the hose onto the valve or fitting by hand until it’s snug. For a tighter seal, use a wrench to tighten it a little more, but be careful not to overtighten. That’s it—you’re done!
Have you ever struggled to reach that tire valve with your bike pump? Or maybe you’ve dealt with a leaky connection when trying to inflate your tires? It’s a common frustration for many cyclists. A flexible extension hose can be a lifesaver, making it easier to pump up your tires and ensuring a secure, airtight fit. But getting it properly attached is key.
In this guide, I’ll walk you through the simple steps to attach a flexible extension hose to your bike pump or other equipment. We’ll cover everything from identifying the right threads to tightening the connection for a perfect seal. Let’s get started and make your pumping experience smoother and more efficient!
Understanding Flexible Extension Hoses

Before we dive into the how-to, let’s talk about what a flexible extension hose is and why you might need one.
What is a Flexible Extension Hose?
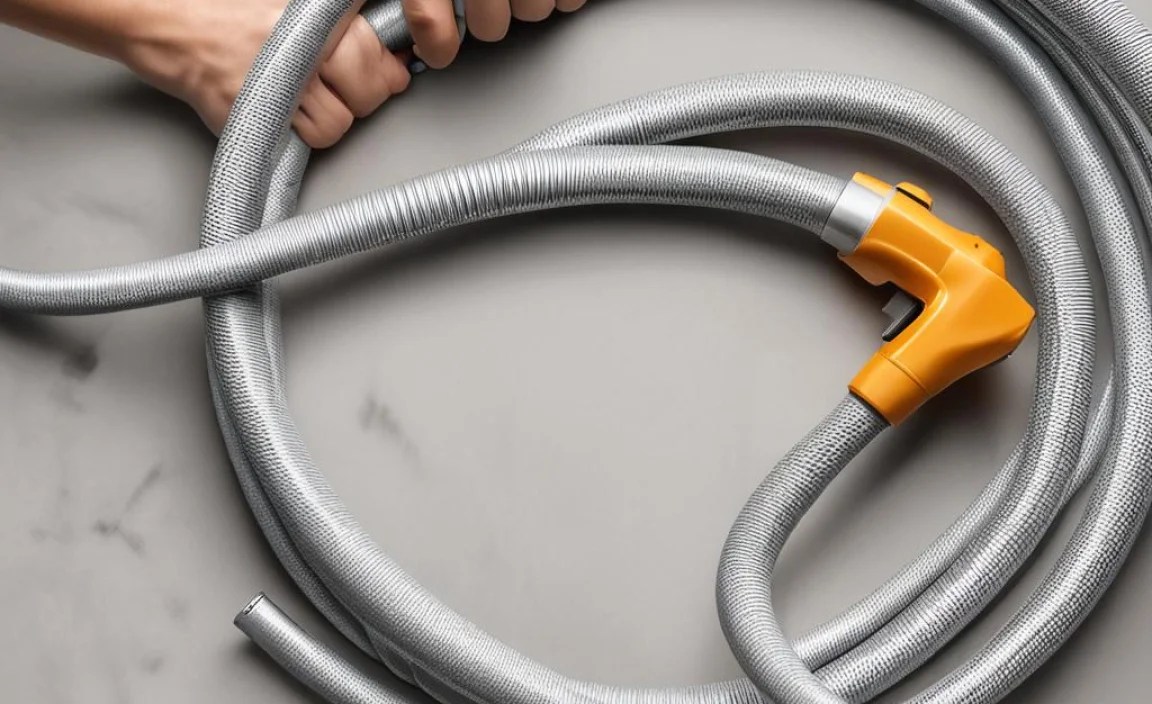
A flexible extension hose is a short length of hose with fittings on both ends, designed to extend the reach of your bike pump or other inflation device. It’s usually made of rubber, plastic, or braided metal, making it flexible and easy to maneuver.
Why Use a Flexible Extension Hose?
- Easier Access: Extension hoses make it easier to reach tire valves, especially on bikes with tight clearances or disc brakes.
- Prevents Damage: By reducing the angle and force on the valve stem, you reduce the risk of bending or breaking it.
- More Comfortable Pumping: You can position the pump in a more comfortable spot without straining.
- Better Seal: Extension hoses often come with high-quality fittings that create a tighter, more reliable seal.
Types of Flexible Extension Hoses
Extension hoses come in various types, so it’s important to choose the right one for your needs:
- Rubber Hoses: These are the most common and affordable. They’re flexible and durable, but can degrade over time.
- Braided Metal Hoses: These are more durable and resistant to wear and tear. They also look great!
- High-Pressure Hoses: Designed for high-pressure applications, like inflating suspension forks or shocks.
Tools and Materials You’ll Need

Before you start, gather the necessary tools and materials. This will make the process smoother and more efficient.
- Flexible Extension Hose: Make sure it’s compatible with your pump and valve type.
- Wrench (Optional): A small adjustable wrench can help tighten fittings.
- Teflon Tape (Optional): Also known as plumber’s tape, it helps create a better seal.
- Clean Cloth: For wiping down surfaces.
Step-by-Step Guide: How to Attach a Flexible Extension Hose

Now, let’s get down to business. Follow these steps to attach your flexible extension hose:
Step 1: Prepare the Fittings
Start by inspecting the fittings on both the hose and the device you’re connecting it to. Make sure they’re clean and free of debris.
- Clean the Threads: Use a clean cloth to wipe down the threads on both the hose fitting and the valve or pump fitting.
- Check for Damage: Look for any signs of damage, such as bent threads or cracks. If you find any, replace the damaged part.
Step 2: Apply Teflon Tape (Optional)
Teflon tape can help create a tighter seal, especially if the threads are worn or slightly damaged.
- Wrap the Threads: Wrap the Teflon tape around the threads of the male fitting. Wrap it in the direction that the fitting will turn when you screw it in.
- Overlap the Tape: Overlap the tape slightly as you wrap it around the threads.
- Smooth it Out: Press the tape firmly onto the threads to smooth it out.
Step 3: Attach the Hose
Now it’s time to connect the hose to the valve or pump.
- Align the Fittings: Carefully align the threads of the hose fitting with the threads of the valve or pump fitting.
- Hand-Tighten: Screw the hose onto the valve or pump by hand. Turn it clockwise until it’s snug.
- Check the Alignment: Make sure the hose is aligned properly and not cross-threaded.
Step 4: Tighten with a Wrench (Optional)
If you want a tighter seal, use a wrench to tighten the fitting a little more.
- Position the Wrench: Place the wrench on the fitting.
- Tighten Gently: Turn the wrench clockwise to tighten the fitting. Be careful not to overtighten, as this can damage the threads.
- Check for Leaks: After tightening, check for leaks by applying a little soapy water to the connection. If you see bubbles, tighten the fitting a little more.
Step 5: Test the Connection
Finally, test the connection to make sure it’s working properly.
- Attach the Pump: Attach your bike pump to the other end of the extension hose.
- Inflate the Tire: Inflate the tire to the desired pressure.
- Check for Leaks: Check for leaks at both ends of the extension hose. If you find any, tighten the fittings or reapply Teflon tape.
Troubleshooting Common Issues
Sometimes, things don’t go as planned. Here are some common issues and how to fix them:
Leaky Connection
- Problem: Air is leaking from the connection between the hose and the valve or pump.
- Solution:
- Tighten the fitting with a wrench.
- Apply Teflon tape to the threads.
- Check for damaged threads and replace the fitting if necessary.
Cross-Threading
- Problem: The threads are not aligned properly, and the fitting is difficult to screw on.
- Solution:
- Stop immediately and realign the threads.
- Clean the threads and remove any debris.
- If the threads are damaged, replace the fitting.
Hose Won’t Stay Attached
- Problem: The hose keeps coming loose from the valve or pump.
- Solution:
- Make sure the threads are compatible.
- Tighten the fitting securely with a wrench.
- Consider using a locking mechanism or quick-release fitting.
Tips for Maintaining Your Flexible Extension Hose

To keep your flexible extension hose in good condition, follow these tips:
- Store it Properly: Store the hose in a cool, dry place away from direct sunlight.
- Clean it Regularly: Wipe down the hose with a clean cloth to remove dirt and debris.
- Inspect it Regularly: Check for cracks, leaks, or other damage. Replace the hose if necessary.
- Lubricate the Fittings: Apply a small amount of lubricant to the fittings to keep them working smoothly.
Different scenarios for attaching a flexible extension hose
The exact steps for attaching a flexible extension hose can vary depending on the specific scenario. Here are a few of the most common situations:
Attaching a flexible extension hose to a bike pump
This is the most common scenario. Here are the steps:
- Make sure that the threads on the extension hose and the bike pump are compatible. Most bike pumps use a standard Schrader valve, but some use a Presta valve.
- If necessary, use an adapter to connect the extension hose to the bike pump.
- Screw the extension hose onto the bike pump until it is snug.
- Attach the other end of the extension hose to the tire valve.
- Inflate the tire to the desired pressure.
Attaching a flexible extension hose to a tire inflator
Tire inflators are often used to inflate tires on cars and other vehicles. The steps for attaching a flexible extension hose to a tire inflator are similar to those for attaching it to a bike pump.
- Make sure that the threads on the extension hose and the tire inflator are compatible. Most tire inflators use a standard Schrader valve.
- If necessary, use an adapter to connect the extension hose to the tire inflator.
- Screw the extension hose onto the tire inflator until it is snug.
- Attach the other end of the extension hose to the tire valve.
- Inflate the tire to the desired pressure.
Attaching a flexible extension hose to an air compressor
Air compressors are often used to power pneumatic tools, such as nail guns and impact wrenches. The steps for attaching a flexible extension hose to an air compressor are similar to those for attaching it to a tire inflator.
- Make sure that the threads on the extension hose and the air compressor are compatible. Most air compressors use a standard NPT fitting.
- If necessary, use an adapter to connect the extension hose to the air compressor.
- Screw the extension hose onto the air compressor until it is snug.
- Attach the other end of the extension hose to the pneumatic tool.
- Turn on the air compressor and use the pneumatic tool.
Table: Comparing Different Types of Flexible Extension Hoses
| Type | Material | Pros | Cons | Best Use |
|---|---|---|---|---|
| Rubber | Rubber | Affordable, flexible | Can degrade over time | General use |
| Braided Metal | Metal | Durable, resistant to wear | More expensive | Heavy-duty use |
| High-Pressure | Reinforced Plastic | Handles high pressure | Less flexible | Suspension forks/shocks |
FAQ: Frequently Asked Questions
Here are some common questions about attaching flexible extension hoses:
What is Teflon tape and why should I use it?
Teflon tape, also known as plumber’s tape, is a thin, white tape used to create a tighter seal between threaded fittings. It helps prevent leaks by filling in any gaps between the threads. It’s especially useful if the threads are worn or slightly damaged.
How tight should I tighten the fittings?
You should tighten the fittings until they’re snug. If you’re using a wrench, tighten them a little more, but be careful not to overtighten. Overtightening can damage the threads and cause leaks.
What if I can’t get the hose to stop leaking?
If you’re having trouble stopping a leak, try these steps:
- Tighten the fitting a little more.
- Apply Teflon tape to the threads.
- Check for damaged threads and replace the fitting if necessary.
Can I use any type of flexible hose as an extension hose?
No, you should only use hoses that are specifically designed for use as extension hoses. These hoses are made from materials that are compatible with the fluids or gases that will be flowing through them, and they are designed to withstand the pressures that will be applied to them.
How do I know if my extension hose is compatible with my pump and valve?
Check the product specifications for both the hose and the pump/valve. Look for information about thread types and sizes. If you’re not sure, ask a salesperson at a bike shop or hardware store.
How often should I replace my flexible extension hose?
You should replace your flexible extension hose every 1-2 years, or more often if it is damaged or worn. Inspect the hose regularly for cracks, leaks, or other damage.
What’s the best way to store a flexible extension hose?
The best way to store a flexible extension hose is to coil it loosely and store it in a cool, dry place. Avoid storing it in direct sunlight or in areas where it will be exposed to extreme temperatures.
External Resources
For additional information on bike maintenance and repair, check out these resources:
- Park Tool Repair Help – Comprehensive guides and videos on bike repair.
- REI Expert Advice on Bicycle Maintenance – Tips and advice on keeping your bike in top condition.
- BikeRadar’s Beginner’s Guide to Bike Maintenance – Essential maintenance tips for new cyclists.
Conclusion
Attaching a flexible extension hose is a simple task that can make your bike maintenance routine much easier. By following these steps and tips, you can ensure a secure, leak-free connection and enjoy a more comfortable pumping experience. Remember to choose the right hose for your needs, prepare the fittings properly, and tighten everything securely. With a little practice, you’ll be a pro in no time!
So, go ahead and give it a try. You’ll be amazed at how much easier it is to inflate your tires with a flexible extension hose. Happy riding!


