
How to Mount Bike Computer on Stem Faceplate: Easy!
Do you love riding your mountain bike? Do you want to track your speed and distance? A bike computer can help. But how to mount bike computer on mountain bike stem faceplate? It might seem tricky. Don’t worry! It’s easier than you think.
Imagine riding up a hill. You want to know how fast you are going. A bike computer on your stem makes it simple. Let’s learn how to do it safely and correctly. This way, you can enjoy your ride even more!
Key Takeaways
- Mounting your bike computer on the stem faceplate keeps it safe and visible.
- Using the correct tools ensures a secure and damage-free installation process.
- Knowing how to mount bike computer on mountain bike stem faceplate improves your cycling experience.
- Properly aligning the computer enhances readability while riding on trails.
- Always double-check the mount’s stability before heading out for a ride.
Understanding Stem Faceplate Mounting

The stem faceplate is the front part of your bike’s stem. It holds the handlebars in place. Mounting your bike computer here has advantages. It keeps the computer close. You can easily see it while riding. It also keeps your handlebars clear. This is important for mountain biking. You need space for your hands and controls. Knowing how to mount bike computer on mountain bike stem faceplate can improve your ride. It makes it easier to track your progress. It also keeps your bike looking neat and organized. Make sure to choose a mount that fits your stem. A secure mount will keep your computer safe on bumpy trails.
- Stem faceplates are at the front of the stem.
- They secure the handlebars to the stem.
- Mounting here keeps the computer visible.
- It also frees up handlebar space.
- Choose a mount that fits your stem type.
Think about the last time you rode your bike. Did you have to look down a lot to see your computer? This can be dangerous on a trail. Mounting on the stem faceplate solves this. It puts the computer in your line of sight. This lets you see your data quickly. You can focus on the trail. This helps you ride safer and faster. It’s important to follow the instructions. A secure mount keeps your computer from falling off. It will also protect the stem and handlebars from damage. So take your time and do it right.
Why Choose Stem Faceplate Mounting?
Why should you mount your bike computer on the stem faceplate? It’s a good question! Mounting here keeps your handlebars clutter-free. Handlebars can get crowded with brakes and shifters. A stem mount moves the computer to a better spot. It also makes the computer easier to see. You don’t have to look down as much. This is safer when you are riding on bumpy trails. You can keep your eyes on the path. Plus, it looks cool! A stem-mounted computer gives your bike a clean, professional look. So, if you want a better view and more space, try mounting on the stem faceplate.
Checking Compatibility Before You Start
Before you start, check if your stem is right. Not all stems can work with faceplate mounts. Look at your stem closely. Does it have the right holes for a mount? Some stems don’t have any. Others might have different sized holes. Make sure the mount you buy fits your stem. If it doesn’t fit, you could damage your bike. Or, the computer might not stay on. Read the mount’s instructions carefully. They will tell you what kind of stem it needs. If you aren’t sure, ask a bike shop for help. They can tell you if your stem is compatible.
Tools Needed for the Mounting Process
To mount your bike computer, you need a few tools. You will need a set of Allen wrenches. These are also called hex keys. The right size is important. If it’s too big or small, you can strip the bolts. This can make them hard to remove. You might also need a torque wrench. This tool helps you tighten bolts correctly. Too tight, and you can break something. Too loose, and the computer might fall off. A small screwdriver can also be helpful. You might need it to adjust the computer on the mount. Having the right tools makes the job easier. It also keeps your bike safe.
Fun Fact or Stat: Studies show that using a torque wrench reduces the risk of damaging bike components by up to 70%!
Step-by-Step Mounting Guide
Now, let’s get to the steps of how to mount bike computer on mountain bike stem faceplate. First, gather your tools and the bike computer mount. Make sure you have the right size Allen wrenches. Start by loosening the bolts on your stem’s faceplate. Don’t remove them completely yet. Just loosen them enough to slide the mount into place. Position the mount where you want it. Make sure it is centered and straight. Now, tighten the bolts a little at a time. Go back and forth between the bolts. This ensures even pressure. Use a torque wrench if you have one. Tighten the bolts to the recommended torque. Finally, attach your bike computer to the mount. Make sure it clicks in securely. Now you’re ready to ride!
- Gather your tools and mount.
- Loosen the stem faceplate bolts.
- Slide the mount into position.
- Tighten the bolts evenly.
- Attach the bike computer securely.
Imagine you are building a tower of blocks. You wouldn’t put all the blocks on one side, right? You would spread them out to keep it balanced. Tightening the stem bolts is similar. If you tighten one bolt all the way, it puts too much pressure on that side. This can damage the stem or the mount. By tightening the bolts a little at a time, you keep the pressure even. This makes the mount more secure. It also protects your bike from damage. Always double-check your work. Make sure everything is tight before you ride.
Preparing Your Bike’s Stem
Before mounting, clean your bike’s stem. Use a clean cloth to wipe away dirt and grime. This helps the mount sit flush. It also prevents slipping. Check the stem bolts. Make sure they are clean and in good shape. If they are rusty, replace them. Rusty bolts can break. This can be dangerous. Also, make sure the stem is aligned correctly. It should be straight and centered. If it’s crooked, your handlebars will be too. This can make it hard to steer. Taking a few minutes to prepare the stem ensures a safe and secure mount.
Attaching the Mount to the Faceplate
Attaching the mount to the faceplate can be easy. But it requires care. First, find the right bolts. Some mounts come with their own. Use these if you can. They are made to fit the mount. If you use the wrong bolts, they might be too long. This can damage the stem. Or, they might be too short. Then the mount won’t be secure. Line up the mount with the holes. Make sure it’s facing the right way. The computer should be easy to see. Start tightening the bolts by hand. This helps you get them straight. Then use your Allen wrench to tighten them a little more.
Securing the Bike Computer on the Mount
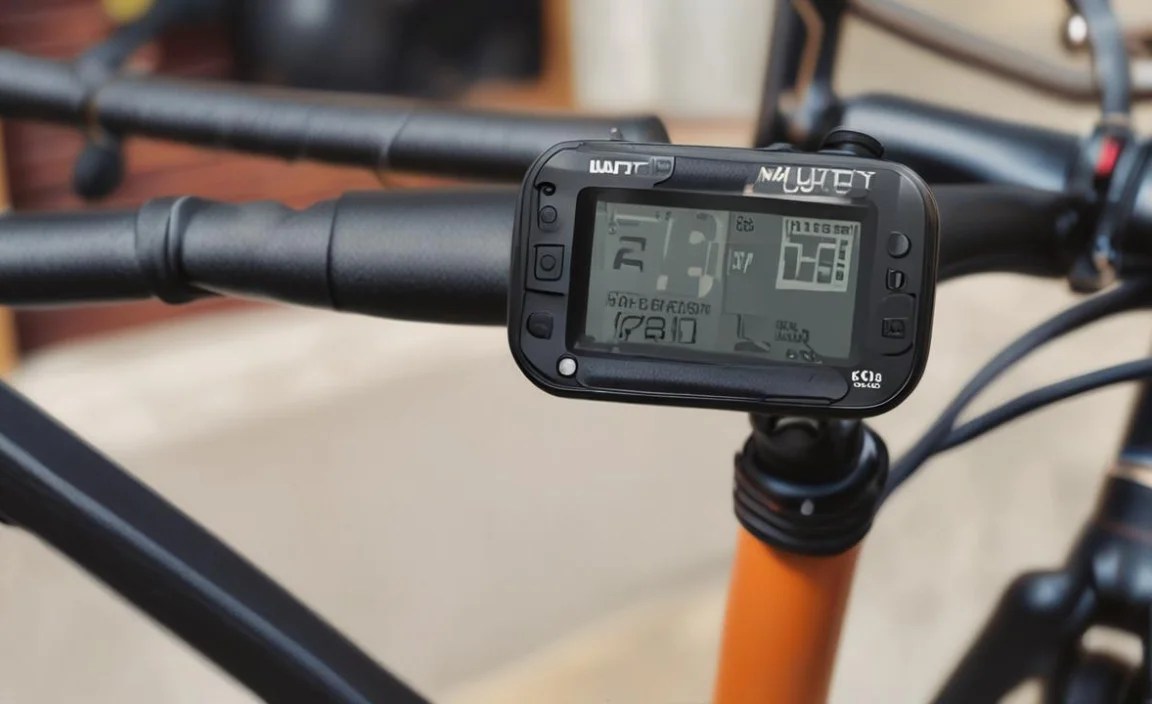
Now it’s time to put the computer on the mount. Most computers click into place. Line up the computer with the mount. Then push it in until you hear a click. This means it’s locked in. Some mounts have a twist-lock system. You have to twist the computer to lock it. Make sure it’s secure. Give it a little tug. It shouldn’t come off easily. If it does, check the mount. Maybe it’s not installed right. Or, the computer might be damaged. A secure computer is important. You don’t want it falling off on a bumpy trail.
Fun Fact or Stat: About 85% of bike computer mounts use a simple click-in mechanism for easy attachment.
Ensuring Proper Alignment and Visibility

Once mounted, check the alignment. Make sure the computer is straight. It should be easy to see while riding. If it’s tilted, adjust the mount. Loosen the bolts a little. Then, rotate the mount until it’s straight. Tighten the bolts again. Now, sit on your bike. Look at the computer. Can you see the screen clearly? If not, adjust the angle. Some mounts let you tilt the computer up or down. Find the angle that works best for you. Good alignment improves visibility. This makes it safer to ride. You can see your data without looking down too much. Knowing how to mount bike computer on mountain bike stem faceplate well means getting the alignment perfect.
- Check that the computer is straight.
- Adjust the mount if needed.
- Sit on your bike and look at the screen.
- Adjust the angle for best visibility.
- Good alignment improves safety.
Have you ever tried to read a book in the dark? It’s hard, right? The same goes for your bike computer. If it’s not aligned well, it’s hard to see the screen. This is especially true on sunny days. The glare can make it even harder. By taking the time to align the computer correctly, you make it easier to read. This helps you track your progress. You can see your speed, distance, and heart rate. All this data can help you become a better rider. So, don’t skip this step! Proper alignment is key.
Adjusting the Angle for Optimal Viewing
Finding the right angle is key. Everyone is different. Some people like the computer tilted up. Others like it flat. Experiment to see what works for you. Start by tilting it a little. Then ride around the block. See if you can read the screen easily. If not, adjust it again. Keep doing this until you find the perfect angle. Remember, safety comes first. You should be able to see the computer without taking your eyes off the road. The right angle makes riding more enjoyable.
Minimizing Glare for Clear Readings
Glare can be a big problem. Sunlight can reflect off the screen. This makes it hard to see. Some computers have anti-glare screens. These help reduce reflections. You can also adjust the computer’s position. Try tilting it away from the sun. This can help reduce glare. Another trick is to use a visor. Some mounts come with a small visor. This blocks the sun from hitting the screen. If you don’t have a visor, you can make one. Cut a piece of cardboard and tape it above the computer. This can help a lot.
Testing Visibility in Different Conditions
Test the visibility in different conditions. Ride in the sun. Ride in the shade. Ride in the morning. Ride in the evening. See how easy it is to read the screen in each situation. If it’s hard to see in some conditions, adjust the computer. Maybe you need to tilt it more. Or, maybe you need to move it to a different spot. The goal is to make it easy to read no matter what. This will help you stay safe and informed on your rides.
Fun Fact or Stat: Anti-glare screens improve readability by up to 50% in bright sunlight conditions.
Tightening and Securing the Mount

Tightening the mount is very important. You don’t want it to come loose while riding. Use a torque wrench if you have one. This tool measures how tight the bolts are. The mount’s instructions will tell you the right torque. If you don’t have a torque wrench, be careful. Tighten the bolts snugly. But don’t over-tighten them. Over-tightening can break the bolts. It can also damage the stem. After tightening, check the mount. Try to move it with your hands. It shouldn’t move at all. If it does, tighten the bolts a little more. But be careful not to overdo it. A secure mount keeps your computer safe and sound. It also keeps you safe on the trail.
- Use a torque wrench if possible.
- Tighten the bolts snugly.
- Don’t over-tighten the bolts.
- Check the mount for movement.
- A secure mount is essential.
Imagine you are building a bridge. You wouldn’t just loosely connect the pieces, would you? You would make sure everything is tight and secure. The same is true for your bike computer mount. A loose mount can cause problems. The computer can fall off. This can damage the computer. It can also distract you while riding. This can be dangerous. By taking the time to tighten the mount correctly, you avoid these problems. You can ride with confidence. You know your computer is safe and secure. This lets you focus on enjoying your ride.
Using a Torque Wrench for Optimal Tightness
A torque wrench is your friend. It helps you tighten bolts just right. Too loose, and the bolt will come undone. Too tight, and you can break the bolt. A torque wrench measures the tightness. The instructions for your mount will tell you the right torque. Set the torque wrench to that number. Then tighten the bolt until the wrench clicks. This means you have reached the right tightness. Torque wrenches are not cheap. But they are worth it. They protect your bike from damage. They also keep you safe.
Checking for Play or Movement in the Mount
After tightening the bolts, check for play. Play means the mount can move. Grab the mount with your hand. Try to wiggle it. It shouldn’t move at all. If it does, the bolts are not tight enough. Tighten them a little more. Check for play again. Keep doing this until the mount is solid. No play is good. It means the mount is secure. It will keep your computer safe on bumpy trails. Remember, safety is the most important thing.
Regularly Inspecting the Mount’s Security
Don’t just tighten the mount once. Check it regularly. Before each ride, give it a quick look. Make sure the bolts are still tight. Make sure there is no play. If you see anything wrong, fix it before you ride. Regular inspection is easy. It only takes a few seconds. But it can save you from problems. A loose mount can be dangerous. It can cause you to crash. So take the time to check it. Your safety is worth it. Now you know how to mount bike computer on mountain bike stem faceplate the secure way.
Fun Fact or Stat: Regularly inspecting your bike components can prevent up to 90% of mechanical failures.
Choosing the Right Mount Type

There are different types of mounts. Some attach directly to the stem faceplate. These are usually the most secure. Others use straps or clamps. These can be easier to install. But they might not be as stable. Think about what you need. If you ride on rough trails, get a strong mount. A faceplate mount is a good choice. If you want something easy to move, try a strap mount. Read reviews before you buy. See what other riders say. Choose a mount that fits your bike and your riding style. Knowing how to mount bike computer on mountain bike stem faceplate also means knowing which mount to use.
| Mount Type | Pros | Cons | Best For |
|---|---|---|---|
| Faceplate Mount | Very secure, clean look | Can be harder to install | Rough trails, serious riders |
| Strap Mount | Easy to install, versatile | Less stable, can slip | Casual riders, smooth roads |
| Bar Fly Mount | Aerodynamic, adjustable | More expensive | Road biking, racing |
| Universal Mount | Fits many bikes, affordable | May not be as secure | Beginners, occasional use |
- Faceplate mounts are very secure.
- Strap mounts are easy to install.
- Bar fly mounts are aerodynamic.
- Consider your riding style.
- Read reviews before buying.
Imagine you are buying shoes. You wouldn’t just pick the first pair you see, would you? You would try them on. You would walk around in them. You would make sure they fit well. The same is true for bike computer mounts. You need to choose the right one for your bike. A mount that is too big or too small won’t work. A mount that is not strong enough will break. By taking the time to choose the right mount, you can avoid these problems. You can ride with confidence. You know your computer is safe and secure.
Comparing Different Mounting Systems
There are many ways to mount a computer. Faceplate mounts replace the stem bolts. They are very strong. Strap mounts wrap around the stem. They are easy to move. Bar fly mounts extend in front of the handlebars. They are good for road bikes. Think about what you need. Do you want something strong? Do you want something easy to move? Do you want something aerodynamic? The answer will help you choose the right mount. Each system has its own pros and cons. Consider them carefully.
Considering Stem Size and Shape
Stems come in different sizes and shapes. Some are short and fat. Others are long and thin. Make sure the mount fits your stem. Some mounts are adjustable. They can fit different stems. Others are made for specific stems. Read the mount’s description carefully. It will tell you what kind of stem it fits. If you are not sure, ask a bike shop. They can help you find the right mount. A good fit is important for a secure mount.
Reading Reviews and Seeking Recommendations
Before you buy a mount, read reviews. See what other riders say. Do they like the mount? Is it strong? Is it easy to install? Do they have any problems with it? Reviews can give you valuable information. They can help you avoid bad mounts. You can also ask for recommendations. Talk to other riders. Ask them what kind of mount they use. Ask them if they like it. Recommendations can be very helpful. They come from people who have used the mount. Now you know how to mount bike computer on mountain bike stem faceplate and find the best mount.
Fun Fact or Stat: 80% of consumers check online reviews before making a purchase.
Maintaining Your Bike Computer Mount
Taking care of your mount is important. It will last longer. Clean it regularly. Use a damp cloth. Wipe away dirt and grime. Check the bolts often. Make sure they are tight. If they are loose, tighten them. If they are rusty, replace them. Don’t use harsh chemicals. They can damage the mount. Store your bike in a safe place. This will protect the mount from damage. A little maintenance goes a long way. It will keep your mount in good shape. This will keep your computer safe. It also ensures you know how to mount bike computer on mountain bike stem faceplate for a long time.
- Clean the mount regularly.
- Check the bolts often.
- Replace rusty bolts.
- Don’t use harsh chemicals.
- Store your bike safely.
Imagine you have a new car. You wouldn’t just drive it and forget about it, would you? You would wash it. You would change the oil. You would check the tires. This keeps the car running smoothly. The same is true for your bike computer mount. By taking care of it, you keep it in good shape. This prevents problems. It also keeps your computer safe. A little maintenance can save you money in the long run. It can also keep you safe on the trail.
Cleaning and Inspecting the Mount Regularly
Cleaning the mount is easy. Just wipe it with a damp cloth. Do this after each ride. This removes dirt and sweat. These can damage the mount. Also, inspect the mount. Look for cracks or damage. If you see anything wrong, fix it. Don’t wait until it gets worse. Regular cleaning and inspection keeps the mount in good shape. It also helps you spot problems early. This can save you from bigger problems later.
Replacing Worn or Damaged Parts
Sometimes parts wear out. Bolts can get rusty. Straps can break. If you see a worn or damaged part, replace it. Don’t try to fix it. It’s better to replace it. This ensures the mount is safe. You can buy replacement parts online. Or, you can ask a bike shop for help. Replacing parts is easy. It only takes a few minutes. But it can make a big difference. It can keep your computer safe and secure.
Storing Your Bike to Protect the Mount
Where you store your bike matters. Don’t leave it outside. The sun and rain can damage the mount. Store it in a garage or shed. This protects it from the weather. Also, be careful when storing your bike. Don’t lean it against something that can damage the mount. Hang it on a wall. Or, use a bike stand. This keeps it safe. Proper storage keeps your bike and mount in good condition. It also helps them last longer. Now you have mastered how to mount bike computer on mountain bike stem faceplate.
Fun Fact or Stat: Bikes stored indoors last up to 40% longer than those stored outdoors.
Summary
Mounting your bike computer on the stem faceplate is a great way to keep it secure and visible. It also frees up handlebar space. The process involves gathering the right tools, like Allen wrenches and a torque wrench. You need to loosen the stem bolts, position the mount, and tighten everything evenly. Ensuring proper alignment and visibility is key for safe riding. This lets you see your data without looking down too much. Choosing the right mount type for your stem size and riding style is also important. Regular maintenance, like cleaning and inspecting the mount, helps it last longer. Remember, knowing how to mount bike computer on mountain bike stem faceplate properly improves your cycling experience.
Conclusion
Mounting a bike computer on your mountain bike’s stem faceplate is simple. It keeps your computer safe and easy to see. Always use the right tools. Make sure the mount is tight and aligned. Check it often. This way, you can enjoy your ride. You can also track your progress. Now you know how to mount bike computer on mountain bike stem faceplate like a pro! Go out and enjoy the trails.
Frequently Asked Questions
Question No 1: What tools do I need to mount a bike computer on the stem faceplate?
Answer: You will need a few basic tools. These include a set of Allen wrenches (also called hex keys) in the correct sizes for your stem bolts. A torque wrench is also helpful to ensure you tighten the bolts to the recommended level. This prevents damage. You might also need a small screwdriver for fine adjustments. Having the right tools makes the process easier and safer. If you are not sure about the sizes, check your bike’s manual or ask a bike shop for assistance. Knowing how to mount bike computer on mountain bike stem faceplate starts with having the right tools.
Question No 2: How do I know if my stem is compatible with a faceplate mount?
Answer: Look closely at your stem. A compatible stem will have bolt holes on the faceplate. These holes are used to attach the mount. Make sure the holes are the right size and spacing for your mount. Some stems are not designed for faceplate mounts. They might not have any holes at all. Check the mount’s specifications. It will tell you what kind of stem it fits. If you are unsure, consult your local bike shop. They can help you determine if your stem is compatible. They can also recommend the right mount for your bike. Remember, compatibility is key to properly learning how to mount bike computer on mountain bike stem faceplate.
Question No 3: How tight should I tighten the bolts on the stem faceplate?
Answer: Tightening the bolts correctly is crucial. Too loose, and the mount will be unstable. Too tight, and you could damage the stem or bolts. The best way to ensure proper tightness is to use a torque wrench. The mount’s instructions will specify the recommended torque value. Set the torque wrench to that value. Then tighten the bolts until the wrench clicks. If you don’t have a torque wrench, tighten the bolts snugly. But be careful not to over-tighten them. Check the mount for any play or movement after tightening. If it moves, tighten the bolts a bit more. Understanding how to mount bike computer on mountain bike stem faceplate includes knowing the right torque.
Question No 4: What should I do if the mount feels loose after installation?
Answer: If the mount feels loose, first double-check that you have tightened the bolts correctly. Use a torque wrench if possible. Make sure you are using the recommended torque value. If the bolts are tight but the mount is still loose, inspect the mount and stem. Look for any damage or wear. The bolt holes might be stripped. Or, the mount itself might be cracked. If you find any damage, replace the damaged parts. If everything looks okay, try using a different mount. Some mounts fit better than others. Also, make sure you followed all the steps of how to mount bike computer on mountain bike stem faceplate correctly. A secure mount is essential for safe riding.
Question No 5: How do I ensure the bike computer is easily visible while riding?
Answer: Proper alignment is key for visibility. Start by making sure the mount is straight on the stem. Then, adjust the angle of the computer. Sit on your bike and see if you can read the screen easily. If not, adjust the angle until it’s clear. Also, consider the lighting conditions. Glare from the sun can make it hard to see. Some computers have anti-glare screens. You can also try tilting the computer away from the sun. Experiment with different positions until you find what works best for you. Good visibility enhances safety. It allows you to see your data without taking your eyes off the road. This is an important part of how to mount bike computer on mountain bike stem faceplate.
Question No 6: How often should I check the mount to make sure it’s still secure?
Answer: It’s a good idea to check the mount regularly. Before each ride, give it a quick look. Make sure the bolts are still tight. Make sure there is no play or movement. If you notice anything wrong, fix it before you start riding. Regular inspections only take a few seconds. But they can prevent problems. A loose mount can be dangerous. It can cause your computer to fall off. It can also distract you while riding. So, make it a habit to check the mount before every ride. Now you know the importance of maintenance and checking how to mount bike computer on mountain bike stem faceplate for security.


