
Mountain Bike Tire Pressure Guide: Ultimate Performance
Mountain Bike Tire Pressure Guide
Quick Summary: Mountain bike tire pressure affects grip, comfort, and speed. Aim for 22-26 PSI for tubeless tires and 30-35 PSI for tubed tires, but adjust based on your weight, tire size, and trail conditions. Use a reliable pressure gauge and experiment to find your ideal pressure for optimal performance.
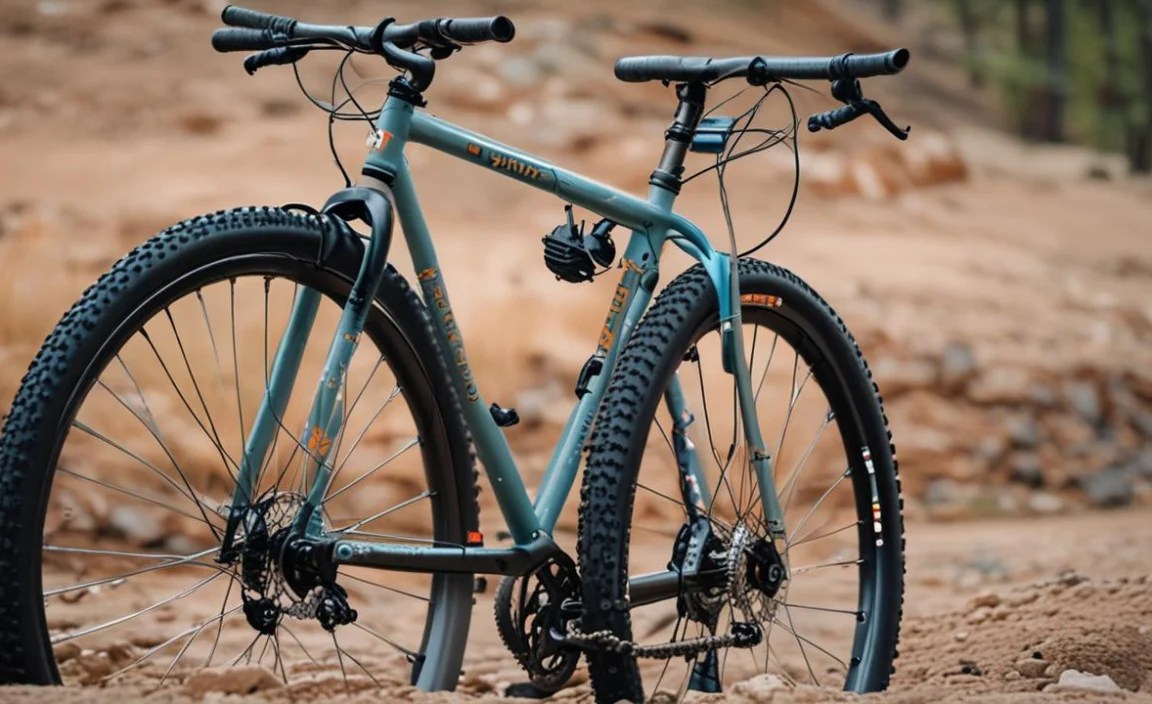
Riding a mountain bike is a blast, but getting the most out of your ride means paying attention to the details. One of the most important, yet often overlooked, aspects is tire pressure. Too much pressure, and you’ll be bouncing all over the trail. Too little, and you risk a flat tire or damaging your rims. Finding the sweet spot can feel like a mystery, but don’t worry! This guide will walk you through everything you need to know to get your tire pressure just right.
We’ll cover how to determine the best pressure for your setup, what tools you’ll need, and how to make adjustments on the fly. Get ready to dial in your ride and experience the trails like never before!
Why Tire Pressure Matters

Tire pressure is more than just a number. It’s a key factor that influences how your bike handles, how comfortable your ride is, and even how likely you are to get a flat tire. Here’s a closer look at why it’s so important:
- Grip: Lower tire pressure increases the contact patch between your tire and the ground, giving you more grip. This is especially important on loose or slippery terrain.
- Comfort: Lower pressure also allows the tire to absorb bumps and vibrations, making for a smoother and more comfortable ride.
- Rolling Resistance: While lower pressure generally increases grip, it can also increase rolling resistance if it’s too low. Finding the right balance is key.
- Puncture Resistance: Too little pressure increases the risk of pinch flats (also known as snake bites), where the tire gets pinched between the rim and a hard object.
- Rim Protection: Higher pressure protects your rims from impacts, but too much can make the ride harsh.
Factors Affecting Tire Pressure

The ideal tire pressure isn’t a one-size-fits-all number. It depends on several factors, including:
- Rider Weight: Heavier riders need higher pressure to avoid pinch flats and rim damage.
- Tire Size: Wider tires can be run at lower pressures than narrower tires.
- Tire Type: Tubeless tires can be run at lower pressures than tubed tires because there’s no inner tube to pinch.
- Rim Width: Wider rims support the tire better, allowing for lower pressures.
- Trail Conditions: Softer, looser trails benefit from lower pressures for better grip. Hardpack trails may require higher pressures to reduce rolling resistance.
- Riding Style: Aggressive riders who corner hard and hit jumps may prefer slightly higher pressures for more support.
Recommended Tire Pressure Ranges

As a general starting point, here are some recommended tire pressure ranges for mountain bikes:
| Tire Setup | Rider Weight (lbs) | Recommended Pressure (PSI) |
|---|---|---|
| Tubeless | 120-150 | 19-23 |
| Tubeless | 150-180 | 22-26 |
| Tubeless | 180-210 | 25-29 |
| Tubeless | 210+ | 28-32 |
| Tubed | 120-150 | 27-31 |
| Tubed | 150-180 | 30-34 |
| Tubed | 180-210 | 33-37 |
| Tubed | 210+ | 36-40 |
Important Note: These are just starting points. Always refer to the tire manufacturer’s recommended pressure range printed on the sidewall of your tire and adjust based on your specific needs and preferences.
Tools You’ll Need
To properly check and adjust your tire pressure, you’ll need a few essential tools:
- Accurate Tire Pressure Gauge: A digital gauge is more precise than an analog gauge. Look for one with a range suitable for mountain bike tires (0-50 PSI). A gauge like the টুকুman Digital Tire Pressure Gauge is a good option.
- Bike Pump: A floor pump with a gauge is ideal for inflating your tires at home. A mini-pump or CO2 inflator is useful for making adjustments on the trail. Consider a pump like the REI Co-op Multi Pump.
- Shock Pump (Optional): If you have air suspension, you’ll also need a shock pump to adjust the pressure in your forks and shocks.
Step-by-Step Guide to Setting Tire Pressure

Here’s a step-by-step guide to setting your mountain bike tire pressure:
- Check the Tire Sidewall: Look for the tire manufacturer’s recommended pressure range printed on the sidewall of your tire. This is a good starting point.
- Consider Your Weight and Riding Style: Adjust the pressure based on your weight, tire size, and the type of riding you’ll be doing. Heavier riders and more aggressive riders will generally need higher pressure.
- Use a Tire Pressure Gauge: Remove the valve cap from your tire and attach the pressure gauge. Make sure the gauge is properly seated on the valve to get an accurate reading.
- Inflate or Deflate as Needed: Use your bike pump to inflate the tire to the desired pressure. If the pressure is too high, use the pressure release valve on the gauge to let out some air.
- Check Again: Double-check the pressure with the gauge to make sure it’s where you want it.
- Repeat for the Other Tire: Repeat the process for your other tire.
- Go for a Ride: The best way to dial in your tire pressure is to experiment on the trail. Start with your initial pressure and make small adjustments until you find what feels best.
Fine-Tuning Your Tire Pressure on the Trail
Once you’re on the trail, you may need to make further adjustments to your tire pressure. Here are some things to look for:
- Too Much Pressure: If your bike feels harsh and bouncy, or if you’re losing traction on corners, your tire pressure is probably too high. Let out a few PSI and see if it improves the ride.
- Too Little Pressure: If you’re feeling the rims bottoming out on rocks or roots, or if the tires feel squirmy in corners, your tire pressure is probably too low. Add a few PSI and see if it helps.
- Pinch Flats: If you’re getting frequent pinch flats, you need to increase your tire pressure.
It’s a good idea to carry a mini-pump or CO2 inflator with you on the trail so you can make adjustments as needed. Practice using your pump or inflator at home before you need it on the trail.
Tubeless vs. Tubed Tires
Tubeless tires offer several advantages over traditional tubed tires, including the ability to run lower pressures without the risk of pinch flats. This can result in better grip, a smoother ride, and fewer flats overall.
Here’s a comparison of tubeless and tubed tires:
| Feature | Tubeless Tires | Tubed Tires |
|---|---|---|
| Puncture Resistance | Higher (sealant can seal small punctures) | Lower (prone to pinch flats) |
| Rolling Resistance | Lower (can run lower pressures) | Higher (requires higher pressures) |
| Grip | Better (can run lower pressures for larger contact patch) | Worse (requires higher pressures) |
| Weight | Generally lighter (no inner tube) | Generally heavier (includes inner tube) |
| Complexity | More complex (requires sealant and proper setup) | Simpler (easier to install and maintain) |
| Cost | More expensive (tires and setup) | Less expensive (tires and tubes) |
If you’re serious about mountain biking, tubeless tires are definitely worth considering. However, they do require a bit more setup and maintenance than tubed tires. You’ll need to use tubeless-ready rims, tubeless tires, sealant, and valves. You can find conversion kits online at retailers like Worldwide Cyclery.
Common Mistakes to Avoid
Here are some common mistakes to avoid when setting your mountain bike tire pressure:
- Ignoring the Tire Sidewall: Always check the tire manufacturer’s recommended pressure range before inflating your tires.
- Using an Inaccurate Gauge: A cheap or inaccurate gauge can give you false readings, leading to improper tire pressure. Invest in a quality digital gauge.
- Not Adjusting for Conditions: Don’t just set your tire pressure and forget about it. Adjust it based on the trail conditions and your riding style.
- Overinflating Your Tires: Overinflating your tires can make for a harsh ride and reduce grip.
- Underinflating Your Tires: Underinflating your tires can increase the risk of pinch flats and rim damage.
FAQ: Mountain Bike Tire Pressure
Here are some frequently asked questions about mountain bike tire pressure:
What is the best tire pressure for my mountain bike?
The best tire pressure depends on your weight, tire size, and trail conditions. A good starting point is 22-26 PSI for tubeless tires and 30-35 PSI for tubed tires. Adjust as needed based on your experience.
How do I know if my tire pressure is too high?
If your bike feels harsh and bouncy, or if you’re losing traction on corners, your tire pressure is probably too high. Let out a few PSI and see if it improves the ride.
How do I know if my tire pressure is too low?
If you’re feeling the rims bottoming out on rocks or roots, or if the tires feel squirmy in corners, your tire pressure is probably too low. Add a few PSI and see if it helps.
Can I use a regular air compressor to inflate my mountain bike tires?
Yes, you can use a regular air compressor, but be careful not to overinflate your tires. Use a pressure gauge to check the pressure regularly as you inflate.
How often should I check my tire pressure?
You should check your tire pressure before every ride. Tire pressure can decrease over time due to small leaks.
What is a pinch flat?
A pinch flat, also known as a snake bite, occurs when the tire gets pinched between the rim and a hard object, causing two small holes in the inner tube.
Are tubeless tires worth it?
Tubeless tires offer several advantages over tubed tires, including better grip, a smoother ride, and fewer flats overall. If you’re serious about mountain biking, they’re definitely worth considering.
Conclusion
Finding the right tire pressure for your mountain bike can make a huge difference in your riding experience. By understanding the factors that affect tire pressure and following the steps outlined in this guide, you’ll be well on your way to dialing in your ride and enjoying the trails to the fullest. Remember to experiment and make small adjustments until you find what works best for you. Happy trails!


