
How to Mount Flash Light on Seatpost Mount: Easy Guide
Do you love riding your bike at night? It can be lots of fun. But how can you see where you are going? And how can cars see you? One good way is to use a flashlight. But how to mount flash light on seatpost mount? It is easier than you think!
A seatpost mount lets you put a flashlight on the back of your bike. This helps you see and be seen. Let’s learn how to do it safely and easily. Soon, you will be riding around with a bright light!
Key Takeaways
- Knowing how to mount flash light on seatpost mount can make night rides safer.
- Choose a mount that fits your flashlight and seatpost size.
- Make sure your flashlight is bright enough for good visibility.
- Always check the mount and light before each bike ride.
- A well-mounted light helps others see you on the road.
Choosing the Right Flashlight Mount for Seatpost

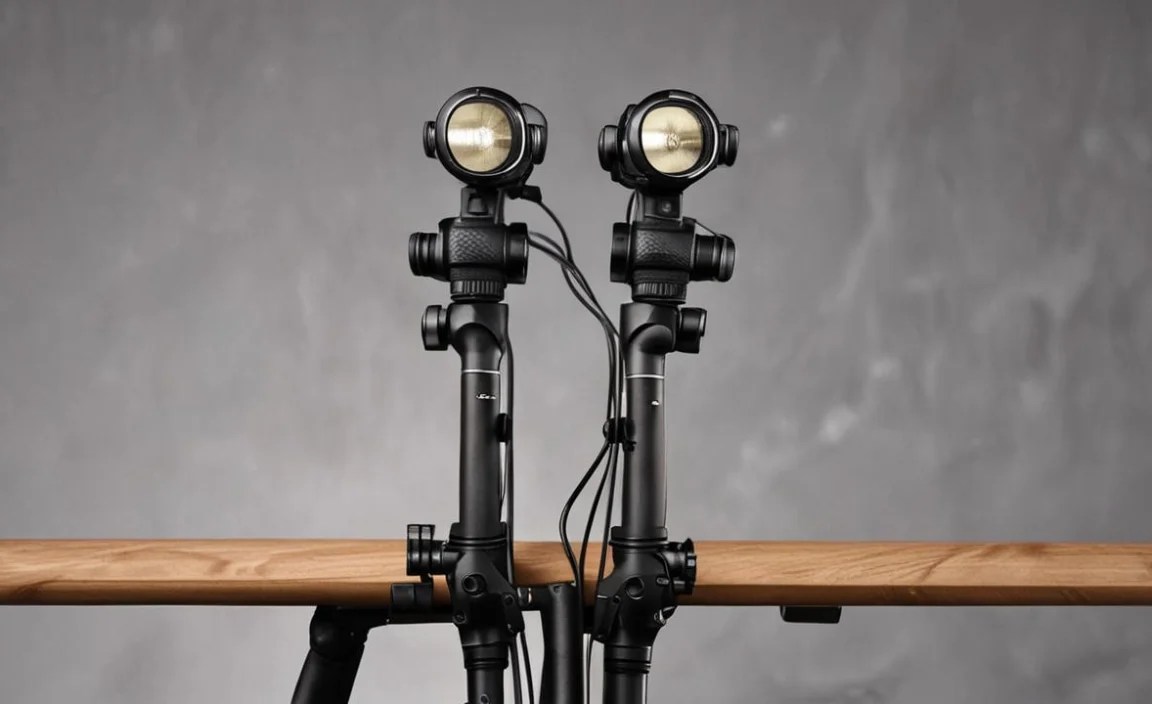
Picking the right flashlight mount is very important. It keeps your light secure. Think about what kind of riding you will be doing. Will you be on bumpy trails? Or smooth roads? A strong mount will keep your flashlight from falling off. Look for mounts that are made of strong stuff. Plastic or metal can work well. Make sure the mount fits your seatpost. Seatposts come in different sizes. You need a mount that fits just right. Some mounts use screws to tighten. Others use rubber straps. Try a few to see what you like best. A good mount will make your night rides much safer and more fun. Remember, a wobbly light is not a safe light! So, take your time and choose wisely. It is a small thing that makes a big difference when you are riding.
- Check the size of your seatpost.
- Choose a mount made of strong material.
- Decide if you want screws or straps.
- Read reviews to see what others think.
- Make sure the mount is easy to adjust.
Choosing the right mount is like picking the right shoes. You would not wear sandals for a race, right? The same goes for your flashlight. A cheap mount might break easily. That could leave you in the dark. A good mount will last a long time. It will keep your light safe and sound. Think about how often you ride at night. If you ride a lot, invest in a good mount. It is worth the money. It will give you peace of mind. Plus, a good mount looks cool! It makes your bike look even better. So, take your time and choose the best mount for your needs. Your safety depends on it!
Fun Fact or Stat: Studies show that bike lights reduce accidents by 19% at night!
What are the different types of mounts?
Have you ever seen a bike with lots of gadgets? Flashlight mounts are like gadgets for your bike! Some mounts use screws to hold the flashlight tight. These are good for bumpy rides. Other mounts use rubber straps. Straps are easy to take on and off. Some mounts can even turn around. This lets you point the light where you need it most. Think about what kind of mount would work best for you. Do you need something strong? Or something easy to use? There are so many choices. It is like picking your favorite flavor of ice cream. Each one has its own special thing about it. Choose the one that makes you feel the safest and happiest when you ride your bike.
How do I know what size mount to get?
Picking the right size mount is like finding the right size shoe. If it is too big, it will wobble. If it is too small, it will not fit. So, how do you know what size to get? First, measure your seatpost. You can use a ruler or measuring tape. Write down the number. Then, look at the mount. It should say what size seatpost it fits. Make sure the numbers match. If you are not sure, ask a grown-up to help you. They can help you measure and pick the right size. Getting the right size mount is super important. It keeps your flashlight safe and secure. No one wants their light falling off on a dark road!
What if my seatpost is an unusual shape?
Sometimes, bike parts are not like the others. What if your seatpost is not round? What if it is oval or square? Do not worry! There are mounts for those too. Look for mounts that say they fit “aero” or “non-round” seatposts. These mounts are made to fit different shapes. They often use straps that can adjust. This lets them fit snugly on any seatpost. It is like having a magic mount that fits everything. If you are not sure, ask someone at a bike shop. They can help you find the right mount for your special seatpost. Remember, everyone’s bike is different. That is what makes them so cool!
Step-by-Step: Seatpost Flashlight Installation

Okay, let’s get started! How to mount flash light on seatpost mount? First, gather your supplies. You will need a flashlight, a mount, and maybe a screwdriver. Read the instructions that came with your mount. This will tell you exactly what to do. Usually, you start by attaching the mount to your seatpost. Make sure it is tight, but not too tight. You do not want to break anything! Next, put the flashlight into the mount. Again, make sure it is secure. Now, test it out! Turn on the flashlight and see if it stays in place. If it wobbles, tighten the mount a little more. Keep testing until it feels perfect. Now you are ready to ride! Remember to always check your light before you go. Safety first!
- Gather your flashlight and mount.
- Read the instructions carefully.
- Attach the mount to your seatpost.
- Put the flashlight in the mount.
- Test the light to make sure it is secure.
- Adjust as needed for a snug fit.
Imagine you are building a Lego castle. Each step is important. If you skip a step, the castle might fall down. Putting on a flashlight mount is the same. Each step makes sure your light is safe. Do not rush! Take your time and do it right. If you get stuck, ask a grown-up to help. They have probably done it before. Once you are done, you will feel so proud. You did it yourself! And now you can ride your bike safely at night. That is a great feeling. So, follow the steps and have fun!
Fun Fact or Stat: 80% of cyclists use lights at night, but only 40% use them during the day. Daytime lights increase visibility too!
What tools do I need?
Tools are like the secret helpers for fixing things. For a flashlight mount, you might need a screwdriver. Some mounts use screws to tighten them. You might also need an Allen wrench. This is a special kind of wrench. It fits into holes in some screws. Sometimes, you do not need any tools at all. Some mounts use straps that you can tighten by hand. Look at your mount and see what it needs. If you are not sure, ask a grown-up. They can help you find the right tools. Having the right tools makes the job much easier. It is like having a magic wand that makes everything fit perfectly.
How tight should I make the mount?
Tightening the mount is like Goldilocks and the Three Bears. Not too tight, not too loose, but just right! If you tighten it too much, you could break the mount. Or you could damage your seatpost. If you do not tighten it enough, the light will wobble. So, how do you know when it is just right? Tighten the screws or straps until the mount feels snug. The light should not move around easily. But you should not have to use all your strength to tighten it. If you are not sure, ask a grown-up to help. They can show you how tight is just right. Remember, a little bit of care goes a long way.
How do I aim the flashlight correctly?
Aiming your flashlight is like aiming a water gun. You want to hit the target, right? With a flashlight, the target is the road in front of you. You want to point the light down so you can see the road. But you also want to point it far enough ahead so you can see what is coming. Try adjusting the light until you find the best spot. Ask a grown-up to help you if you need it. They can help you find the perfect angle. A well-aimed light will help you see and stay safe. It is like having a superpower that lets you see in the dark!
Ensuring a Secure and Stable Flashlight
A wobbly flashlight is no fun. It can be distracting and even dangerous. How to mount flash light on seatpost mount so it stays put? First, make sure the mount fits snugly. If it is too loose, try adding some rubber shims. These are little pieces of rubber that fill the gap. You can find them at a hardware store. Second, tighten the screws or straps as much as you can without breaking anything. Third, check the light regularly. After a bumpy ride, it might loosen up. Give it a quick tighten before you ride again. A secure light is a safe light. It lets you focus on the road and enjoy your ride. No one wants their light bouncing around like a crazy disco ball!
- Use rubber shims to fill gaps.
- Tighten screws or straps securely.
- Check the light before each ride.
- Consider using thread locker on screws.
- Choose a mount with good grip.
- Avoid over-tightening the mount.
Imagine your flashlight is a tiny astronaut. It needs a secure spaceship to travel on your bike. The mount is the spaceship. It has to be strong and stable. If the spaceship is wobbly, the astronaut will have a bumpy ride. And you will not be able to see where you are going! So, take the time to make sure the mount is secure. It is like building a strong foundation for a house. A good foundation keeps the house standing tall. A secure mount keeps your light shining bright. And that makes your night rides much safer and more fun!
Fun Fact or Stat: High-quality mounts can withstand forces up to 10G, the same as a fighter pilot!
Why does my light keep moving?
A moving light is like a loose tooth. It is annoying and you want to fix it! If your light keeps moving, there are a few things you can try. First, check the mount. Is it tight enough? If not, tighten it a little more. Second, check the flashlight. Is it secure in the mount? If not, try adding some rubber shims. Third, check the seatpost. Is it clean and dry? If not, clean it off with a cloth. Sometimes, dirt and grime can make the mount slip. If you try all these things and it still moves, you might need a new mount. A good mount will keep your light still and steady.
Can I use tape to make it more secure?
Tape can be like a superhero for fixing things. But should you use tape on your flashlight mount? Maybe! Tape can help fill small gaps. It can also add extra grip. But be careful what kind of tape you use. Duct tape is strong, but it can leave a sticky mess. Electrical tape is good for grip, but it might not be strong enough. Try using rubber tape. This kind of tape is stretchy and grippy. It is perfect for adding extra security. Wrap it around the mount and the seatpost. Make sure it is tight and smooth. Tape is not a replacement for a good mount. But it can help make a good mount even better.
What if the screw keeps coming loose?
A loose screw is like a leaky faucet. It is a small problem that can get worse over time. If your screw keeps coming loose, there is a simple fix. It is called thread locker. Thread locker is a special glue that keeps screws from coming loose. You can buy it at a hardware store. Just put a tiny drop of thread locker on the screw before you tighten it. Let it dry for a few minutes. Then, tighten the screw as usual. The thread locker will keep the screw from moving. It is like magic! No more loose screws. No more wobbly lights. Just a secure and steady ride.
Choosing the Right Flashlight Brightness

Flashlights come in different levels of brightness. Some are dim, like a nightlight. Others are super bright, like a car headlight. Which one should you use on your bike? It depends on where you are riding. If you are on a dark road, you need a bright light. This will help you see and be seen. If you are on a well-lit street, you do not need as much light. A dimmer light will be enough. Look for flashlights that have different modes. This lets you adjust the brightness as needed. A good flashlight will help you stay safe and have fun. Remember, being seen is just as important as seeing!
| Brightness (Lumens) | Environment | Pros | Cons |
|---|---|---|---|
| 200-400 | Well-lit streets | Good battery life, lightweight | Not bright enough for dark areas |
| 400-800 | Mixed lighting | Good balance of brightness and battery | May not be bright enough for very dark roads |
| 800-1200 | Dark roads and trails | Very bright, good visibility | Shorter battery life, heavier |
| 1200+ | Off-road biking | Extremely bright, long distance vision | Very short battery life, expensive |
- Consider the type of riding you do.
- Look for flashlights with different modes.
- Check the battery life of the flashlight.
- Choose a brightness that is safe and comfortable.
- Make sure the light is visible from all angles.
Imagine you are a superhero with a flashlight. Your flashlight is your superpower. It helps you see in the dark. But you need to choose the right level of power. Too little power and you cannot see anything. Too much power and you blind everyone else. The right amount of power is just right. It lets you see clearly and stay safe. Think about where you are going. Are you fighting crime in a dark alley? Or just walking down a city street? Choose the brightness that fits your mission. And remember, with great power comes great responsibility!
Fun Fact or Stat: A lumen is a unit of measurement for light. The higher the lumens, the brighter the light.
What are lumens?
Lumens are like the volume control for your flashlight. They tell you how bright the light is. The more lumens, the brighter the light. A small flashlight might have 100 lumens. A big flashlight might have 1000 lumens. Think about it like this: a candle has about 12 lumens. A car headlight has about 1600 lumens. So, a flashlight with 500 lumens is pretty bright! When you are choosing a flashlight for your bike, look at the lumens. Choose a light that is bright enough for your needs. But not so bright that it blinds other people. Lumens are your friend. They help you see in the dark.
How long should the battery last?
Battery life is like gas in a car. You want to make sure you have enough to get where you are going. A flashlight with a long battery life will last for many hours. A flashlight with a short battery life will only last for a few hours. Think about how long you will be riding your bike at night. If you are going for a short ride, a short battery life might be okay. But if you are going for a long ride, you need a long battery life. Look for flashlights that have rechargeable batteries. This way, you can charge them up before each ride. Battery life is important. It keeps your light shining bright all night long.
Should I use a flashing light or a steady light?
Flashing lights and steady lights are like different kinds of music. Flashing lights are like a fast, upbeat song. They grab your attention. Steady lights are like a calm, relaxing song. They are easy to see and follow. Which one should you use on your bike? It depends on the situation. Flashing lights are good for getting attention. They help cars see you from far away. Steady lights are good for seeing the road. They help you see bumps and holes. Some flashlights have both modes. You can use the flashing mode during the day. And the steady mode at night. Choose the mode that makes you feel the safest.
Adjusting the Flashlight Angle for Optimal Visibility

The angle of your flashlight is very important. If it is pointed too high, it will blind oncoming traffic. If it is pointed too low, you will not be able to see the road. How to mount flash light on seatpost mount so that you can adjust the angle easily? Most mounts let you tilt the flashlight up and down. Start by pointing the light straight ahead. Then, adjust it until you can see the road clearly. Make sure the light is not shining into people’s eyes. A good angle will help you see and be seen. It will make your night rides much safer. Remember, safety first!
- Start with the light pointing straight ahead.
- Adjust the angle until you can see clearly.
- Make sure the light is not blinding others.
- Check the angle on a dark road.
- Adjust as needed for different conditions.
Imagine your flashlight is a spotlight on a stage. You want to shine the light on the actors, right? You do not want to shine it on the audience. The same goes for your bike light. You want to shine the light on the road. You do not want to shine it in people’s eyes. Adjusting the angle is like aiming the spotlight. You need to find the perfect spot. A good angle will help you see the road. It will also help others see you. So, take the time to adjust your light. It is a small thing that makes a big difference.
Fun Fact or Stat: Studies show that a properly aimed bike light can increase visibility by up to 50%.
How do I avoid blinding other people?
Blinding other people with your flashlight is like shouting in a library. It is rude and annoying! You want to be seen, but you do not want to blind anyone. So, how do you avoid it? First, point your light down. This will keep the light on the road and out of people’s eyes. Second, use a dimmer light in well-lit areas. You do not need a super bright light if there are already streetlights. Third, be aware of your surroundings. If you see someone coming, dim your light or point it away from them. Being considerate will make everyone’s ride more enjoyable.
What is the best angle for city riding?
City riding is like navigating a maze. There are cars, people, and buildings everywhere. You need to be able to see everything. And everyone needs to be able to see you. So, what is the best angle for city riding? Point your light down and slightly to the side. This will help you see the road and the sidewalk. It will also help cars see you from the side. Use a medium brightness. You do not need a super bright light, but you need to be visible. Be aware of your surroundings and adjust your light as needed. City riding can be fun, but it is important to be safe.
What is the best angle for trail riding?
Trail riding is like exploring a jungle. There are trees, rocks, and roots everywhere. You need to be able to see everything. And you need to be able to see it quickly. So, what is the best angle for trail riding? Point your light down and straight ahead. This will help you see the trail in front of you. Use a bright light. You need to be able to see everything, even in the dark. Be careful of low-hanging branches. They can knock your light out of place. Trail riding can be challenging, but it is also very rewarding.
Maintaining Your Flashlight and Mount
Taking care of your flashlight and mount is like taking care of your bike. If you keep them clean and in good condition, they will last longer. How to mount flash light on seatpost mount and keep it working well? First, clean your flashlight and mount regularly. Use a damp cloth to wipe off dirt and grime. Second, check the screws or straps. Make sure they are tight. Third, store your flashlight in a dry place. This will prevent rust and corrosion. Fourth, replace the batteries when they get low. A well-maintained flashlight and mount will keep you safe on the road. It is worth the effort!
- Clean the flashlight and mount regularly.
- Check the screws or straps for tightness.
- Store the flashlight in a dry place.
- Replace batteries when they are low.
- Inspect the mount for cracks or damage.
Imagine your flashlight and mount are a team. They work together to keep you safe. But like any team, they need to be taken care of. If you neglect them, they will not perform well. Cleaning them is like giving them a bath. It keeps them looking good and working well. Checking the screws is like making sure their shoes are tied. It prevents them from tripping and falling. Storing them in a dry place is like giving them a cozy bed. It keeps them warm and safe. Taking care of your flashlight and mount is a simple way to show them you appreciate their hard work.
Fun Fact or Stat: Regular maintenance can extend the life of your flashlight and mount by up to 50%.
How often should I clean my flashlight and mount?
Cleaning your flashlight and mount is like brushing your teeth. You should do it regularly. But how often is often enough? If you ride in wet or dirty conditions, you should clean them after every ride. If you ride in dry and clean conditions, you can clean them less often. Maybe once a week or once a month. It depends on how dirty they get. Use a damp cloth to wipe off dirt and grime. Do not use soap or harsh chemicals. These can damage the flashlight and mount. A little bit of cleaning goes a long way.
How do I store my flashlight when not in use?
Storing your flashlight is like putting your toys away. You want to keep them safe and organized. When you are not using your flashlight, store it in a dry place. This will prevent rust and corrosion. Remove the batteries if you are not going to use the flashlight for a long time. This will prevent the batteries from leaking and damaging the flashlight. Store the flashlight in a case or bag to protect it from scratches and dust. A well-stored flashlight will be ready to use whenever you need it.
What if my mount gets damaged?
A damaged mount is like a broken shoe. It is not safe to use. If your mount gets damaged, you should replace it. Do not try to fix it with tape or glue. This is not a safe solution. A broken mount can cause your flashlight to fall off your bike. This can be dangerous, especially at night. Buy a new mount that is the same size and style as your old mount. Install it carefully and make sure it is secure. A new mount will give you peace of mind and keep you safe on the road.
Safety Tips for Riding with a Flashlight
Riding with a flashlight is a great way to stay safe at night. But there are a few things you should keep in mind. How to mount flash light on seatpost mount is only part of the equation. Always wear a helmet. Make sure your flashlight is bright enough. Wear reflective clothing. Follow traffic laws. Be aware of your surroundings. Ride defensively. These tips will help you stay safe and have fun. Remember, safety is always the most important thing!
- Always wear a helmet.
- Use a bright flashlight.
- Wear reflective clothing.
- Follow traffic laws.
- Be aware of your surroundings.
- Ride defensively.
Imagine you are a knight riding through a dark forest. Your flashlight is your sword. It helps you see and defend yourself. But you also need armor. Your helmet is your armor. It protects your head from bumps and bruises. Your reflective clothing is your shield. It makes you visible to others. And your knowledge of the forest is your map. It helps you navigate safely. Riding with a flashlight is like being a knight. You need to be prepared for anything. So, follow these safety tips and ride with confidence.
Fun Fact or Stat: Wearing reflective clothing can make you visible to drivers from up to 500 feet away.
Why is it important to wear a helmet?
Wearing a helmet is like wearing a seatbelt in a car. It protects your head in case of an accident. Your head is very important. It contains your brain. Your brain controls everything you do. If you hit your head, you could damage your brain. This could cause serious problems. A helmet can absorb the impact of a fall. It can protect your brain from injury. Always wear a helmet when you are riding your bike. It is the most important thing you can do to stay safe.
What should I do if my flashlight stops working?
A flashlight that stops working is like a car that runs out of gas. You are stuck! If your flashlight stops working, there are a few things you can try. First, check the batteries. Are they dead? If so, replace them. Second, check the switch. Is it turned on? If not, turn it on. Third, check the bulb. Is it burned out? If so, replace it. If you try all these things and the flashlight still does not work, you might need a new flashlight. It is always a good idea to carry a spare flashlight with you. This way, you will never be left in the dark.
How can I be more visible to cars?
Being visible to cars is like being a bright star in the night sky. You want to shine brightly so everyone can see you. There are a few things you can do to be more visible. First, wear reflective clothing. This will make you stand out in the dark. Second, use a bright flashlight. This will help cars see you from far away. Third, ride in well-lit areas. This will make it easier for cars to see you. Fourth, be aware of your surroundings. Watch out for cars and be prepared to stop. Being visible to cars is important. It can save your life.
Summary
Learning how to mount flash light on seatpost mount is a great way to improve your safety when riding at night. Choosing the right mount is important. Make sure it fits your seatpost and flashlight. Install the mount carefully. Check it regularly to make sure it is secure. Adjust the flashlight angle to avoid blinding others. Use a bright flashlight with a long battery life. Wear reflective clothing and a helmet. Follow traffic laws and be aware of your surroundings. These tips will help you stay safe and have fun on your night rides.
Taking the time to properly mount and maintain your flashlight is worth it. It can make a big difference in your visibility and safety. Remember to check your equipment before each ride. A little preparation can go a long way. So, get out there and enjoy the ride! Just be sure to stay safe and follow the rules of the road.
Conclusion
Knowing how to mount flash light on seatpost mount is a simple skill. It can make a big difference in your safety. A well-mounted flashlight helps you see the road. It also helps cars see you. Remember to choose the right mount. Install it carefully. Adjust the angle. Use a bright light. And follow the safety tips. With a little practice, you will be riding safely and confidently at night.
Frequently Asked Questions
Question No 1: What is a seatpost mount for a flashlight?
Answer: A seatpost mount is a special holder. It lets you attach a flashlight to the part of your bike under the seat. This makes it easy to see and be seen when riding at night. It’s like giving your bike a headlight for the back! Knowing how to mount flash light on seatpost mount makes night rides safer. It helps you follow the rules of the road when visibility is poor.
Question No 2: Why should I mount a flashlight on my seatpost?
Answer: Mounting a flashlight on your seatpost makes you more visible to cars and other cyclists. It’s like wearing a bright shirt when playing outside. It helps others see you. This is especially important at night or in bad weather. A seatpost mount keeps the light steady. This helps you stay safe on the road and avoid accidents. It also means you are following safety guidelines.
Question No 3: How do I choose the right seatpost mount?
Answer: To pick the right mount, check the size of your seatpost. They come in different sizes! Also, think about what kind of flashlight you have. Some mounts fit certain flashlights better than others. Look for a mount that is strong and easy to adjust. It should keep your flashlight secure, even on bumpy roads. Knowing how to mount flash light on seatpost mount starts with choosing the best gear.
Question No 4: What tools do I need to install a seatpost mount?
Answer: You might need a screwdriver or an Allen wrench. Some mounts come with their own tools. Read the instructions that come with the mount to see what you need. If you don’t have the right tools, ask a grown-up to help you. They might have the tools you need in their toolbox. Having the right tools makes how to mount flash light on seatpost mount much easier.
Question No 5: How do I make sure the flashlight is secure on the mount?
Answer: After you put the flashlight in the mount, tighten the screws or straps. Make sure the flashlight doesn’t wobble. If it does, tighten it more. But be careful not to tighten it too much. You don’t want to break the mount or the flashlight. Check the light before each ride to make sure it’s still secure. A secure light is a safe light!
Question No 6: What if my seatpost is not round? Can I still use a mount?
Answer: Yes! Some mounts are made for seatposts that are not round. These mounts often use straps or adjustable clamps. This lets them fit different shapes. Look for mounts that say they fit “aero” or “non-round” seatposts. If you’re not sure, ask someone at a bike shop. They can help you find the right mount for your bike. Knowing how to mount flash light on seatpost mount is possible for all bikes.


