
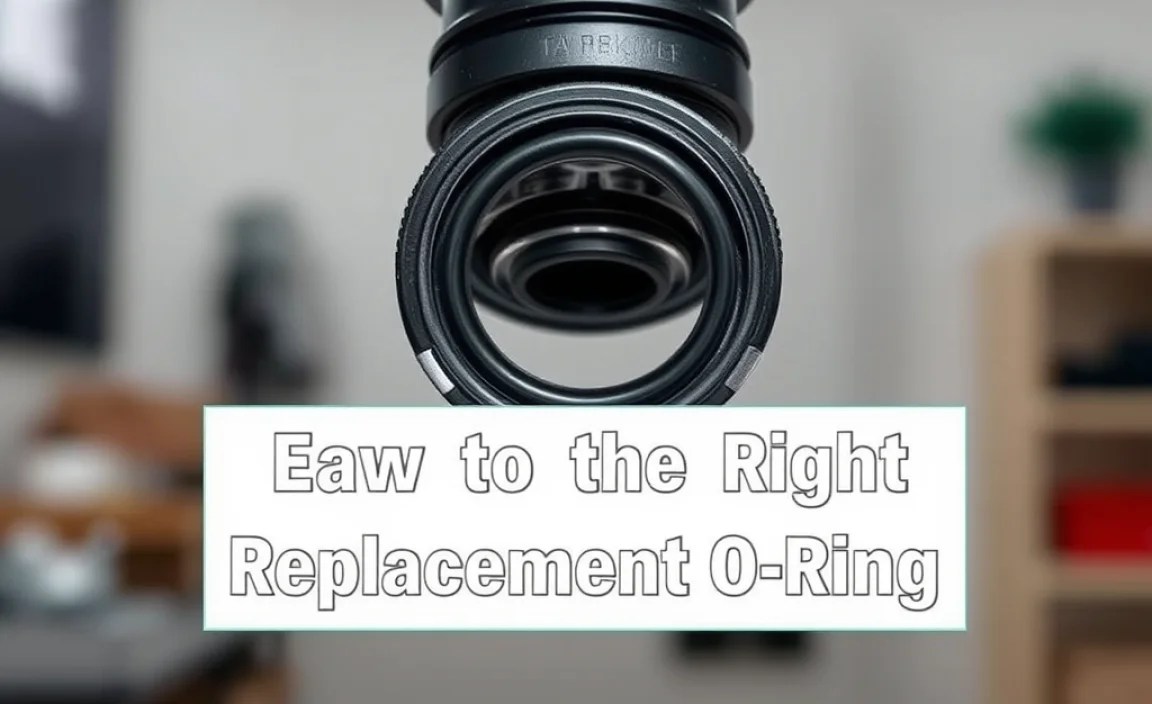
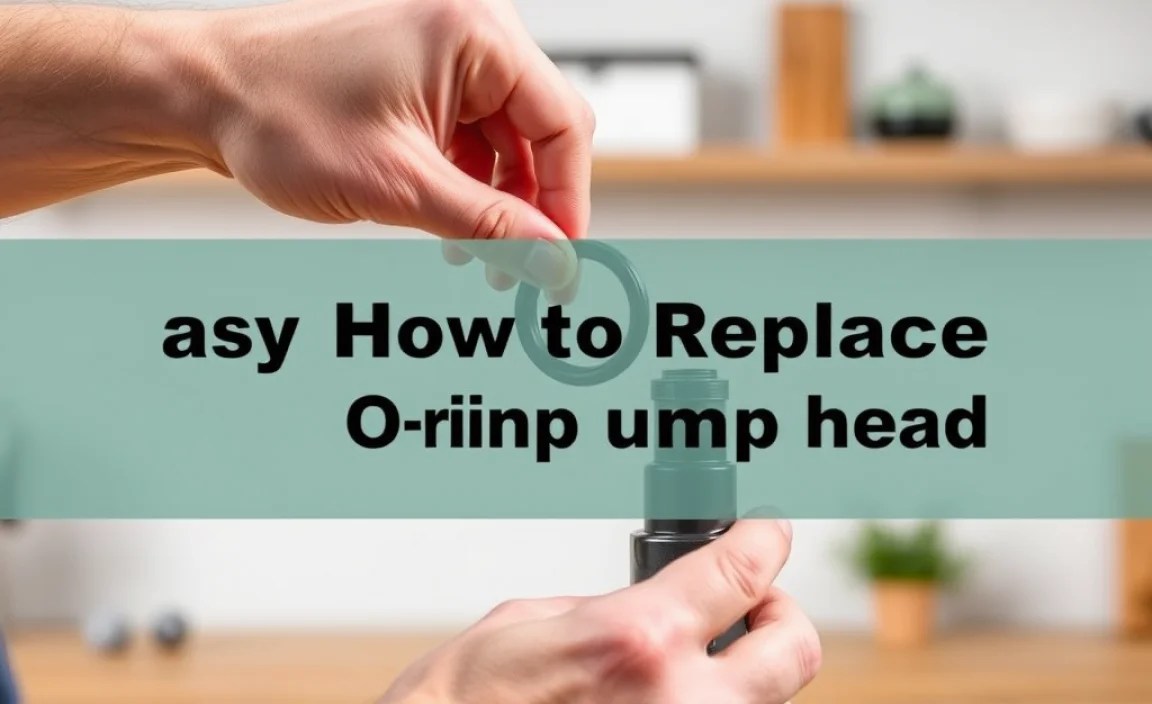
Easy: How to Replace O-ring/Seal on Shock Pump Head
Do you know what keeps your bike’s suspension working? It’s a small part called an O-ring or seal. These little rings stop air from leaking out of your shock pump. Sometimes, these rings wear out. Then, you need to know how to replace O-ring/seal on shock pump head.
It might seem hard, but it’s not. We will show you how to do it. This will keep your bike riding smoothly.
Think of your bike pump like a tire on your car. Over time, the tire wears out. You need to replace it. The same is true for the O-ring in your shock pump. It needs replacing sometimes too. Knowing how to replace O-ring/seal on shock pump head is useful.
Don’t worry if you have never done this before. We will guide you through each step. Soon, you will be a pro at replacing these seals! Let’s get started and learn something new.
Key Takeaways
- Knowing how to replace O-ring/seal on shock pump head saves time and money.
- Gather the right tools like a small screwdriver and new O-rings.
- Carefully remove the old O-ring from the shock pump head.
- Install the new O-ring, making sure it sits correctly in its place.
- Test your shock pump after replacement to ensure it works perfectly.
How to Remove the Old O-Ring/Seal

First, you need to get ready. Find a clean space to work. You do not want dirt getting into your shock pump. You’ll need a few simple tools. A small, flat-head screwdriver works well. Have your new O-rings ready. Also, get some clean rags or paper towels. Now, let’s start taking apart the shock pump head. Look closely at how everything fits together. This will help you put it back correctly later. Sometimes, taking a picture with your phone is useful. This way, you can remember where each part goes. Knowing how to replace O-ring/seal on shock pump head starts with careful disassembly. Make sure you don’t lose any small parts. Put them in a safe place. A small bowl or container is great for this.
- Find a clean workspace.
- Gather your tools.
- Have new O-rings ready.
- Look closely at the assembly.
- Take a picture for reference.
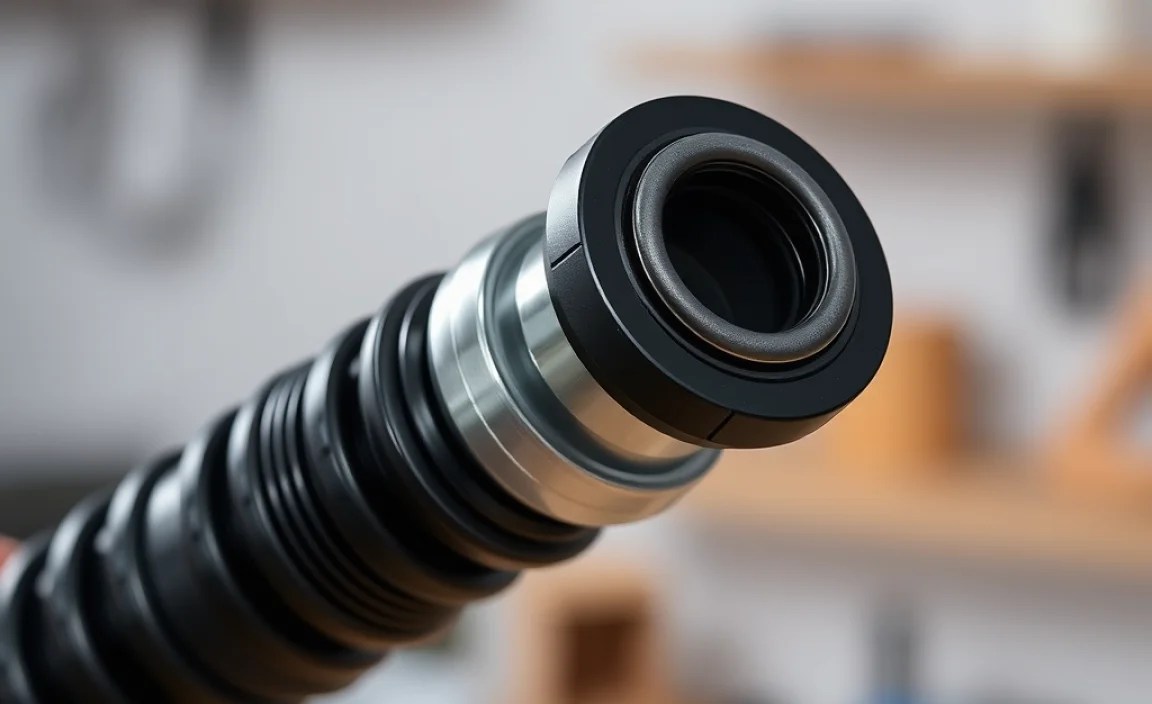
The first step is to release any air pressure in the pump. You don’t want air shooting out when you open it. Now, find the old O-ring. It’s usually a small, black rubber ring. It might be cracked or worn out. Use your small screwdriver to gently pry it out. Be careful not to scratch the metal around it. You don’t want to damage the pump head. If the O-ring is stuck, try using a small pick. Work slowly and carefully. Once you get one side loose, you can usually pull the rest of the ring out. Clean the area where the O-ring was. Use a clean rag to wipe away any dirt or old grease. Now, you are ready to put in the new O-ring. This is an important part of how to replace O-ring/seal on shock pump head.
Fun Fact or Stat: The lifespan of an O-ring in a shock pump is typically 1-2 years, depending on usage and environmental conditions.
Why O-Rings Fail
O-rings don’t last forever. They can fail for several reasons. One reason is age. Over time, the rubber can dry out and crack. This makes it less effective at sealing air. Another reason is friction. Every time you use the pump, the O-ring rubs against other parts. This can wear it down. Dirt and grime can also cause problems. These particles can get stuck between the O-ring and the metal. This can scratch the O-ring and cause leaks. Also, using the wrong type of lubricant can damage the O-ring. Some lubricants can cause the rubber to swell or break down. Knowing why O-rings fail helps you prevent it. Clean your pump regularly. Use the right lubricant. Replace the O-ring when you see signs of wear. This will keep your pump working well.
Tools for O-Ring Removal
Having the right tools makes the job easier. A small, flat-head screwdriver is a must-have. It helps you gently pry out the old O-ring. A set of small picks is also useful. These can help you get into tight spaces. They are great for removing stubborn O-rings. A magnifying glass can help you see the O-ring more clearly. This is especially helpful for small pumps. Good lighting is also important. Make sure you have enough light to see what you are doing. A clean rag or paper towel is needed to wipe away dirt. A small container keeps your parts organized. Having these tools on hand makes how to replace O-ring/seal on shock pump head easier. It also helps you avoid damaging your pump.
Cleaning the Pump Head
Before you put in the new O-ring, clean the pump head. This is very important. Dirt can damage the new O-ring. Use a clean rag to wipe away any dirt. You can also use a small brush to clean hard-to-reach spots. Make sure there is no old grease left behind. You can use a special cleaner for this. Be careful not to get cleaner inside the pump. This could damage other parts. Let the pump head dry completely before putting in the new O-ring. A clean pump head helps the new O-ring seal better. This prevents leaks and keeps your pump working well. Remember, a clean pump is a happy pump. Cleaning is a key step in how to replace O-ring/seal on shock pump head.
How to Select the Right Replacement O-Ring
Choosing the right O-ring is important. Not all O-rings are the same. They come in different sizes and materials. Using the wrong O-ring can cause leaks or damage your pump. To find the right one, start by looking at the old O-ring. If you still have it, measure its thickness and diameter. You can use a ruler or calipers for this. If you don’t have the old O-ring, check your pump’s manual. It should list the correct size. You can also search online for the pump model. Many websites list the O-ring size. The material of the O-ring is also important. Most shock pumps use O-rings made of rubber or polyurethane. Make sure the new O-ring is made of the same material. This will ensure it can handle the pressure in the pump. Knowing how to replace O-ring/seal on shock pump head includes selecting the right replacement.
- Measure the old O-ring size.
- Check your pump’s manual.
- Search online for the pump model.
- Match the O-ring material.
- Buy from a trusted supplier.
When buying a new O-ring, get it from a trusted supplier. This ensures you are getting a good quality part. Cheap O-rings might not last long. They could also be the wrong size. This can cause problems with your pump. A good O-ring should fit snugly in the pump head. It should not be too loose or too tight. If it’s too loose, it will leak. If it’s too tight, it could break. Always double-check the size before installing the new O-ring. This will save you time and frustration. Replacing the O-ring correctly is essential for a properly functioning pump. Taking the time to select the right O-ring is a key part of how to replace O-ring/seal on shock pump head.
Fun Fact or Stat: O-rings are used not only in bike pumps but also in cars, airplanes, and even space shuttles to prevent leaks!
Size Matters: O-Ring Dimensions
O-ring size is very important. It is measured in two ways. These are inner diameter (ID) and cross-sectional diameter (CS). The inner diameter is the size of the hole in the middle. The cross-sectional diameter is the thickness of the O-ring. You need to know both of these measurements. If the ID is too small, the O-ring won’t fit. If it’s too big, it will leak. If the CS is too thin, it won’t seal properly. If it’s too thick, it might be hard to install. Use calipers for accurate measurements. Calipers are tools that measure small things very precisely. They will help you get the right size O-ring. Always double-check your measurements. This ensures you get the correct replacement. Getting the right size is key for how to replace O-ring/seal on shock pump head.
Materials: Choosing the Right Compound
O-rings are made from different materials. The most common materials are rubber, nitrile, and silicone. Each material has different properties. Rubber is good for general use. Nitrile is resistant to oil and chemicals. Silicone can handle high and low temperatures. For shock pumps, rubber or nitrile are usually the best choices. Check your pump’s manual. It will tell you what material to use. Using the wrong material can cause problems. The O-ring might break down over time. It could also react with the lubricant. This can cause leaks. Always use the recommended material. This will keep your pump working well. Choosing the right material is important for how to replace O-ring/seal on shock pump head.
Where to Buy Replacement O-Rings
You can buy replacement O-rings from many places. Bike shops are a good option. They usually have a selection of O-rings for different pumps. Online retailers also sell O-rings. Make sure you buy from a trusted source. This ensures you get a good quality product. Hardware stores might also have O-rings. However, they might not have the right size or material. It’s best to buy from a bike shop or online retailer. They specialize in bike parts. They will have the right O-rings for your pump. When buying online, check the reviews. See what other people say about the product. This will help you make a good choice. Getting O-rings from a good source is key for how to replace O-ring/seal on shock pump head.
Installing the New O-Ring/Seal
Now it’s time to put in the new O-ring. First, make sure the area is clean. Wipe it down with a clean rag. This removes any dirt that could damage the new O-ring. Next, apply a small amount of grease to the O-ring. This helps it slide into place. Use a grease that is safe for rubber. Some greases can damage O-rings. Place the O-ring around the groove where the old one was. Gently push it into place. Make sure it sits evenly all the way around. Don’t stretch or twist the O-ring. This can damage it. If it’s hard to get in, try using a small tool. A plastic tire lever works well. Be careful not to scratch the metal. Once the O-ring is in place, check it. Make sure it’s seated correctly. It should fit snugly and not be loose. Knowing how to replace O-ring/seal on shock pump head involves proper installation.
- Clean the area thoroughly.
- Apply a small amount of grease.
- Place the O-ring in the groove.
- Gently push it into place.
- Check for proper seating.
After installing the O-ring, put the pump head back together. Make sure all the parts are in the right place. Use the picture you took earlier as a guide. Tighten the screws or bolts. Don’t over-tighten them. This can damage the pump. Once the pump is back together, test it. Connect it to your bike’s suspension. Pump it up to the correct pressure. Check for leaks. If you see any leaks, take the pump apart. Check the O-ring. It might not be seated correctly. Or, it might be damaged. If everything looks good, try again. Sometimes, it takes a few tries to get it right. Don’t give up. With practice, you will become a pro at how to replace O-ring/seal on shock pump head. This skill will save you money and keep your bike riding smoothly.
Fun Fact or Stat: Properly installed O-rings can withstand pressures up to 5,000 PSI (pounds per square inch)!
Lubricating the New O-Ring
Lubricating the new O-ring is very important. It helps the O-ring slide into place easily. It also protects it from damage. Use a special grease for rubber. This grease is safe for O-rings. Don’t use regular grease. It can damage the rubber. Apply a small amount of grease to the O-ring. You can use your finger or a small brush. Make sure the entire O-ring is coated. Don’t use too much grease. This can attract dirt. The grease helps the O-ring seal better. It also reduces friction. This makes the pump work more smoothly. Lubricating the O-ring is a key step in how to replace O-ring/seal on shock pump head. It ensures the O-ring lasts longer and works well.
Seating the O-Ring Correctly
Making sure the O-ring is seated correctly is important. If it’s not, it will leak. Look closely at the groove where the O-ring sits. Make sure it’s clean. There should be no dirt or old grease. Place the O-ring in the groove. Gently push it into place. Use your fingers or a small tool. Make sure the O-ring sits evenly all the way around. It should not be twisted or stretched. If it is, it won’t seal properly. Check the O-ring from all angles. Make sure it’s fully seated. If you see any gaps, push it in further. A properly seated O-ring is essential for a good seal. This prevents leaks and keeps your pump working well. Seating the O-ring correctly is a key part of how to replace O-ring/seal on shock pump head.
Reassembling the Pump Head
After installing the new O-ring, you need to put the pump head back together. This can be tricky. Make sure you remember how everything fits. Use the picture you took earlier as a guide. Place each part in its correct position. Tighten the screws or bolts. Don’t over-tighten them. This can damage the pump. Make sure all the parts are aligned correctly. If they are not, the pump won’t work. Double-check everything before you finish. Make sure nothing is missing. Once the pump is back together, test it. This ensures it works properly. Reassembling the pump head correctly is important for how to replace O-ring/seal on shock pump head. It ensures your pump is ready to use.
Testing the Shock Pump After O-Ring Replacement
After you have replaced the O-ring, you need to test the pump. This makes sure it’s working correctly. Connect the pump to your bike’s suspension. Pump it up to the correct pressure. Check the pressure gauge. It should show the correct reading. If the pressure is too low, there might be a leak. Listen for any hissing sounds. This can indicate a leak. Also, check the connection between the pump and the suspension. Make sure it’s tight. If you see any leaks, take the pump apart. Check the O-ring again. It might not be seated correctly. Or, it might be damaged. If everything looks good, try again. Sometimes, it takes a few tries to get it right. Knowing how to replace O-ring/seal on shock pump head includes testing the pump. This ensures your bike’s suspension works properly.
- Connect the pump to your bike.
- Pump to the correct pressure.
- Check the pressure gauge.
- Listen for hissing sounds.
- Check for leaks.
- Recheck the O-ring if needed.
If the pump is working correctly, you are done. Congratulations! You have successfully replaced the O-ring. Now, your bike’s suspension should work perfectly. Ride your bike and enjoy the smooth ride. Remember to check the pump regularly. This ensures it stays in good condition. O-rings can wear out over time. So, it’s a good idea to replace them every year or two. This will keep your pump working well. Learning how to replace O-ring/seal on shock pump head is a valuable skill. It saves you money and keeps your bike riding smoothly. Keep practicing and you will become an expert.
Fun Fact or Stat: A well-maintained shock pump can improve your bike’s suspension performance by up to 20%!
Checking for Leaks
Checking for leaks is very important after replacing the O-ring. Leaks can cause your suspension to lose pressure. This makes your ride uncomfortable. Connect the pump to your bike’s suspension. Pump it up to the correct pressure. Then, listen for hissing sounds. These sounds indicate a leak. Check the connection between the pump and the suspension. Make sure it’s tight. You can also use soapy water to check for leaks. Apply soapy water to the connection. If you see bubbles, there is a leak. If you find a leak, take the pump apart. Check the O-ring. It might not be seated correctly. Or, it might be damaged. Fixing leaks is key for how to replace O-ring/seal on shock pump head. It ensures your suspension works properly.
Maintaining Proper Pressure
Maintaining proper pressure in your bike’s suspension is important. It affects how your bike rides. Too much pressure makes the ride harsh. Too little pressure makes it too soft. Check your bike’s manual. It will tell you the correct pressure for your weight. Use your shock pump to adjust the pressure. Pump it up or release air as needed. Check the pressure regularly. It can change over time. Temperature also affects pressure. Colder temperatures lower the pressure. Warmer temperatures increase it. Adjust the pressure as needed. Maintaining proper pressure is important for how to replace O-ring/seal on shock pump head. It ensures your bike rides smoothly and safely.
Troubleshooting Common Issues
Sometimes, you might have problems after replacing the O-ring. The pump might not work at all. Or, it might leak. Check the O-ring first. Make sure it’s seated correctly. It should not be twisted or stretched. Also, check the connection between the pump and the suspension. Make sure it’s tight. If the pump still doesn’t work, check the other parts. Something else might be broken. If you can’t fix it yourself, take it to a bike shop. They can help you troubleshoot the problem. Knowing how to replace O-ring/seal on shock pump head helps. But sometimes, you need extra help. Don’t be afraid to ask for it. Troubleshooting helps you fix any problems after the replacement.
Preventative Maintenance for Shock Pump O-Rings

Taking care of your shock pump helps it last longer. It also keeps it working well. Clean the pump regularly. Wipe it down with a clean rag. This removes dirt and grime. Lubricate the O-ring. Use a special grease for rubber. This protects it from damage. Store the pump in a clean, dry place. This prevents rust and corrosion. Check the O-ring regularly. Look for signs of wear. If it’s cracked or worn, replace it. Don’t wait until it fails completely. This can damage your suspension. Following these tips helps you avoid problems. It also saves you money in the long run. Knowing how to replace O-ring/seal on shock pump head is useful. But preventing problems is even better.
- Clean the pump regularly.
- Lubricate the O-ring.
- Store the pump properly.
- Check the O-ring regularly.
- Replace worn O-rings promptly.
Preventative maintenance is key. It helps you avoid costly repairs. It also keeps your bike riding smoothly. A well-maintained shock pump is a happy pump. It will provide accurate pressure readings. It will also last for many years. So, take the time to care for your pump. It’s worth the effort. Remember, a little maintenance goes a long way. This is true for all bike parts. But it’s especially important for shock pumps. They are essential for your suspension. Keep them in good condition. Preventative maintenance is a key part of how to replace O-ring/seal on shock pump head. It ensures you don’t have to replace it too often.
Fun Fact or Stat: Regular maintenance on your bike, including the shock pump, can extend its lifespan by up to 50%!
Cleaning and Storage Tips
Cleaning and storing your shock pump properly is important. It helps prevent damage. It also keeps it working well. After each use, wipe the pump down with a clean rag. This removes dirt and grime. Pay special attention to the connection point. This is where dirt can build up. Store the pump in a clean, dry place. Avoid storing it in direct sunlight. This can damage the rubber parts. A toolbox or storage bag is a good option. This protects the pump from dust and moisture. Don’t store the pump with heavy objects on top of it. This can bend or break the parts. Following these tips will help your pump last longer. Cleaning and storage are important for how to replace O-ring/seal on shock pump head. They reduce the need for frequent replacements.
Choosing the Right Lubricant
Using the right lubricant is essential for your shock pump. It protects the O-ring from damage. It also helps the pump work smoothly. Use a special grease for rubber. This grease is safe for O-rings. Don’t use regular grease. It can damage the rubber. Look for a lubricant that is specifically designed for O-rings. These lubricants are available at bike shops and online retailers. Apply a small amount of lubricant to the O-ring. You can use your finger or a small brush. Make sure the entire O-ring is coated. Don’t use too much lubricant. This can attract dirt. Using the right lubricant is key for how to replace O-ring/seal on shock pump head. It ensures the O-ring lasts longer and works well.
Regular Inspection of O-Rings
Checking your O-rings regularly is a good habit. It helps you catch problems early. Look for signs of wear. This includes cracks, tears, and swelling. If you see any of these signs, replace the O-ring. Don’t wait until it fails completely. This can damage your suspension. Check the O-ring every time you use the pump. This only takes a few seconds. But it can save you a lot of trouble. Regular inspection is important for how to replace O-ring/seal on shock pump head. It helps you avoid unexpected failures. It also keeps your bike riding smoothly. Make it a part of your routine maintenance.
Common Problems and Solutions
Sometimes, things go wrong when replacing O-rings. You might encounter common problems. Knowing how to fix them is helpful. One problem is the O-ring not seating correctly. Make sure the groove is clean. Apply a small amount of grease. Push the O-ring into place gently. Another problem is leaks. Check the connection between the pump and the suspension. Make sure it’s tight. Also, check the O-ring for damage. A third problem is the pump not working at all. Check all the parts. Make sure they are in the right place. If you can’t fix the problem, take the pump to a bike shop. They can help you diagnose the issue. Knowing how to replace O-ring/seal on shock pump head includes troubleshooting common problems.
| Problem | Possible Solution |
|---|---|
| O-ring not seating | Clean groove, apply grease, push gently. |
| Leaks after replacement | Check connections, inspect O-ring. |
| Pump not working | Check all parts, seek professional help. |
| Difficulty removing old O-ring | Use small picks, apply penetrating oil. |
These are just a few common problems. There are many other things that can go wrong. The key is to be patient. Take your time. Don’t force anything. If you are not sure what to do, ask for help. There are many resources available. You can find videos online. You can also ask a friend who is experienced. Replacing an O-ring can be challenging. But it’s also rewarding. You will save money and learn a new skill. Knowing how to replace O-ring/seal on shock pump head is a valuable skill for any cyclist.
Fun Fact or Stat: Nearly 80% of common bike maintenance issues can be resolved with simple tools and a little know-how!
Stripped Threads
Stripped threads can be a frustrating problem. This happens when the screws or bolts are over-tightened. The threads get damaged. This makes it hard to tighten the screws. One solution is to use a thread repair kit. This kit contains a special insert. It replaces the damaged threads. Another solution is to use a longer screw. This might reach undamaged threads. Be careful not to over-tighten the new screw. Stripped threads can be avoided by being careful. Don’t force the screws. Use the right size screwdriver. If you are not sure what to do, ask for help. Knowing how to replace O-ring/seal on shock pump head sometimes involves dealing with stripped threads. Take your time and be careful.
Cross-Threading
Cross-threading is another common problem. This happens when the screws are not aligned correctly. The threads get damaged. This makes it hard to tighten the screws. One solution is to back out the screw. Then, try again. Make sure the screw is aligned correctly. Don’t force the screw. If the threads are already damaged, you might need a thread repair kit. Cross-threading can be avoided by being careful. Start the screws by hand. Make sure they are aligned correctly. If you are not sure what to do, ask for help. Knowing how to replace O-ring/seal on shock pump head sometimes involves dealing with cross-threading. Take your time and be careful.
Broken Parts
Sometimes, parts break when you are working on the pump. This can be frustrating. But don’t give up. You can usually replace the broken parts. Check with the pump manufacturer. They might sell replacement parts. You can also find parts online. Make sure you get the right part for your pump model. Replacing broken parts can be challenging. But it’s often cheaper than buying a new pump. If you are not sure how to replace the parts, ask for help. A bike shop can do it for you. Knowing how to replace O-ring/seal on shock pump head sometimes involves replacing broken parts. Take your time and be careful.
Summary
Replacing the O-ring on your shock pump head is a simple job. First, gather your tools and new O-rings. Then, take apart the pump head carefully. Remove the old O-ring and clean the area. Install the new O-ring and put the pump back together. Test the pump to make sure it works. Remember to use the right size and type of O-ring. Also, lubricate the O-ring before installing it. This helps it seal better. Following these steps makes how to replace O-ring/seal on shock pump head easy. With a little practice, you can do it yourself.
Keeping your shock pump working well is important. It helps you maintain the right pressure in your bike’s suspension. This makes your ride smoother and more comfortable. Regular maintenance is key. Check the O-ring regularly and replace it when needed. Also, clean the pump and store it properly. This will help it last longer. Learning how to replace O-ring/seal on shock pump head is a valuable skill. It saves you money and keeps your bike riding smoothly.
Conclusion
Learning how to replace O-ring/seal on shock pump head is a useful skill. It helps you keep your bike in good condition. You can save money by doing it yourself. Remember to be careful and take your time. Gather the right tools and follow the steps. With practice, you will become confident. Replacing the O-ring regularly ensures your pump works well. This keeps your bike’s suspension performing its best. Enjoy the smoother ride!
Frequently Asked Questions
Question No 1: Why is it important to replace the O-ring on a shock pump head?
Answer: It is important to replace the O-ring because it stops air from leaking out of your shock pump. Over time, the O-ring can wear out. This causes the pump to lose pressure. When the pump loses pressure, it does not work as well. This means you cannot inflate your bike’s suspension properly. Replacing the O-ring keeps your pump working correctly. This ensures your bike’s suspension is always at the right pressure. Knowing how to replace O-ring/seal on shock pump head helps maintain your bike.
Question No 2: What tools do I need to replace the O-ring on a shock pump head?
Answer: You need a few simple tools. A small, flat-head screwdriver is useful. This helps you gently pry out the old O-ring. A set of small picks can also be helpful. These are great for removing stubborn O-rings. You will also need a new O-ring of the correct size. Some grease that is safe for rubber is also important. This helps the new O-ring slide into place. Finally, you need a clean rag or paper towel. This is for wiping away dirt and grease. Having these tools makes how to replace O-ring/seal on shock pump head easier.
Question No 3: How do I know what size O-ring to buy for my shock pump?
Answer: To find the right size O-ring, start by looking at the old one. If you have it, measure its thickness and diameter. You can use a ruler or calipers for this. If you don’t have the old O-ring, check your pump’s manual. It should list the correct size. You can also search online for the pump model. Many websites list the O-ring size. Make sure the new O-ring is made of the same material as the old one. This will ensure it can handle the pressure in the pump. Knowing how to replace O-ring/seal on shock pump head includes selecting the right size.
Question No 4: How often should I replace the O-ring on my shock pump?
Answer: You should replace the O-ring when you see signs of wear. This includes cracks, tears, or swelling. It’s a good idea to check the O-ring regularly. A general guideline is to replace it every year or two. This depends on how often you use the pump. If you use the pump frequently, you might need to replace the O-ring more often. Regular maintenance helps prevent problems. It also keeps your pump working well. Knowing how to replace O-ring/seal on shock pump head helps you maintain your bike.
Question No 5: What type of grease should I use when installing a new O-ring?
Answer: Use a grease that is safe for rubber. This type of grease will not damage the O-ring. Some greases can cause the rubber to swell or break down. This can cause leaks. Look for a grease that is specifically designed for O-rings. These greases are available at bike shops and online retailers. Apply a small amount of grease to the O-ring before installing it. This helps it slide into place and seal properly. Using the right grease is important for how to replace O-ring/seal on shock pump head.
Question No 6: What should I do if I still have a leak after replacing the O-ring?
Answer: If you still have a leak, check the O-ring again. Make sure it’s seated correctly. It should not be twisted or stretched. Also, check the connection between the pump and the suspension. Make sure it’s tight. You can use soapy water to check for


