
How to Connect External Gauge to Bike Pump Hose: Easy!
Have you ever tried to pump up your bike tires? Did you know if they had enough air? It can be tricky! Knowing the right tire pressure is important. It helps you ride safely and smoothly. One way to check is with a gauge. But how to connect external gauge to bike pump hose? Let’s find out!
Key Takeaways
- Connecting an external gauge helps get the perfect tire pressure every time.
- You will need a gauge, your bike pump, and possibly an adapter.
- Learning how to connect external gauge to bike pump hose is simple with the right steps.
- Always check your tire’s recommended PSI before pumping.
- Having the right tire pressure makes biking safer and more fun.
Why Use an External Gauge?
Using an external gauge is a smart idea. It helps you get the perfect tire pressure. Many built-in pump gauges are not very accurate. They might show the wrong PSI. This can lead to over-inflated or under-inflated tires. Over-inflated tires can burst. Under-inflated tires make it hard to pedal. An external gauge gives you a precise reading. You can trust it to be accurate. This helps your tires last longer. It also makes your rides safer and more enjoyable. Plus, it’s an easy way to make sure your bike is always ready to go. So, consider adding an external gauge to your biking toolkit. It’s a small investment that makes a big difference.
- External gauges offer more accurate readings.
- They help prevent over or under-inflation.
- Correct tire pressure improves ride quality.
- Using a gauge extends the life of your tires.
- They are easy to use and read.
Think of it like baking a cake. If you don’t measure the ingredients correctly, the cake won’t turn out right. The same goes for your bike tires. If you don’t have the right pressure, your ride won’t be as good. An external gauge is like a measuring cup for your tires. It helps you get the perfect amount of air every time. This makes biking more fun and safer. Plus, you’ll feel like a pro knowing you’re taking good care of your bike. So, grab an external gauge and start enjoying smoother rides!
Fun Fact or Stat: Studies show that properly inflated tires can improve your cycling speed by up to 10%!
What is PSI?
Have you ever heard someone say “PSI”? What does it even mean? PSI stands for pounds per square inch. It’s how we measure the pressure inside your bike tires. Think of it like this: imagine you have a tiny square. PSI tells you how much force is pushing on that square from the air inside the tire. A higher PSI means more air is packed into the tire. A lower PSI means less air. Knowing the right PSI for your tires is super important. It helps you ride smoothly and safely. Check the side of your tire. It will tell you the recommended PSI range. This will help you know how much air to put in your tires.
Analog vs. Digital Gauges
When you’re looking at external gauges, you’ll see two main types: analog and digital. Analog gauges have a needle that moves to show the pressure. They are simple and don’t need batteries. Digital gauges have a screen that shows the pressure as a number. They are often more precise and easy to read. Which one is better? It depends on what you like! Analog gauges are classic and reliable. Digital gauges are modern and accurate. Some people prefer the simplicity of analog. Others like the precision of digital. Try both if you can and see which one you like best. Either way, an external gauge is a great tool for keeping your tires properly inflated.
Finding the Right Gauge
Choosing the right gauge can feel tricky. There are so many options! Start by thinking about what’s important to you. Do you want something simple and easy to use? An analog gauge might be a good choice. Do you want the most accurate reading possible? A digital gauge could be better. Also, think about the range of pressure you need. Some gauges are better for high-pressure tires. Others are better for low-pressure tires. Read reviews and ask friends for recommendations. Don’t be afraid to try a few different gauges. The goal is to find one that you feel comfortable using. With a little research, you’ll find the perfect gauge for your needs.
Fun Fact or Stat: Digital gauges are often accurate to within 1 PSI, while analog gauges can have a margin of error of 2-3 PSI.
Tools You’ll Need
Before you start, gather your tools. You’ll need a few things. First, of course, you need an external gauge. Make sure it’s one that works with your bike tires. Next, you’ll need your bike pump. Check that the pump head fits your tire valves. Sometimes, you might need an adapter. This helps connect the pump to the valve. A valve adapter is a small piece that screws onto the valve. It lets you use different types of pumps. Having a clean rag is also helpful. You can use it to wipe off any dirt or grime. With these tools, you’ll be ready to connect your external gauge and pump up your tires!
- External pressure gauge (analog or digital).
- Bike pump with a secure head.
- Valve adapter (if needed for your pump).
- Clean rag for wiping dirt.
- Your bike with tires needing inflation.
Imagine you’re building a LEGO set. You wouldn’t start without all the pieces, right? The same goes for pumping your bike tires. Having the right tools makes the job much easier. Without an adapter, your pump might not fit your valve. Without a gauge, you won’t know the pressure. Taking the time to gather everything beforehand saves you time and frustration. Plus, it ensures you do the job correctly. So, take a quick inventory of your tools. Then, you’ll be ready to inflate those tires like a pro!
Fun Fact or Stat: Presta and Schrader are the two most common types of bike tire valves.
Choosing the Right Pump
Picking the right pump matters a lot. There are floor pumps and hand pumps. Floor pumps are bigger and easier to use. They have a gauge built in, but it might not be super accurate. Hand pumps are smaller and easier to carry. They are good for fixing tires on the road. But they can be harder to use to reach high pressure. Think about where you will be pumping your tires. If you are at home, a floor pump is great. If you are on a ride, a hand pump is better. Make sure the pump head fits your tire valve. Some pumps work with both Presta and Schrader valves. Others only work with one type. Choose a pump that works for you and your bike.
Finding the Correct Adapter
Sometimes, your pump head doesn’t fit your tire valve. This is where an adapter comes in handy. Adapters are small pieces that change the valve type. If you have a Presta valve and your pump only works with Schrader, you need an adapter. Adapters are cheap and easy to find. You can buy them at most bike shops. Keep an adapter in your bike bag. This way, you’ll always be ready to pump your tires. Make sure you know what kind of valves your bike has. This will help you choose the right adapter. With the right adapter, any pump can work on your tires.
Maintaining Your Tools
Taking care of your tools helps them last longer. Keep your pump clean and dry. Wipe it down after each use. Store it in a safe place. Check the pump head regularly. Make sure it’s not damaged. Replace it if it is. For your gauge, handle it with care. Don’t drop it or get it wet. Store it in a case or bag. This will protect it from damage. If you have a digital gauge, replace the batteries when they get low. By taking good care of your tools, they will work better and last longer. This saves you money in the long run.
Fun Fact or Stat: A well-maintained bike pump can last for over 10 years!
Steps to Connect the Gauge

Now, let’s get to the important part. How to connect external gauge to bike pump hose? First, make sure your tire valve is accessible. Remove any dust cap. Next, attach the gauge to the tire valve. Make sure it’s on tight. You should hear a click or feel it snap into place. Now, connect the pump hose to the gauge. Again, make sure it’s secure. If you’re using an adapter, attach it first. Then, connect the gauge and pump. Once everything is connected, you’re ready to start pumping. Keep an eye on the gauge as you pump. Stop when you reach the desired PSI. It’s that easy!
- Remove the dust cap from the tire valve.
- Attach the external gauge to the tire valve.
- Connect the bike pump hose to the gauge.
- Ensure all connections are secure and tight.
- Begin pumping and monitor the gauge reading.
Think of it like connecting puzzle pieces. Each piece has to fit just right. If one piece is loose, the puzzle falls apart. The same goes for your gauge and pump. If the connections aren’t tight, air will leak out. This makes it hard to get an accurate reading. Take your time and make sure everything is connected properly. Wiggle the connections to make sure they’re secure. Once everything is snug, you’re ready to pump. You’ll feel confident knowing everything is connected correctly.
Fun Fact or Stat: The sound of air leaking from a connection is called “hissing.”
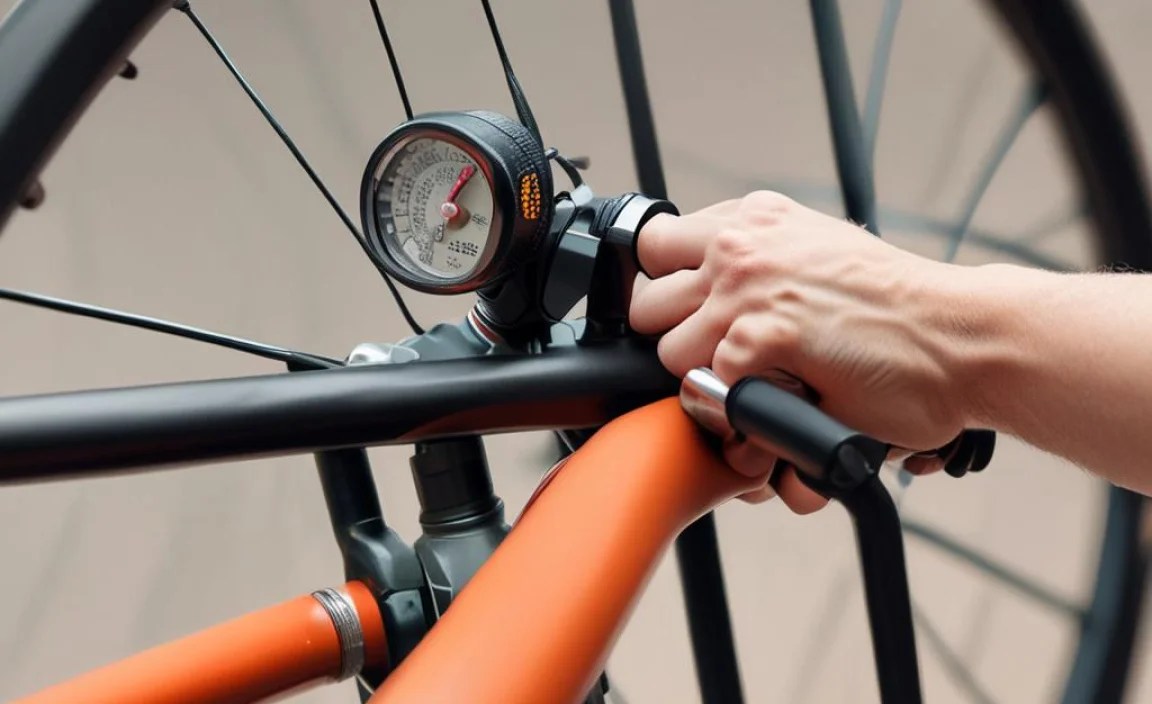
Attaching the Gauge to the Valve
Getting the gauge onto the valve correctly is key. First, line up the gauge head with the valve. Make sure it’s straight. Push the gauge head onto the valve firmly. You should feel it click or snap into place. If it’s a screw-on type, twist it until it’s snug. Don’t over-tighten it. This could damage the valve. Give it a little wiggle to make sure it’s secure. If it’s loose, air will leak out. Try again until it’s tight. A good connection is important for an accurate reading. With a little practice, you’ll get it right every time.
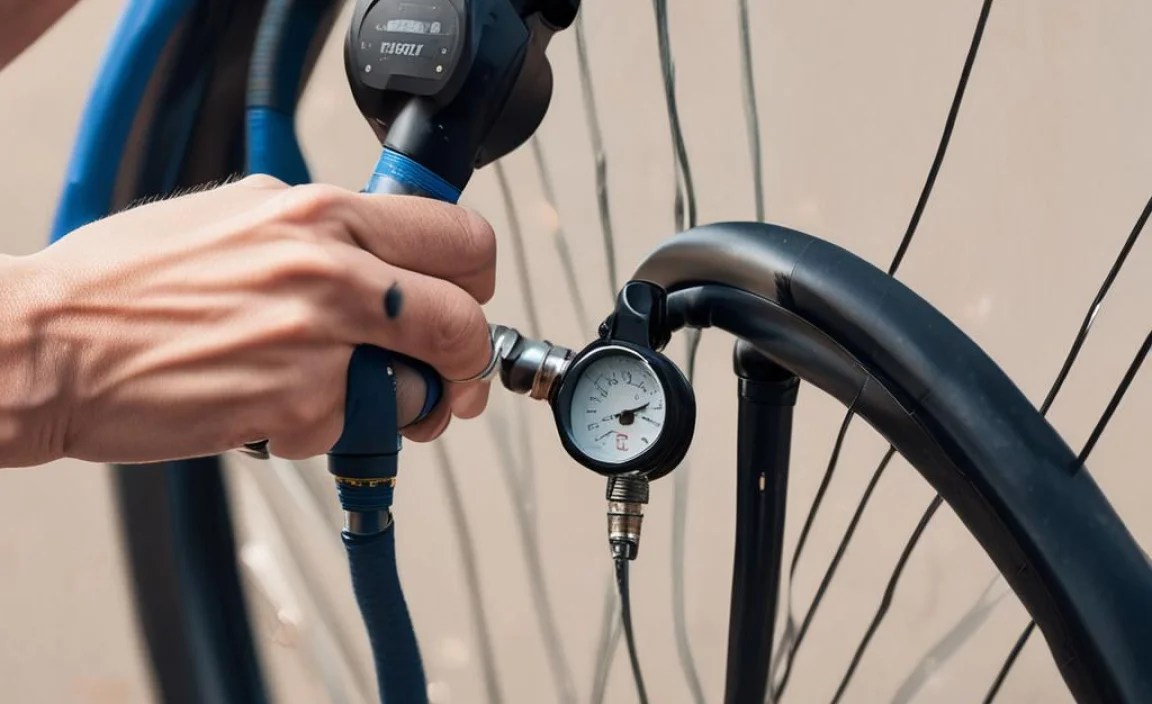
Connecting the Pump Hose
Connecting the pump hose is the next step. Find the opening on the gauge that fits the pump hose. It’s usually on the side or the end. Push the pump hose onto the gauge firmly. Some hoses have a lever to lock them in place. Make sure the lever is closed. This keeps the hose from popping off. If it’s a screw-on type, twist it until it’s snug. Again, don’t over-tighten it. Check that the hose is secure. Give it a little tug to make sure it won’t come off. A secure connection is important for getting the right pressure.
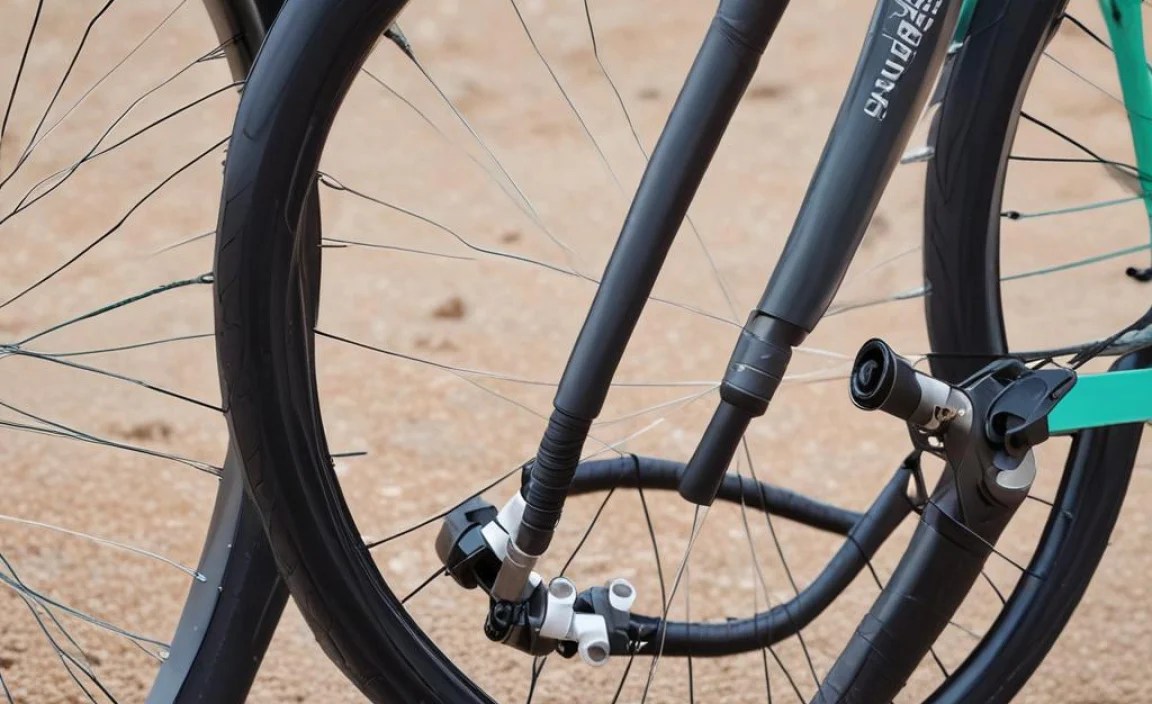
Checking for Leaks
Before you start pumping, check for leaks. Look and listen closely. Do you see or hear any air escaping? If you do, something isn’t connected right. The gauge might not be tight on the valve. The pump hose might be loose. Reconnect everything and try again. Make sure everything is snug and secure. If you still hear a leak, the valve might be damaged. You might need to replace it. Checking for leaks saves you time and effort. It also ensures you get an accurate pressure reading. A little extra care goes a long way.
Fun Fact or Stat: A small leak can cause you to lose several PSI in just a few seconds.
Reading the Gauge Correctly
Once everything is connected, it’s time to read the gauge. If you have an analog gauge, look at the needle. It points to a number on the dial. That number is the PSI. If you have a digital gauge, the PSI will be displayed on the screen. Make sure you know what the recommended PSI is for your tires. It’s usually printed on the side of the tire. As you pump, watch the gauge closely. Stop when you reach the desired PSI. Don’t over-inflate the tires. This can be dangerous. Reading the gauge correctly is important for safe and smooth rides.
- Locate the pressure reading on the gauge.
- Compare the reading to the recommended PSI.
- Stop pumping when you reach the desired PSI.
- Avoid over-inflating tires beyond the limit.
- Double-check the reading for accuracy.
Imagine you’re driving a car. You need to know how fast you’re going, right? The speedometer tells you your speed. The gauge is like a speedometer for your tires. It tells you how much air is inside. Knowing how to read the gauge is just as important as knowing how to read a speedometer. It helps you stay safe and in control. So, take a moment to understand your gauge. Learn how to read it accurately. Your tires (and your body) will thank you!
Fun Fact or Stat: Mountain bike tires typically have a lower PSI than road bike tires.
Understanding PSI Ranges
Tires have a range of PSI. This means there’s a minimum and maximum pressure. The range is usually printed on the side of the tire. For example, it might say “40-60 PSI”. This means you should inflate the tire to somewhere between 40 and 60 PSI. Why a range? Different conditions need different pressures. For smooth roads, you can use a higher PSI. This makes you go faster. For bumpy roads, use a lower PSI. This gives you more comfort. Experiment to find what works best for you. Just stay within the recommended range.
When to Stop Pumping
Knowing when to stop pumping is important. Watch the gauge as you pump. When the needle or the digital display reaches your target PSI, stop. Don’t go over the maximum PSI. Over-inflating can cause the tire to burst. It’s better to be a little under-inflated than over-inflated. If you’re not sure, start with a lower pressure. You can always add more air later. Pay attention to the gauge and stop at the right time. This keeps you safe and your tires in good shape.
Adjusting for Ride Conditions
The ideal tire pressure depends on the ride. Are you riding on smooth pavement? Or are you tackling rough trails? Smooth pavement lets you use higher pressure. This reduces rolling resistance and makes you faster. Rough trails need lower pressure. This gives you more grip and comfort. Lower pressure lets the tire absorb bumps. Experiment with different pressures. See what feels best for you. Remember to stay within the recommended PSI range. Adjusting for ride conditions makes biking more fun and comfortable.
Fun Fact or Stat: Tire pressure affects your bike’s rolling resistance, grip, and comfort.
Troubleshooting Common Issues

Sometimes, things don’t go as planned. You might have trouble connecting the gauge. Or the gauge might not show a reading. Don’t worry! These problems are common. First, check all your connections. Make sure everything is tight. If the gauge isn’t showing a reading, it might be broken. Try a different gauge. If air is leaking, the valve might be damaged. You might need to replace it. Take a deep breath and try again. With a little patience, you can solve most problems.
- Check all connections for tightness.
- Try a different gauge to rule out malfunctions.
- Inspect the valve for damage or leaks.
- Ensure the pump is functioning correctly.
- Consult a bike shop for complex issues.
Imagine you’re trying to fly a kite. Sometimes the wind isn’t strong enough. Sometimes the kite gets tangled. You don’t give up, right? You try different things until it flies. The same goes for pumping your tires. If you run into a problem, don’t get discouraged. Try different solutions. Ask a friend for help. Watch a video online. With a little effort, you’ll get it working. And when you do, you’ll feel proud of yourself!
Fun Fact or Stat: A damaged valve can cause a slow leak, leading to flat tires.
Gauge Not Showing a Reading
If the gauge isn’t showing a reading, don’t panic. First, make sure the gauge is turned on. Some digital gauges have an on/off switch. Next, check the battery. If the battery is low, the gauge might not work. Replace the battery with a new one. If it’s an analog gauge, make sure the needle isn’t stuck. Sometimes the needle gets stuck. Tap the gauge gently to see if it moves. If none of these things work, the gauge might be broken. Try a different gauge to see if that works.
Air Leaking from Connections
Air leaking from the connections is a common problem. It means something isn’t tight. First, check the connection between the gauge and the valve. Make sure it’s secure. If it’s loose, tighten it. Next, check the connection between the pump hose and the gauge. Make sure it’s also tight. If air is still leaking, the valve might be damaged. You might need to replace it. Use a valve cap to protect the valve from dirt and damage. A little maintenance goes a long way.
Pump Not Inflating the Tire
If the pump isn’t inflating the tire, something might be wrong with the pump. First, make sure the pump head is properly attached to the valve. It should be snug and secure. Next, check the pump for any damage. The hose might be cracked or the handle might be broken. If the pump is damaged, you might need to repair or replace it. Also, make sure you’re using the right type of pump for your valve. Some pumps only work with Presta valves. Others only work with Schrader valves. Use the right pump for your tires.
Fun Fact or Stat: Regular cleaning and lubrication can extend the life of your bike pump.
Safety Tips for Using a Gauge
Safety always comes first. When using a gauge, be careful not to over-inflate your tires. Over-inflating can cause them to burst. This can be dangerous. Always check the recommended PSI on the side of the tire. Wear eye protection. This will protect your eyes from flying debris. Don’t use a damaged gauge or pump. This could lead to inaccurate readings or injuries. Keep your fingers away from moving parts. Be mindful of your surroundings. By following these safety tips, you can pump your tires safely and confidently.
- Always check the recommended PSI on the tire.
- Wear eye protection to prevent injuries.
- Avoid using damaged gauges or pumps.
- Keep fingers away from moving parts.
- Be aware of your surroundings while pumping.
Imagine you’re cooking. You wouldn’t use a broken knife, right? That could be dangerous! The same goes for your bike tools. If your gauge or pump is damaged, don’t use it. Get it fixed or replaced. Your safety is more important than saving a few dollars. Plus, using safe tools makes the job easier and more enjoyable. So, take a moment to inspect your equipment. Make sure everything is in good working order. Then, you can pump your tires with peace of mind.
Fun Fact or Stat: Tire blowouts can cause serious accidents, especially at high speeds.
Avoiding Over-Inflation
Over-inflation is a big risk. It can lead to tire blowouts. Always check the recommended PSI on the tire. Don’t exceed the maximum pressure. Use a gauge to monitor the pressure as you pump. Stop when you reach the desired PSI. If you’re not sure, start with a lower pressure. You can always add more air later. It’s better to be a little under-inflated than over-inflated. Over-inflation can also make your ride uncomfortable. The tires will be too stiff. Avoid over-inflation for a safer and smoother ride.
Protecting Your Eyes
Protecting your eyes is essential. Wear safety glasses or goggles when pumping your tires. This will shield your eyes from flying debris. Small pieces of rubber or dirt can get kicked up. These can cause serious eye injuries. Safety glasses are cheap and easy to find. Keep a pair in your bike bag. Wear them every time you pump your tires. It’s a simple way to protect your vision. Your eyes will thank you for it.
Using Safe Equipment
Using safe equipment is crucial. Inspect your gauge and pump before each use. Look for any signs of damage. Are there any cracks or leaks? Is the hose frayed? If you find any problems, don’t use the equipment. Get it repaired or replaced. Damaged equipment can be dangerous. It can lead to inaccurate readings or injuries. Invest in high-quality tools. They will last longer and be safer to use. Safe equipment makes biking more enjoyable.
Fun Fact or Stat: Wearing safety glasses can reduce the risk of eye injuries by up to 90%.
Summary
Connecting an external gauge to your bike pump hose is a simple way to ensure your tires are properly inflated. This improves your ride quality and safety. You need a gauge, a pump, and possibly an adapter. First, attach the gauge to the tire valve. Then, connect the pump hose to the gauge. Watch the gauge as you pump. Stop when you reach the recommended PSI. How to connect external gauge to bike pump hose becomes easy with practice. Always check for leaks and follow safety tips. With the right tools and knowledge, you can keep your tires in top condition.
Conclusion
Learning how to connect external gauge to bike pump hose is a great skill for any cyclist. It helps you maintain your bike and enjoy safer, smoother rides. Using an external gauge provides more accurate tire pressure readings. This ensures optimal performance and prevents tire damage. Take the time to learn the steps. Gather the necessary tools. Practice connecting the gauge and pump. With a little effort, you’ll be a tire-inflating pro in no time!
Frequently Asked Questions
Question No 1: Why should I use an external gauge instead of the one on my pump?
Answer: Many bike pumps have built-in gauges. But these gauges are often not very accurate. They might show the wrong tire pressure. An external gauge provides a more precise reading. This helps you inflate your tires to the correct PSI. Correct tire pressure makes your ride smoother and safer. It also helps your tires last longer. So, using an external gauge is a smart upgrade.
Question No 2: What if I don’t have an adapter for my pump and valve?
Answer: Not having the right adapter can be frustrating. The good news is adapters are easy to find. Most bike shops sell them. They are also available online. Make sure you know what type of valve your tires have. Presta or Schrader. Then, buy the correct adapter for your pump. Keep the adapter in your bike bag. This way, you’ll always be prepared to inflate your tires. Adapters are small and inexpensive. But they can make a big difference.
Question No 3: How do I know what PSI to inflate my tires to?
Answer: Finding the right PSI is important. Look at the side of your tire. You’ll see a range of numbers. For example, it might say “40-60 PSI”. This is the recommended pressure range. Start with the lower number if you’re unsure. You can always add more air later. Also, consider the type of riding you’ll be doing. Smooth roads need higher pressure. Rough roads need lower pressure. Experiment to find what works best for you. But always stay within the recommended range.
Question No 4: What if my tire keeps losing air, even after I pump it up?
Answer: If your tire keeps losing air, you might have a leak. First, check the valve. Make sure it’s tight. If it’s loose, tighten it with a valve tool. Next, inspect the tire for any punctures. Look for small holes or cuts. If you find a puncture, you’ll need to patch or replace the tube. You can buy a patch kit at most bike shops. If the tire is old or damaged, it might be time for a new one. Keeping your tires properly inflated is important for safety.
Question No 5: Can I use any type of gauge to check my bike tire pressure?
Answer: You should use a gauge that is designed for bike tires. Car tire gauges might not be accurate for the lower pressures used in bike tires. Look for a gauge that measures in PSI (pounds per square inch). Make sure the gauge has a range that matches your tire’s recommended pressure. Some gauges are specifically designed for high-pressure road bike tires. Others are better for lower-pressure mountain bike tires. Choose a gauge that fits your needs. Knowing how to connect external gauge to bike pump hose ensures the right tool use.
Question No 6: Is it okay to use a bike pump with a gauge on other inflatables?
Answer: Bike pumps are designed for bike tires. They might not work well for other inflatables. For example, they might not provide enough air for a large pool toy. Also, the pump head might not fit the valve on other inflatables. Using the wrong pump can damage the valve or the pump. It’s best to use a pump that is specifically designed for the inflatable you’re trying to inflate. This will ensure proper inflation and prevent damage. While learning how to connect external gauge to bike pump hose is useful, it’s specific to bike maintenance.


