
How to Use Mini Pump for Kids Bike Tires: Easy Guide
Quick Summary: Using a mini pump to inflate your kid’s bike tires is simple. First, make sure the pump head fits the tire valve (Schrader or Presta). Attach the pump securely to the valve, then pump until you reach the recommended tire pressure (PSI), usually found on the tire sidewall. Check the pressure with a gauge for accuracy.
Is your kid’s bike tire looking a little flat? Don’t worry, you don’t need to be a bike mechanic to fix it! A mini pump is a lifesaver for quick top-ups and emergency repairs on the go. It might seem a bit tricky at first, but with a few simple steps, you’ll be able to inflate those tires and get your little cyclist back on the road (or trail!) in no time.
This guide will walk you through everything you need to know about using a mini pump on your kid’s bike. We’ll cover identifying valve types, attaching the pump correctly, and pumping to the right pressure. Let’s get started and keep those wheels turning!
Understanding Bike Tire Valves

Before you start pumping, it’s important to know what type of valve your kid’s bike tires have. There are two main types:
- Schrader: This is the same type of valve you find on car tires. It’s wider and sturdier, with a spring-loaded pin in the center.
- Presta: This valve is narrower and has a lock ring at the tip. You need to unscrew the lock ring before inflating and screw it back on afterward.
Take a close look at the valve on your kid’s bike tire to determine which type it is. This will help you choose the correct side of the pump head or adapter.
Essential Tools and Preparation
Before you begin, gather these essential items:
- Mini Pump: Choose a mini pump that’s compatible with both Schrader and Presta valves, or one that matches the valve type on your kid’s bike. Look for a pump with a pressure gauge for accurate inflation.
- Tire Pressure Gauge: While some mini pumps have built-in gauges, a separate gauge can provide more accurate readings.
- Rag or Cloth: Use this to wipe off any dirt or debris from the valve before attaching the pump.
Choosing the Right Mini Pump
With so many mini pumps available, how do you pick the best one? Here are a few factors to consider:
- Valve Compatibility: Ensure the pump works with both Schrader and Presta valves, or specifically matches the valve type on your kid’s bike.
- Pressure Gauge: A built-in gauge or compatibility with an external gauge is crucial for accurate inflation.
- Size and Weight: Look for a compact and lightweight pump that’s easy to carry on rides.
- Durability: Choose a pump made from durable materials like aluminum alloy for long-lasting performance.
- Pumping Efficiency: Some pumps are designed to inflate tires faster and with less effort.
Here’s a table comparing different types of mini pumps:
| Type of Mini Pump | Pros | Cons |
|---|---|---|
| Hand Pump | Lightweight, compact, affordable | Requires more effort, can be slow |
| Frame-Mounted Pump | Easy to access, doesn’t take up pocket space | Can be bulky, may not fit all frames |
| CO2 Inflator | Fast inflation, convenient for emergencies | Requires CO2 cartridges, can be wasteful |
| Hybrid Pump (Hand/CO2) | Versatile, offers both hand pumping and CO2 inflation | Can be more expensive, requires cartridges for CO2 use |
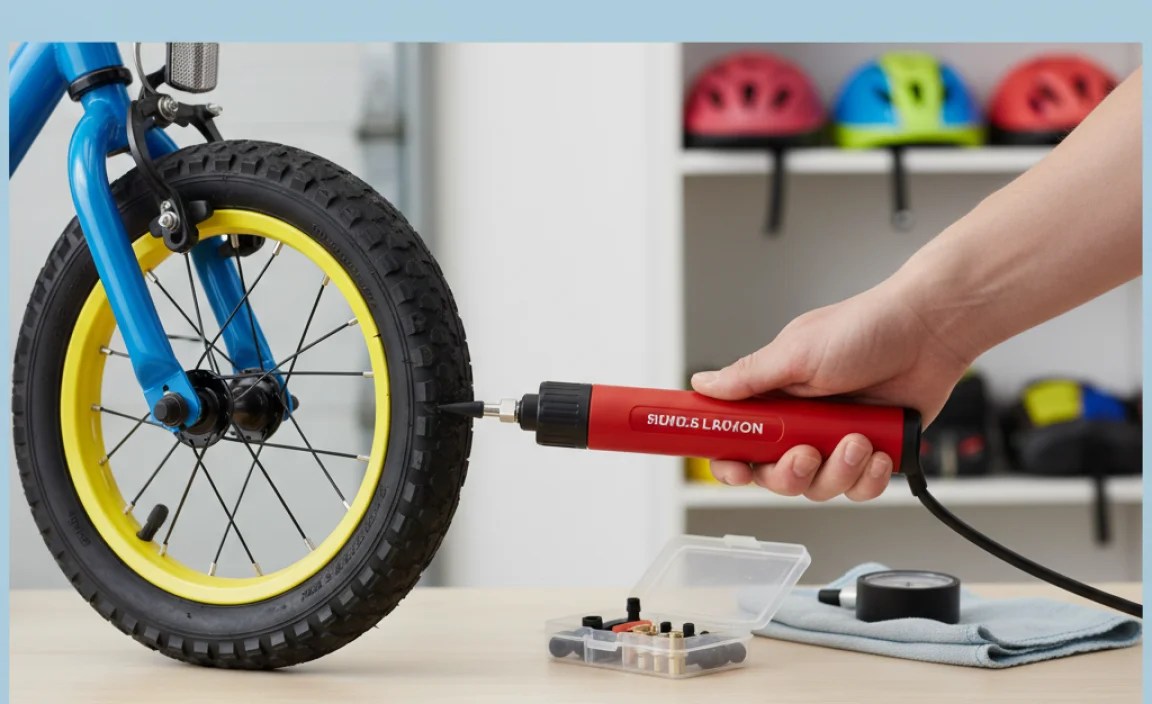
Step-by-Step Guide: Inflating Kid’s Bike Tires with a Mini Pump

Follow these steps to inflate your kid’s bike tires quickly and easily:
Step 1: Prepare the Valve
Remove the valve cap by unscrewing it counterclockwise. For Presta valves, also unscrew the lock ring at the tip. Press the valve stem briefly to release any remaining air and ensure it’s not stuck.
Step 2: Attach the Pump Head
Match the pump head to the valve type. Most mini pumps have a dual-head design or require you to switch an internal part to accommodate Schrader or Presta valves. Firmly press the pump head onto the valve, ensuring a tight seal. If your pump has a lever, engage it to lock the pump head in place.
Step 3: Start Pumping
Hold the pump handle firmly and begin pumping in a smooth, steady motion. Use your body weight to help generate force. Keep an eye on the pressure gauge (if your pump has one) to monitor the inflation level.
Step 4: Inflate to the Correct Pressure
Check the recommended tire pressure (PSI) on the tire sidewall. Inflate the tire to this pressure, or slightly below if you’re unsure. It’s better to under-inflate than over-inflate, as over-inflation can cause the tire to burst.
Here’s a table to help you determine the correct tire pressure for your kid’s bike:
| Tire Size | Recommended Pressure (PSI) |
|---|---|
| 12-inch | 25-35 PSI |
| 16-inch | 30-40 PSI |
| 20-inch | 35-45 PSI |
| 24-inch | 40-50 PSI |
Note: These are general recommendations. Always refer to the tire sidewall for the manufacturer’s suggested pressure range.
Step 5: Remove the Pump Head
Disengage the lever (if applicable) and carefully remove the pump head from the valve. Be prepared for a slight hiss of air as you detach the pump.
Step 6: Secure the Valve
For Presta valves, screw the lock ring back on. Replace the valve cap on both Schrader and Presta valves to protect them from dirt and debris.
Step 7: Check the Tire Pressure
Use a tire pressure gauge to double-check the inflation level. Make adjustments as needed to achieve the correct pressure.
Troubleshooting Common Issues
Sometimes, things don’t go as planned. Here are some common issues you might encounter and how to fix them:
- Pump Not Sealing: Make sure the pump head is securely attached to the valve. Check for dirt or damage on the pump head or valve. Try moistening the pump head with water for a better seal.
- Air Leaking: Ensure the valve core is tightened properly. If the valve is damaged, you may need to replace it.
- Difficulty Pumping: Make sure the pump is properly lubricated. Check for any obstructions in the pump hose or valve.
- Incorrect Pressure Reading: Calibrate your tire pressure gauge or try a different gauge to ensure accurate readings.
Maintaining Your Mini Pump

To keep your mini pump in good working order, follow these maintenance tips:
- Clean Regularly: Wipe down the pump with a damp cloth to remove dirt and grime.
- Lubricate Moving Parts: Apply a small amount of lubricant to the pump’s moving parts, such as the piston and seals.
- Store Properly: Store the pump in a dry place to prevent rust and corrosion.
- Inspect Regularly: Check the pump hose, seals, and valve connectors for damage or wear. Replace any worn parts as needed.
Safety Tips for Pumping Bike Tires
Follow these safety tips to prevent accidents and injuries:
- Wear Eye Protection: Wear safety glasses or goggles to protect your eyes from debris.
- Avoid Over-Inflation: Never exceed the maximum pressure rating on the tire sidewall.
- Pump in a Safe Location: Choose a well-lit and level surface to pump your tires.
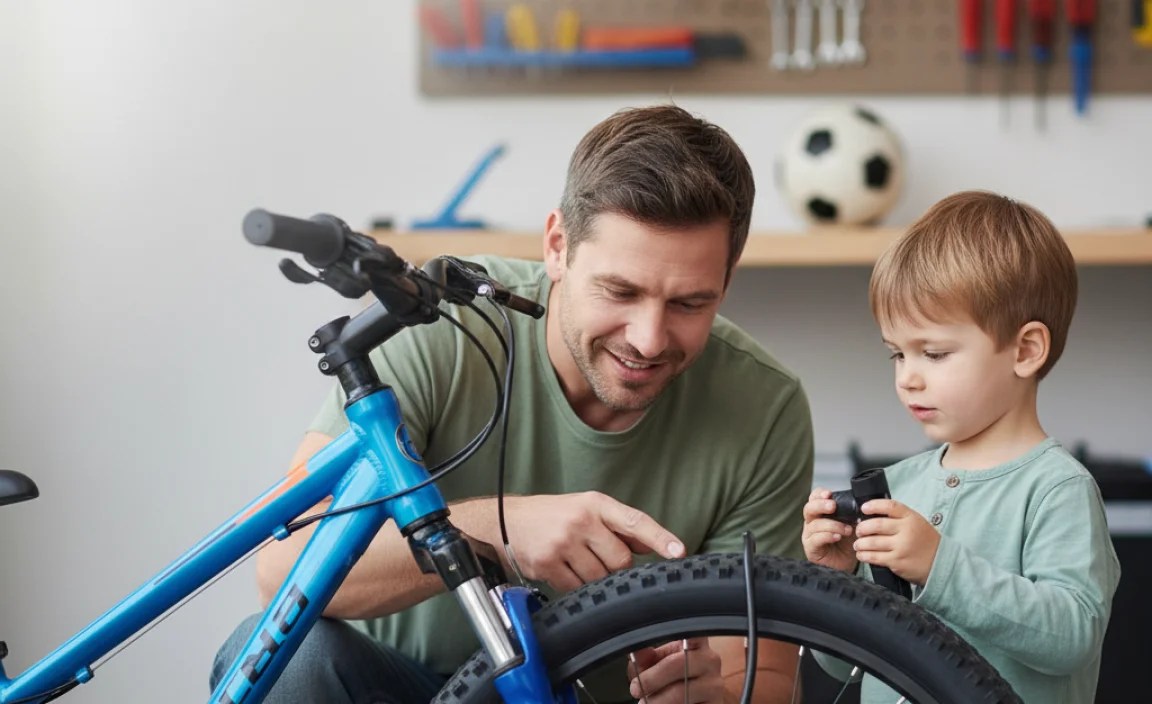
- Supervise Children: If children are helping, supervise them closely and teach them proper pumping techniques.
Alternative Inflation Methods
While a mini pump is great for on-the-go inflation, here are some alternative methods for inflating your kid’s bike tires:
- Floor Pump: A floor pump provides more leverage and can inflate tires faster and more easily.
- CO2 Inflator: A CO2 inflator uses compressed carbon dioxide to quickly inflate tires, ideal for emergencies.
- Air Compressor: An air compressor can inflate tires quickly and easily, but requires access to a power source.
Recommended Mini Pumps for Kids’ Bikes
Here are a few highly-rated mini pumps that are perfect for inflating kids’ bike tires:
- Topeak Mini Morph: This pump features a footpad for stability and a built-in gauge for accurate inflation.
- Lezyne Micro Floor Drive HP: This compact pump delivers high pressure with minimal effort.
- Crankbrothers Sterling S: This lightweight pump is easy to carry and compatible with both Schrader and Presta valves.
Frequently Asked Questions (FAQ)
Here are some common questions about using a mini pump for kids’ bike tires:
- Q: How do I know what PSI to inflate my kid’s bike tires to?
- A: The recommended PSI is usually printed on the tire sidewall. Look for a range, such as “30-40 PSI,” and inflate within that range.
- Q: What’s the difference between Schrader and Presta valves?
- A: Schrader valves are wider and similar to car tire valves, while Presta valves are narrower and have a lock ring at the tip.
- Q: My mini pump isn’t working. What should I do?
- A: Check that the pump head is securely attached to the valve and that the valve core is tightened. Also, make sure the pump is properly lubricated.
- Q: Can I use a car tire pump on my kid’s bike tires?
- A: Yes, but you’ll need an adapter if your kid’s bike has Presta valves. Be careful not to over-inflate the tires, as car tire pumps can deliver high pressure quickly.
- Q: How often should I inflate my kid’s bike tires?
- A: Check the tire pressure before each ride and inflate as needed. Tires can lose pressure over time, especially in colder weather.
- Q: What if my mini pump doesn’t have a pressure gauge?
- A: Use a separate tire pressure gauge to check the inflation level. You can find affordable gauges at most bike shops or online retailers.
- Q: Is it okay to slightly over-inflate or under-inflate my kid’s bike tires?
- A: It’s better to slightly under-inflate than over-inflate. Over-inflation can cause the tire to burst, while under-inflation can make it harder to pedal and increase the risk of pinch flats.
Conclusion
Now you’re equipped with the knowledge and skills to use a mini pump to inflate your kid’s bike tires like a pro! Remember to identify the valve type, attach the pump securely, inflate to the correct pressure, and maintain your pump for long-lasting performance. With a little practice, you’ll be able to keep those tires properly inflated and ensure a safe and enjoyable ride for your little cyclist. So, grab your mini pump, hit the road (or trail), and enjoy the ride!


