
How to Test Mini Pump Pressure Output: Easy Guide
Quick Summary: Want to make sure your mini pump is up to the task? You can test its pressure output with a gauge-equipped pump or pressure tester. Attach the mini pump, inflate to your target PSI, and check the reading. If it falls short, it might be time for a new pump or a rebuild. Regular testing ensures you’re never caught short on the road!
Few things are more frustrating than a flat tire miles from home, only to find your mini pump can’t deliver enough pressure to get you rolling again. We’ve all been there! Mini pumps are a cyclist’s best friend, but their performance can vary. Knowing how to test your mini pump’s pressure output will give you peace of mind, ensuring it can handle the job when you need it most. This guide will walk you through a simple, step-by-step process to check your pump’s performance, so you can ride with confidence.
Why Test Your Mini Pump’s Pressure Output?

Before we dive into the “how,” let’s cover the “why.” There are several reasons why testing your mini pump’s pressure output is a smart move:
- Safety: Underinflated tires can lead to poor handling and a higher risk of pinch flats.
- Performance: Proper tire pressure optimizes rolling resistance and overall ride quality.
- Reliability: Knowing your pump’s capabilities prevents roadside surprises.
- Longevity: Identifying performance drops early can prompt maintenance and extend your pump’s life.
What You’ll Need

To test your mini pump’s pressure output, you’ll need a few essential items:
- Your Mini Pump: The pump you want to test, obviously!
- A Gauge-Equipped Floor Pump or Digital Pressure Tester: This serves as your control to measure the mini pump’s output. A reliable floor pump with an accurate gauge is ideal. Digital pressure testers are also great for their precision.
- Your Bike Tire or a Spare: This is what you’ll be inflating. Make sure it’s compatible with your pump’s valve type (Presta or Schrader).
- Valve Adaptor (if needed): Some mini pumps only work with one valve type, so you might need an adaptor.
- Rag or Towel (optional): To wipe off any dirt or grime.
Step-by-Step Guide: Testing Your Mini Pump
Here’s a detailed guide on how to test your mini pump’s pressure output:
Step 1: Prepare Your Tire and Pump
First, ensure your tire is partially deflated. You don’t want to start with a fully inflated tire, as it will be difficult to accurately gauge the mini pump’s contribution.
Next, inspect your mini pump. Check for any visible damage, such as cracks in the hose or a loose pump head. Make sure the pump head is compatible with your tire’s valve (Presta or Schrader). If not, use the appropriate adapter.
Step 2: Connect the Mini Pump
Attach the mini pump securely to your tire’s valve. Ensure a tight connection to prevent air leakage. Many mini pumps have a lever or locking mechanism to secure the pump head to the valve.
Step 3: Inflate the Tire
Begin pumping the tire with your mini pump. Use a consistent pumping motion and count the number of strokes. Pay attention to how much effort it takes to inflate the tire. Note any unusual sounds or resistance.
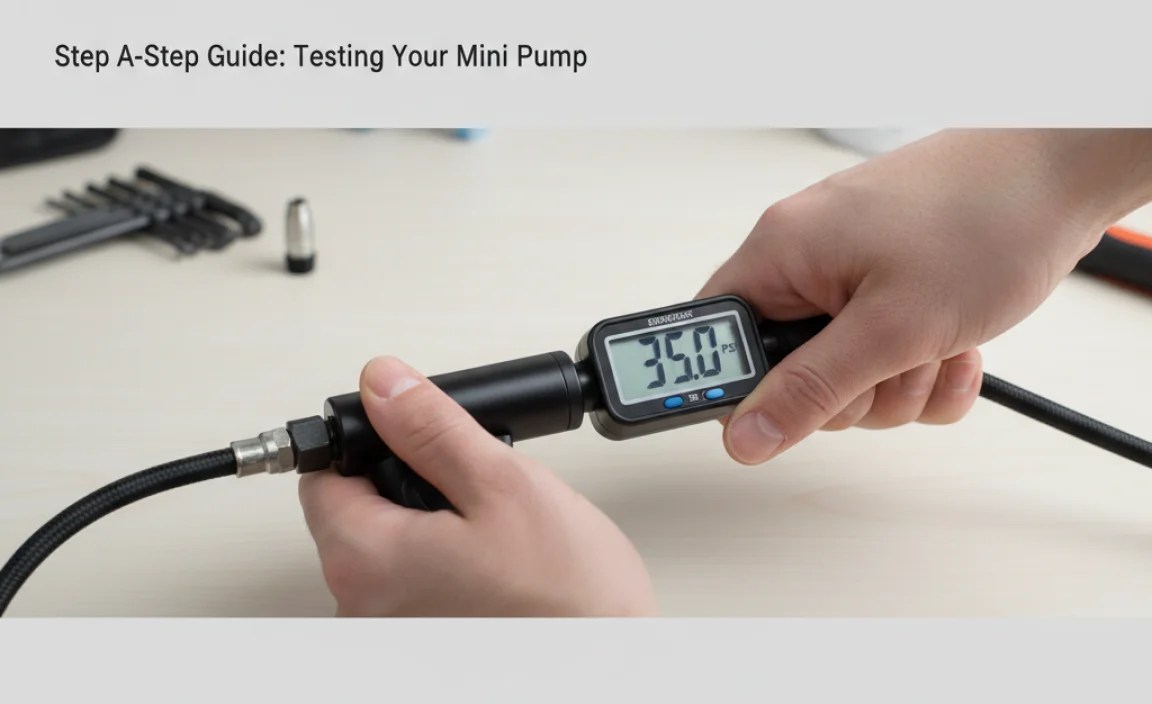
Step 4: Check the Pressure with a Gauge
Once you’ve pumped for a reasonable amount of time or reached a point where it becomes difficult to pump further, disconnect the mini pump. Immediately attach your gauge-equipped floor pump or digital pressure tester to the tire valve.
Read the pressure on the gauge. This reading indicates the pressure your mini pump was able to achieve.
Step 5: Compare and Evaluate
Compare the pressure reading to your target tire pressure. The ideal tire pressure is usually printed on the sidewall of your tire. Consider these points:
- Within 10 PSI of Target: Your mini pump is in good working condition.
- 10-20 PSI Below Target: Your pump is usable, but consider servicing it or purchasing a new one soon.
- More Than 20 PSI Below Target: Your pump is not reliable and should be replaced.
Step 6: Repeat for Accuracy
Repeat the test two or three times to ensure consistent results. This helps to account for any variations in your pumping technique or minor leaks.
Troubleshooting Common Issues
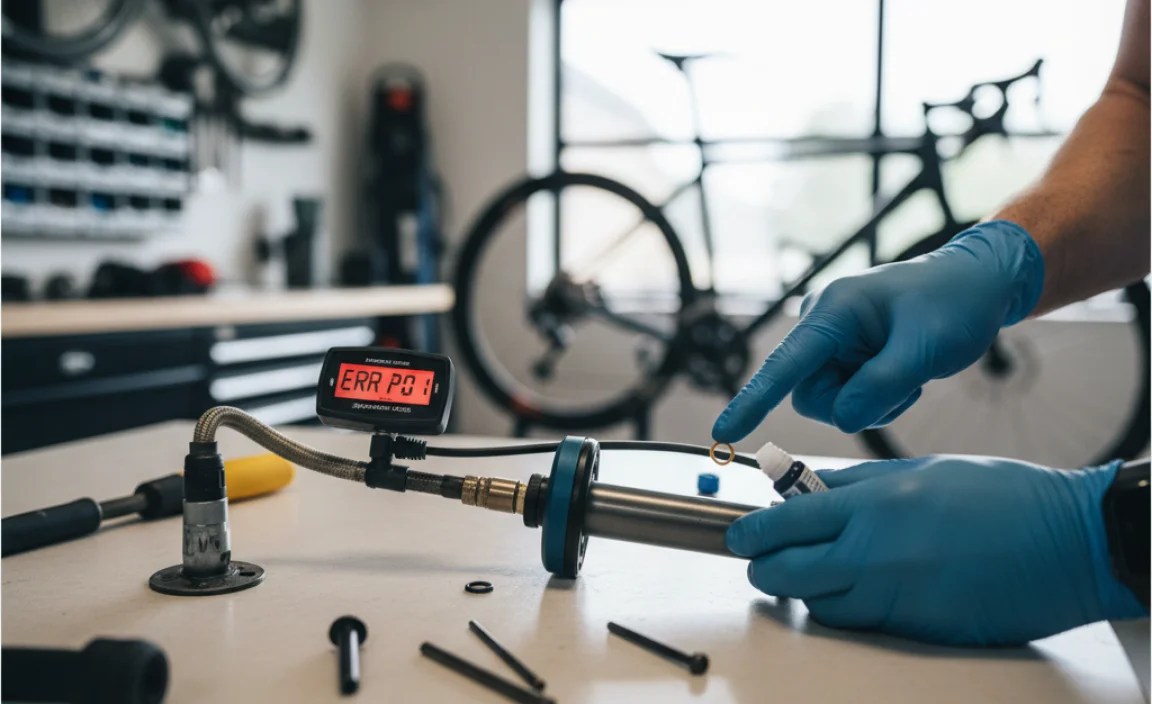
During the testing process, you might encounter some common issues. Here’s how to troubleshoot them:
- Air Leakage: Ensure the pump head is securely attached to the valve. Check for any damage to the pump head or valve.
- Difficulty Pumping: This could indicate a blockage in the pump or a worn-out seal. Try lubricating the pump with a silicone-based lubricant.
- Inconsistent Readings: Make sure your gauge is accurate. Try using a different gauge to verify the readings.
Understanding Mini Pump Performance
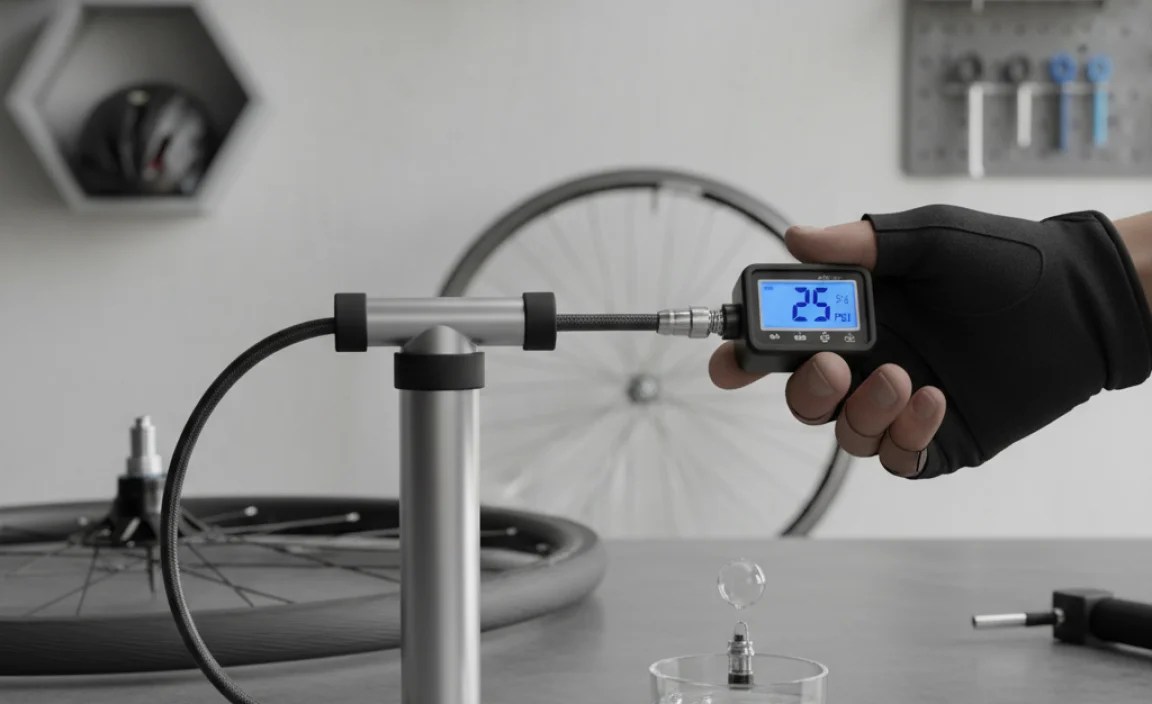
Mini pumps are designed for portability, not high-volume inflation. They typically require more strokes to reach the desired pressure compared to a floor pump. Here’s a table outlining typical mini pump performance characteristics:
| Pump Type | Typical Pressure Range (PSI) | Strokes to Reach 80 PSI (Approximate) | Pros | Cons |
|---|---|---|---|---|
| Compact Mini Pump | 60-80 | 200-300 | Highly portable, lightweight | Requires many strokes, lower maximum pressure |
| Hybrid Mini Pump (with foot) | 80-100 | 150-250 | More efficient than compact pumps, stable | Slightly larger, heavier |
| Mini Floor Pump | 100-120 | 100-200 | Most efficient mini pump, easy to use | Least portable, bulkier |
Factors Affecting Mini Pump Performance
Several factors can influence your mini pump’s performance:
- Pump Size and Design: Smaller pumps generally require more strokes to achieve the same pressure.
- Seal Quality: Worn or damaged seals can lead to air leakage and reduced efficiency.
- Pumping Technique: Consistent, full strokes are more effective than short, rapid strokes.
- Valve Type: Some pumps are better suited for Presta or Schrader valves.
- Altitude: Higher altitudes can affect the pump’s performance due to lower air density.
Maintaining Your Mini Pump
Regular maintenance can extend the life and improve the performance of your mini pump. Here are some tips:
- Clean Regularly: Wipe down the pump with a damp cloth to remove dirt and grime.
- Lubricate Seals: Apply a silicone-based lubricant to the pump’s seals to keep them supple.
- Inspect for Damage: Check for cracks, leaks, or worn parts. Replace any damaged components.
- Store Properly: Store your pump in a dry place to prevent corrosion.
Upgrading Your Mini Pump
If your mini pump consistently fails to meet your pressure needs, it might be time for an upgrade. Here are some features to look for in a new mini pump:
- High Pressure Capacity: Choose a pump that can reach your desired tire pressure.
- Efficient Design: Look for pumps with a high volume per stroke.
- Durable Construction: Opt for pumps made from high-quality materials like aluminum.
- Integrated Gauge: Some mini pumps have built-in gauges for convenient pressure monitoring.
- Presta and Schrader Compatibility: Select a pump that works with both valve types.
Mini Pump Types and Recommendations
Navigating the mini pump market can be tricky! Here’s a quick overview of the common types and some popular models:
Compact Mini Pumps
These are the smallest and lightest options, perfect for minimalist riders. They often lack features like gauges or foot rests, prioritizing portability above all else.
Pros:
- Extremely lightweight and compact
- Easy to carry in a jersey pocket or saddlebag
- Affordable
Cons:
- Require many strokes to inflate tires
- Can be tiring to use for high-pressure tires
- Often lack a pressure gauge
Hybrid Mini Pumps
Hybrid pumps strike a balance between portability and efficiency. They often include features like foldable foot rests or telescoping designs to improve pumping power.
Pros:
- More efficient than compact mini pumps
- Easier to use for higher pressures
- Offer a good balance of size and performance
Cons:
- Slightly larger and heavier than compact pumps
- Can still require a significant number of strokes
Mini Floor Pumps
These pumps offer the most efficient inflation in a portable package. They feature a foldable foot and handle, allowing you to use them like a traditional floor pump.
Pros:
- Most efficient mini pump design
- Easiest to use for high-pressure tires
- Provide a stable pumping platform
Cons:
- Largest and heaviest of the mini pump options
- Less portable than other types
Air Compressors and CO2 Inflators
While this article focuses on mini-pumps, let’s briefly touch on alternatives like air compressors and CO2 inflators. These options can get you back on the road quickly, but they have their own pros and cons.
Air Compressors
Small, portable air compressors are becoming increasingly popular, especially for e-bikes and tubeless tire setups. Brands like Ryobi offer cordless inflators that can easily reach high pressures. However, they require battery charging and are heavier than traditional pumps.
CO2 Inflators
CO2 inflators use cartridges of compressed carbon dioxide to quickly inflate tires. They are lightweight and fast, but you need to carry spare cartridges, and they can be wasteful. Plus, CO2 permeates tire walls faster than regular air, so you’ll need to reinflate with a pump later.
Testing with Different Tire Types
The process for testing a mini pump is the same regardless of tire type, but the target pressure will vary. Here’s a quick guide:
| Tire Type | Typical Pressure Range (PSI) | Considerations |
|---|---|---|
| Road Bike Tires | 80-120 | Higher pressures for lower rolling resistance |
| Mountain Bike Tires | 25-40 | Lower pressures for better grip and comfort |
| Gravel Bike Tires | 30-60 | Pressure depends on terrain and tire width |
| E-Bike Tires | 40-60 | Often require higher pressures due to added weight |
FAQ: Mini Pump Pressure Testing
Here are some frequently asked questions about testing mini pump pressure output:
Q: How often should I test my mini pump?
A: It’s a good idea to test your mini pump every few months, especially before a long ride or event. Regular testing helps you catch performance issues early.
Q: Can I use a car tire gauge to test my bike pump?
A: While you *can*, car tire gauges are often not as accurate at the lower pressure ranges used for bicycle tires. A dedicated bike pump gauge or digital pressure tester is recommended.
Q: What does PSI mean?
A: PSI stands for “pounds per square inch.” It’s a unit of pressure commonly used to measure tire inflation. Knowing the correct PSI for your tires is crucial for optimal performance and safety.
Q: Is it normal for a mini pump to take a lot of strokes?
A: Yes, it’s normal for mini pumps to require many strokes compared to floor pumps. Their compact size means they move less air per stroke.
Q: What if my mini pump doesn’t have a Presta/Schrader switch?
A: Many mini pumps come with adapters for both Presta and Schrader valves. Check if your pump came with an adapter, or you can purchase one separately at most bike shops.
Q: Can I fix a mini pump that’s not working well?
A: Sometimes! Check for obvious issues like loose connections or damaged seals. Cleaning and lubricating the pump can also help. However, if the pump is severely damaged or worn, it might be more cost-effective to replace it.
Q: Where can I find the recommended PSI for my tires?
A: The recommended PSI range is usually printed on the sidewall of your tire. Look for a label that says “Inflate to…” or “Max. Pressure…” Always stay within the recommended range.
External Resources
For further reading and product information, check out these resources:
- Park Tool Repair Help: Offers detailed repair guides for various bike components.
- REI Expert Advice on Bike Pumps: Provides comprehensive information on choosing and using bike pumps.
Conclusion
Testing your mini pump’s pressure output is a simple yet crucial step in ensuring your cycling safety and enjoyment. By following this guide, you can confidently assess your pump’s performance and address any issues before they leave you stranded. Remember, a well-maintained and reliable mini pump is an indispensable tool for any cyclist. So, grab your pump, gauge, and tire, and put your pump to the test. Happy riding!


