
How to Use a Cycle Pump: A Beginner’s Guide
Quick Summary: Using a cycle pump is simple! First, identify your tire’s valve type (Presta or Schrader). Then, attach the pump head securely to the valve. Lock the pump head lever (if applicable) and inflate the tire to the recommended PSI, which is usually printed on the tire sidewall. Finally, detach the pump head and check the tire pressure. Regular pumping keeps your rides smooth and safe!
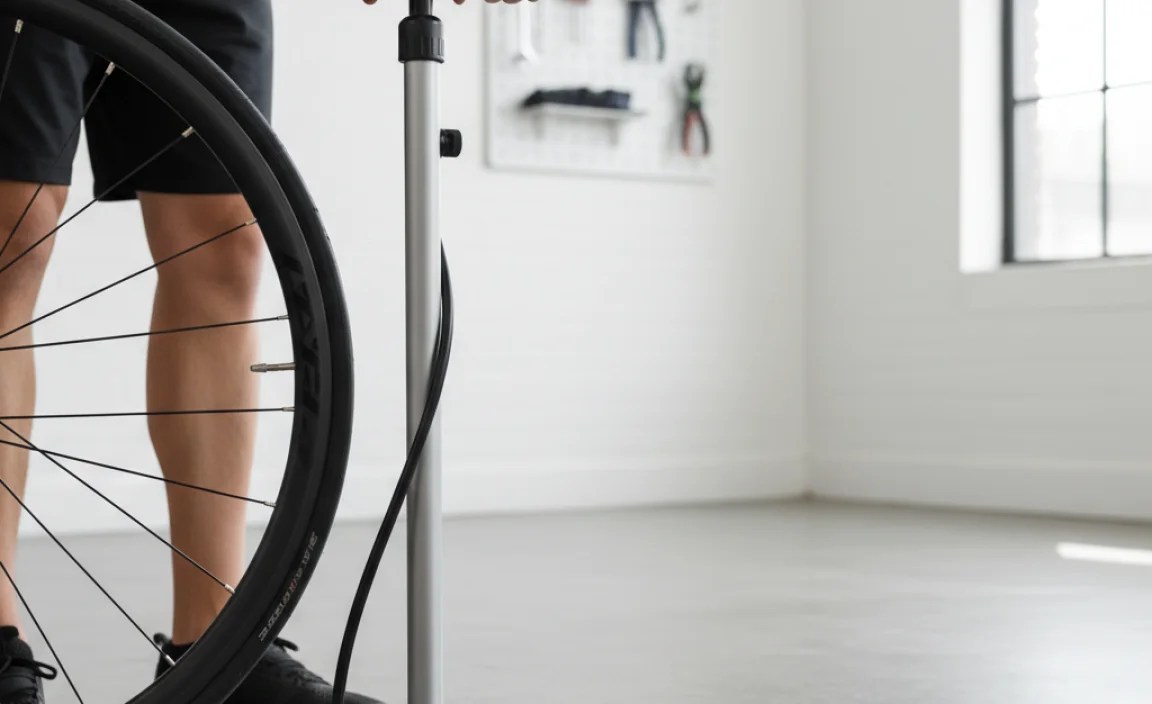
Flat tires happen. It’s part of cycling. But knowing how to use a cycle pump means you can quickly get back on the road or trail. Many new cyclists find bike pumps confusing, but don’t worry! It’s a straightforward process once you understand the basics. This guide will walk you through each step, so you can confidently inflate your tires and keep them at the right pressure.
We’ll cover identifying your valve type, connecting the pump correctly, and pumping efficiently. Plus, we’ll share tips for choosing the right pump and maintaining it for years of reliable use. Let’s get started and keep those tires rolling smoothly!
Understanding Your Bike’s Valves

Before you grab your pump, you need to know what type of valve your bike has. The two most common types are Presta and Schrader. Knowing the difference is crucial for a successful inflation.
Presta Valves
Presta valves are typically found on road bikes and higher-end mountain bikes. They are narrower and have a small locking nut at the tip.
Identifying Features:
- Thin and narrow.
- Have a locking nut that needs to be unscrewed before inflation.
- Often found on road bikes.
Schrader Valves
Schrader valves are the same type you find on car tires. They are wider and more robust than Presta valves.
Identifying Features:
- Wider and sturdier.
- Have a spring-loaded pin in the center.
- Common on mountain bikes, hybrid bikes, and kids’ bikes.
Valve Types Comparison:
| Feature | Presta Valve | Schrader Valve |
|---|---|---|
| Width | Narrow | Wide |
| Locking Mechanism | Locking Nut | Spring-Loaded Pin |
| Typical Bikes | Road Bikes, High-End Mountain Bikes | Mountain Bikes, Hybrid Bikes, Kids’ Bikes |
| Pressure Gauge Compatibility | Requires Adapter for Some Gauges | Direct Compatibility |
| Ease of Inflation | Requires Unscrewing Nut | Direct Inflation |
Choosing the Right Cycle Pump

There are several types of cycle pumps available, each suited for different needs. Here’s a breakdown to help you choose the best one for you.
Floor Pumps (Track Pumps)
Floor pumps are the most common type for home use. They provide a stable base and a long hose for easy inflation. Many have built-in pressure gauges for accurate inflation.
Pros:
- Easy to use and stable.
- Efficient for inflating tires quickly.
- Often include a pressure gauge.
Cons:
- Not portable.
- Can be more expensive than other types.
Hand Pumps
Hand pumps are compact and portable, perfect for carrying on rides. They require more effort to use than floor pumps but are essential for fixing flats on the go.
Pros:
- Portable and lightweight.
- Affordable.
- Ideal for emergency repairs.
Cons:
- Require more effort to inflate tires.
- Can be difficult to reach high pressures.
- Pressure gauges are rare.
CO2 Inflators
CO2 inflators use compressed carbon dioxide cartridges to quickly inflate tires. They are lightweight and fast but require purchasing cartridges.
Pros:
- Extremely fast inflation.
- Very lightweight and compact.
- Great for racing or quick repairs.
Cons:
- Require purchasing CO2 cartridges.
- Can be wasteful if not used correctly.
- Offer less control over pressure.
Electric Pumps
Electric pumps offer hands-free inflation. They are convenient but often more expensive and require a power source.
Pros:
- Hands-free operation.
- Can inflate multiple tires quickly.
- Often include digital pressure gauges.
Cons:
- More expensive.
- Require a power source or battery.
- Less portable than hand pumps.
Step-by-Step Guide: Using a Floor Pump
Floor pumps are ideal for inflating your tires at home. Here’s how to use one effectively.
- Prepare the Valve:
- For Presta valves, unscrew the locking nut at the tip. Press the valve briefly to release any trapped air.
- For Schrader valves, simply remove the valve cap.
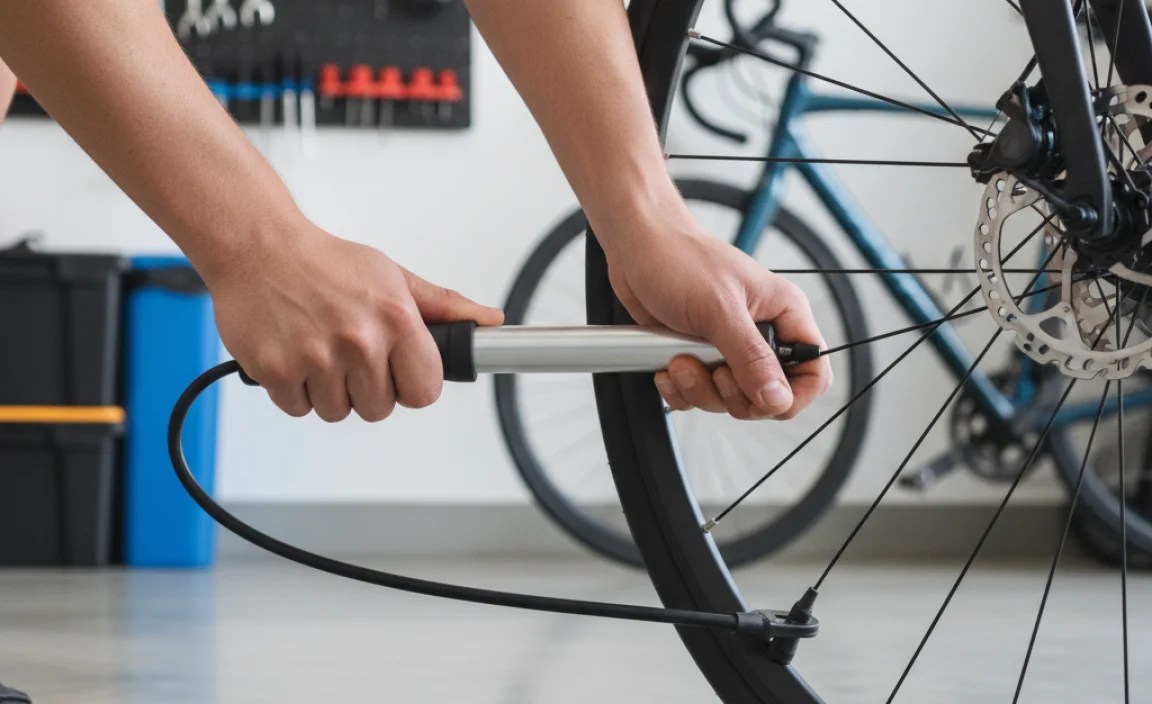
- Attach the Pump Head:
- Most floor pumps have a dual-head that fits both Presta and Schrader valves. Select the correct opening.
- Firmly press the pump head onto the valve, ensuring a secure fit.
- Lock the Pump Head (if applicable):
- Many floor pumps have a lever to lock the pump head onto the valve. Flip the lever to secure the connection.
- Inflate the Tire:
- Stand with your feet on the pump’s base for stability.
- Grip the pump handle firmly and pump up and down in a smooth, steady motion.
- Watch the pressure gauge (if equipped) and inflate to the recommended PSI (pounds per square inch), which is usually printed on the tire sidewall.
- Detach the Pump Head:
- Unlock the lever (if applicable).
- Carefully remove the pump head from the valve.
- Check the Pressure:
- Use a separate pressure gauge to verify the tire pressure if your pump doesn’t have one.
- Adjust as needed.
- Secure the Valve:
- For Presta valves, screw the locking nut back on.
- For Schrader valves, replace the valve cap.
Step-by-Step Guide: Using a Hand Pump
Hand pumps are essential for on-the-go inflation. Here’s how to use one effectively.
- Prepare the Valve:
- For Presta valves, unscrew the locking nut at the tip. Press the valve briefly to release any trapped air.
- For Schrader valves, simply remove the valve cap.
- Attach the Pump Head:
- Most hand pumps have a dual-head or a reversible head for both Presta and Schrader valves. Select the correct opening.
- Firmly press the pump head onto the valve, ensuring a secure fit. Some hand pumps have a lever to lock the head.
- Inflate the Tire:
- Place the pump head against the valve with one hand while gripping the pump body with the other.
- Begin pumping. It may require more effort compared to a floor pump.
- Inflate the tire in short bursts, maintaining a firm grip.
- Check the Pressure:
- Since most hand pumps don’t have a gauge, use a separate pressure gauge to check.
- Squeeze the tire to get a sense of the pressure, but this is less accurate.
- Detach the Pump Head:
- Carefully remove the pump head from the valve.
- Secure the Valve:
- For Presta valves, screw the locking nut back on.
- For Schrader valves, replace the valve cap.
Step-by-Step Guide: Using a CO2 Inflator
CO2 inflators are great for quick fixes, but require careful handling. Here’s how to use one safely and effectively.
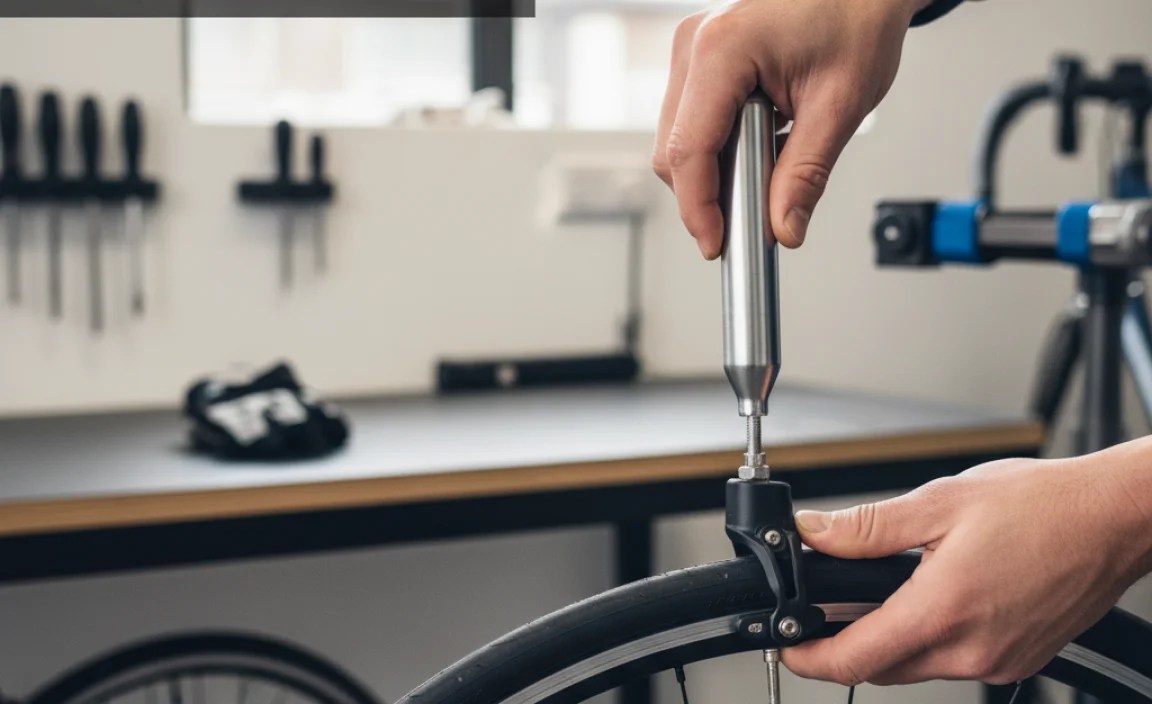
- Prepare the Valve:
- For Presta valves, unscrew the locking nut at the tip. Press the valve briefly to release any trapped air.
- For Schrader valves, simply remove the valve cap.
- Attach the Inflator Head:
- Screw the CO2 cartridge into the inflator head (be careful, it will get cold quickly).
- Firmly press the inflator head onto the valve.
- Inflate the Tire:
- Control the release of CO2 by pressing the inflator head.
- Inflate the tire in short bursts to avoid over-inflation.
- The tire will inflate very quickly, so be ready to stop the flow.
- Detach the Inflator Head:
- Carefully remove the inflator head from the valve.
- Check the Pressure:
- Since CO2 inflators don’t provide pressure readings, check the tire’s firmness. It’s best to replace the CO2 with air from a floor pump later to get the pressure exactly right.
- Secure the Valve:
- For Presta valves, screw the locking nut back on.
- For Schrader valves, replace the valve cap.
Tips for Efficient Pumping
Here are some tips to make pumping easier and more efficient.
- Use Your Body Weight: When using a floor pump, use your body weight to push down on the handle. This reduces strain on your arms.
- Maintain a Smooth Motion: Avoid jerky movements. Smooth, steady pumping is more efficient.
- Check the Hose: Make sure the pump hose is not kinked or damaged.
- Listen for Leaks: If you hear air leaking, check the connection between the pump head and the valve. Readjust if necessary.
- Lubricate the Pump: Periodically lubricate the pump’s internal parts to keep it working smoothly.
Maintaining Your Cycle Pump
Regular maintenance will extend the life of your cycle pump. Here’s what you should do.
- Clean the Pump Head: Keep the pump head clean to ensure a good seal with the valve.
- Check for Wear and Tear: Inspect the hose, handle, and base for any signs of damage.
- Lubricate Moving Parts: Apply a small amount of lubricant to the pump’s moving parts to keep them functioning smoothly.
- Store Properly: Store your pump in a dry place to prevent rust and corrosion.
Troubleshooting Common Pump Problems
Sometimes, you might encounter issues while pumping your tires. Here are some common problems and how to fix them.
| Problem | Possible Cause | Solution |
|---|---|---|
| Pump Not Inflating Tire | Incorrect valve attachment, damaged pump head | Ensure correct valve setting, check and replace pump head |
| Air Leaking During Pumping | Loose connection, damaged valve | Tighten connection, inspect and replace valve |
| Difficulty Pumping | Dry pump cylinder, blocked hose | Lubricate pump cylinder, clear any blockages in the hose |
| Pressure Gauge Not Working | Faulty gauge | Replace pressure gauge |
| Pump Head Won’t Lock | Worn locking mechanism | Replace pump head |
FAQ: Cycle Pump Questions Answered
Here are some frequently asked questions about using cycle pumps.
- What PSI should I inflate my tires to?
- The recommended PSI is usually printed on the sidewall of your tire. Always stay within that range.
- Can I use a car tire pump on my bike?
- Yes, if your bike has Schrader valves. However, car pumps can sometimes overinflate bicycle tires quickly, so be cautious.
- How often should I inflate my bike tires?
- Check and inflate your tires before each ride. Tires lose pressure over time, even when they’re not being used.
- What’s the difference between PSI and BAR?
- PSI (pounds per square inch) and BAR are both units of pressure. 1 BAR is approximately equal to 14.5 PSI.
- Why is my tire pressure so important?
- Correct tire pressure improves rolling efficiency, handling, and prevents pinch flats. Underinflated tires increase the risk of flats and make riding harder, while overinflated tires can reduce grip and comfort.
- What is a pinch flat?
- A pinch flat happens when the tire is underinflated and the tube gets pinched between the rim and the road, causing two small holes in the tube.
- How do I convert my pump to fit different valve types?
- Many modern pumps come with dual-head designs or adapters. Simply switch to the appropriate setting or use the adapter to match your valve type.
Conclusion
Knowing how to use a cycle pump is a fundamental skill for any cyclist. Whether you’re at home or on the road, keeping your tires properly inflated ensures a safer, more efficient, and more enjoyable ride. With the right pump and a little practice, you’ll be able to maintain your tires with confidence. So, keep pumping and enjoy the ride!
“`


