
How to Pump High-Pressure Tires with Mini Pump: Easy!
Pumping high-pressure tires with a mini pump can be tough! Make sure the pump head is securely attached to the valve. Use your body weight to compress the pump and inflate the tire in short bursts. Check the pressure frequently and don’t be afraid to take breaks. With patience and a good technique, you’ll get there!
Have you ever been stuck on the side of the road with a flat tire, wrestling with a mini pump that just won’t seem to inflate your tire to the proper pressure? It’s a common frustration for cyclists. Mini pumps are great for their portability, but getting those high-pressure tires up to spec can feel like a workout in itself! But don’t worry, it’s totally achievable with the right technique and a little patience.
In this guide, I’ll walk you through a step-by-step process to effectively pump your high-pressure tires using a mini pump. We’ll cover everything from choosing the right pump to mastering the pumping technique. By the end, you’ll be able to confidently inflate your tires and get back on the road quickly and safely.
Choosing the Right Mini Pump
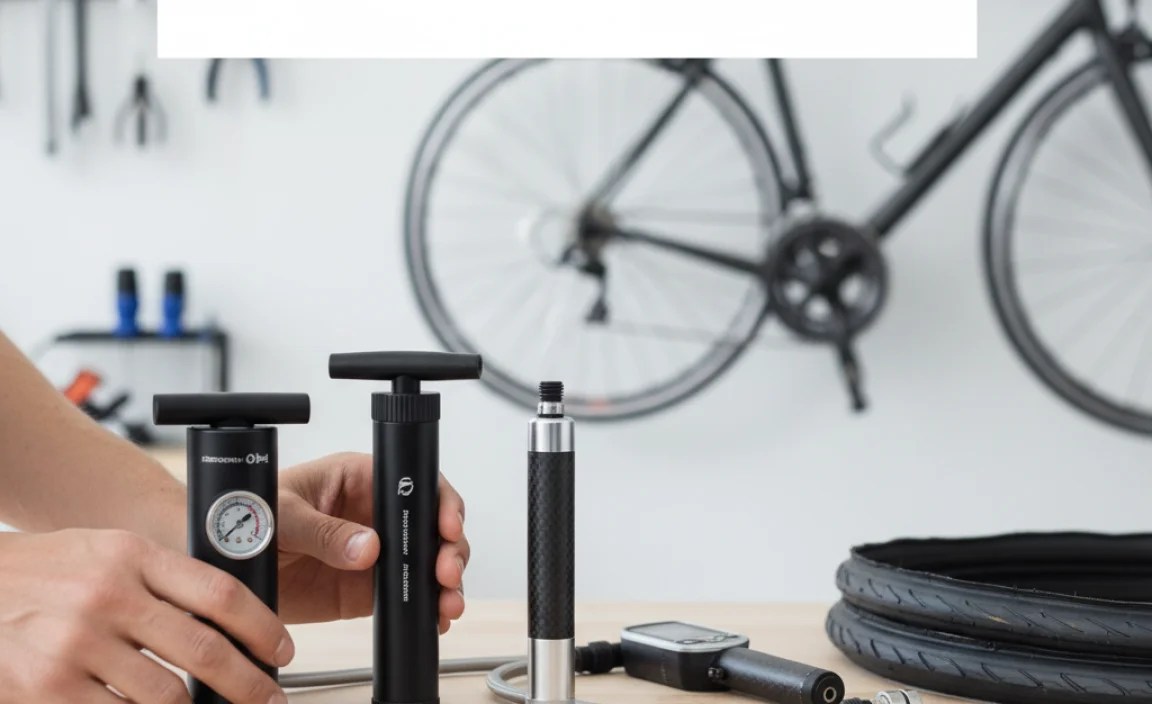
Not all mini pumps are created equal. Selecting the right one can make a big difference in how easily you can inflate your high-pressure tires. Here’s what to look for:
Pump Type
- Hand Pumps: These are the most common type of mini pump. Look for one with a high maximum pressure rating (100+ PSI).
- Hybrid Pumps (Hand/CO2): These pumps offer the option of using CO2 cartridges for faster inflation, which can be helpful for getting to higher pressures quickly.
- Frame-Mounted vs. Pocket Pumps: Frame-mounted pumps attach directly to your bike frame, while pocket pumps are smaller and fit easily in a jersey pocket or saddlebag. Choose based on your preference and storage options.
Features to Look For
- Pressure Gauge: A built-in pressure gauge is extremely helpful for accurately inflating your tires to the desired PSI. Digital gauges are more precise than analog ones.
- Pump Head: Some pumps have heads that work with both Presta and Schrader valves, while others require you to switch internal parts. Look for a pump head that’s easy to use and creates a secure seal.
- Inflation Efficiency: This refers to how much air the pump delivers per stroke. Higher volume pumps will inflate tires faster, but may require more effort at higher pressures.
- Materials and Build Quality: Look for a pump made from durable materials like aluminum alloy. A well-built pump will last longer and be more reliable.
Recommended Mini Pumps
Here are a few highly-rated mini pumps known for their ability to handle high-pressure tires:
| Pump Model | Maximum Pressure | Features |
|---|---|---|
| Lezyne Micro Floor Drive HP | 160 PSI | Foot peg, integrated gauge, ABS chuck |
| Topeak Road Morph G Mini Pump | 160 PSI | Fold-out foot pad, gauge, flexible hose |
| Blackburn Core Pro Mini-Pump | 120 PSI | Compact, lightweight, reversible Presta/Schrader |
Step-by-Step Guide to Pumping High-Pressure Tires

Now, let’s get into the actual process of pumping your tires. Follow these steps for the best results:
1. Prepare Your Bike and Pump
- Inspect the Tire: Before you start, check the tire for any debris (glass, thorns, etc.) that may have caused the flat. Remove anything you find to prevent another puncture.
- Locate the Valve: Identify whether your tire has a Presta or Schrader valve. Presta valves are narrower and have a small locking nut at the tip, while Schrader valves are wider and similar to those found on car tires.
- Prepare the Pump Head: Make sure the pump head is configured correctly for your valve type. Some pumps have a reversible head or require you to unscrew and flip internal parts.
2. Attach the Pump Head to the Valve
- Presta Valve: Unscrew the locking nut at the tip of the valve. Gently push the valve stem in to ensure it’s not stuck. Press the pump head firmly onto the valve, ensuring a secure seal. Some pump heads have a lever that you need to engage to lock it in place.
- Schrader Valve: Simply press the pump head firmly onto the valve. You should feel it click into place.
- Check the Seal: Before you start pumping, make sure there are no air leaks around the valve. If you hear hissing, readjust the pump head until you get a good seal.
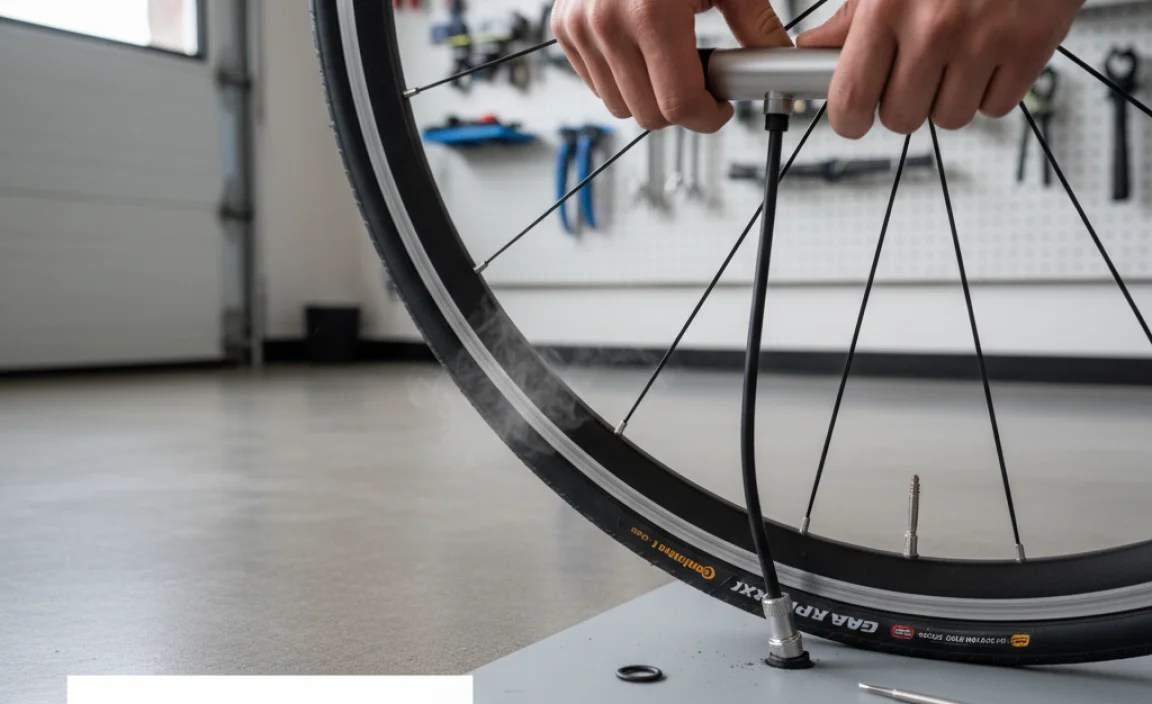
3. Start Pumping
- Position Yourself: Find a stable position. You may want to brace the tire against your leg or a wall for better leverage.
- Use Your Body Weight: Mini pumps require more effort than floor pumps. Use your body weight to help compress the pump. Lean over the pump and push down with your arms and upper body.
- Short, Consistent Strokes: Use short, consistent strokes rather than long, forceful ones. This will help you maintain a steady pressure and avoid overheating the pump.
- Listen for Leaks: Pay attention to any hissing sounds that may indicate a leak. If you hear a leak, stop pumping and readjust the pump head.
4. Monitor the Pressure
- Use a Gauge: If your pump has a built-in gauge, monitor the pressure as you pump. If not, stop periodically and use a separate pressure gauge to check the pressure.
- Target Pressure: Check the sidewall of your tire for the recommended pressure range (usually listed in PSI). Inflate the tire to the desired pressure, erring on the lower side if you’re unsure.
- Don’t Overinflate: Overinflating can cause the tire to burst. Always stay within the recommended pressure range.
5. Detach the Pump Head
- Presta Valve: Disengage the locking lever (if applicable) and gently remove the pump head. Screw the locking nut back onto the valve stem.
- Schrader Valve: Simply pull the pump head straight off the valve.
- Check the Tire: Give the tire a squeeze to make sure it feels firm.
Tips and Tricks for Easier Inflation

Pumping high-pressure tires with a mini pump can be challenging, but these tips can make the process easier:
- Use a Foot Peg: Some mini pumps have a fold-out foot peg that allows you to stabilize the pump with your foot. This can make pumping more efficient and less tiring.
- Flexible Hose: A pump with a flexible hose can make it easier to attach the pump head to the valve, especially in tight spaces.
- Take Breaks: If you’re struggling to reach the desired pressure, take breaks to avoid overheating the pump and tiring yourself out.
- Lube the Piston: Periodically lubricating the pump piston with a small amount of silicone grease can help it move more smoothly and efficiently.
- Practice Makes Perfect: The more you practice, the better you’ll become at using a mini pump. Try inflating your tires at home before you need to do it on the road.
Troubleshooting Common Issues
Here are some common problems you might encounter when using a mini pump, along with solutions:
| Issue | Possible Cause | Solution |
|---|---|---|
| Pump won’t attach to valve | Incorrect valve type setting | Check and adjust the pump head setting to match your valve type (Presta or Schrader). |
| Air leaking around valve | Poor seal | Ensure the pump head is securely attached. Try pressing harder or readjusting the position. Check the valve core for damage. |
| Pump gets too hot | Overuse without breaks | Take breaks to allow the pump to cool down. |
| Difficulty reaching high pressure | Pump volume too low | Consider a higher-volume pump or use CO2 inflator for the final PSI. |
| Valve stem is damaged | Bent or broken valve stem | Replace the inner tube or tire. |
CO2 Inflators: An Alternative Option

CO2 inflators offer a quick and easy way to inflate your tires, especially when you need to reach high pressures quickly. They use cartridges of compressed carbon dioxide to fill the tire in seconds.
Pros of CO2 Inflators:
- Speed: Inflate tires much faster than hand pumps.
- Convenience: Compact and easy to carry.
- Effortless: Require minimal physical effort.
Cons of CO2 Inflators:
- One-Time Use: Each cartridge can only be used once.
- Cost: Cartridges need to be purchased regularly.
- Environmental Impact: CO2 cartridges contribute to greenhouse gas emissions.
- Potential for Freeze Burn: CO2 can cause freeze burn if it comes into contact with skin.
How to Use a CO2 Inflator:
- Attach the inflator head to the valve.
- Screw in the CO2 cartridge to puncture it.
- Control the flow of CO2 with the inflator valve.
- Check the pressure with a gauge.
Important Note: Always use a controlled CO2 inflator to avoid over-inflation. Some inflators release all the CO2 at once, which can be dangerous.
Maintaining Your Mini Pump
Proper maintenance will extend the life of your mini pump and ensure it’s always ready when you need it. Here are some tips:
- Clean Regularly: Wipe down the pump with a damp cloth to remove dirt and grime.
- Lubricate the Piston: Apply a small amount of silicone grease to the piston every few months to keep it moving smoothly.
- Check the Seals: Inspect the seals around the pump head and piston for wear and tear. Replace them if necessary.
- Store Properly: Store the pump in a dry place to prevent rust and corrosion.
FAQ: Pumping High-Pressure Tires with a Mini Pump
What PSI should my road bike tires be?
The recommended PSI (pounds per square inch) for road bike tires typically ranges from 80 to 130 PSI. Check the sidewall of your tire for the manufacturer’s recommended range. It’s crucial to stay within this range to ensure optimal performance, comfort, and safety.
Why is it so hard to pump my tires with a mini pump?
Mini pumps are designed for portability, not efficiency. They have a small volume, meaning they pump less air per stroke compared to a floor pump. This requires more strokes and effort to reach higher pressures. Using proper technique, like leveraging your body weight and taking breaks, can help.
Can I use a mini pump for mountain bike tires?
Yes, you can, but mountain bike tires usually require lower pressures (25-40 PSI) and higher volume. A mini pump designed for high volume is preferable. Some mountain bikers also carry CO2 inflators for quick inflation on the trails.
How do I know if my pump head is compatible with my valve?
Most modern mini pumps have heads that are either reversible or adaptable to fit both Presta and Schrader valves. Check the pump head for markings or instructions on how to switch between valve types. Ensure the head is securely attached to avoid leaks.
What is the difference between Presta and Schrader valves?
Presta valves are narrow, with a small locking nut at the tip, commonly found on road bikes. Schrader valves are wider, similar to car tire valves, and often used on mountain and hybrid bikes. Presta valves allow for higher pressures, while Schrader valves are more robust and easier to inflate at gas stations.
Is it better to use a mini pump or a CO2 inflator?
It depends on the situation. Mini pumps are reliable and reusable but require more effort. CO2 inflators are faster and easier but require purchasing cartridges and are single-use. Many cyclists carry both: a mini pump for everyday use and a CO2 inflator for emergencies.
How often should I check my tire pressure?
Ideally, check your tire pressure before every ride. Tires lose pressure over time, and riding with under-inflated tires can lead to pinch flats, reduced efficiency, and poor handling. Consistent monitoring ensures optimal performance and safety.
Conclusion
Pumping high-pressure tires with a mini pump might seem daunting at first, but with the right technique, the proper pump, and a little practice, you can master it. Remember to choose a pump with a high-pressure rating and a secure pump head. Use your body weight to your advantage, take breaks when needed, and always monitor the pressure to avoid overinflation.
Whether you’re a seasoned cyclist or just starting out, being able to inflate your tires on the go is a valuable skill. So, get out there, practice your pumping technique, and enjoy the ride knowing you’re prepared for anything the road throws your way. And remember, a well-maintained bike is a happy bike, and a happy bike means a happy rider!


