
How to Switch Hose Between Two Pumps: Easy Guide
Quick Summary:
Switching a hose between two pumps is simple! First, release any pressure in both pumps. Then, detach the hose from the first pump by unscrewing or unclipping it. Quickly attach the hose to the second pump, ensuring a snug fit by tightening the connection. Check for leaks before using the second pump to inflate. This ensures you can easily move one hose between multiple pumps as needed.
Ever found yourself needing to inflate a tire, but your favorite pump is in the garage while you’re out on the road? Or perhaps you have a floor pump and a mini-pump and want to use the same high-quality hose on both? Switching a hose between two pumps might seem tricky, but it’s actually a straightforward process. Many cyclists run into this situation, and it’s a real time-saver to know how to do it right.
In this guide, I’ll walk you through each step, ensuring you can quickly and efficiently swap your hose between pumps without any hassle. We’ll cover everything from preparing your pumps to checking for leaks, making the whole process a breeze. Let’s get started!
Understanding Bike Pump Hoses and Connections

Before diving into the steps, let’s understand the basics of bike pump hoses and connections. Knowing these details will make the switching process smoother and prevent any damage to your equipment.
Types of Hoses
Bike pump hoses come in various materials, each with its own set of advantages:
- Rubber Hoses: These are flexible and durable but can degrade over time, especially with exposure to sunlight and extreme temperatures.
- Braided Hoses: Often made with stainless steel or nylon, these hoses are more resistant to wear and tear. They offer better pressure resistance and longer lifespans.
- Hybrid Hoses: Combining materials like rubber and polymer, these hoses aim to offer the best of both worlds—flexibility and durability.
Types of Connections
Understanding the different types of connections is crucial for a seamless switch. Here are the most common types:
- Threaded Connections: These screw onto the pump and hose, providing a secure and airtight seal. They are common in high-pressure floor pumps.
- Quick-Release Couplers: These allow you to quickly attach and detach the hose with a simple push or click. They are often found on mini-pumps and some high-end floor pumps.
- Push-Fit Connections: These involve pushing the hose onto a fitting until it locks in place. They are easy to use but may not be as secure as threaded connections.
Tools and Materials You’ll Need

Before you start, gather the necessary tools and materials. Having everything on hand will make the process quicker and more efficient.
- Two Bike Pumps: The pumps you want to switch the hose between.
- Adjustable Wrench: For loosening or tightening threaded connections.
- Clean Rags: To wipe away any dirt or grime.
- Teflon Tape (Optional): For creating a tighter seal on threaded connections.
- Small Container of Water: For testing for leaks after the switch.
Step-by-Step Guide to Switching a Hose Between Two Pumps

Now, let’s get into the detailed steps. Follow these instructions carefully to ensure a smooth and successful hose switch.
Step 1: Prepare the Pumps
First, ensure both pumps are ready for the switch. This involves releasing any pressure and cleaning the connection points.
- Release Pressure:
- For floor pumps, release the pressure by opening the valve head or using the pressure release button if available.
- For mini-pumps, carefully detach the hose from the tire valve to release any remaining pressure.
- Clean Connection Points:
- Use a clean rag to wipe away any dirt, grime, or debris from the hose and pump connection points. This ensures a clean and secure connection.
Step 2: Detach the Hose from the First Pump
Next, carefully detach the hose from the first pump. The method will depend on the type of connection.
- Threaded Connections:
- Use an adjustable wrench to loosen the hose connection. Turn the wrench counterclockwise to loosen the fitting.
- Once loose, unscrew the hose completely by hand. Be careful not to cross-thread the connection.
- Quick-Release Couplers:
- Locate the release mechanism on the coupler. This may be a button, lever, or collar.
- Press the button, flip the lever, or pull back the collar to release the hose. Gently pull the hose away from the pump.
- Push-Fit Connections:
- Locate the release collar or button near the connection point.
- Press the release mechanism while gently pulling the hose away from the pump.
Step 3: Attach the Hose to the Second Pump
Now, attach the hose to the second pump. Again, the method will depend on the type of connection.
- Threaded Connections:
- Align the hose fitting with the threaded connection on the second pump.
- Screw the hose onto the pump by hand, turning it clockwise. Ensure the threads align properly to avoid cross-threading.
- Once hand-tight, use an adjustable wrench to tighten the connection further. Be careful not to overtighten, as this can damage the threads.
- Quick-Release Couplers:
- Align the hose coupler with the corresponding fitting on the second pump.
- Push the hose into the coupler until you hear a click or feel it lock into place. Ensure the connection is secure by gently pulling on the hose.
- Push-Fit Connections:
- Align the hose with the fitting on the second pump.
- Push the hose firmly onto the fitting until it locks into place. Ensure the connection is secure by gently pulling on the hose.
Step 4: Check for Leaks
After attaching the hose, it’s crucial to check for leaks to ensure a secure and airtight connection.
- Visual Inspection:
- Inspect the connection point for any visible gaps or misalignments.
- Water Test:
- Fill a small container with water.
- Apply a small amount of water to the connection point.
- Look for bubbles forming, which indicate a leak.
- Pressure Test:
- Attach the pump to a tire valve.
- Pump a small amount of air into the tire.
- Listen for any hissing sounds near the connection point, which indicate a leak.
- If you detect a leak, tighten the connection further or use Teflon tape to create a tighter seal.
Step 5: Final Adjustments
If you find any leaks, make the necessary adjustments to ensure a secure connection.
- Tighten Connections:
- If you detect a leak at a threaded connection, use an adjustable wrench to tighten the fitting slightly. Be careful not to overtighten.
- Use Teflon Tape:
- If tightening the connection doesn’t solve the leak, remove the hose and apply Teflon tape to the threads. Wrap the tape clockwise around the threads, overlapping each layer.
- Reattach the hose and tighten the connection.
- Check Again:
- Repeat the leak test to ensure the connection is now airtight.
Tips for Maintaining Your Bike Pump Hose

Proper maintenance of your bike pump hose will extend its lifespan and ensure reliable performance. Here are some tips to keep your hose in good condition:
- Regular Cleaning: Wipe down the hose with a clean, damp cloth to remove dirt and grime.
- Proper Storage: Store the hose in a cool, dry place away from direct sunlight and extreme temperatures.
- Avoid Kinking: Avoid bending or kinking the hose, as this can weaken the material and cause leaks.
- Inspect Regularly: Check the hose regularly for signs of wear and tear, such as cracks, fraying, or bulges.
- Replace When Necessary: If you notice any significant damage, replace the hose immediately to prevent further issues.
Troubleshooting Common Issues
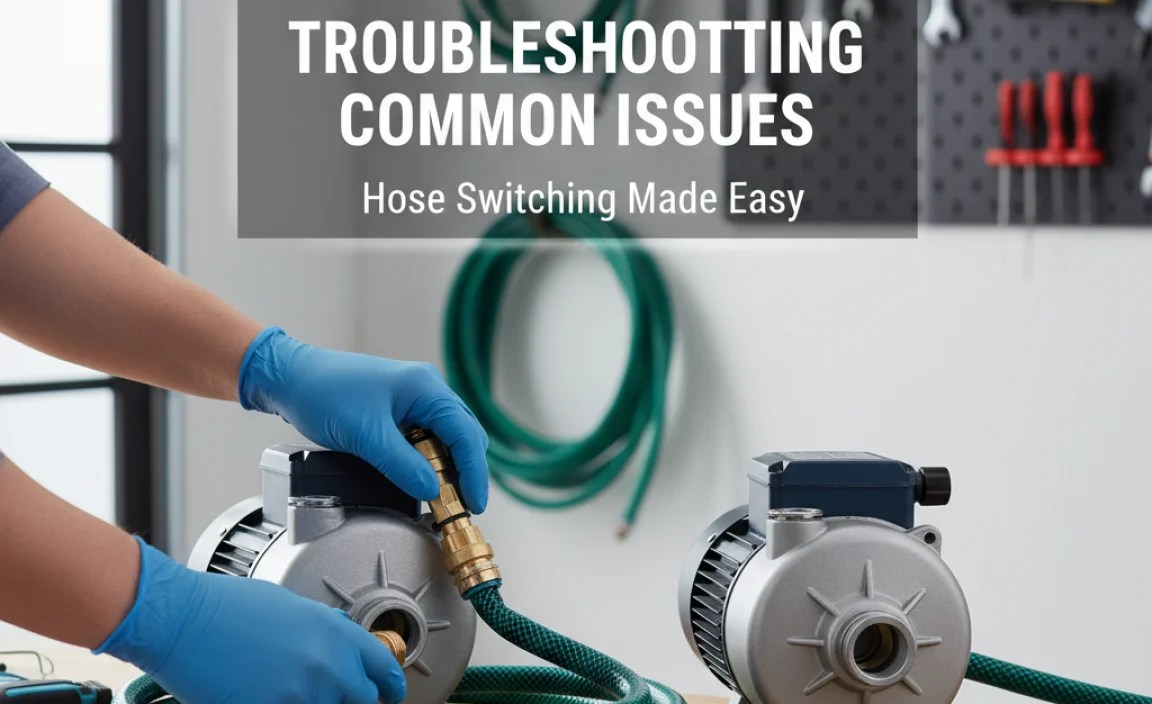
Even with careful execution, you might encounter some issues during the hose switching process. Here are some common problems and how to solve them:
| Issue | Possible Cause | Solution |
|---|---|---|
| Hose won’t detach | Corrosion or tight connection | Use penetrating oil and a wrench for leverage |
| Hose won’t attach | Cross-threading or incorrect fitting | Align threads carefully or use the correct adapter |
| Leak at the connection | Loose connection or damaged threads | Tighten the connection or use Teflon tape |
| Hose is damaged | Wear and tear | Replace the hose |
Advantages and Disadvantages of Switching Hoses
Switching hoses between two pumps can be a convenient solution, but it has its pros and cons.
Advantages
- Cost-Effective: Allows you to use a high-quality hose on multiple pumps without buying additional hoses.
- Convenience: Enables you to use your preferred hose on different pumps as needed.
- Space-Saving: Reduces the need to store multiple hoses.
Disadvantages
- Time-Consuming: Switching hoses can take time, especially if the connections are tight or difficult to access.
- Wear and Tear: Frequent switching can increase wear and tear on the hose and connections.
- Potential for Damage: Improper handling during the switch can damage the hose or pump.
Alternatives to Switching Hoses
If you find switching hoses too cumbersome, here are some alternative solutions:
- Purchase Additional Hoses: Buy separate hoses for each pump. This eliminates the need to switch hoses but requires a higher initial investment.
- Use Adapters: Use adapters to make your existing hose compatible with different pumps. This can be a cost-effective solution if the pumps have different connection types.
- Invest in a Universal Hose: Some hoses are designed to be compatible with a wide range of pumps and valves. Consider purchasing one of these for added convenience.
Choosing the Right Bike Pump for Your Needs
Selecting the right bike pump is essential for maintaining your tires at the correct pressure. Here’s a comparison table to help you decide which type suits your needs:
| Type of Pump | Pros | Cons | Best For |
|---|---|---|---|
| Floor Pump | High pressure, stable, easy to use | Bulky, not portable | Home use, achieving high pressures |
| Mini-Pump | Portable, lightweight | Requires more effort, lower pressure | On-the-go repairs, emergencies |
| CO2 Inflator | Fast inflation, very portable | Single-use cartridges, can be wasteful | Quick fixes during races, emergencies |
| Frame-Mounted Pump | Convenient, always with the bike | Can be bulky, may affect aerodynamics | Everyday commuting, touring |
Recommended Bike Pump Hoses
If you’re looking to upgrade or replace your bike pump hose, here are some recommendations:
- Lezyne ABS Flex Hose: Known for its durability and compatibility with both Presta and Schrader valves. Lezyne Hoses
- Topeak SmartHead Upgrade Kit: Offers a versatile and reliable connection for various pumps. Topeak Upgrade Kits
- Silca Hiro V.2 Chuck: A high-end option for serious cyclists, providing precise and secure inflation. Silca Pump Parts
FAQ: Switching Hose Between Two Pumps
Here are some frequently asked questions about switching hoses between two pumps:
1. Can I use any hose with any pump?
No, not all hoses are compatible with all pumps. You need to ensure that the hose connection matches the pump connection. Using adapters can help bridge the gap between different connection types.
2. What if the hose is too tight to remove?
If the hose is too tight, try using a penetrating oil to loosen the connection. Apply the oil and let it sit for a few minutes before attempting to remove the hose with a wrench.
3. How often should I replace my bike pump hose?
You should replace your bike pump hose when you notice signs of wear and tear, such as cracks, fraying, or bulges. Regular inspection will help you identify when a replacement is needed.
4. Is it safe to use Teflon tape on bike pump connections?
Yes, Teflon tape is safe to use on bike pump connections. It can help create a tighter seal and prevent leaks. Just make sure to wrap the tape correctly around the threads.
5. What should I do if I cross-thread the connection?
If you cross-thread the connection, stop immediately. Forcing the connection can damage the threads on both the hose and the pump. Try realigning the threads carefully and reattaching the hose.
6. Can I switch hoses between a floor pump and a mini-pump?
Yes, you can switch hoses between a floor pump and a mini-pump, provided that the connections are compatible or you have the necessary adapters. This allows you to use your preferred hose on both types of pumps.
7. What type of hose is best for a bike pump?
Braided hoses are generally considered the best for bike pumps due to their durability and resistance to wear and tear. They offer better pressure resistance and a longer lifespan compared to rubber hoses.
Conclusion
Switching a hose between two pumps is a practical skill that can save you time and money. By understanding the types of hoses and connections, following the step-by-step guide, and maintaining your equipment, you can easily swap hoses whenever needed. Remember to check for leaks and make necessary adjustments to ensure a secure connection. Whether you’re a seasoned cyclist or just starting, mastering this technique will empower you to keep your tires properly inflated and enjoy a smoother ride. Happy cycling!


