
How to Eliminate Cycling in Your Pump Switch: A Simple Guide
Quick Summary: Stop your pump switch from turning on and off repeatedly by adjusting the pressure switch settings. First, turn off power. Then, locate the pressure switch and adjust the cut-in and cut-out pressure settings. Clean the pressure switch nipple, check the tank’s air pre-charge, and ensure proper pipe sizing. These steps will stabilize your water pressure and prevent the pump from short cycling.
Is your well pump switch driving you crazy by constantly cycling on and off? This issue, known as “short cycling,” not only wastes energy but can also damage your pump over time. It’s a common problem for many homeowners, but don’t worry! With a few simple steps, you can troubleshoot and fix this issue yourself. This guide will walk you through each step, helping you restore consistent water pressure and extend the life of your pump. Let’s get started!
Understanding Pump Cycling

Before diving into the solutions, let’s understand why your pump might be cycling. Pump cycling, or short cycling, refers to the rapid and frequent turning on and off of your well pump. This usually indicates a problem with water pressure regulation or the pump’s ability to maintain consistent pressure.
Common Causes of Pump Cycling
- Incorrect Pressure Switch Settings: The pressure switch controls when the pump turns on and off. If the settings are too close together, the pump may cycle rapidly.
- Low Air Charge in the Pressure Tank: The pressure tank stores water under pressure, providing a buffer between pump cycles. A low air charge reduces this buffer, causing the pump to cycle more often.
- Clogged or Restricted Pipes: Restrictions in the pipes can cause pressure fluctuations, leading to cycling.
- Faulty Check Valve: A check valve prevents water from flowing back into the well. If it fails, the pump may cycle to refill the pressure tank constantly.
- Waterlogged Pressure Tank: Over time, pressure tanks can become waterlogged, reducing their air cushion and causing rapid cycling.
- Well Issues: Low well yield or a failing well can cause the pump to struggle to maintain pressure, leading to short cycling.
Step-by-Step Guide to Eliminating Pump Cycling

Follow these steps to diagnose and fix the cycling issue in your pump switch.
Step 1: Safety First – Turn Off the Power
Before you start any work, it’s crucial to turn off the power to your pump. Locate the circuit breaker that controls the pump and switch it to the “off” position. This prevents any electrical accidents during the repair process.
Step 2: Locate the Pressure Switch
The pressure switch is usually located near the pressure tank and is connected to the water line. It’s a small, box-shaped device with electrical wires running to it. Once you’ve found it, remove the cover to access the adjustment screws.
Step 3: Adjust the Pressure Switch Settings
The pressure switch has two main settings: cut-in pressure (the pressure at which the pump turns on) and cut-out pressure (the pressure at which the pump turns off). Adjusting these settings can help eliminate cycling.
- Identify the Adjustment Screws: Inside the pressure switch, you’ll find two screws. One controls the pressure range (the difference between cut-in and cut-out), and the other controls the overall pressure setting.
- Increase the Pressure Range: To increase the pressure range, turn the range screw (the larger of the two) clockwise. A quarter turn is usually enough to start. This increases the difference between the cut-in and cut-out pressures, reducing the likelihood of short cycling.
- Adjust the Overall Pressure: If necessary, adjust the smaller screw to fine-tune the overall pressure. Turning it clockwise increases both the cut-in and cut-out pressures.
- Test the Settings: After making adjustments, turn the power back on and observe the pump. Watch the pressure gauge to see if the pump cycles less frequently. If it still cycles, repeat the adjustment process until you achieve stable pressure.
Step 4: Clean the Pressure Switch Nipple
The pressure switch is connected to the water line via a small pipe or nipple. This nipple can become clogged with sediment and debris, causing inaccurate pressure readings and cycling.
- Turn Off the Water: Before disconnecting the pressure switch, turn off the water supply to the pump system.
- Disconnect the Pressure Switch: Carefully disconnect the pressure switch from the nipple.
- Clean the Nipple: Use a small wire or pipe cleaner to remove any sediment or debris from the nipple. You can also use a vinegar solution to dissolve mineral buildup.
- Reassemble: Reconnect the pressure switch to the clean nipple and turn the water supply back on.
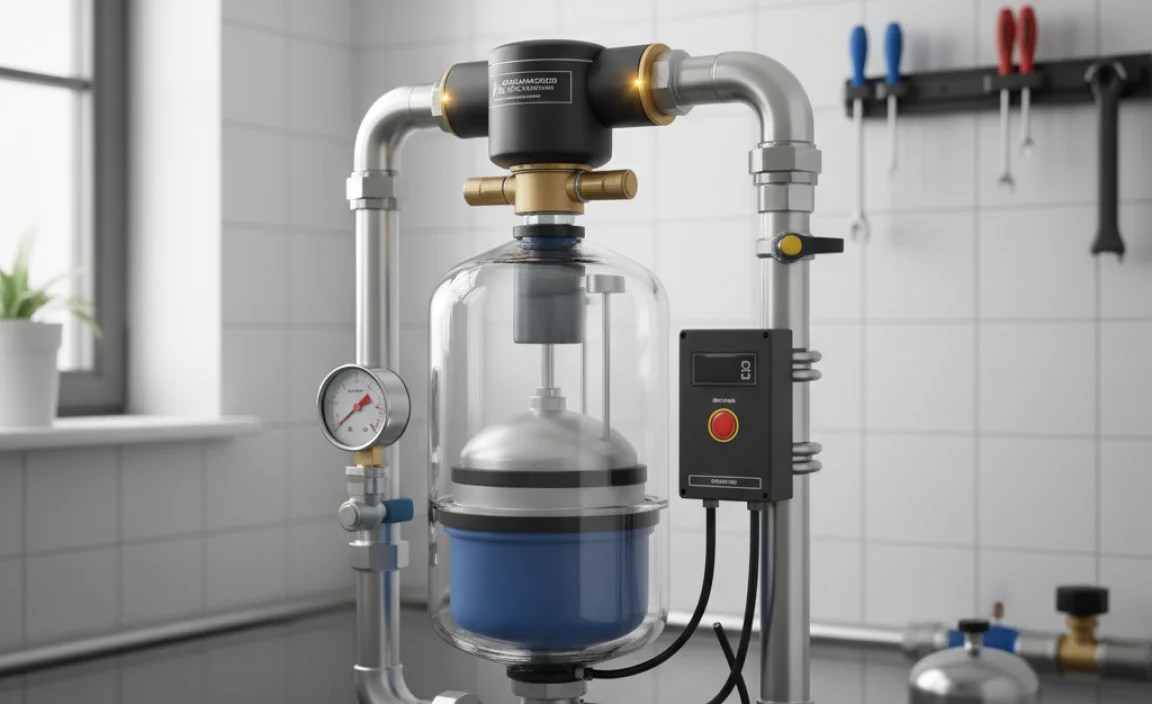
Step 5: Check the Tank’s Air Pre-Charge
The pressure tank stores water under pressure, providing a buffer between pump cycles. The tank has an air pre-charge that needs to be set correctly for the system to function properly.
- Locate the Schrader Valve: Find the Schrader valve (similar to a tire valve) on top of the pressure tank.
- Check the Pressure: Use a tire pressure gauge to check the air pressure in the tank. The air pressure should be 2 PSI below the cut-in pressure of your pump switch. For example, if your cut-in pressure is 40 PSI, the air pressure should be 38 PSI.
- Adjust the Air Pressure: If the air pressure is too low, use an air compressor to add air to the tank. If it’s too high, release some air by pressing the valve core.
Step 6: Inspect the Check Valve
The check valve prevents water from flowing back into the well. If it’s faulty, the pump will have to work harder to maintain pressure, leading to cycling.
- Locate the Check Valve: The check valve is usually located near the pump or in the well.
- Inspect the Valve: Check for any signs of damage or corrosion. If the valve is easily accessible, you can remove it and inspect it more closely.
- Test the Valve: To test the valve, try blowing air through it in both directions. It should only allow air to flow in one direction. If air can flow in both directions, the valve is faulty and needs to be replaced.
- Replace if Necessary: Replace the check valve with a new one if it’s faulty.
Step 7: Check for Leaks
Even small leaks in your plumbing system can cause pressure drops, leading to pump cycling. Inspect all pipes, fittings, and fixtures for any signs of leaks.
- Check Faucets and Toilets: Make sure there are no drips or leaks from faucets or toilets. A running toilet can cause significant water loss and pressure fluctuations.
- Inspect Pipes and Fittings: Look for any signs of water stains or corrosion on pipes and fittings. Tighten any loose connections and repair any leaks.
- Check the Pressure Tank: Inspect the pressure tank for any signs of leaks or damage.
Step 8: Ensure Proper Pipe Sizing
Using pipes that are too small can restrict water flow and cause pressure fluctuations. Make sure your pipes are adequately sized for your pump and water usage.
Consult a plumbing professional to determine the correct pipe size for your system. Replacing undersized pipes can improve water pressure and reduce pump cycling.
Step 9: Monitor and Adjust
After making these adjustments, monitor your pump system for a few days to ensure the cycling issue is resolved. If the pump still cycles, you may need to make further adjustments or consult a professional.
Troubleshooting Table
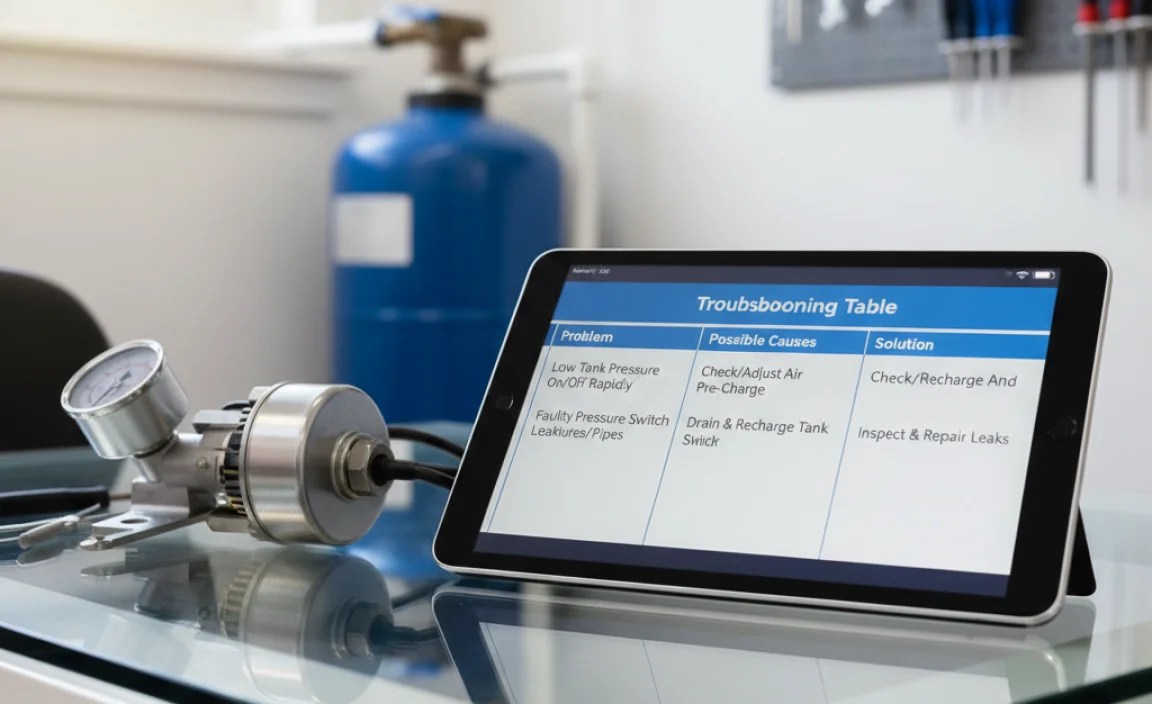
Use this table to quickly diagnose and address common issues that cause pump cycling.
| Problem | Possible Cause | Solution |
|---|---|---|
| Pump cycles frequently | Incorrect pressure switch settings | Adjust cut-in and cut-out pressures |
| Pump cycles and pressure is low | Low air charge in pressure tank | Check and adjust air pre-charge |
| Pump cycles and pressure fluctuates | Clogged pressure switch nipple | Clean the nipple |
| Pump runs constantly | Faulty check valve | Replace the check valve |
| Pump cycles and water is discolored | Well issues | Consult a well professional |
| Pump cycles and there is water near the tank | Leaking pressure tank | Replace the pressure tank |
Advanced Solutions
If the basic troubleshooting steps don’t resolve the cycling issue, consider these advanced solutions.
Variable Frequency Drives (VFDs)
A VFD can regulate the speed of your pump motor, providing consistent water pressure and reducing energy consumption. VFDs can be expensive but offer significant benefits in terms of performance and efficiency.
Constant Pressure Systems
Constant pressure systems use a combination of a VFD and a pressure sensor to maintain a constant water pressure, regardless of demand. These systems eliminate pump cycling and provide a more consistent water supply.
Tools You’ll Need
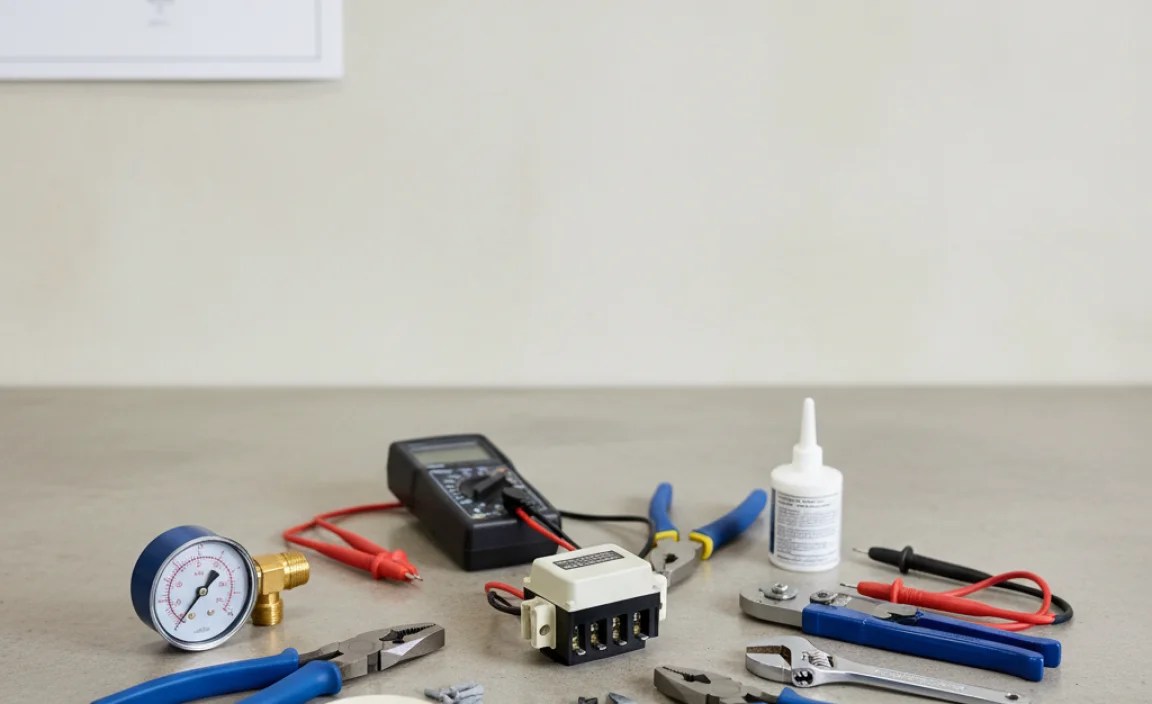
Having the right tools on hand will make the troubleshooting process much easier.
- Screwdrivers: For adjusting the pressure switch settings.
- Wrenches: For disconnecting and reconnecting pipes and fittings.
- Tire Pressure Gauge: For checking the air pressure in the pressure tank.
- Air Compressor: For adding air to the pressure tank.
- Wire Brush or Pipe Cleaner: For cleaning the pressure switch nipple.
- Multimeter: For testing electrical connections (use with caution and only if you’re comfortable working with electricity).
Why Preventing Pump Cycling Matters
Preventing pump cycling is crucial for the longevity and efficiency of your well pump system. Here’s why:
- Extends Pump Life: Frequent cycling puts unnecessary wear and tear on the pump motor, reducing its lifespan.
- Saves Energy: Each pump start consumes extra energy. Reducing cycling saves energy and lowers your electricity bill.
- Maintains Consistent Water Pressure: Eliminating cycling provides a more stable and reliable water supply.
- Prevents Plumbing Damage: Rapid pressure fluctuations can damage pipes and fittings over time.
Pros and Cons of DIY vs. Professional Help
Deciding whether to tackle the pump cycling issue yourself or hire a professional depends on your comfort level and the complexity of the problem.
| Factor | DIY | Professional |
|---|---|---|
| Cost | Lower (parts and tools only) | Higher (labor and parts) |
| Time | Can be time-consuming | Faster resolution |
| Expertise | Requires some knowledge and experience | Expert diagnosis and repair |
| Risk | Potential for mistakes or injury | Lower risk of errors |
| Warranty | No warranty on labor | Warranty on labor and parts |
FAQ: Eliminating Pump Cycling
Here are some frequently asked questions about pump cycling and how to address it.
What is pump short cycling?
Pump short cycling is when your well pump rapidly turns on and off, rather than running steadily. This is usually a sign of a problem with your water pressure system.
Why is short cycling bad for my pump?
Short cycling causes extra wear and tear on the pump motor, reducing its lifespan and increasing the risk of failure.
How do I know if my pressure tank is waterlogged?
If your pressure tank is waterlogged, it will feel heavy and full of water when you tap on it. You may also notice frequent pump cycling and low water pressure.
What should the air pressure be in my pressure tank?
The air pressure in your pressure tank should be 2 PSI below the cut-in pressure of your pump switch. Check your switch settings and adjust the air pressure accordingly.
Can a leaky toilet cause pump cycling?
Yes, a leaky toilet can cause pump cycling by continuously drawing water and reducing the pressure in the system.
How often should I check my pressure tank’s air charge?
You should check your pressure tank’s air charge at least once a year, or more frequently if you notice signs of pump cycling or low water pressure.
When should I call a professional?
If you’ve tried the troubleshooting steps and your pump is still cycling, or if you’re not comfortable working with electricity or plumbing, it’s best to call a qualified professional.
Conclusion
Eliminating cycling in your pump switch is a manageable task with the right knowledge and tools. By understanding the causes of cycling and following these step-by-step instructions, you can restore consistent water pressure, extend the life of your pump, and save energy. Remember to prioritize safety and consult a professional if you encounter any difficulties. Happy pumping!
“`


