
How to Tighten Hose Fittings Properly: Easy Guide
Quick Summary:
To tighten hose fittings properly, start by inspecting the threads for damage. Use the correct size wrench to grip the fitting securely and turn clockwise. Avoid overtightening, which can damage the fitting or hose. If leaks persist, try adding Teflon tape or replacing the fitting entirely. Regularly check fittings for tightness to prevent future leaks.
Hose fittings are crucial for connecting hoses in many systems, from your garden hose to your bike pump. A loose fitting can cause leaks, reducing pressure and wasting water or air. Nobody wants a leaky connection when they’re trying to inflate a tire or water the garden! Properly tightening these fittings is essential for optimal performance and preventing frustration.
This guide will walk you through the steps to tighten hose fittings correctly, ensuring a secure, leak-free connection. We’ll cover everything from identifying the right tools to applying the proper technique. Let’s get started and make those connections tight!
Understanding Hose Fittings

Before diving into the tightening process, it’s important to understand the basics of hose fittings. Different types of fittings require different approaches, and knowing the components helps you avoid damage.
Types of Hose Fittings
There are several common types of hose fittings, each designed for specific applications:
- Threaded Fittings: These fittings have threads (male or female) that screw together. Examples include NPT (National Pipe Thread) and garden hose fittings.
- Compression Fittings: These fittings use a compression nut and a sleeve (ferrule) to create a tight seal.
- Quick-Connect Fittings: These fittings allow for quick and easy connection and disconnection, often used in air hoses and garden hoses.
- Barb Fittings: These fittings have a barbed end that is inserted into the hose, secured with a clamp.
Common Problems with Hose Fittings
Several issues can lead to loose or leaking hose fittings:
- Loose Connections: Over time, vibrations and pressure changes can cause fittings to loosen.
- Damaged Threads: Cross-threading or physical damage can prevent a tight seal.
- Worn Washers or Seals: Rubber washers and seals can deteriorate over time, leading to leaks.
- Overtightening: Applying too much force can damage the fitting or the hose.
Tools You’ll Need
Having the right tools makes the job easier and prevents damage to the fittings. Here’s a list of essential tools:
- Wrenches: Use the correct size wrench for the fitting. Adjustable wrenches can work, but fixed-size wrenches are better for a secure grip.
- Teflon Tape (PTFE Tape): This tape is used to seal threaded connections.
- Pipe Dope (Thread Sealant): An alternative to Teflon tape, providing a tighter seal.
- Hose Clamps: Used to secure hoses to barb fittings.
- Screwdrivers: For tightening hose clamps.
- Penetrating Oil: To loosen corroded or stuck fittings.
- Gloves: To protect your hands.
Step-by-Step Guide to Tightening Hose Fittings

Follow these steps to properly tighten hose fittings and prevent leaks.
Step 1: Inspect the Fitting and Hose
Before tightening, carefully inspect the fitting and hose for any signs of damage.
- Check for Cracks: Look for cracks in the fitting or hose, especially near the connection point.
- Inspect Threads: Make sure the threads are clean and not damaged. Damaged threads can prevent a tight seal.
- Examine Washers and Seals: Check rubber washers and seals for wear, cracks, or deterioration. Replace them if necessary.
Step 2: Prepare the Threads
Properly preparing the threads is crucial for a tight, leak-free seal.
- Clean the Threads: Use a wire brush to remove any dirt, rust, or debris from the threads.
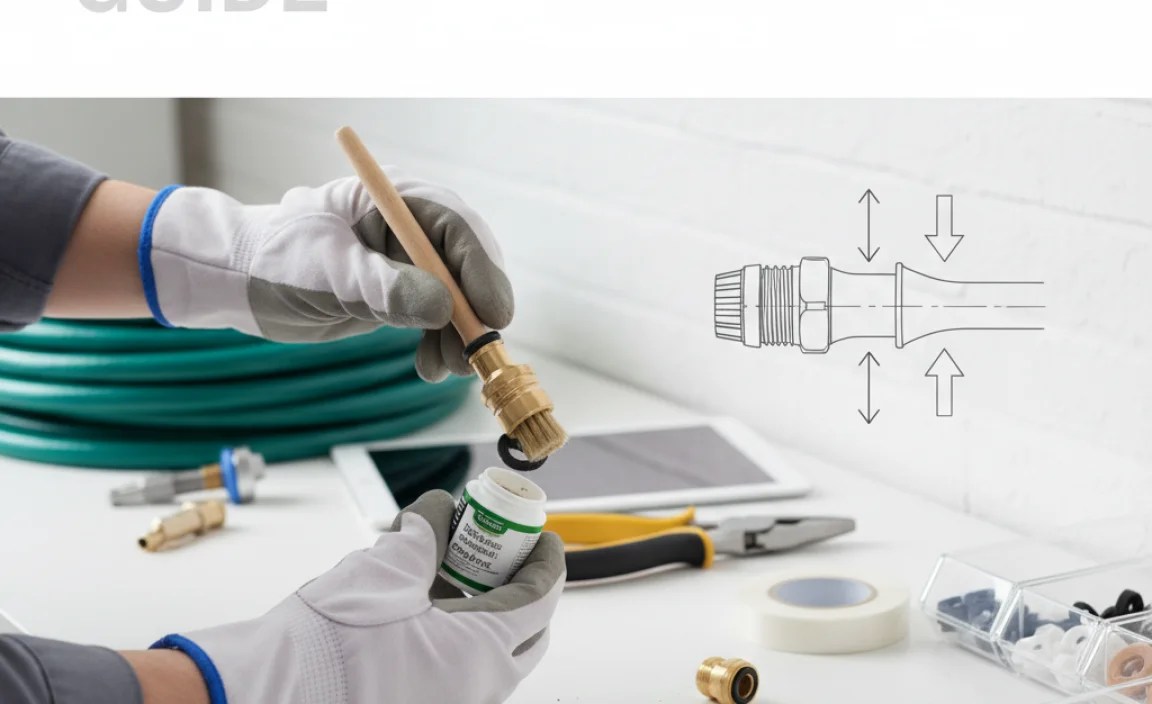
- Apply Teflon Tape or Pipe Dope: If the fitting is threaded, apply Teflon tape or pipe dope to the male threads.
- Teflon Tape: Wrap the tape clockwise around the threads, overlapping each layer. Apply 2-3 layers.
- Pipe Dope: Apply a thin, even layer of pipe dope to the threads using a brush.
Step 3: Tighten the Fitting
Tightening the fitting properly ensures a secure connection without causing damage.
- Align the Fitting: Carefully align the male and female threads before tightening. Avoid cross-threading.
- Hand-Tighten: Start by hand-tightening the fitting as much as possible. This helps ensure the threads are properly aligned.
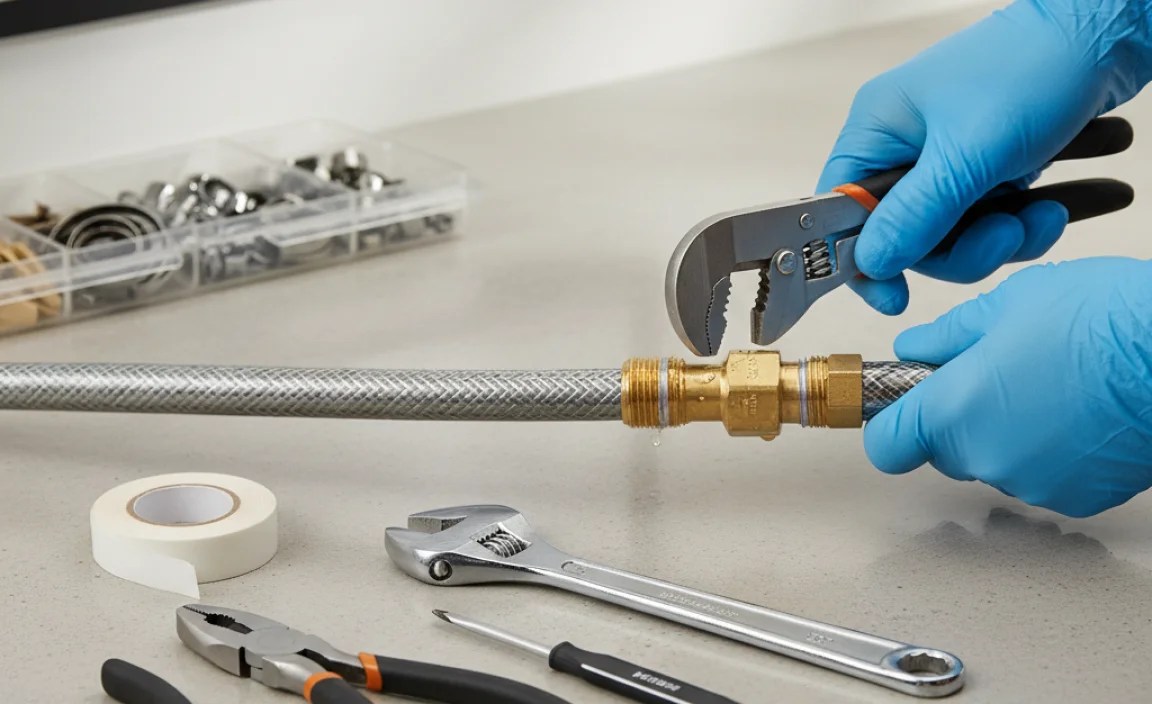
- Use a Wrench: Use the correct size wrench to tighten the fitting. Grip the fitting securely and turn clockwise.
- Apply Proper Torque: Tighten the fitting until it is snug. Avoid overtightening, which can damage the fitting or hose. A general rule is to tighten until you feel resistance and then give it another quarter turn.
Step 4: Tightening Specific Types of Fittings
Different types of fittings require slightly different techniques.
Threaded Fittings
For threaded fittings like NPT or garden hose fittings:
- Use Teflon tape or pipe dope on the male threads.
- Tighten until snug, then give it another quarter turn.
- Avoid overtightening, which can crack the fitting.
Compression Fittings
For compression fittings:
- Slide the compression nut and ferrule onto the hose.
- Insert the hose into the fitting.
- Tighten the compression nut with a wrench until snug, then give it another half turn.
- Overtightening can crush the ferrule and cause leaks.
Quick-Connect Fittings
For quick-connect fittings:
- Ensure the fitting is clean and free of debris.
- Push the hose into the fitting until it clicks into place.
- To disconnect, press the release collar and pull the hose out.
Barb Fittings
For barb fittings:
- Push the hose onto the barb.
- Secure with a hose clamp.
- Tighten the hose clamp with a screwdriver until snug.
- Ensure the clamp is positioned correctly over the barb.
Step 5: Test for Leaks
After tightening the fitting, test for leaks to ensure a secure connection.
- Turn on the Water or Air: Slowly turn on the water or air supply to the hose.
- Check for Leaks: Inspect the fitting for any signs of leaks. Look for drips or moisture around the connection.
- Tighten Further if Necessary: If you find a leak, tighten the fitting slightly and retest. Avoid overtightening.
Troubleshooting Leaky Hose Fittings

Even after tightening, some fittings may still leak. Here are some common issues and solutions.
Common Issues
- Damaged Threads: If the threads are damaged, the fitting may not seal properly.
- Worn Washers or Seals: Old or damaged washers and seals can cause leaks.
- Incorrect Fitting Type: Using the wrong type of fitting for the application can lead to leaks.
- Corrosion: Corrosion can prevent a tight seal.
Troubleshooting Tips
- Replace Damaged Fittings: If the fitting is damaged, replace it with a new one.
- Replace Washers and Seals: Replace worn or damaged washers and seals.
- Use the Correct Fitting Type: Ensure you are using the correct type of fitting for the application.
- Clean Corroded Fittings: Clean corroded fittings with a wire brush or replace them if necessary.
- Apply More Teflon Tape or Pipe Dope: If the fitting is not sealing properly, try applying more Teflon tape or pipe dope.
- Check Hose Clamps: Ensure hose clamps are properly tightened and positioned over the barb.
Preventative Maintenance
Regular maintenance can prevent hose fittings from loosening or leaking.
Regular Inspections
- Check Fittings Regularly: Inspect hose fittings regularly for any signs of looseness or leaks.
- Tighten Loose Fittings: Tighten any loose fittings before they start to leak.
- Replace Worn Components: Replace worn washers, seals, and hoses as needed.
Proper Storage
- Store Hoses Properly: Store hoses in a cool, dry place to prevent deterioration.
- Avoid Kinking: Avoid kinking hoses, as this can damage the hose and the fittings.
- Protect from Extreme Temperatures: Protect hoses from extreme temperatures, which can cause them to crack or become brittle.
Choosing the Right Hose and Fittings
Selecting the right hose and fittings for your application is crucial for performance and longevity.
Considerations
- Material: Choose a hose material that is compatible with the fluid or gas you are using.
- Pressure Rating: Select a hose with a pressure rating that meets or exceeds the maximum pressure of your system.
- Temperature Rating: Choose a hose that can withstand the temperature range of your application.
- Fitting Type: Select the appropriate fitting type for your application.
- Size: Ensure the hose and fittings are the correct size for your system.
Hose Materials
Different hose materials offer different properties:
- Rubber: Flexible and durable, suitable for many applications.
- PVC: Lightweight and chemical-resistant, good for water and chemicals.
- Silicone: Heat-resistant, ideal for high-temperature applications.
- Braided: Reinforced for high-pressure applications.
Table: Common Hose Fitting Materials and Their Uses
| Material | Common Uses | Pros | Cons |
|---|---|---|---|
| Brass | Water, air, and gas lines | Corrosion-resistant, durable | More expensive |
| Stainless Steel | High-pressure and high-temperature applications | Very durable, corrosion-resistant | Most expensive |
| Plastic (PVC, Nylon) | Low-pressure water and chemical lines | Lightweight, inexpensive | Less durable, not suitable for high temperatures |
| Aluminum | Air lines, fuel lines | Lightweight, corrosion-resistant | Not suitable for all chemicals |
Table: Troubleshooting Common Hose Fitting Leaks
| Problem | Possible Cause | Solution |
|---|---|---|
| Leak at threaded connection | Insufficient Teflon tape or sealant | Remove fitting, apply more Teflon tape or sealant, and retighten |
| Dripping from hose clamp | Loose clamp or damaged hose | Tighten clamp or replace hose if damaged |
| Leak at compression fitting | Overtightened or undertightened nut | Loosen nut, inspect ferrule, and retighten to proper torque |
| Spray or burst near fitting | Hose pressure exceeds rating | Replace with higher-rated hose or reduce system pressure |
FAQ: Tightening Hose Fittings
Q: How tight should I make a hose fitting?
A: Tighten the fitting until it is snug, then give it another quarter turn. Avoid overtightening, which can damage the fitting or hose.
Q: What is Teflon tape and why should I use it?
A: Teflon tape (PTFE tape) is a white, non-adhesive tape used to seal threaded connections. It helps create a tighter seal and prevents leaks.
Q: Can I reuse Teflon tape?
A: No, it’s best to use fresh Teflon tape each time you reconnect a fitting. Old tape can become compressed and less effective.
Q: What do I do if I overtighten a hose fitting?
A: If you overtighten a fitting, loosen it and inspect the threads for damage. If the threads are damaged, replace the fitting. If not, re-tighten to the proper torque.
Q: How often should I check my hose fittings?
A: Check your hose fittings regularly, especially if they are subject to vibration or pressure changes. A monthly inspection is a good practice.
Q: What’s the difference between pipe dope and Teflon tape?
A: Both seal threaded connections, but pipe dope is a liquid sealant while Teflon tape is a solid tape. Some prefer pipe dope for its gap-filling abilities, while others prefer the clean application of Teflon tape.
Q: Can I use pliers instead of a wrench?
A: While pliers can work in a pinch, they are more likely to damage the fitting. It’s best to use the correct size wrench for a secure grip and to prevent damage.
Conclusion
Properly tightening hose fittings is essential for preventing leaks and ensuring the efficient operation of many systems. By following these steps, you can achieve a secure, leak-free connection every time. Remember to inspect your fittings regularly and address any issues promptly to avoid more significant problems down the road. Whether you’re working on your bike pump, garden hose, or any other system with hose fittings, these techniques will help you maintain a tight and reliable connection. Happy riding and pumping!


