
How to Repair Shock Pump Hose Thread: Easy Fix!
Quick Summary: Don’t let a damaged shock pump hose thread ruin your ride! You can often repair it yourself. First, inspect the threads for damage. If minor, try cleaning and carefully realigning them. For more serious damage, use thread repair tools like a thread file or thread restorer kit. In some cases, replacing the entire hose might be the best solution.
Having trouble with your shock pump hose thread? It’s a common issue that can leave you stranded and unable to adjust your suspension. Don’t worry; you don’t always need to replace the entire pump! With a little know-how and the right tools, you can often repair the threads and get back to riding. We’ll walk you through the steps to diagnose the problem and explore several repair options. Let’s get started!
Understanding Shock Pump Hose Thread Damage
Before you grab any tools, it’s important to understand the type of damage you’re dealing with. This will help you choose the best repair method.
Common Types of Thread Damage
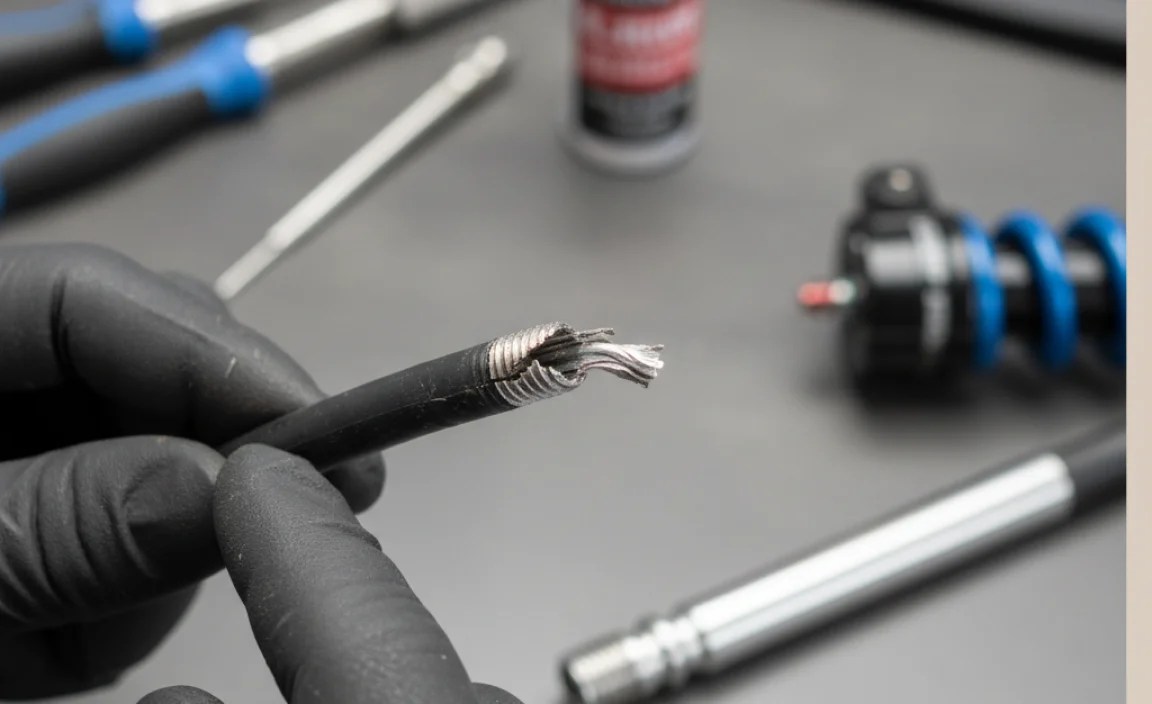
- Cross-threading: This happens when the hose is forced onto the valve at an angle, damaging the threads on both parts.
- Stripped threads: Over-tightening or repeated use can wear down the threads until they no longer grip.
- Debris and corrosion: Dirt, grit, and moisture can accumulate in the threads, causing damage and making it difficult to connect the hose.
- Bent or deformed threads: Impact or improper storage can bend the threads out of shape.
Identifying the Severity of the Damage
Carefully inspect the threads on both the hose and the shock valve. Use a magnifying glass if needed. Ask yourself these questions:
- Are the threads visibly flattened or distorted?
- Are there any signs of metal shavings or debris?
- Does the hose feel loose or wobbly when connected?
- Can you see any corrosion or rust?
Minor damage might be repairable with simple tools and techniques. Severe damage might require more specialized tools or hose replacement.
Tools and Materials You’ll Need

Having the right tools on hand will make the repair process much smoother. Here’s a list of essentials:
- Cleaning supplies:
- Clean rags or paper towels
- Degreaser or solvent (e.g., isopropyl alcohol)
- Small brush (e.g., toothbrush or parts cleaning brush)
- Thread repair tools:
- Thread file (for cleaning and realigning threads)
- Thread restorer kit (for more serious thread damage)
- Pick set (for removing debris)
- Lubricant:
- Light machine oil or silicone grease
- Optional tools:
- Magnifying glass (for close inspection)
- Work gloves (to protect your hands)
- Vise (to hold the hose securely)
Step-by-Step Guide to Repairing Shock Pump Hose Threads

Now, let’s get into the repair process. Follow these steps carefully to avoid further damage.
Step 1: Cleaning the Threads
This is the first and most important step. Cleaning removes dirt and debris that can interfere with the repair process.
- Apply degreaser: Apply a small amount of degreaser or solvent to the threads.
- Scrub the threads: Use a small brush to scrub the threads thoroughly. Pay attention to any areas with visible dirt or corrosion.
- Wipe clean: Wipe away the degreaser and debris with a clean rag or paper towel.
- Inspect: Inspect the threads again to ensure they are clean. Repeat the process if necessary.
Step 2: Realigning Bent or Deformed Threads
If the threads are bent or deformed, you can try to realign them using a thread file or a small pick.
- Use a thread file: Carefully run the thread file along the damaged threads, following the original thread pattern. Apply gentle pressure and avoid removing any material.
- Use a pick: If you don’t have a thread file, you can use a small pick to gently bend the threads back into shape. Be careful not to break the threads.
- Test the fit: After realigning the threads, try connecting the hose to the shock valve. If it still doesn’t fit properly, repeat the process or try a different repair method.
Step 3: Using a Thread Restorer Kit
For more serious thread damage, a thread restorer kit can be very effective. These kits typically include a set of taps and dies that can reshape the threads.
- Select the correct tap or die: Choose the tap or die that matches the thread size and pitch of your hose. Refer to the kit’s instructions for guidance.
- Apply cutting oil: Apply a small amount of cutting oil to the tap or die. This will help to lubricate the threads and prevent damage.
- Thread the tap or die: Carefully thread the tap or die into the damaged threads. Turn it slowly and apply gentle pressure. If you encounter resistance, stop and back off the tap or die.
- Remove the tap or die: Once you have threaded the tap or die through the damaged area, remove it and clean the threads.
- Test the fit: Try connecting the hose to the shock valve. If it still doesn’t fit properly, repeat the process or try a different repair method.
Note: Thread restorer kits can be aggressive and may remove material from the threads. Use them with caution and only when necessary.
Step 4: Lubricating the Threads
After repairing the threads, it’s important to lubricate them to prevent future damage and ensure a smooth connection.
- Apply lubricant: Apply a small amount of light machine oil or silicone grease to the threads.
- Distribute the lubricant: Use your finger or a clean rag to distribute the lubricant evenly over the threads.
- Connect the hose: Connect the hose to the shock valve and tighten it securely.
When to Consider Hose Replacement
Sometimes, the damage to the hose threads is too severe to repair. In these cases, replacing the hose is the best option.
Signs That Replacement Is Necessary
- The threads are completely stripped or missing.
- The hose is cracked or damaged.
- You’ve tried multiple repair methods without success.
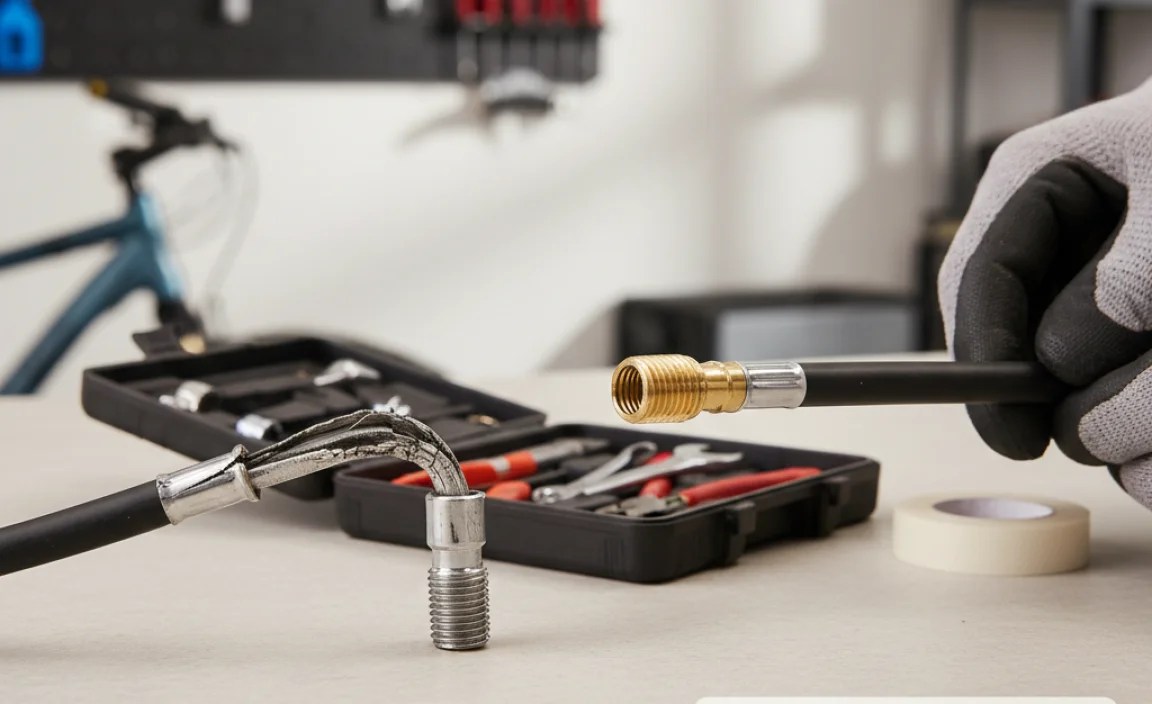
How to Replace the Hose
Replacing the hose is a relatively simple process. Here’s what you need to do:
- Purchase a replacement hose: Buy a replacement hose that is compatible with your shock pump. You can find these at most bike shops or online retailers.
- Remove the old hose: Disconnect the old hose from the shock pump. Depending on the pump design, this may involve unscrewing a fitting or removing a clip.
- Install the new hose: Connect the new hose to the shock pump. Make sure the connection is secure.
- Test the pump: Test the pump to ensure it is working properly. Check for leaks and make sure the hose is securely connected to the shock valve.
Preventing Future Thread Damage
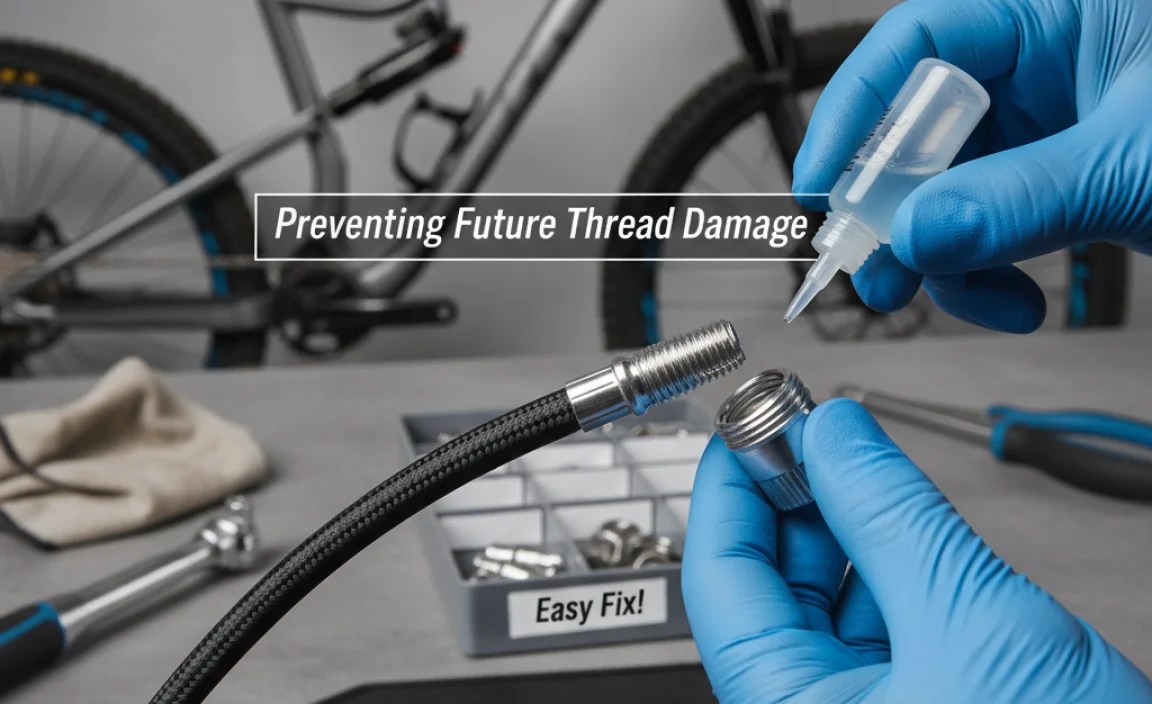
Preventing thread damage is always better than trying to repair it. Here are some tips to keep your shock pump hose in good condition:
- Always align the hose properly: Make sure the hose is aligned straight with the valve before connecting it. Avoid forcing the hose onto the valve at an angle.
- Avoid over-tightening: Over-tightening the hose can damage the threads. Tighten it only until it is snug.
- Clean the threads regularly: Clean the threads regularly to remove dirt and debris.
- Store the pump properly: Store the pump in a clean, dry place. Avoid storing it in direct sunlight or extreme temperatures.
- Use a thread protector: Consider using a thread protector to protect the threads when the hose is not in use.
Troubleshooting Common Issues
Even with the best techniques, you might encounter some issues during the repair process. Here are some common problems and how to solve them:
| Issue | Possible Cause | Solution |
|---|---|---|
| Hose won’t connect to the valve | Damaged threads, dirt or debris, incorrect hose size | Clean the threads, repair or replace the threads, use the correct hose size |
| Hose leaks air | Loose connection, damaged threads, worn-out O-ring | Tighten the connection, repair or replace the threads, replace the O-ring |
| Thread file or tap won’t fit | Incorrect thread size or pitch | Check the thread size and pitch, use the correct tool |
| Threads are too damaged to repair | Severe stripping or deformation | Replace the hose |
Alternative Repair Methods
Besides the methods described above, there are a few other options you can try:
- Using thread sealant: Apply a small amount of thread sealant to the threads before connecting the hose. This can help to fill in minor imperfections and create a tighter seal. Permatex is a well-known brand in this space and has a variety of thread sealants.
- Using Teflon tape: Wrap Teflon tape around the threads before connecting the hose. This can also help to create a tighter seal.
- Professional repair: If you’re not comfortable repairing the hose yourself, you can take it to a bike shop for professional repair.
Cost Analysis: Repair vs. Replacement
Before you start repairing, it’s a good idea to compare the cost of repair with the cost of replacement. Here’s a breakdown:
| Option | Cost | Pros | Cons |
|---|---|---|---|
| Repair | $5-$30 (depending on tools and materials) | Cheaper than replacement, can be done at home, extends the life of the hose | May not be effective for severe damage, requires some skill and patience |
| Replacement | $20-$50 (depending on the hose and pump) | Guaranteed to fix the problem, provides a new hose | More expensive than repair, requires purchasing a new hose |
Essential Maintenance Tips for Shock Pumps
Keep your shock pump in top shape with routine maintenance. Here’s how:
- Check seals: Inspect O-rings and seals regularly for wear or damage. Replace them as needed to prevent leaks and maintain pressure.
- Lubricate moving parts: Apply a small amount of silicone grease to the pump’s piston and other moving parts to ensure smooth operation.
- Clean the pump body: Wipe down the exterior of the pump with a damp cloth to remove dirt and grime. Avoid using harsh chemicals that can damage the finish.
- Store properly: Keep your shock pump in a clean, dry place, away from direct sunlight and extreme temperatures. This helps prevent degradation of the pump’s components.
FAQ: Repairing Shock Pump Hose Threads
What causes shock pump hose thread damage?
Cross-threading, over-tightening, dirt, and corrosion are the most common culprits. Improper storage and accidental impacts can also lead to thread damage.
Can I use any type of lubricant on the threads?
No, avoid using petroleum-based lubricants, as they can damage rubber seals. Opt for light machine oil or silicone grease to keep the threads smooth and protected.
How do I know if I’m over-tightening the hose?
If you feel excessive resistance or hear a creaking sound, you’re likely over-tightening the hose. Tighten it only until it’s snug and secure.
Is it safe to use a thread restorer kit?
Yes, but use it with caution. Select the correct size tap or die, apply cutting oil, and turn it slowly. Avoid forcing it, as this can remove too much material from the threads.
How often should I clean the threads?
Clean the threads every time you use the pump, or at least once a month. This will prevent dirt and debris from accumulating and causing damage.
What if the hose is leaking air after the repair?
Check the connection to ensure it’s tight and secure. If the leak persists, the threads may still be damaged or the O-ring may be worn out. Try replacing the O-ring or consider replacing the hose.
Where can I find a replacement hose for my shock pump?
You can find replacement hoses at most bike shops or online retailers. Make sure to choose a hose that is compatible with your shock pump.
Conclusion
Repairing a damaged shock pump hose thread might seem daunting, but with the right tools and techniques, it’s often a manageable task. By understanding the type of damage, following the step-by-step guides, and taking preventive measures, you can keep your shock pump in good working order and avoid costly replacements. So, next time you encounter a thread issue, don’t panic – try these repair methods and get back to enjoying your ride!


