
How to Easily Attach Hose to CO2 Inflator?
Quick Summary: To attach a hose to your CO2 inflator, first, ensure both the inflator head and the CO2 cartridge are compatible with a threaded connection. Screw the hose firmly onto the inflator head until snug. Then, thread the CO2 cartridge into the other end of the hose until it’s hand-tight. Be ready to inflate your tire quickly once pierced to avoid wasting CO2.
Ever been stuck on the side of the road with a flat, wrestling with your CO2 inflator? Getting the hose properly attached can be trickier than it looks! Many cyclists struggle with leaky connections or accidentally discharging the entire cartridge before the tire is even close to full. It’s frustrating, but with a few simple steps, you can master this essential skill.
In this guide, I’ll walk you through how to correctly attach a hose to your CO2 inflator, ensuring a secure and efficient inflation every time. We’ll cover everything from choosing the right equipment to troubleshooting common problems, so you can get back on your ride with confidence. Let’s get started!
Understanding CO2 Inflators and Their Components

Before we dive into the how-to, let’s break down the parts of a CO2 inflator and understand their roles. This knowledge will help you assemble everything correctly and troubleshoot any issues you might encounter.
Key Components
- CO2 Cartridge: A small, single-use container filled with compressed carbon dioxide. They come in various sizes, typically 12g, 16g, or 25g.
- Inflator Head: The device that controls the release of CO2 from the cartridge into the tire. It usually has a threaded connection for the CO2 cartridge and a valve interface for the tire.
- Hose (optional): A flexible tube that connects the inflator head to the tire valve. Hoses provide better control and reduce the risk of freezing your hands during inflation.
- Valve Connector: The part of the inflator head (or hose) that attaches to the tire valve (Presta or Schrader).
Types of Inflators
There are mainly two types of CO2 inflators:
- Direct-Thread Inflators: These screw directly onto the CO2 cartridge and then onto the tire valve. They are compact but can be harder to control.
- Hose-Equipped Inflators: These have a hose that connects the inflator head to the tire valve. The hose provides more flexibility and control during inflation.
For this guide, we’ll focus on hose-equipped inflators, as they are generally easier to use and offer more control.
Choosing the Right Equipment

Using compatible and quality equipment is crucial for successful CO2 inflation. Here’s what to consider:
CO2 Cartridge Size
The size of the CO2 cartridge depends on your tire size and type. Here’s a general guideline:
- 12g Cartridge: Suitable for road bike tires (700x23c to 700x28c).
- 16g Cartridge: Ideal for larger road bike tires, gravel bike tires, and smaller mountain bike tires (26″ or 27.5″).
- 25g Cartridge: Best for larger mountain bike tires (29″) and fat bike tires.
Always check the recommended pressure for your tires and choose a cartridge that can achieve that pressure.
Inflator Head Compatibility
Ensure the inflator head is compatible with both Presta and Schrader valves. Some inflators have a dual-head design, while others require you to switch internal parts. Check the product specifications to confirm compatibility.
Hose Quality
A good quality hose should be durable and have secure connections. Look for hoses made from reinforced materials that can withstand high pressure. The connections should be threaded and easy to tighten by hand.
Additional Considerations
- Threaded vs. Non-Threaded Cartridges: Make sure your inflator head is designed for the type of cartridge you’re using. Threaded cartridges are more common and generally more reliable.
- Insulation: CO2 cartridges get extremely cold when discharging. Consider using an inflator with a built-in insulation sleeve or wear gloves to protect your hands.
Step-by-Step Guide: Attaching the Hose to Your CO2 Inflator

Now, let’s get to the main event. Follow these steps to correctly attach the hose to your CO2 inflator:
Step 1: Gather Your Tools and Equipment
Before you start, make sure you have everything you need:
- CO2 Inflator Head
- CO2 Cartridge (compatible size)
- Hose (if not already attached to the inflator head)
- Tire (with a flat)
- Gloves (optional, for insulation)
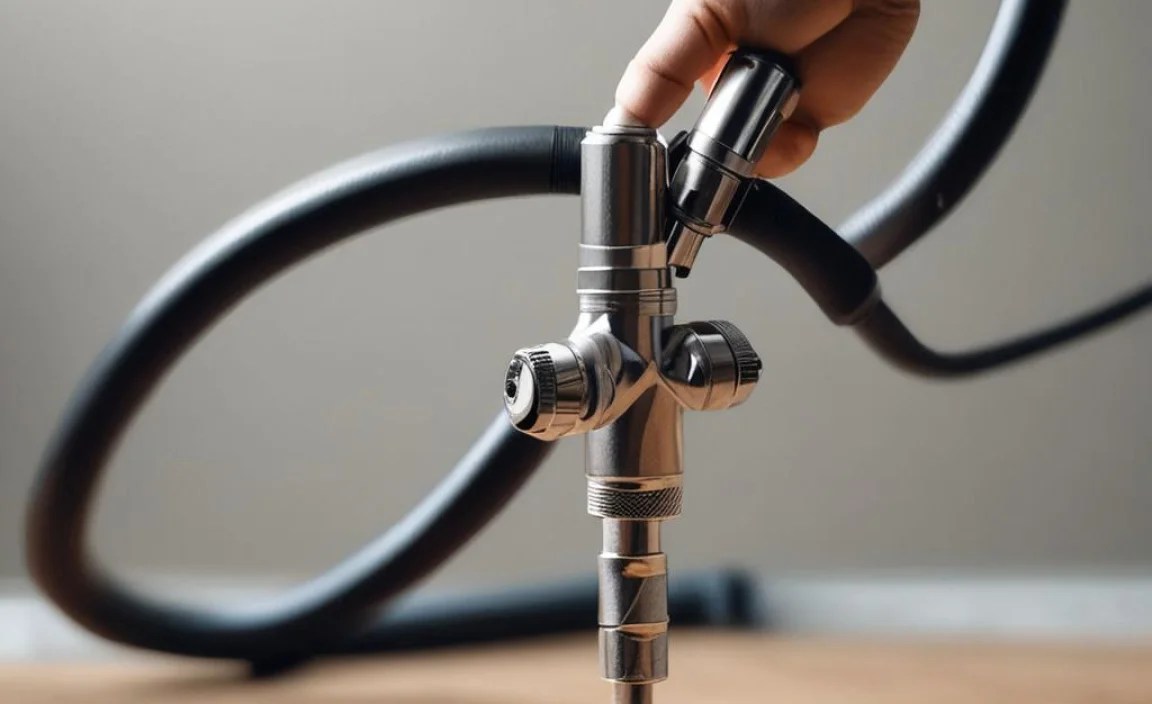
Step 2: Connect the Hose to the Inflator Head
- Identify the Threaded Connection: Locate the threaded port on the inflator head where the hose will attach.
- Align the Hose: Align the threaded end of the hose with the threaded port on the inflator head.
- Thread the Hose: Gently thread the hose onto the inflator head. Turn the hose clockwise until you feel it catch the threads.
- Tighten the Connection: Hand-tighten the hose onto the inflator head. Make sure it’s snug but not overly tight. You don’t want to damage the threads.
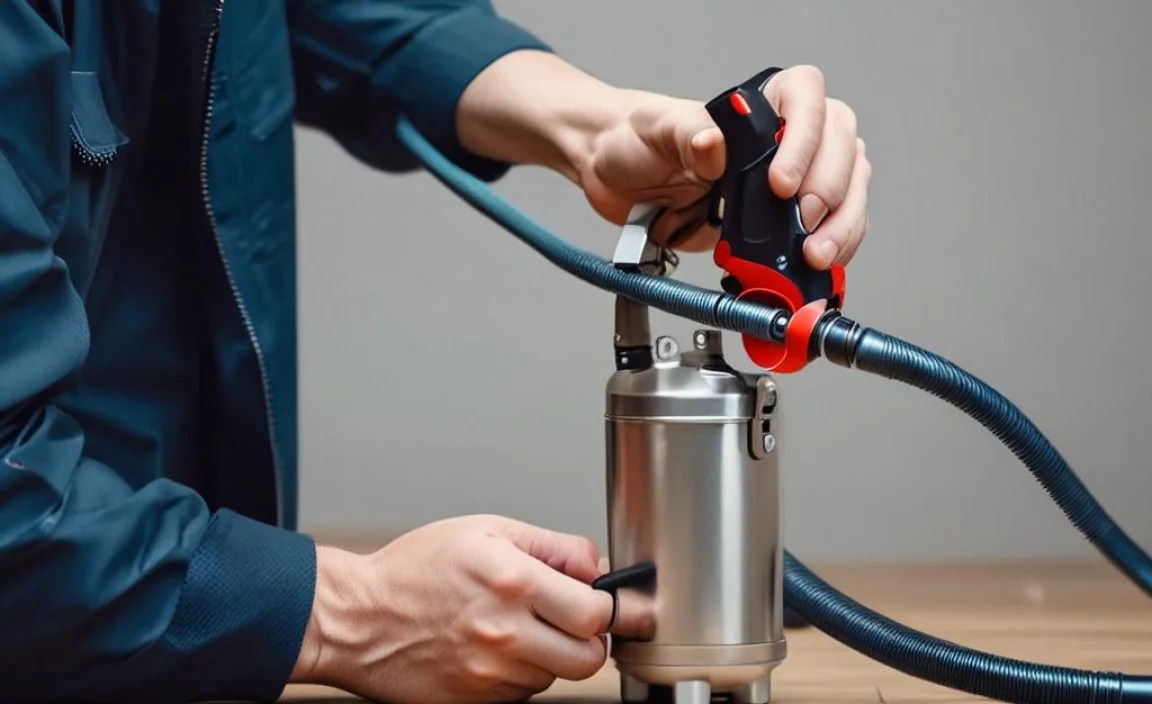
Step 3: Prepare the CO2 Cartridge
- Inspect the Cartridge: Check the CO2 cartridge for any signs of damage or leaks. Do not use a damaged cartridge.
- Identify the Threaded End: Locate the threaded end of the CO2 cartridge.
Step 4: Attach the CO2 Cartridge to the Hose
- Align the Cartridge: Align the threaded end of the CO2 cartridge with the threaded port on the hose.
- Thread the Cartridge: Gently thread the CO2 cartridge onto the hose. Turn the cartridge clockwise until you feel it catch the threads.
- Tighten the Connection: Hand-tighten the CO2 cartridge onto the hose. Again, make sure it’s snug but not overly tight.
Step 5: Prepare Your Tire Valve
- Locate the Valve: Find the valve on your tire (either Presta or Schrader).
- Remove the Valve Cap: Unscrew and remove the valve cap. Store it in a safe place.
- For Presta Valves: Loosen the valve nut by turning it counter-clockwise. Press the valve stem briefly to ensure it’s not stuck.
Step 6: Attach the Inflator Head to the Tire Valve
- Align the Inflator Head: Align the valve connector on the inflator head (or hose) with the tire valve.
- Press or Screw On: Depending on the design of your inflator, either press the connector firmly onto the valve or screw it on.
- Ensure a Secure Fit: Make sure the connection is tight and secure to prevent leaks.
Step 7: Inflate the Tire
- Control the Flow: Most inflators have a mechanism to control the flow of CO2. This could be a button, a twist valve, or a lever.
- Release the CO2: Activate the inflator to release CO2 into the tire. Use short bursts to avoid over-inflation.
- Monitor the Pressure: Check the tire pressure frequently by squeezing the tire or using a pressure gauge.
- Inflate to Recommended Pressure: Inflate the tire to the recommended pressure indicated on the tire sidewall.
Step 8: Remove the Inflator Head
- Close the Valve: If your inflator has a valve, close it to stop the flow of CO2.
- Detach the Inflator Head: Carefully detach the inflator head from the tire valve.
- For Presta Valves: Tighten the valve nut by turning it clockwise.
- Replace the Valve Cap: Screw the valve cap back onto the valve.
Troubleshooting Common Issues
Even with careful preparation, you might encounter some common issues. Here’s how to troubleshoot them:
Issue: Leaking Connection
- Cause: Loose connection between the hose and the inflator head or CO2 cartridge.
- Solution: Tighten the connections. Make sure they are snug but not overly tight. If the threads are damaged, replace the hose or inflator head.
Issue: CO2 Cartridge Freezing
- Cause: Rapid expansion of CO2 causes the cartridge to become extremely cold.
- Solution: Wear gloves or use an inflator with a built-in insulation sleeve to protect your hands.
Issue: Tire Not Inflating
- Cause: Blocked valve, empty CO2 cartridge, or incorrect inflator setup.
- Solution: Check the valve for obstructions. Ensure the CO2 cartridge is full and properly pierced. Verify that the inflator is correctly attached to the tire valve.
Issue: Over-Inflation
- Cause: Releasing too much CO2 at once.
- Solution: Use short bursts of CO2 and monitor the tire pressure frequently. If you over-inflate, release some air by pressing the valve stem (for Presta valves) or using a pressure release valve on the inflator.
Tips for Efficient CO2 Inflation
Here are some additional tips to make your CO2 inflation process smoother and more efficient:
- Practice: Practice using your CO2 inflator at home before you need it on the road. This will help you become familiar with the process and troubleshoot any issues in a controlled environment.
- Carry Extra Cartridges: Always carry at least two CO2 cartridges on your rides. You never know when you might need a second one.
- Check Cartridge Weight: If you’re unsure if a cartridge is full, weigh it. A full cartridge will weigh more than an empty one.
- Use a Pressure Gauge: Carry a small pressure gauge to accurately check your tire pressure after inflation.
- Inspect Your Tires: Regularly inspect your tires for cuts, abrasions, or embedded objects. Addressing these issues early can prevent flats.
CO2 Inflator vs. Hand Pump: Which Is Right for You?
Both CO2 inflators and hand pumps have their pros and cons. Here’s a comparison to help you decide which is best for your needs:
| Feature | CO2 Inflator | Hand Pump |
|---|---|---|
| Speed | Very fast | Slow |
| Portability | Highly portable | Portable, but bulkier |
| Ease of Use | Easy to use, but requires practice | Simple to use |
| Cost | Requires replacement cartridges | One-time purchase |
| Reliability | Can fail if cartridge is empty or inflator malfunctions | Reliable, but requires physical effort |
| Environmental Impact | Single-use cartridges contribute to waste | More environmentally friendly |
CO2 Inflators: Best for quick repairs on the road, racing, and situations where speed is essential.
Hand Pumps: Ideal for everyday use, topping off tire pressure, and riders who prefer a more sustainable option.
Many cyclists carry both a CO2 inflator and a mini-pump as a backup.
Maintaining Your CO2 Inflator
Proper maintenance will keep your CO2 inflator in good working condition and ensure it’s ready when you need it. Here are some tips:
- Clean Regularly: Clean the inflator head and hose with a dry cloth after each use to remove dirt and debris.
- Check for Corrosion: Inspect the threads and connections for signs of corrosion. Clean with a wire brush or replace the affected parts.
- Store Properly: Store the inflator in a dry place away from extreme temperatures and direct sunlight.
- Replace O-Rings: Replace any worn or damaged O-rings to prevent leaks.
- Test Periodically: Test the inflator periodically to ensure it’s functioning correctly. Use an old CO2 cartridge for testing.
Recommended CO2 Inflators and Accessories
Here are some highly-rated CO2 inflators and accessories to consider:
| Product | Description | Features |
|---|---|---|
| Lezyne Control Drive CO2 Inflator | A compact and reliable inflator with a CNC-machined aluminum body. | Presta/Schrader compatible, controlled inflation, includes neoprene sleeve. |
| Genuine Innovations Ultraflate CO2 Inflator | A lightweight and easy-to-use inflator with a push-to-inflate design. | Presta/Schrader compatible, push-button control, compact size. |
| Park Tool INF-2 Shop Inflator | A durable and high-quality inflator designed for professional use. | Presta/Schrader compatible, ergonomic handle, built-in pressure gauge. |
| Topeak Micro AirBooster CO2 Inflator | A mini inflator with a compact design and precise control. | Presta/Schrader compatible, twist-to-control valve, lightweight. |
When choosing an inflator, consider your budget, the type of riding you do, and the features that are most important to you.
External Resource: BicycleTutor.com
For more information on fixing a flat tire with a CO2 inflator, check out this article on BicycleTutor.com. It provides a comprehensive guide with detailed instructions and helpful tips.
FAQ: Common Questions About CO2 Inflators
What size CO2 cartridge do I need for my road bike?
For standard road bike tires (700x23c to 700x28c), a 12g or 16g CO2 cartridge is usually sufficient. Check the recommended pressure on your tire sidewall to ensure the cartridge can reach that pressure.
Can I reuse a CO2 cartridge?
No, CO2 cartridges are single-use only. Once they are emptied, they cannot be refilled.
How do I know if my CO2 inflator is compatible with Presta and Schrader valves?
Check the product specifications or look for a dual-head design. Some inflators require you to switch internal parts to be compatible with both valve types.
Is it safe to touch a CO2 cartridge while inflating a tire?
CO2 cartridges get extremely cold when discharging, which can cause frostbite. It’s recommended to wear gloves or use an inflator with a built-in insulation sleeve.
What should I do if my CO2 inflator is leaking?
Check the connections between the hose, inflator head, and CO2 cartridge. Tighten any loose connections. If the leaking persists, replace any damaged parts.
Can I bring CO2 cartridges on an airplane?
According to the FAA, you can bring CO2 cartridges for bicycle tire inflation in carry-on or checked baggage only if the cartridges are each 30g (1.1 oz) or less, the inflator is self-contained, and the cylinder is not rechargeable. You must have the approval of the airline.
How long will a CO2-inflated tire hold air?
CO2 permeates rubber faster than air, so a CO2-inflated tire will lose pressure more quickly. It’s best to replace the CO2 with regular air as soon as possible, ideally within 12-24 hours.
Conclusion
Attaching a hose to your CO2 inflator doesn’t have to be a daunting task. By understanding the components, following the step-by-step guide, and troubleshooting common issues, you can confidently inflate your tires on the go. Remember to practice at home, carry extra cartridges, and maintain your equipment for reliable performance. With these tips, you’ll be back on the road in no time, enjoying a smooth and safe ride. Happy cycling!


