
How to Install New Chuck with Hose Kit: Easy Guide
Quick Summary:
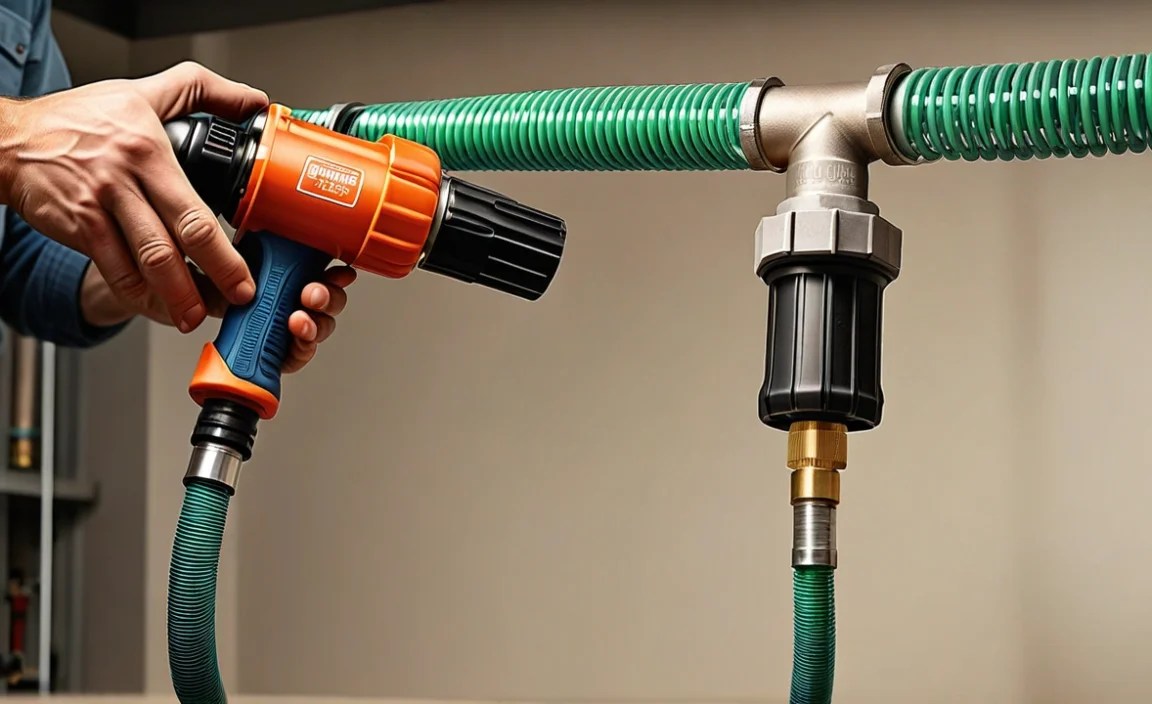
Installing a new chuck with a hose kit is easier than you think! First, remove the old chuck by unscrewing it. Next, attach the new hose to your pump. Then, screw the new chuck onto the hose, ensuring it’s snug. Finally, test for leaks and you’re ready to inflate. With a few simple steps, you can get your bike tires pumped up in no time!
Is your bike pump not working like it used to? Maybe the chuck (the part that connects to your tire valve) is worn out. Or perhaps the hose has sprung a leak. Don’t worry, you don’t need a brand-new pump! Replacing the chuck and hose is a simple fix that can save you money and get you back on the road quickly. This guide will walk you through each step, making the process easy and stress-free. Let’s get started and breathe new life into your trusty bike pump!
What You’ll Need

Before we begin, let’s gather everything you’ll need. This will make the installation process smoother and faster.
- New Chuck and Hose Kit: Make sure it’s compatible with your pump and valve types (Presta or Schrader).
- Wrench or Adjustable Spanner: To loosen and tighten connections.
- Pliers (Optional): For extra grip if needed.
- Teflon Tape (Plumber’s Tape): To ensure a tight, leak-proof seal.
- Scissors or Knife: To cut the Teflon tape.
- Soapy Water (for testing): To check for leaks after installation.
Step-by-Step Guide to Installing a New Chuck and Hose Kit
Follow these simple steps to replace your bike pump’s chuck and hose. Let’s dive in!
Step 1: Remove the Old Chuck and Hose
First, we need to disconnect the old, worn-out parts.
- Disconnect the Hose from the Pump: Use a wrench or adjustable spanner to loosen the nut connecting the hose to the pump body. Turn it counterclockwise.
- Remove the Old Chuck: Unscrew the chuck from the hose. It might be tight, so use pliers for a better grip if necessary. Turn it counterclockwise to remove.
- Inspect the Threads: Check the threads on the pump and hose for any damage or debris. Clean them if needed.
Step 2: Prepare the New Hose
Now, let’s get the new hose ready for installation.
- Check the Hose Fittings: Ensure the new hose has the correct fittings for your pump and chuck.
- Apply Teflon Tape: Wrap Teflon tape around the threads of the hose fitting that will connect to the pump. This helps create a tight seal and prevents leaks. Wrap it in the direction that the fitting will tighten, usually clockwise.
- Trim Excess Tape: Use scissors or a knife to trim any excess Teflon tape.
Step 3: Attach the New Hose to the Pump
Time to connect the new hose to your bike pump.
- Align the Hose Fitting: Line up the hose fitting with the pump’s connector.
- Tighten the Nut: Use a wrench or adjustable spanner to tighten the nut securely. Turn it clockwise until it’s snug. Be careful not to overtighten, as this could damage the threads.
- Check the Connection: Ensure the hose is firmly attached to the pump and doesn’t wiggle.
Step 4: Install the New Chuck
Let’s attach the new chuck to the hose.
- Apply Teflon Tape: Wrap Teflon tape around the threads of the hose fitting where the chuck will be attached.
- Screw on the Chuck: Screw the new chuck onto the hose fitting. Turn it clockwise until it’s snug. Use pliers for a better grip if needed.
- Adjust the Chuck (if needed): Some chucks have adjustable parts for different valve types. Make sure it’s properly adjusted for your valve (Presta or Schrader).
Step 5: Test for Leaks
The final step is to test for leaks and ensure everything is working correctly.
- Prepare Soapy Water: Mix some soap with water in a small container.
- Inflate a Tire: Connect the chuck to your bike tire valve and inflate the tire.
- Apply Soapy Water: Use a brush or your finger to apply the soapy water to the connections between the hose and pump, and the hose and chuck.
- Check for Bubbles: Watch for bubbles forming at the connections. Bubbles indicate a leak.
- Tighten Connections (if needed): If you see bubbles, tighten the connections slightly with a wrench or pliers. Be careful not to overtighten.
- Repeat the Test: Reapply soapy water and check for bubbles again. Repeat until there are no leaks.
- Final Inflation: Once you’ve confirmed there are no leaks, inflate the tire to the desired pressure.
Troubleshooting Common Issues

Sometimes, things don’t go as planned. Here are some common issues and how to fix them.
- Leaking Connections: Make sure the connections are tight and that you’ve used enough Teflon tape.
- Chuck Not Gripping the Valve: Ensure the chuck is properly adjusted for your valve type (Presta or Schrader). Check for debris inside the chuck.
- Hose Kinking: Avoid sharp bends in the hose, which can restrict airflow.
- Pump Not Building Pressure: Check all connections for leaks. Make sure the pump’s internal seals are in good condition.
Choosing the Right Chuck and Hose Kit

Selecting the right chuck and hose kit is important for optimal performance and compatibility. Consider these factors:
- Valve Compatibility: Ensure the chuck works with both Presta and Schrader valves, or choose one specifically for your valve type.
- Hose Length: Choose a hose length that’s comfortable for your pump and riding style.
- Material Quality: Look for durable materials that can withstand regular use.
- Brand Reputation: Opt for reputable brands known for quality and reliability.
Maintaining Your New Chuck and Hose
Proper maintenance will extend the life of your new chuck and hose.
- Regular Cleaning: Clean the chuck regularly to remove dirt and debris.
- Inspect for Wear: Check the hose and chuck for signs of wear or damage.
- Store Properly: Store your pump in a dry place to prevent corrosion.
- Replace When Needed: Replace the chuck and hose when they show signs of significant wear or damage.
Tools for the Job: A Quick Comparison
Here’s a look at some common tools you might use during the installation.
| Tool | Description | Pros | Cons |
|---|---|---|---|
| Wrench | A tool with a fixed-size opening used for gripping and turning nuts and bolts. | Provides a secure grip, durable. | Requires different sizes for different nuts. |
| Adjustable Spanner | A wrench with an adjustable jaw to fit different sizes of nuts and bolts. | Versatile, fits various sizes. | Can slip if not properly adjusted. |
| Pliers | A tool with two handles and gripping jaws, used for holding and manipulating objects. | Provides extra grip. | Can damage nuts and bolts if used improperly. |
| Teflon Tape | A thin white tape used to seal pipe threads. | Creates a tight seal, prevents leaks. | Needs to be applied correctly to be effective. |
Presta vs. Schrader Valves: Understanding the Difference
Knowing the difference between Presta and Schrader valves is crucial for choosing the right chuck. Here’s a simple breakdown:
| Valve Type | Appearance | Commonly Found On | Pros | Cons |
|---|---|---|---|---|
| Presta | Narrower, with a locking nut at the tip. | Road bikes, high-performance bikes. | Holds higher pressure, easier to inflate. | More fragile, requires an adapter for some pumps. |
| Schrader | Wider, like a car tire valve. | Mountain bikes, commuter bikes. | More durable, compatible with gas station pumps. | Can be harder to inflate to high pressures. |
Where to Buy Chuck and Hose Kits
You can find chuck and hose kits at various places:
- Local Bike Shops: Offer expert advice and a range of options.
- Online Retailers: Provide a wide selection and competitive prices. Check out sites like Amazon, REI, or specialized cycling stores.
- Hardware Stores: May carry generic hose fittings that can be adapted.
Extra Tips for a Smooth Installation
Here are some extra tips to ensure a smooth installation process:
- Work in a Clean Area: This prevents dirt and debris from getting into the pump and connections.
- Take Your Time: Rushing can lead to mistakes. Work carefully and methodically.
- Refer to the Manual: Check the instructions that came with your new chuck and hose kit.
- Watch Videos: YouTube can be a great resource for visual learners.
Why This Maintenance Matters
Maintaining your bike pump isn’t just about saving money; it’s about ensuring your safety and enjoying your rides. A well-maintained pump provides accurate inflation, which leads to better tire performance, improved handling, and reduced risk of flats. Plus, it’s a great way to learn more about your bike and take pride in your DIY skills.
External Resources
For more in-depth information on bike maintenance and repair, check out these resources:
- Park Tool Repair Help: A comprehensive guide to bike repair and maintenance.
- REI Expert Advice on Bicycle Maintenance: Tips and advice on keeping your bike in top condition.
- The League of American Bicyclists: Advocacy and resources for cyclists.
FAQ: Installing a New Chuck with Hose Kit
Q: What is a bike pump chuck?
A: The chuck is the part of the bike pump that attaches to the tire valve to inflate the tire.
Q: Why should I replace my bike pump chuck and hose?
A: Over time, the chuck and hose can wear out, causing leaks or making it difficult to inflate your tires properly.
Q: What tools do I need to replace the chuck and hose?
A: You’ll need a new chuck and hose kit, a wrench or adjustable spanner, pliers (optional), Teflon tape, and scissors or a knife.
Q: How do I know if my chuck is compatible with my valve type?
A: Check if the chuck is designed for Presta, Schrader, or both. Some chucks have adjustable parts to switch between valve types.
Q: How do I prevent leaks after installing the new chuck and hose?
A: Use Teflon tape on the threads of the connections and make sure to tighten the connections securely. Test for leaks with soapy water.
Q: Can I use any type of hose for my bike pump?
A: No, you should use a hose specifically designed for bike pumps to ensure it can handle the pressure and has the correct fittings.
Q: Where can I buy a new chuck and hose kit?
A: You can buy a new chuck and hose kit at local bike shops, online retailers, or some hardware stores.
Conclusion
Congratulations! You’ve successfully installed a new chuck and hose kit on your bike pump. With a few simple steps, you’ve saved money, extended the life of your pump, and ensured you can keep your tires properly inflated for every ride. Remember to regularly maintain your pump and check for any signs of wear. Now, get out there and enjoy the ride, knowing you’re well-equipped to handle any inflation needs on the road!


