
How to Use Push-On Chuck Correctly: Easy Guide
Quick Summary: Using a push-on chuck correctly involves securely attaching it to your bike tire’s valve. First, ensure the chuck is clean and undamaged. Firmly push the chuck straight onto the valve until it’s fully seated. Inflate your tire, monitoring the pressure. To remove, pull the chuck straight off to avoid damaging the valve. Regular practice ensures accurate inflation and prolongs the life of both the chuck and your tires.
Ever struggled to get your bike tire properly inflated? One common culprit is the push-on chuck. These handy little devices can be a lifesaver, but only if you know how to use them right. A poorly attached chuck leads to air leaks, inaccurate pressure readings, and a whole lot of frustration. But don’t worry! With a few simple steps, you’ll be inflating your tires like a pro in no time. We’ll walk through everything from selecting the right chuck to mastering the perfect attachment technique, ensuring your tires are always ready for the road.
Understanding Push-On Chucks

Before diving into the how-to, let’s clarify what a push-on chuck is and why it’s so useful.
What is a Push-On Chuck?
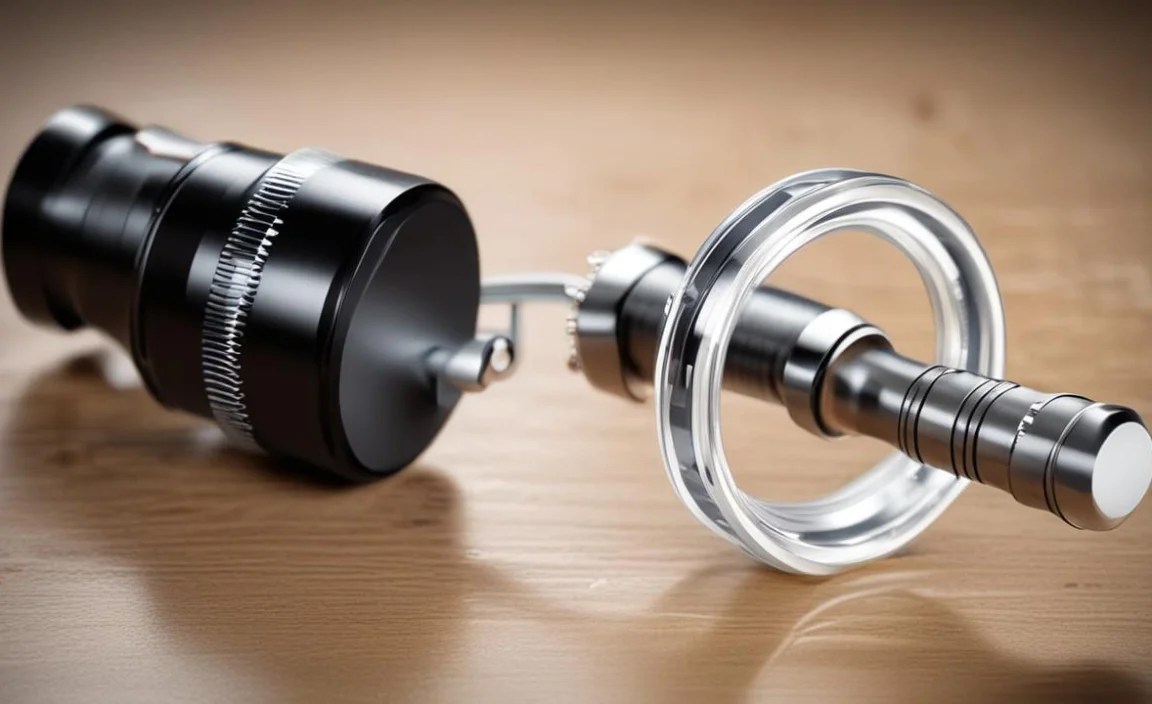
A push-on chuck is a type of valve connector used to inflate tires. It’s designed to create a tight seal around the valve stem when pushed onto it, allowing air to flow into the tire. Unlike threaded chucks, push-on chucks don’t require twisting or screwing. Their ease of use makes them popular among cyclists for quick and convenient inflation.
Types of Bike Valves
To properly use a push-on chuck, you need to identify your bike’s valve type. The two most common are:
- Presta Valves: These are narrow valves with a small locking nut at the tip. They’re commonly found on road bikes and high-performance bicycles.
- Schrader Valves: These are wider and sturdier, similar to those found on car tires. They’re common on mountain bikes, hybrid bikes, and some recreational bicycles.
Some push-on chucks are designed to work with both Presta and Schrader valves, while others are specific to one type. Always check compatibility before use.
Advantages of Push-On Chucks
Why choose a push-on chuck? Here are some key benefits:
- Speed and Convenience: Quick attachment and detachment save time and effort.
- Ease of Use: Simple push-on mechanism is straightforward, even for beginners.
- Versatility: Many models are compatible with both Presta and Schrader valves.
Choosing the Right Push-On Chuck

Selecting the right chuck is crucial for effective inflation. Here’s what to consider:
Valve Compatibility
First and foremost, ensure the chuck is compatible with your bike’s valve type. Some chucks are dual-head, meaning they can accommodate both Presta and Schrader valves. Others are single-head and designed for a specific valve type.
Material and Build Quality
Look for chucks made from durable materials like brass or high-quality plastic. A well-built chuck will last longer and provide a more reliable seal.
Hose Connection
Consider how the chuck connects to your pump’s hose. Some chucks have a threaded connection, while others use a lever or clamp. Choose a connection type that’s secure and easy to use.
Pressure Gauge Compatibility
If you want to monitor tire pressure while inflating, choose a chuck that’s compatible with a pressure gauge. Some chucks have a built-in gauge, while others require a separate gauge attachment.
Step-by-Step Guide: Using a Push-On Chuck
Now, let’s get to the practical part. Follow these steps to use a push-on chuck correctly:
Step 1: Prepare Your Bike and Pump
Before you start, make sure your bike is stable and your pump is within easy reach. Clean the valve stem with a cloth to remove any dirt or debris. This helps ensure a good seal.
Step 2: Prepare the Chuck
Inspect the chuck for any damage or debris. Make sure the O-rings (if present) are in good condition. If your chuck has a lever or switch, ensure it’s in the open position.
Step 3: Attach the Chuck to the Valve
This is where precision matters. Here’s how to attach the chuck to each valve type:
Attaching to a Presta Valve:
- Unscrew the small locking nut at the tip of the Presta valve.
- Gently push the valve stem down to ensure it’s not stuck.
- Align the chuck with the valve stem.
- Firmly push the chuck straight onto the valve until it’s fully seated. You should feel a secure connection.
- If your chuck has a lever, close it to secure the connection.
Attaching to a Schrader Valve:
- Remove the valve cap.
- Align the chuck with the valve stem.
- Firmly push the chuck straight onto the valve until it’s fully seated. You should feel a secure connection.
- If your chuck has a lever, close it to secure the connection.
Step 4: Inflate the Tire
Once the chuck is securely attached, begin inflating the tire. Use smooth, steady strokes to avoid damaging the valve or chuck.
Step 5: Monitor Tire Pressure
Regularly check the tire pressure using a gauge. Inflate to the recommended pressure range, which is usually printed on the tire sidewall. Avoid over-inflation, as this can lead to blowouts.
Step 6: Remove the Chuck
After reaching the desired pressure, carefully remove the chuck. Here’s how:
Removing from a Presta Valve:
- Open the lever (if applicable).
- Pull the chuck straight off the valve. Avoid twisting or bending the valve stem.
- Screw the locking nut back onto the valve tip.
Removing from a Schrader Valve:
- Open the lever (if applicable).
- Pull the chuck straight off the valve. Avoid twisting or bending the valve stem.
- Replace the valve cap.
Troubleshooting Common Issues
Even with the best technique, you might encounter some common problems. Here’s how to troubleshoot them:
Air Leaks
If you hear air leaking from the connection, try these solutions:
- Re-seat the Chuck: Make sure the chuck is fully pushed onto the valve.
- Check O-rings: Replace worn or damaged O-rings.
- Clean the Valve Stem: Remove any dirt or debris that might be interfering with the seal.
Difficulty Attaching the Chuck
If you’re struggling to attach the chuck, consider these tips:
- Lubricate the Chuck: Apply a small amount of silicone grease to the chuck’s interior.
- Check Valve Alignment: Ensure the valve stem is straight and not bent.
- Use a Different Chuck: The chuck might be incompatible with your valve type.
Incorrect Pressure Readings
If your pressure readings seem inaccurate, try these steps:
- Calibrate Your Gauge: Ensure your pressure gauge is properly calibrated.
- Check the Chuck Connection: A loose connection can lead to inaccurate readings.
- Use a Different Gauge: Your gauge might be faulty.
Maintenance Tips for Your Push-On Chuck

Proper maintenance will extend the life of your push-on chuck and ensure reliable performance. Follow these tips:
- Clean Regularly: Wipe the chuck with a clean cloth after each use to remove dirt and debris.
- Lubricate O-rings: Periodically apply a small amount of silicone grease to the O-rings to keep them supple.
- Store Properly: Store the chuck in a clean, dry place to prevent corrosion and damage.
- Replace Worn Parts: Replace worn or damaged O-rings and other components as needed.
Table: Comparing Push-On Chucks vs. Threaded Chucks
| Feature | Push-On Chuck | Threaded Chuck |
|---|---|---|
| Attachment Method | Pushed onto valve | Threaded onto valve |
| Speed | Faster | Slower |
| Ease of Use | Easier, especially for beginners | Requires more precision |
| Seal Reliability | Can be prone to leaks if not properly seated | Generally more secure |
| Valve Compatibility | Some models are dual-head (Presta/Schrader) | Typically valve-specific |
| Maintenance | Requires regular cleaning and O-ring lubrication | Less frequent maintenance |
Table: Recommended Tire Pressure Ranges for Different Bike Types
| Bike Type | Tire Width (mm) | Recommended Pressure (PSI) |
|---|---|---|
| Road Bike | 23-28 | 80-130 |
| Mountain Bike | 50-60 | 25-35 |
| Hybrid Bike | 32-42 | 50-70 |
| Gravel Bike | 35-45 | 40-60 |
External Resources for Bike Maintenance
- Park Tool Repair Help: Comprehensive guides on bike maintenance and repair.
- REI Expert Advice on Bicycle Maintenance: Tips and tutorials for keeping your bike in top condition.
FAQ: Push-On Chucks
1. What is the difference between a Presta and Schrader valve?
Presta valves are narrow and have a small locking nut at the tip, commonly found on road bikes. Schrader valves are wider and sturdier, similar to car tire valves, used on mountain and hybrid bikes.
2. How do I know if my push-on chuck is compatible with my valve?
Check the chuck’s packaging or product description. Dual-head chucks work with both Presta and Schrader valves, while single-head chucks are valve-specific.
3. Why is my tire losing air after I inflate it with a push-on chuck?
This is usually due to a poor seal. Ensure the chuck is fully seated on the valve, check the O-rings for damage, and clean the valve stem.
4. Can I use a push-on chuck on any type of bike pump?
Most push-on chucks are designed to fit standard bike pump hoses. However, always check compatibility before use.
5. How often should I replace the O-rings on my push-on chuck?
Replace O-rings when they show signs of wear or damage, such as cracks or deformation. Regular lubrication can extend their lifespan.
6. What is the ideal tire pressure for my bike?
The recommended pressure range is usually printed on the tire sidewall. Adjust within this range based on your weight, riding style, and terrain.
7. Is it better to use a push-on chuck or a threaded chuck?
Push-on chucks are faster and easier to use, while threaded chucks generally provide a more secure seal. The best choice depends on your personal preference and needs.
Conclusion
Mastering the use of a push-on chuck is a simple yet essential skill for any cyclist. By understanding the different types of chucks, following the correct attachment and removal techniques, and troubleshooting common issues, you can ensure your tires are always properly inflated and ready for the road. Regular maintenance will keep your chuck in top condition, providing reliable performance for years to come. So, grab your pump, practice these steps, and enjoy the confidence of knowing you can handle your bike’s inflation needs with ease. Happy riding!


