
Why Does Air Leak When Removing Chuck? Quick Fix!
Why does air leak when removing a chuck from a tire valve? It’s usually because the chuck hasn’t fully sealed onto the valve or the internal check valve in the pump head is momentarily opening as you disconnect. A quick, straight pull can minimize this. Learning the right technique makes inflating your tires easier and more accurate!
Ever pump up your bike tires, only to hear that frustrating hiss of escaping air as you pull off the pump chuck? It’s a common problem that can make you question if you’ve lost pressure or damaged the valve. Don’t worry, you’re not alone! This small air leak is often normal, but mastering the proper technique can minimize it.
This guide will walk you through why air leaks when removing a pump chuck, how to prevent it, and what to do if you suspect a bigger problem. We’ll cover everything from Presta to Schrader valves, hand pumps to floor pumps, and even those pesky tubeless setups. Let’s get started and make those tire inflation sessions smooth and efficient!
Understanding Why Air Escapes

When you remove a pump chuck from a tire valve, a small amount of air escaping is often unavoidable. But understanding the reasons why it happens can help you minimize the loss and ensure your tires are properly inflated.
The Valve Core’s Role
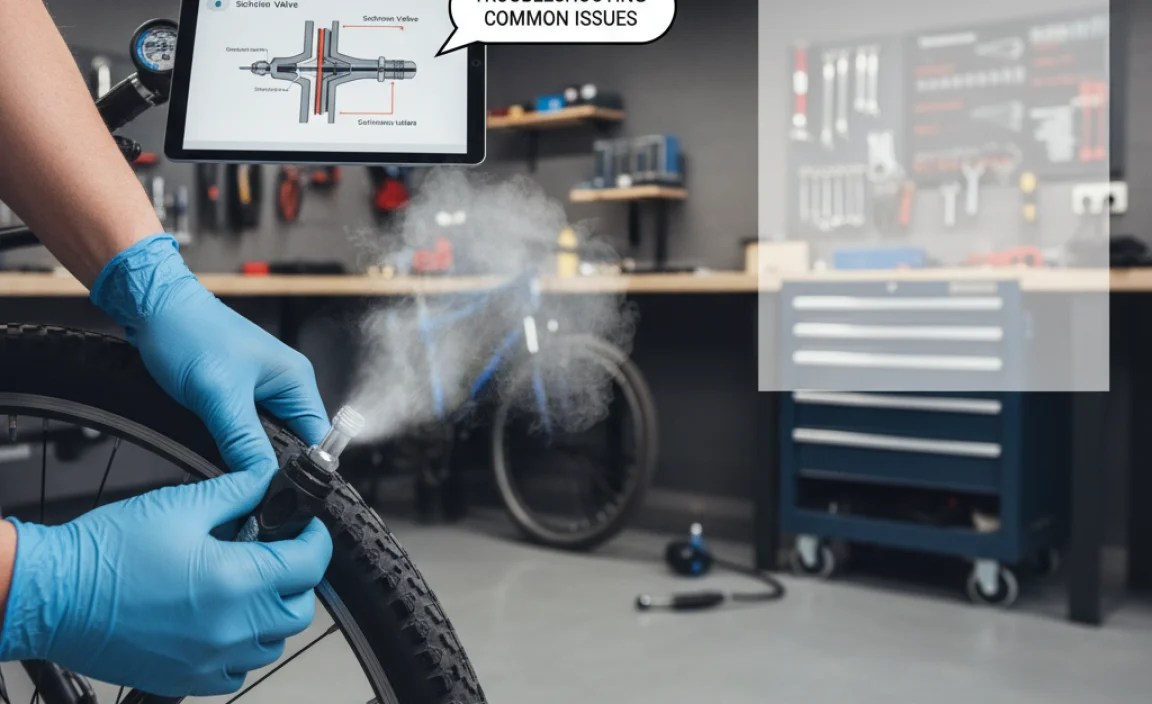
Both Presta and Schrader valves have a valve core that’s designed to seal air inside the tire. This core is spring-loaded. When you attach a pump chuck, it presses down on the valve core to allow air to flow in. When you remove the chuck, the valve core is supposed to seal instantly.
- Schrader Valves: Similar to those on car tires, Schrader valves have a spring-loaded pin in the center. The pump chuck pushes this pin to allow airflow.
- Presta Valves: Found mostly on higher-end bikes, Presta valves require you to unscrew a small nut to open the valve before inflation. After inflation, you screw it back down to seal.
The Chuck’s Impact
The pump chuck is the connector between your pump and the tire valve. Its design and how you use it play a big role in how much air escapes.
- Seal Quality: A worn or poorly designed chuck might not create a perfect seal around the valve, leading to leaks during removal.
- Removal Technique: A slow, angled removal can briefly unseat the valve core, allowing air to escape before it fully seals.
Pressure Dynamics
The pressure inside the tire versus the atmospheric pressure outside also influences air loss.
- High Pressure: Higher tire pressure means a greater force pushing outward. Any slight delay in the valve sealing will result in a more noticeable hiss.
- Rapid Pressure Changes: Quickly pulling off the chuck can create a sudden pressure change, momentarily forcing the valve open.
Step-by-Step Guide to Minimizing Air Loss

Here’s a step-by-step guide to help you minimize air loss when removing your pump chuck, keeping your tire pressure right where you want it.
Step 1: Prepare the Valve
Before attaching your pump, make sure the valve is ready.
- Presta Valves: Unscrew the valve nut completely. Gently depress the valve to ensure it isn’t stuck. This also makes sure the valve isn’t stuck closed.
- Schrader Valves: Simply remove the valve cap.
Step 2: Securely Attach the Chuck
A good connection is key to minimizing air loss.
- Straight Alignment: Align the chuck straight onto the valve. Avoid angling it, which can damage the valve core.
- Firm Press: Press the chuck firmly onto the valve until it’s fully seated. You should feel a secure connection.
- Lever or Thread: If your chuck has a lever or threaded connection, engage it fully to create an airtight seal.
Step 3: Inflate to the Desired Pressure
Pump your tire to the recommended pressure, usually found on the tire sidewall. Use a reliable gauge to ensure accuracy.
Step 4: The Removal Technique
This is where technique matters most. A quick, clean removal is essential.
- Quick Motion: Use a swift, straight pulling motion to remove the chuck. Avoid wiggling or twisting.
- Straight Pull: Pull the chuck directly away from the valve, keeping it aligned.
- Seal Awareness: Be mindful of the moment the chuck breaks contact. The quicker the valve reseals, the less air you’ll lose.
Step 5: Post-Removal Check
After removing the chuck, double-check your work.
- Valve Seal: Listen for any hissing. If the valve is leaking, tighten the Presta valve nut or check the Schrader valve core.
- Pressure Check: Use a tire pressure gauge to confirm you’re at the desired pressure.
- Valve Cap: Replace the valve cap to protect the valve from dirt and damage.
Troubleshooting Common Issues
Sometimes, despite your best efforts, you might still experience excessive air loss. Here’s how to troubleshoot some common problems.
Leaky Valve Core
A faulty valve core is a prime suspect when you’re losing air.
- Check for Damage: Inspect the valve core for any visible damage, such as bends or cracks.
- Tighten or Replace: For Schrader valves, use a valve core tool to tighten the core. For Presta valves, ensure the nut is snug. If the core is damaged, replace it.
Problematic Pump Chuck
The pump chuck itself can be the source of the issue.
- Inspect the Seal: Check the rubber or plastic seal inside the chuck for wear or damage. Replace the chuck if necessary.
- Clean the Chuck: Dirt and debris can interfere with the seal. Clean the chuck regularly with a dry cloth.
- Try a Different Chuck: If possible, test with a different pump or chuck to see if the problem persists.
Valve Stem Issues
The valve stem on your inner tube or tubeless setup can also cause problems.
- Bent Stems: A bent valve stem can prevent a good seal. Replace the inner tube or valve stem.
- Tubeless Seal: For tubeless tires, ensure the valve stem is properly sealed to the rim. Use sealant to fill any gaps.
Choosing the Right Pump and Chuck

The quality of your pump and chuck can significantly affect how much air you lose during removal. Here’s what to look for.
Pump Types
Different pumps offer different levels of performance and convenience.
- Floor Pumps: These offer the best stability and leverage for inflating tires to high pressures. Look for models with accurate gauges and durable construction.
- Hand Pumps: Compact and portable, hand pumps are great for on-the-go inflation. Choose one with a comfortable grip and efficient pumping action.
- CO2 Inflators: For quick inflation during a ride, CO2 inflators are hard to beat. Practice using one before you need it on the road.
Chuck Features
The chuck is your direct connection to the tire valve, so choose wisely.
- Dual Head: Some chucks have separate openings for Presta and Schrader valves, while others have a switchable design.
- Threaded vs. Levered: Threaded chucks screw onto the valve for a secure seal, while levered chucks use a cam mechanism. Levered chucks are faster, but threaded ones can offer a more reliable connection.
- Material: Look for chucks made from durable materials like metal or high-quality plastic.
Recommended Pumps and Chucks
Here are a few highly-rated options to consider:
| Product | Type | Features |
|---|---|---|
| Lezyne Floor Drive | Floor Pump | Accurate gauge, durable construction, ABS chuck |
| Topeak Road Morph G | Hand Pump | Integrated gauge, fold-out footpad, comfortable handle |
| Genuine Innovations Ultraflate | CO2 Inflator | Controlled inflation, compact design, works with Presta and Schrader |
Valve Types: Presta vs. Schrader

Understanding the differences between Presta and Schrader valves is crucial for proper inflation and maintenance.
Presta Valves
Presta valves are commonly found on road bikes and high-performance bicycles.
- Design: Narrower than Schrader valves, with a valve core that needs to be unscrewed before inflation.
- Pros: Lighter weight, better for narrow rims, can hold higher pressures.
- Cons: More delicate, can be finicky to use, requires unscrewing and screwing.
Schrader Valves
Schrader valves are similar to those found on car tires and are common on mountain bikes and hybrid bikes.
- Design: Wider than Presta valves, with a spring-loaded pin in the center.
- Pros: More durable, easier to inflate at gas stations, familiar to most users.
- Cons: Heavier, not ideal for narrow rims, can be less accurate at high pressures.
Adapters
If you have Presta valves and need to inflate at a gas station, you can use a Presta-to-Schrader adapter. These screw onto the Presta valve, allowing you to use a Schrader-compatible pump.
Maintaining Your Bike Pump
Regular maintenance will keep your pump working efficiently and extend its lifespan.
Cleaning
Keep your pump clean to prevent dirt and debris from interfering with its operation.
- Wipe Down: Regularly wipe down the pump body and hose with a damp cloth.
- Clean the Chuck: Use a small brush or compressed air to clean the inside of the chuck.
Lubrication
Lubricate moving parts to keep the pump working smoothly.
- Piston: Apply a few drops of silicone-based lubricant to the piston or plunger.
- Seals: Lubricate the seals in the chuck to maintain an airtight connection.
Storage
Proper storage can prevent damage and prolong the life of your pump.
- Cool, Dry Place: Store your pump in a cool, dry place away from direct sunlight.
- Hanging: If possible, hang your floor pump to prevent the hose from kinking.
Advanced Techniques for Tubeless Setups
Tubeless tires offer many benefits, but they also require some specific inflation techniques.
Seating the Tire
Getting a tubeless tire to seat properly on the rim can be challenging. Here are some tips:
- Remove Valve Core: Removing the valve core allows for a higher volume of air to enter the tire quickly.
- Use a Booster Pump: A booster pump or air compressor can deliver a large burst of air to seat the tire.
- Apply Soap: Use soapy water around the tire bead to help it slide onto the rim.
Maintaining Pressure
Tubeless tires can lose pressure over time, so regular maintenance is essential.
- Check Sealant: Regularly check the sealant level and add more as needed.
- Inspect for Leaks: Look for small leaks around the rim or valve stem.
- Use a Digital Gauge: A digital gauge provides precise pressure readings, which is important for tubeless setups.
Safety Tips
Inflating tires can be dangerous if not done correctly. Here are some safety tips to keep in mind.
- Don’t Exceed Max Pressure: Never inflate your tires beyond the maximum pressure listed on the sidewall.
- Inspect Tires: Before inflating, inspect your tires for cuts, bulges, or other damage.
- Wear Eye Protection: Consider wearing safety glasses to protect your eyes from debris.
FAQ Section
Why does my tire lose air when I remove the pump chuck?
A small amount of air loss is normal due to the time it takes for the valve to seal. However, excessive air loss can indicate a problem with the valve core, pump chuck, or your removal technique.
How do I know if my valve core is bad?
If you hear a hissing sound after removing the pump chuck, or if your tire loses pressure quickly, your valve core may be damaged or not sealing properly. Inspect it for damage or try tightening or replacing it.
Can I use a car tire pump on my bike?
Yes, you can use a car tire pump on a bike with Schrader valves. For Presta valves, you’ll need a Presta-to-Schrader adapter.
What’s the best way to remove a pump chuck from a Presta valve?
Use a quick, straight pulling motion. Avoid wiggling or twisting the chuck, as this can damage the valve core. Make sure you’ve unscrewed the valve nut completely before inflating.
How often should I check my tire pressure?
Check your tire pressure before every ride. Proper tire pressure improves handling, rolling resistance, and prevents flats.
What PSI should I inflate my tires to?
The recommended PSI is usually printed on the tire sidewall. This range depends on the tire size, rider weight, and riding conditions. Use a reliable gauge to ensure accuracy.
Why is it hard to pump up my tubeless tires?
Tubeless tires can be challenging to inflate because they require a good seal between the tire and rim. Make sure the tire bead is properly seated, use sealant, and consider using a booster pump or air compressor for initial inflation.
Conclusion
Minimizing air loss when removing a pump chuck is a skill that improves with practice. By understanding the mechanics of valves and chucks, using the right techniques, and maintaining your equipment, you can ensure your tires are always properly inflated for a smooth and enjoyable ride. Remember to check your valves, keep your pump clean, and use a swift, straight motion when removing the chuck. Happy riding!


